iOS 자동 레이아웃
IOS 자동 레이아웃
Introduction
자동 레이아웃은 iOS 6.0에서 도입되었으며 IOS6.0 이상만 지원합니다. 여러 장치에 대한 인터페이스를 만드는 데 도움이 됩니다.
인스턴스 단계
1. 간단한 뷰 기반 애플리케이션을 생성합니다
2. 아래와 같이 ViewController.m의 파일 내용을 수정합니다#🎜 🎜 #
#import "ViewController.h"@interface ViewController ()@property (nonatomic, strong) UIButton *leftButton;@property (nonatomic, strong) UIButton *rightButton;@property (nonatomic, strong) UITextField *textfield;@end@implementation ViewController- (void)viewDidLoad{    [super viewDidLoad];    UIView *superview = self.view;    /*1. Create leftButton and add to our view*/    self.leftButton = [UIButton buttonWithType:UIButtonTypeRoundedRect];    self.leftButton.translatesAutoresizingMaskIntoConstraints = NO;    [self.leftButton setTitle:@"LeftButton" forState:UIControlStateNormal];    [self.view addSubview:self.leftButton];
    /* 2. Constraint to position LeftButton's X*/    NSLayoutConstraint *leftButtonXConstraint = [NSLayoutConstraint
    constraintWithItem:self.leftButton attribute:NSLayoutAttributeCenterX
    relatedBy:NSLayoutRelationGreaterThanOrEqual toItem:superview attribute:    NSLayoutAttributeCenterX multiplier:1.0 constant:-60.0f];    /* 3. Constraint to position LeftButton's Y*/    NSLayoutConstraint *leftButtonYConstraint = [NSLayoutConstraint
    constraintWithItem:self.leftButton attribute:NSLayoutAttributeCenterY
    relatedBy:NSLayoutRelationEqual toItem:superview attribute:    NSLayoutAttributeCenterY multiplier:1.0f constant:0.0f];
    /* 4. Add the constraints to button's superview*/    [superview addConstraints:@[ leftButtonXConstraint,
    leftButtonYConstraint]];
    /*5. Create rightButton and add to our view*/    self.rightButton = [UIButton buttonWithType:UIButtonTypeRoundedRect];    self.rightButton.translatesAutoresizingMaskIntoConstraints = NO;    [self.rightButton setTitle:@"RightButton" forState:UIControlStateNormal];    [self.view addSubview:self.rightButton];
    /*6. Constraint to position RightButton's X*/    NSLayoutConstraint *rightButtonXConstraint = [NSLayoutConstraint
    constraintWithItem:self.rightButton attribute:NSLayoutAttributeCenterX
    relatedBy:NSLayoutRelationGreaterThanOrEqual toItem:superview attribute:    NSLayoutAttributeCenterX multiplier:1.0 constant:60.0f];    /*7. Constraint to position RightButton's Y*/
    rightButtonXConstraint.priority = UILayoutPriorityDefaultHigh;    NSLayoutConstraint *centerYMyConstraint = [NSLayoutConstraint
    constraintWithItem:self.rightButton attribute:NSLayoutAttributeCenterY
    relatedBy:NSLayoutRelationGreaterThanOrEqual toItem:superview attribute:    NSLayoutAttributeCenterY multiplier:1.0f constant:0.0f];    [superview addConstraints:@[centerYMyConstraint,
    rightButtonXConstraint]];   //8. Add Text field    self.textfield = [[UITextField alloc]initWithFrame:    CGRectMake(0, 100, 100, 30)];    self.textfield.borderStyle = UITextBorderStyleRoundedRect;    self.textfield.translatesAutoresizingMaskIntoConstraints = NO;    [self.view addSubview:self.textfield];    //9. Text field Constraints    NSLayoutConstraint *textFieldTopConstraint = [NSLayoutConstraint
    constraintWithItem:self.textfield attribute:NSLayoutAttributeTop
    relatedBy:NSLayoutRelationGreaterThanOrEqual toItem:superview
    attribute:NSLayoutAttributeTop multiplier:1.0 constant:60.0f];    NSLayoutConstraint *textFieldBottomConstraint = [NSLayoutConstraint
    constraintWithItem:self.textfield attribute:NSLayoutAttributeTop
    relatedBy:NSLayoutRelationGreaterThanOrEqual toItem:self.rightButton
    attribute:NSLayoutAttributeTop multiplier:0.8 constant:-60.0f];    NSLayoutConstraint *textFieldLeftConstraint = [NSLayoutConstraint
    constraintWithItem:self.textfield attribute:NSLayoutAttributeLeft
    relatedBy:NSLayoutRelationEqual toItem:superview attribute:    NSLayoutAttributeLeft multiplier:1.0 constant:30.0f];    NSLayoutConstraint *textFieldRightConstraint = [NSLayoutConstraint
    constraintWithItem:self.textfield attribute:NSLayoutAttributeRight
    relatedBy:NSLayoutRelationEqual toItem:superview attribute:    NSLayoutAttributeRight multiplier:1.0 constant:-30.0f];    [superview addConstraints:@[textFieldBottomConstraint ,
    textFieldLeftConstraint, textFieldRightConstraint,
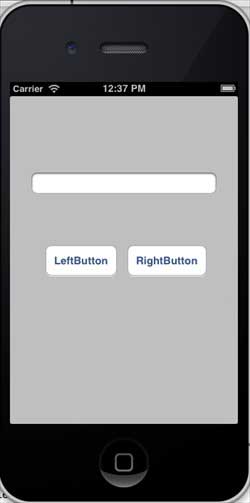
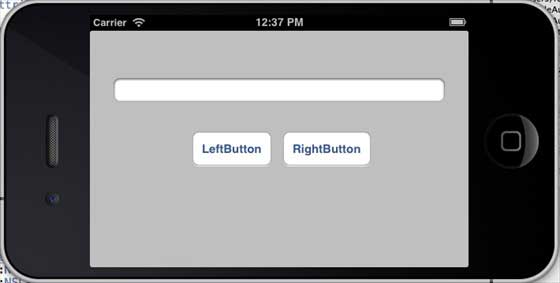
textFieldTopConstraint]]; }- (void)didReceiveMemoryWarning{ [super didReceiveMemoryWarning]; // Dispose of any resources that can be recreated.}@endOutput애플리케이션을 실행하면 iPhone 시뮬레이터에 다음과 같은 출력이 표시됩니다 #🎜🎜 #언제 시뮬레이터를 가로 방향으로 변경하면 출력은 다음과 같습니다
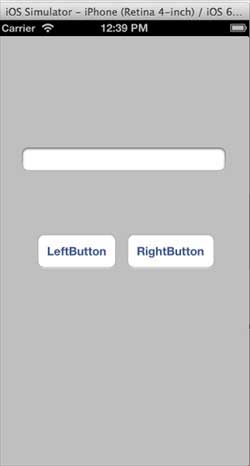
 iPhone 5 시뮬레이터에서 동일한 애플리케이션을 실행하면 출력은 다음과 같습니다.
 시뮬레이터를 가로 방향으로 변경하면 출력 결과는 다음과 같습니다.


