SpringBoot 외부화를 구성하는 방법
- WBOYWBOYWBOYWBOYWBOYWBOYWBOYWBOYWBOYWBOYWBOYWBOYWB앞으로
- 2023-05-15 09:43:051440검색
SpringBoot 외부화 구성(2.4.0 이상 기준)
Spring Boot를 사용하면 구성을 외부화하여 다양한 환경에서 동일한 애플리케이션 코드를 사용할 수 있습니다. Java 속성 파일, YAML 파일, 환경 변수, 명령줄 매개변수를 비롯한 다양한 외부 구성 소스를 사용할 수 있습니다.
Property 값은 @Value 주석을 사용하여 Bean에 직접 주입하거나 Spring 환경을 통해 액세스하거나 @ConfigurationProperties를 통해 객체에 바인딩할 수 있습니다. 동시에 Spring Boot는 사용자가 적절한 시나리오에서 특정 속성 값을 재정의할 수 있도록 매우 특별한 PropertyOrder를 제공합니다. 이 순서는 값을 합리적으로 재정의할 수 있도록 설계되었습니다.
우선순위는 다음 순서에 따라 낮은 것에서 높은 것입니다. 후자의 속성 값은 전자를 재정의하며 모든 구성은 보완적인 구성을 형성합니다:
기본 속성(SpringApplication.setDefaultProperties를 사용하여 지정)
@Configuration 클래스의 @PropertySource 주석에 의해 도입된 구성 속성@Configuration类上的@PropertySource注解引入的配置属性
请注意,这样的属性源直到ApplicationContext被刷新时才会被添加到环境中。这对于配置某些属性来说已经太晚了,比如logging.* 和spring.main.* ,它们在刷新开始前就已经被读取了。
配置数据(例如application.properties文件)
对于random.*形式的属性,优先从RandomValuePropertySource获取(指优先于后者)
OS environment variables((操作系统环境变量)
Java System properties(Java 系统属性System.getProperties())
JNDI 属性
ServletContext 的 初始化参数
ServletConfig 的 初始化参数
SPRING_APPLICATION_JSON 属性
命令行参数
test 模块下的 properties 属性
test 模块下 @TestPropertySource 注解引入的配置文件
启用 devtools 时 $HOME/.config/spring-boot 路径下的配置
配置数据文件按以下加载顺序考虑:
打包在 jar 中的应用程序属性(application.properties 和 YAML)
打包在 jar 中的特定配置文件的应用程序属性(application-{profile}.properties 和 YAML)
打包 jar 之外的应用程序属性(application.properties 和 YAML)
打包 jar 之外的特定配置文件的应用程序属性(application-{profile}.properties 和 YAML)
SpringBoot配置文件
Spring中常见的配置文件类型
XML资源
Properties资源
YAML资源
Profile概述
Profile 本质上代表一种用于组织配置信息的维度,在不同场景下可以代表不同的含义。例如,如果 Profile 代表的是一种状态,我们可以使用 open、halfopen、close 等值来分别代表全开、半开和关闭等。再比如系统需要设置一系列的模板,每个模板中保存着一系列配置项。
配置命名规则:
/{application}.yml
/{application}-{profile}.yml
/{label}/{application}-{profile}.yml
/{application}-{profile}.properties
/{label}/{application}-{profile}.properties
配置文件加载顺序
Spring Boot 启动时,会自动加载 JAR 包内部及 JAR 包所在目录指定位置的配置文件(Properties 文件、YAML 文件)。列表按优先级排序(较低项目的值覆盖较早项目的值)
classpath( –classpath )
classpath 根路径
classpath 下的 /config 包
当前目录( –file )
当前目录下
当前目录下的 config/ 子目录
当前目录下的 config/ 子目录的直接子目录
. project-sample
├── config
│   ├── application.yml (4)
│   └── src/main/resources
|   │   ├── application.yml (1)
|   │   └── config
|   |   │   ├── application.yml (2)
├── application.yml (3)
启动时加载配置文件顺序:1 > 2 > 3 > 4
Profile 配置覆盖变更(2.4.0以后)
2.4.0以前版本,默认情况的加载顺序如下:
打包在 jar 中的应用程序属性(application.properties 和 YAML)。
打包 jar 之外的应用程序属性(application.properties 和 YAML)
打包在 jar 中的特定于配置文件的应用程序属性(application-{profile}.properties 和 YAML)
打包 jar 之外的特定于配置文件的应用程序属性(application-{profile}.properties 和 YAML)
注意:在之前的版本中,JAR 包外部的application.properties配置文件不会覆盖 JAR 包里面的基于 "profile" 的application-{profile}.properties 配置文件。
2.4.0
ApplicationContext가 새로 고쳐질 때까지 환경에 추가되지 않습니다. . 새로 고침이 시작되기 전에 이미 읽혀진 logging.* 및 spring.main.* 과 같은 일부 속성을 구성하기에는 너무 늦었습니다. - 구성 데이터(예: application.properties 파일)
random.*형식의 속성의 경우 먼저RandomValuePropertySource에서 가져옵니다(우선순위 참조). 후자) - OS 환경 변수((운영 체제 환경 변수)Java 시스템 속성(Java 시스템 속성
System.getProperties()) - JNDI 속성ServletContext의 초기화 매개 변수🎜🎜초기화 매개 변수 ServletConfig🎜🎜SPRING_APPLICATION_JSON 속성 🎜🎜명령줄 매개변수🎜🎜properties 속성 테스트 모듈🎜🎜테스트 모듈 아래 @TestPropertySource 주석에 의해 도입된 구성 파일🎜🎜devtools가 활성화된 경우 $HOME/.config/spring-boot 경로 아래 구성🎜🎜 구성 데이터 파일은 다음과 같습니다. 로드 순서 고려 사항: 🎜🎜🎜🎜jar에 패키지된 애플리케이션 속성(application.properties 및 YAML) 🎜🎜🎜🎜jar에 패키지된 특정 프로필의 애플리케이션 속성(application-{profile}.properties 및 YAML) 🎜🎜🎜🎜패키지 jar 외부의 애플리케이션 속성(application.properties 및 YAML) 🎜🎜🎜🎜패키지 jar 외부의 특정 프로필(application-{profile}.properties 및 YAML)에 대한 애플리케이션 속성🎜🎜 ul>🎜 SpringBoot 구성 파일🎜
Spring의 일반적인 구성 파일 유형
🎜🎜🎜XML resources🎜🎜🎜🎜Properties resources🎜🎜🎜🎜YAML resources🎜🎜
프로필 개요
🎜 프로필은 기본적으로 구성 정보를 구성하는 데 사용되는 차원을 나타내며 다양한 시나리오에서 다양한 의미를 나타낼 수 있습니다. 예를 들어 프로필이 상태를 나타내는 경우 열림, 반열림, 닫힘과 같은 값을 사용할 수 있습니다. , 폐쇄 등. 또 다른 예는 시스템이 일련의 템플릿을 설정해야 하며 각 템플릿은 일련의 구성 항목을 저장한다는 것입니다: 🎜spring:
profiles:
active: dev #激活开发环境配置구성 파일 로딩 순서
🎜Spring Boot가 시작되면 JAR 패키지 내부 및 JAR 패키지가 있는 디렉터리의 지정된 위치에 구성 파일(속성 파일, YAML 파일)을 자동으로 로드합니다. 목록은 우선순위에 따라 정렬됩니다(낮은 항목의 값이 이전 항목의 값보다 우선함) 🎜🎜classpath( –classpath ) 🎜🎜classpath 루트 경로 🎜🎜/config 패키지 under classpath 🎜🎜현재 디렉터리( –file ) 🎜🎜 현재 디렉터리 아래🎜🎜현재 디렉터리 아래의 config/ 하위 디렉터리🎜🎜현재 디렉터리 아래의 config/ 하위 디렉터리🎜$ java -jar myproject.jar --spring.config.location=classpath:/default.properties,classpath:/override.properties🎜시작 시 구성 파일 로드 순서: 1 > 2 > ; 4🎜
프로필 구성 적용 범위 변경(2.4.0 이후)
🎜2.4.0이전 버전의 경우 기본 로딩 순서는 다음과 같습니다. 🎜🎜🎜🎜애플리케이션 속성 패키지 jar(애플리케이션 .properties 및 YAML)에 있습니다. 🎜🎜🎜🎜jar 외부의 패키지 애플리케이션 속성(application.properties 및 YAML) 🎜🎜🎜🎜jar 내부의 패키지 프로필별 애플리케이션 속성(application-{profile}.properties 및 YAML) 🎜🎜🎜 🎜프로필별 애플리케이션 속성 (application-{profile}.properties 및 YAML) 패키지된 jar 외부 🎜🎜🎜참고: 이전 버전에서는 JAR 패키지 외부의 application.properties 구성 파일이 " JAR 패키지의 profile" 기반 application-{profile}.properties 구성 파일입니다. 🎜🎜2.4.0 및 이후 버전에서 기본 검색 순서는 다음과 같습니다. JAR 패키지 외부의 애플리케이션 매개변수가 JAR 패키지 내부의 특정 활성화 구성 매개변수보다 우선하도록 보장합니다. 🎜🎜🎜🎜Packaged jar의 애플리케이션 속성(application.properties 및 YAML) 🎜🎜🎜🎜jar에 패키지된 프로필별 애플리케이션 속성(application-{profile}.properties 및 YAML) 🎜🎜🎜🎜jar 외부에 애플리케이션 속성 패키징(application.properties 및 YAML) 🎜打包 jar 之外的特定于配置文件的应用程序属性(application-{profile}.properties 和 YAML)
注意:同一位置下,Properties 文件优先级高于 YAML 文件 , 如果Spring Boot在优先级更高的位置找到了配置,那么它就会无视优先级低的配置。
文档排序(2.4.0以后)
从 Spring Boot 2.4 开始,加载 Properties 和 YAML 文件时候会遵循, 在文档中声明排序靠前的属性将被靠后的属性覆盖 。
激活指定配置文件
命令行激活: --spring.profiles.active=prod
spring:
  profiles:
active: dev #激活开发环境配置配置文件激活如上,只需要在application.yml或者properties文件中配置即可
注意:在application.yml或者properties文件存在的情况下,不管激活的是prod还是dev,还是会读取默认的配置文件,只不过指定的配置文件会覆盖默认配置文件中的属性
导入额外的配置文件(2.4.0以后)
可以使用spring.config.import属性从其他地方导入更多的配置数据,比如spring.config.import=my.yaml 。它会将 my.yaml 文件作为临时文件放在当前配置文件之后处理,因此其属性具有更高的优先级
激活外部配置文件
在运行Jar包的命令中加入这个参数就可以指定Jar包以外的配置文件的位置了,也可以在application的配置文件中配置该属性
$ java -jar myproject.jar --spring.config.location=classpath:/default.properties,classpath:/override.properties
这个参数就是指定外部application.yml配置文件位置的参数,它支持classpath和file路径
java -jar myproject.jar --spring.config.name=myproject
如果您不喜欢application.properties作为配置文件名,您可以通过指定spring.config.name环境属性来切换到另一个文件名
optional可选的配置文件
对于spring.config.location、spring.config.additional-location和spring.config.import等属性的路径,添加optional:前缀,则当对应文件不存在时应用仍可以正常启动
比如spring.config.location=optional:file:/my.yaml,当应用启动加载文件 my.yaml 不存在时,不会抛出异常
嵌入系统配置信息
例如,如果想要获取当前应用程序的名称并作为一个配置项进行管理,那么很简单,我们直接通过 ${spring.application.name} 占位符:
myapplication.name : ${spring.application.name}假设我们使用 Maven 来构建应用程序,那么可以按如下所示的配置项来动态获取与系统构建过程相关的信息:
info:
  app:
    encoding: @project.build.sourceEncoding@
    java:
      source: @java.version@
      target: @java.version@
# 等同于下述效果
info:
  app:
    encoding: UTF-8
    java:
        source: 1.8.0_31
        target: 1.8.0_31
配置参数提示
additional-spring-configuration-metadata.json、spring-configuration-metadata.json在springboot-starter官方项目或第三方starter项目中随处可见,那它起的作用是什么?
配置
additional-spring-configuration-metadata.json文件后,在开发人员的IDE工具使用个人编写的配置读取很有效的在application.properties或application.yml文件下完成提示
配置处理器
在Maven中,该依赖关系应被声明为可选的,如以下例子所示。
<dependency>
    <groupId>org.springframework.boot</groupId>
    <artifactId>spring-boot-configuration-processor</artifactId>
    <optional>true</optional>
</dependency>
创建additional-spring-configuration-metadata.json
在resources/META-INF目录下创建additional-spring-configuration-metadata.json,分类为 “groups” 或 “properties”,附加值提示分类为 "hints",如以下例子所示:
{
    "groups": [
        {
            "name": "server",
            "type": "org.springframework.boot.autoconfigure.web.ServerProperties",
            "sourceType": "org.springframework.boot.autoconfigure.web.ServerProperties"
        },
        {
            "name": "spring.jpa.hibernate",
            "type": "org.springframework.boot.autoconfigure.orm.jpa.JpaProperties$Hibernate",
            "sourceType": "org.springframework.boot.autoconfigure.orm.jpa.JpaProperties",
            "sourceMethod": "getHibernate()"
        }
    ...
    ],
    "properties": [
        {
            "name": "server.port",
            "type": "java.lang.Integer",
            "sourceType": "org.springframework.boot.autoconfigure.web.ServerProperties"
        },
        {
            "name": "server.address",
            "type": "java.net.InetAddress",
            "sourceType": "org.springframework.boot.autoconfigure.web.ServerProperties"
        },
        {
            "name": "spring.jpa.hibernate.ddl-auto",
            "type": "java.lang.String",
            "description": "DDL mode. This is actually a shortcut for the "hibernate.hbm2ddl.auto" property.",
            "sourceType": "org.springframework.boot.autoconfigure.orm.jpa.JpaProperties$Hibernate"
        }
    ...
    ],
    "hints": [
        {
            "name": "spring.jpa.hibernate.ddl-auto",
            "values": [
                {
                    "value": "none",
                    "description": "Disable DDL handling."
                },
                {
                    "value": "validate",
                    "description": "Validate the schema, make no changes to the database."
                },
                {
                    "value": "update",
                    "description": "Update the schema if necessary."
                },
                {
                    "value": "create",
                    "description": "Create the schema and destroy previous data."
                },
                {
                    "value": "create-drop",
                    "description": "Create and then destroy the schema at the end of the session."
                }
            ]
        }
    ]
}
Property 属性
properties 数组中包含的JSON对象可以包含下表中描述的属性。
속성의 전체 이름입니다. 이름은 소문자, 마침표로 구분된 형식입니다(예: server.address). 이 속성은 필수입니다.| type | String | 속성 데이터 유형(예: java.lang.String)의 전체 서명이지만 전체 일반 유형(예: java.util.Map |
|---|---|---|
| description | String | 사용자에게 표시될 수 있는 속성에 대한 간단한 설명입니다. 설명이 없으면 생략 가능합니다. 설명의 마지막 줄은 마침표(.)로 끝나야 합니다. |
| sourceType | String | 이 속성을 제공한 소스의 클래스 이름입니다. 예를 들어 속성이 @ConfigurationProperties 주석이 달린 클래스에서 나온 경우 속성에는 클래스의 정규화된 이름이 포함됩니다. 소스 유형을 알 수 없는 경우 생략할 수 있습니다. |
| defaultValue | Object | 기본값, 이 속성을 지정하지 않으면 이 값이 사용됩니다. 속성 유형이 배열인 경우 값의 배열일 수 있습니다. 기본값을 알 수 없는 경우 생략할 수 있습니다. |
| deprecation | Deprecation | 이 속성이 더 이상 사용되지 않는지 여부를 지정합니다. 이 필드가 더 이상 사용되지 않거나 이 정보를 알 수 없는 경우 생략할 수 있습니다. 다음 표에서는 지원 중단 속성에 대한 자세한 내용을 제공합니다. |
| 힌트 속성 | 힌트 배열에 포함된 JSON 개체는 아래 표의 속성을 포함할 수 있습니다. | |
| Name | Type | Purpose |
| values | ValueHint[] | ValueHint 개체에 의해 정의된 유효한 값 목록입니다(아래 표에 설명되어 있음). 각 항목에는 정의된 값이 있으며 설명이 있을 수 있습니다. |
|---|---|---|
| 각 힌트 요소의 값 속성에 포함된 JSON 개체에는 아래 표에 설명된 속성이 포함될 수 있습니다. | ||
| Type | Purpose |
| description | String | 사용자에게 표시할 수 있는 값에 대한 간단한 설명입니다. 설명이 없으면 생략 가능합니다. 설명의 마지막 줄은 마침표(.)로 끝나야 합니다. |
|---|---|---|
SpringBoot命令行参数参考:https://www.yisu.com/article/191629.htm 启动Spring Boot项目时传递参数,有三种参数形式:
--foo
--foo=bar
--foo="bar then baz"
--foo=bar,baz,biz
相当于 SpringBoot 基于 Java 命令行参数中的非选项参数自定义了选项参数的规则,具体可以看解析器 class SimpleCommandLineArgsParser {
public CommandLineArgs parse(String... args) {
CommandLineArgs commandLineArgs = new CommandLineArgs();
for (String arg : args) {
// --开头的选参数解析
if (arg.startsWith("--")) {
// 获得key=value或key值
String optionText = arg.substring(2, arg.length());
String optionName;
String optionValue = null;
// 如果是key=value格式则进行解析
if (optionText.contains("=")) {
optionName = optionText.substring(0, optionText.indexOf('='));
optionValue = optionText.substring(optionText.indexOf('=')+1, optionText.length());
} else {
// 如果是仅有key(--foo)则获取其值
optionName = optionText;
}
// 如果optionName为空或者optionValue不为空但optionName为空则抛出异常
if (optionName.isEmpty() || (optionValue != null && optionValue.isEmpty())) {
throw new IllegalArgumentException("Invalid argument syntax: " + arg);
}
// 封装入CommandLineArgs
commandLineArgs.addOptionArg(optionName, optionValue);
} else {
commandLineArgs.addNonOptionArg(arg);
}
}
return commandLineArgs;
}
}参数值的获取如果您需要访问传递给应用程序的参数 @Component
public class MyBean {
@Autowired
public MyBean(ApplicationArguments args) {
boolean debug = args.containsOption("debug");
List<String> files = args.getNonOptionArgs();
// if run with "--debug logfile.txt" debug=true, files=["logfile.txt"]
}
}
参数值的区别关于参数值区别,重点看选项参数和系统参数。通过上面的示例我们已经发现使用选项参数时,参数在命令中是位于 如果不按照该顺序进行执行,比如使用如下方式使用选项参数: java -jar --server.port=8081 xxx.jar 则会抛出如下异常: Unrecognized option: --server.port=8081 Error: Could not create the Java Virtual Machine. Error: A fatal exception has occurred. Program will exit. 如果将系统参数放在jar包后面,问题会更严重,会出现可以正常启动,但参数无法生效。这个错误是最坑的,所以一定谨记:通过-D传递系统参数时,务必放置在待执行的jar包之前。 扩展“外部化配置”属性源
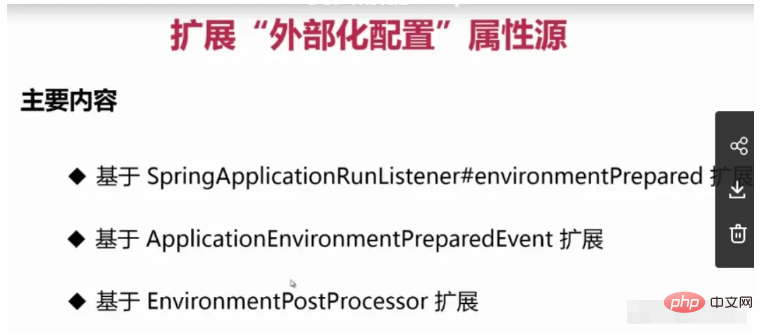
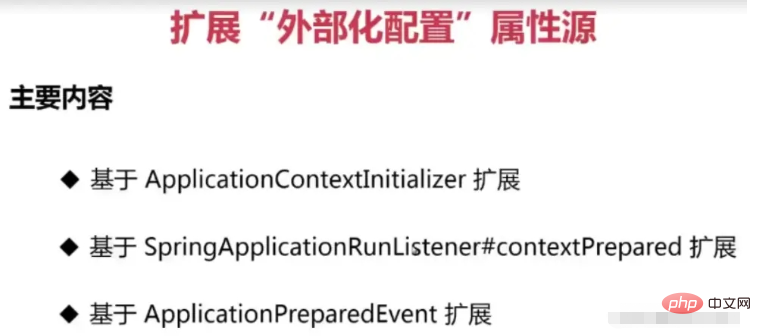
SpingBoot怎么支持YAML配置文件解析?处理@PropertySource注解从ConfigurationClassParser#processPropertySource方法进 Spring中@PropertySource默认不支持YAML格式的解析,但是SpringBoot的配置文件却可以解析YAML,这说明SpringBoot中已经实现了YAML文件的解析,我们只需要复用即可,我们可以看该注解源码 /**
* Specify a custom {@link PropertySourceFactory}, if any.
* <p>By default, a default factory for standard resource files will be used.
* @since 4.3
* @see org.springframework.core.io.support.DefaultPropertySourceFactory
* @see org.springframework.core.io.support.ResourcePropertySource
*/
Class<? extends PropertySourceFactory> factory() default PropertySourceFactory.class;PropertySourceFactory的默认实现是DefaultPropertySourceFactory public class DefaultPropertySourceFactory implements PropertySourceFactory {
@Override
public PropertySource<?> createPropertySource(@Nullable String name, EncodedResource resource) throws IOException {
return (name != null ? new ResourcePropertySource(name, resource) : new ResourcePropertySource(resource));
}
}ResourcePropertySource默认不支持YAML,所以我们可以通过实现PropertySourceFactory接口,然后用@PropertySource的factory属性来实现YAML的解析 public class YamlPropertySourceFactory implements PropertySourceFactory {
@Override
public PropertySource<?> createPropertySource(String name, EncodedResource resource) throws IOException {
YamlPropertiesFactoryBean yamlPropertiesFactoryBean = new YamlPropertiesFactoryBean();
yamlPropertiesFactoryBean.setResources(resource.getResource());
Properties yamlProperties = yamlPropertiesFactoryBean.getObject();
return new PropertiesPropertySource(name, yamlProperties);
}
}关于ApplicationEnvironmentPreparedEvent没有被执行的原因官方文档中有说到:有些事件实际上是在ApplicationContext被创建之前触发的,所以我们不能将这些事件的监听器注册为@Bean。 因为这个时候应用上下文还没有被创建,也就是说监听器也还没有被初始化,这个先后顺序不对,会导致这些事件的监听器不会被触发 但可以使用 如果您希望这些侦听器自动注册的话,可以通过新建一个 org.springframework.context.ApplicationListener=com.example.project.MyListener 应用程序事件应用程序运行时,应用程序事件按以下顺序发送:
위 목록에는 SpringApplicationEvents만 포함됩니다. SpringApplication에 연결되어 있습니다. 이 외에도 ApplicationPreparedEvent 이후와 ApplicationStartedEvent 이전에 다음 이벤트도 게시됩니다.
|
위 내용은 SpringBoot 외부화를 구성하는 방법의 상세 내용입니다. 자세한 내용은 PHP 중국어 웹사이트의 기타 관련 기사를 참조하세요!


