
Spring Boot Actuator 관리 로그 구현 방법

- 王林앞으로
- 2023-05-12 18:01:121212검색
다음 두 가지 문제를 해결하려면
1. 단일 JAR 패키지 애플리케이션이 로그를 확인해야 하는 경우 원격으로 서버에 접속하여 로그를 확인하는 것이 상대적으로 번거롭습니다. 프로덕션 환경에서 로그 레벨을 일시적으로 변경해야 하는 경우 서비스를 다시 시작해도 해결되지 않습니다
그래서 이 두 가지 문제를 해결하기 위해 액추에이터의 일부를 사용했습니다.
먼저 POM 파일에 액추에이터 종속성을 도입합니다.
  <dependency>
            <groupId>org.springframework.boot</groupId>
            <artifactId>spring-boot-starter-actuator</artifactId>
            <version>${spring-boot.version}</version>
 </dependency>
구성 파일에서 구성:
management.endpoints.web.base-path=/actuator
management.endpoints.web.exposure.include=logfile,loggers
management.endpoint.health.show-details=always
logging.file.name=logs/EL-3KJ/EL-3KJ.log
그런 다음 http://localhost:8085/actuator
에 직접 액세스하여 다음 결과를 얻을 수 있습니다.
{ "_links":{"self"{"href":"http://localhost:8085/actuator","templated":false},"로그 파일: "href":"http://localhost:8085/ Actuator/logfile" ,"templated":false},"loggers":{"href":"http://localhost:8085/actuator/loggers","templated":false},"loggers-name":{" href":" http://localhost:8085/actuator/loggers/{name}","templated":true}}}
여기서
- logfile은 로그 파일을 보는 것입니다.
- loggers는 로그 수준을 보려면
- loggers/{name}은 변경 로그 수준입니다
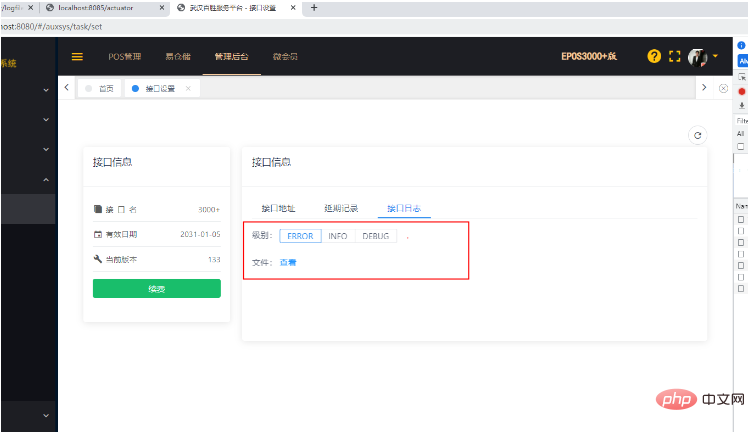
- 프런트 엔드 참조 코드:
<TabPane label="接口日志" name="name3">
级别:
<RadioGroup v-model="loglevel" type="button" size="small" @on-
change="lvChange()">
<Radio label="ERROR"></Radio>
<Radio label="INFO"></Radio>
<Radio label="DEBUG"></Radio>
</RadioGroup> <br/><br/>
文件:<a :href="logfileurl" rel="external nofollow" target="_blank" > 查看</a>
</TabPane>
this.logfileurl = res.dataApi+"actuator/logfile";
this.loglevelurl = res.dataApi+"actuator/loggers/root";
getLogLevel(){
this.ajax_get({
url: this.loglevelurl,
params: {},
}).then((res) => {
this.loglevel=res.configuredLevel
});
},
lvChange(){
this.changeLogLevel(this.loglevel)
},
changeLogLevel(level){
this.ajax_post({
url: this.tenant.dataApi + "actuator/loggers/root",
params: {'configuredLevel':level},
}).then((res) => {
this.spinShow = false;
if (!res.code) {
this.$Notice.success({
title:'更改日志级别为'+level,
desc:res.msg
});
} else {
this.$Notice.error({
title:'更改日志级别失败',
desc:res.msg
});
}
});
}최종 효과는 다음과 같습니다.
위 내용은 Spring Boot Actuator 관리 로그 구현 방법의 상세 내용입니다. 자세한 내용은 PHP 중국어 웹사이트의 기타 관련 기사를 참조하세요!
성명:
이 기사는 yisu.com에서 복제됩니다. 침해가 있는 경우 admin@php.cn으로 문의하시기 바랍니다. 삭제