
Linux 시스템에서 Nginx용 PHP의 여러 버전을 설치하는 방법

- WBOYWBOYWBOYWBOYWBOYWBOYWBOYWBOYWBOYWBOYWBOYWBOYWB앞으로
- 2023-05-11 19:34:041485검색
linux 버전: 64비트 centos 6.4
nginx 버전: nginx1.8.0
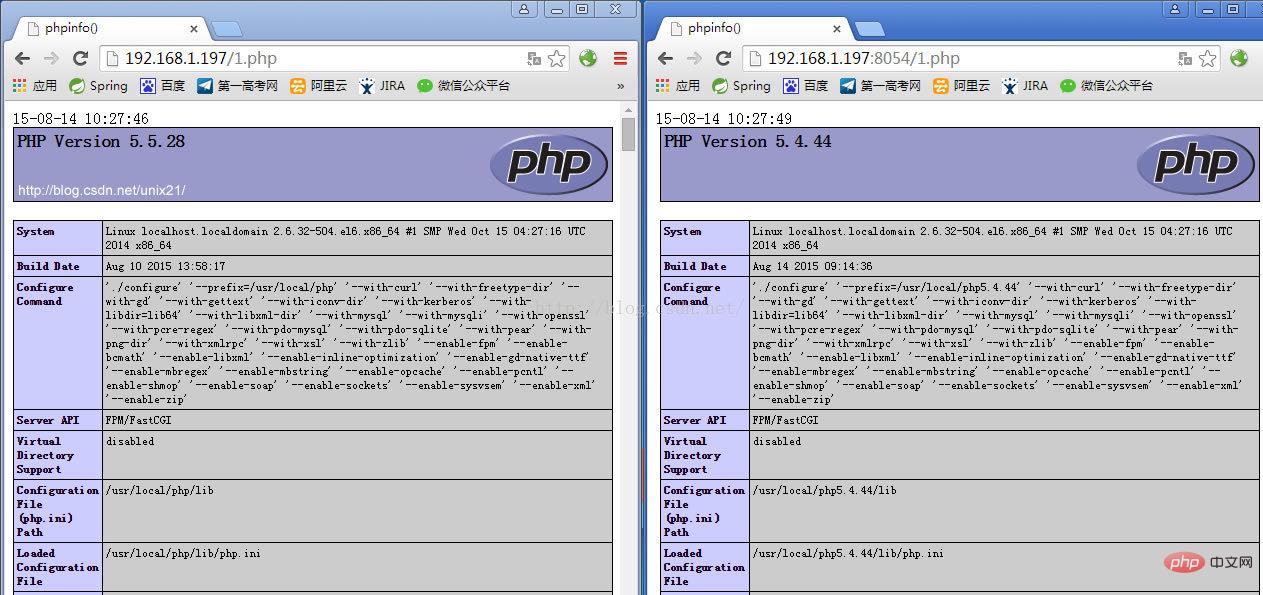
php 버전: php5.5.28 & php5.4.44
php5.5가 기본 버전이고 /usr/에 설치된 경우 주의하세요. local/php 디렉토리, 그런 다음 다른 버전의 PHP를 설치하고 다른 설치 디렉토리를 지정하십시오.
php
# wget http://cn2.php.net/get/php-5.4.44.tar.gz/from/this/mirror
# tar zxvf php-5.4.44.tar.gz
# cd php-5.4.44
#./configure --prefix=/usr/local/php5.4.44 \
--with-curl \
--with-freetype-dir \
--with-gd \
--with-gettext \
--with-iconv-dir \
--with-kerberos \
--with-libdir=lib64 \
--with-libxml-dir \
--with-mysql \
--with-mysqli \
--with-openssl \
--with-pcre-regex \
--with-pdo-mysql \
--with-pdo-sqlite \
--with-pear \
--with-png-dir \
--with-xmlrpc \
--with-xsl \
--with-zlib \
--enable-fpm \
--enable-bcmath \
--enable-libxml \
--enable-inline-optimization \
--enable-gd-native-ttf \
--enable-mbregex \
--enable-mbstring \
--enable-pcntl \
--enable-shmop \
--enable-soap \
--enable-sockets \
--enable-sysvsem \
--enable-xml \
--enable-zip
# make && make install
# cp -r ./sapi/fpm/php-fpm.conf /usr/local/php5.4.44/etc/php-fpm.conf
# cp php.ini-development /usr/local/php5.4.44/lib/php.ini
# cp -r ./sapi/fpm/php-fpm /etc/init.d/php-fpm5.4.44
설치 php-fpm.conf의 수신 포트를 9001로 수정하세요. 기본 버전 5.5.28이 9000을 수신하기 때문입니다.
; note: this value is mandatory.
listen = 127.0.0.1:9001
php-fpm 시작
# /etc/init.d/php-fpm5.4.44
php가 성공적으로 설치되고 진행 상황을 확인하세요
#ps aux|grep php

이제 php-fpm이 시작되었습니다.
Configure nginx
새 포트 8054 구성을 추가하고 9001 및 지정된 디렉터리를 가리킵니다.
server {
    listen    8054;
    server_name localhost;


    location / {
      #root  html;
root /usr/www5.4.44;
      index index.html index.htm;
    }


    error_page  500 502 503 504 /50x.html;
    location = /50x.html {
      root  html;
    }


location ~ \.php$ {
root html;
fastcgi_pass 127.0.0.1:9001;
fastcgi_index index.php;
include fastcgi_params;
fastcgi_param script_filename /usr/www5.4.44$fastcgi_script_name;
}

  }
nginx 구성 파일 nginx.conf는
# cd /usr/local/nginx/conf
에 있습니다. 전체 nginx 구성은 다음과 같습니다.
#user nobody;
worker_processes 4;

#error_log logs/error.log;
#error_log logs/error.log notice;
#error_log logs/error.log info;

#pid    logs/nginx.pid;


events {
  worker_connections 1024;
}


http {
  include    mime.types;
  default_type application/octet-stream;

  #log_format main '$remote_addr - $remote_user [$time_local] "$request" '
  #         '$status $body_bytes_sent "$http_referer" '
  #         '"$http_user_agent" "$http_x_forwarded_for"';

  #access_log logs/access.log main;

  sendfile    on;
  #tcp_nopush   on;

  #keepalive_timeout 0;
  keepalive_timeout 65;

  #gzip on;

  server {
    listen    80;
    server_name localhost;

    #charset koi8-r;

    #access_log logs/host.access.log main;

    location / {
      #root  html;
			root /usr/www;
      index index.html index.htm;
    }

    #error_page 404       /404.html;

    # redirect server error pages to the static page /50x.html
    #
    error_page  500 502 503 504 /50x.html;
    location = /50x.html {
      root  html;
    }

    # proxy the php scripts to apache listening on 127.0.0.1:80
    #
    #location ~ \.php$ {
    #  proxy_pass  http://127.0.0.1;
    #}

    # pass the php scripts to fastcgi server listening on 127.0.0.1:9000
    #
    #location ~ \.php$ {
    #  root      html;
    #  fastcgi_pass  127.0.0.1:9000;
    #  fastcgi_index index.php;
    #  fastcgi_param script_filename /scripts$fastcgi_script_name;
    #  include    fastcgi_params;
    #}

		location ~ \.php$ {
		root html;
		fastcgi_pass 127.0.0.1:9000;
		fastcgi_index index.php;
		include fastcgi_params;
		fastcgi_param script_filename /usr/www$fastcgi_script_name;
		}

    # deny access to .htaccess files, if apache's document root
    # concurs with nginx's one
    #
    #location ~ /\.ht {
    #  deny all;
    #}
  }

	server {
    listen    8054;
    server_name localhost;

    location / {
      #root  html;
			root /usr/www5.4.44;
      index index.html index.htm;
    }

    error_page  500 502 503 504 /50x.html;
    location = /50x.html {
      root  html;
    }

		location ~ \.php$ {
		root html;
		fastcgi_pass 127.0.0.1:9001;
		fastcgi_index index.php;
		include fastcgi_params;
		fastcgi_param script_filename /usr/www5.4.44$fastcgi_script_name;
		}

  }


  # another virtual host using mix of ip-, name-, and port-based configuration
  #
  #server {
  #  listen    8000;
  #  listen    somename:8080;
  #  server_name somename alias another.alias;

  #  location / {
  #    root  html;
  #    index index.html index.htm;
  #  }
  #}


  # https server
  #
  #server {
  #  listen    443 ssl;
  #  server_name localhost;

  #  ssl_certificate   cert.pem;
  #  ssl_certificate_key cert.key;

  #  ssl_session_cache  shared:ssl:1m;
  #  ssl_session_timeout 5m;

  #  ssl_ciphers high:!anull:!md5;
  #  ssl_prefer_server_ciphers on;

  #  location / {
  #    root  html;
  #    index index.html index.htm;
  #  }
  #}

}
다시 시작 nginx
# /usr/local/nginx/sbin/nginx -s reload
방화벽에서 새 포트를 열어야 합니다. 그렇지 않으면 다음 항목에 액세스할 수 없습니다.
방화벽 구성
컴퓨터에서 가상 머신의 웹 페이지에 액세스하려는 경우 xp와 같은 로컬 머신, centos6인 경우 방화벽을 수정하여 포트 80
# cd /etc/sysconfig
을 수정해야 합니다. iptables 파일을 수정하거나 vim
# vim /etc/sysconfig/iptables
으로 직접 편집하여 방화벽 포트 80을 열려면 다음 줄을 추가하세요.
-a input -m state --state new -m tcp -p tcp --dport 8054 -j accept
방화벽을 다시 시작하세요
# /etc/init.d/iptables restart
테스트에 성공하면 phpinfo()를 확인하세요
위 내용은 Linux 시스템에서 Nginx용 PHP의 여러 버전을 설치하는 방법의 상세 내용입니다. 자세한 내용은 PHP 중국어 웹사이트의 기타 관련 기사를 참조하세요!