
Java에서 HttpServer 시뮬레이션 프런트 엔드 인터페이스 호출을 구현하는 방법

- PHPz앞으로
- 2023-04-17 10:28:39726검색
실행 결과 표시
여기에 두 가지 간단한 테스트 표시가 있고, 마지막에 더 많은 테스트 예가 있습니다.
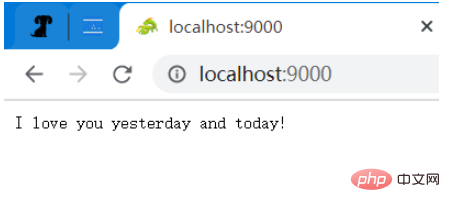
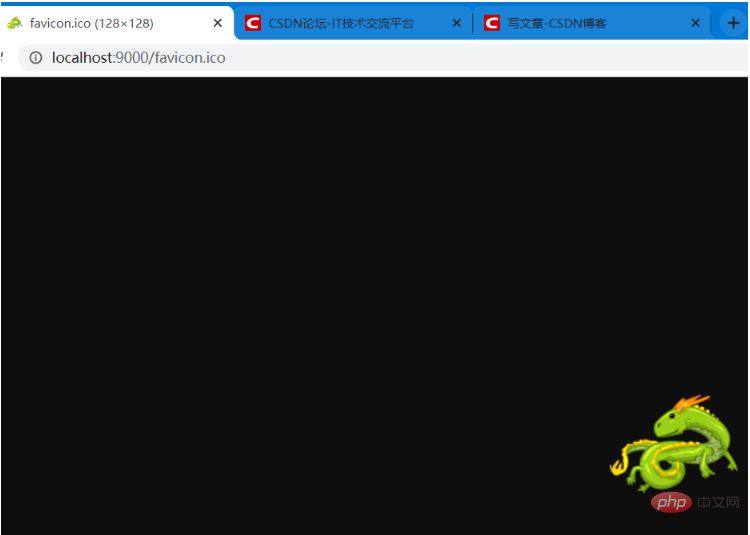
루트 디렉터리에 액세스하면 문장(문자열)이 반환됩니다. (참고: 그린 드래곤은 브라우저를 통해서만 볼 수 있으며 이미지 자체도 요청에 속합니다.) Content-Type: application/ json
이 이미지에 별도로 액세스하면 반환 값은 이미지(바이너리 데이터)
요청 및 응답 구성 파일
사용자가 요청 정보 및 응답 정보를 설정하는 한 미리 특정 요청에 접근하면 특정 데이터가 반환될 수 있습니다. 따라서 이 정보를 구성하기 위해 간단한 xml 파일을 설계했습니다. xml 구성을 사용하는 것이 더 편리합니다. 속성 구성 파일은 계층적 정보를 표현할 수 없으며 간단한 구성 요구 사항에만 적용할 수 있습니다.
큰 request_and_responses는 다양한 요청 및 응답 구성을 나타냅니다. 각 request_and_response 노드는 요청 및 응답의 기본 정보가 포함된 request 요청 및 response 응답 정보를 나타냅니다. GET 요청에는 주로 (method) 요청 메서드와 (path) 요청 경로 및 매개변수가 포함됩니다. POST 메서드 요청에는 (param ) 요청 매개변수도 포함됩니다. 응답에는 content_type(응답 콘텐츠 유형) 및 value(응답 콘텐츠)가 포함됩니다.
GET과 POST의 차이점은 GET의 요청 경로와 요청 매개변수가 함께(요청 본문 없이 요청 헤더에 있음) 반면 POST의 요청 매개변수는 요청 본문에 있다는 점입니다. 헤더와 요청 본문 사이의 구분 기호입니다.
xml 파일
<?xml version="1.0" encoding="UTF-8"?>
<request_and_responses>
	<!-- & 需要使用转义字符 & -->

	<request_and_response>
		<request>
			<method>GET</method>
			<path>/</path>
		</request>
		<response>
			<content_type>application/json</content_type>
			<value>I love you yesterday and today!</value>
		</response>
	</request_and_response>

	<request_and_response>
		<request>
			<method>GET</method>
			<path>/login?account=123&pwd=456</path>
		</request>

		<response>
			<content_type>application/json</content_type>
			<value>success</value>
		</response>
	</request_and_response>

	<request_and_response>
		<request>
			<method>GET</method>
			<path>/query/龙</path>
		</request>
		<response>
			<content_type>application/json</content_type>
			<value>龙是中国等东亚国家古代神话传说生活于海中的神异生物。</value>
		</response>
	</request_and_response>

	<request_and_response>
		<request>
			<method>POST</method>
			<path>/login</path>
			<param>account=123&pwd=456</param>
		</request>

		<response>
			<content_type>application/json</content_type>
			<value>{"result":success}</value>
		</response>
	</request_and_response>


	<request_and_response>
		<request>
			<method>POST</method>
			<path>/login</path>
			<param>workId=12345</param>
		</request>

		<response>
			<content_type>application/json</content_type>
			<value>{"result":"success", "data":{"name":"李工", "sex":"男", "age":35}}</value>
		</response>
	</request_and_response>


	<request_and_response>
		<request>
			<method>GET</method>
			<path>/pictures/husky.jpeg</path>
		</request>

		<response>
			<content_type>image/jpeg</content_type>
			<value>D:/DB/husky.jpeg</value>
		</response>
	</request_and_response>

	<!-- 浏览器访问时的图标 -->
	<request_and_response>
		<request>
			<method>GET</method>
			<path>/favicon.ico</path>
		</request>

		<response>
			<content_type>image/webp</content_type>
			<value>D:/DB/favicon.ico</value>
		</response>
	</request_and_response>

</request_and_responses>
xml은 엔터티 클래스
xml의 정보를 매핑하고 이를 메모리로 읽어온 다음 엔터티 클래스를 사용하여 정보를 캡슐화합니다.
package com.dragon;

public class RequestAndResponse {
	private String method;
	private String path;
	private String param;
	private String content_type;
	private String value;

	public String getMethod() {
		return method;
	}
	public void setMethod(String method) {
		this.method = method;
	}
	public String getPath() {
		return path;
	}
	public void setPath(String path) {
		this.path = path;
	}
	public String getParam() {
		return param;
	}
	public void setParam(String param) {
		this.param = param;
	}
	public String getContent_type() {
		return content_type;
	}
	public void setContent_type(String content_type) {
		this.content_type = content_type;
	}
	public String getValue() {
		return value;
	}
	public void setValue(String value) {
		this.value = value;
	}

	@Override
	public String toString() {
		return "RequestAndResponse [method=" + method + ", path=" + path + ", param=" + param + ", content_type="
				+ content_type + ", value=" + value + "]";
	}
}
xml 파일 파서 클래스
클래스를 사용하여 xml 파일을 Java 객체로 구문 분석한 다음 List 컬렉션을 사용하여 모든 객체를 저장합니다.
참고: 저는 이름을 잘 못 짓고, 너무 길어서 그냥 할게요! ㅋ. 참고: xml 구문 분석을 위한 jar 패키지는 여기에서 사용됩니다: dom4j.
package com.dragon;

import java.io.File;
import java.util.ArrayList;
import java.util.Iterator;
import java.util.List;

import org.dom4j.Document;
import org.dom4j.DocumentException;
import org.dom4j.Element;
import org.dom4j.io.SAXReader;

/**
 * 解析 xml 文件中配置的用户请求和响应数据。
 * */
public class RequestAndResponseResolver {
	private static final String method = "method";
	private static final String path = "path";
	private static final String param = "param";
	private static final String content_type = "content_type";
	private static final String value = "value";

	public static List<RequestAndResponse> listRequestAndResponse(String filePath) throws DocumentException{
		File file = new File(filePath);
		SAXReader reader = new SAXReader();
		Document doc = reader.read(file);

		Element root = doc.getRootElement();
		//获取根元素下面所有的子元素,利用迭代器方式
		Iterator<?> it = root.elementIterator();

		List<RequestAndResponse> requestAndResponses = new ArrayList<>();
		while (it.hasNext()) {
			//取出元素request_and_response
			Element e = (Element)it.next();
			//依次遍历每一个 request_and_response,获取相应的信息
			Element request = e.element("request");
			Element response = e.element("response");

			RequestAndResponse requestAndResponse = new RequestAndResponse();
			requestAndResponse.setMethod(request.elementText(method));
			requestAndResponse.setPath(request.elementText(path));
			requestAndResponse.setParam(request.elementText(param));   //GET 方式,这个属性为 null
			requestAndResponse.setContent_type(response.elementText(content_type));
			requestAndResponse.setValue(response.elementText(value));

			requestAndResponses.add(requestAndResponse);
		}

		return requestAndResponses;
	}
}
요청을 받아 처리하는 부분
다음은 Socket을 이용해 요청을 받아 처리하는 부분을 소개합니다. 여기에 관련된 지식은 기본적으로 소켓을 사용하는 것과 동일합니다. 유일한 차이점은 콘텐츠 자체에 데이터 부분과 비데이터 부분이 포함되어 있기 때문입니다. (HTTP 관점에서는 데이터 부분만 볼 수 있습니다.) 소켓 프로그래밍을 사용하는 것은 단순히 포트를 듣고 연결이 오면 처리하는 것입니다. (여기서는 전통적인 BIO를 사용하고 NIO 부분은 모르겠습니다.)
여기서 제가 처리하는 것은 스레드 풀을 사용하여 처리하고 연결마다 하나의 스레드를 사용하는 것입니다. 이 클래스(Server 클래스)의 전체 코드는 아래를 참조하세요.
	public void receive() {
		//使用线程池处理请求
		ExecutorService pool = Executors.newFixedThreadPool(THREAD_NUMBER);

		while (true) {
			try {
				Socket connection = server.accept();
				pool.submit(new UserConnection(connection));
			} catch (IOException e) {
				System.out.println(this.getDate()+" 用户连接断开");
				e.printStackTrace();
			}
		}
	}
요청을 수신하는 코드: 서버 클래스
package com.dragon;

import java.io.IOException;
import java.net.ServerSocket;
import java.net.Socket;
import java.text.SimpleDateFormat;
import java.util.Date;
import java.util.concurrent.ExecutorService;
import java.util.concurrent.Executors;

public class Server {
	private static final int THREAD_NUMBER = 10;
	private ServerSocket server;
	private int port;

	public Server(int port) {
		this.port = port;
	}

	//启动服务。
	public void start() {
		try {
			server = new ServerSocket(port);
			System.out.println(this.getDate()+" 服务启动!");
			this.receive();
		} catch (IOException e) {
			System.out.println(this.getDate()+" 服务启动失败!");
			e.printStackTrace();
		}
	}

	public void receive() {
		//使用线程池处理请求
		ExecutorService pool = Executors.newFixedThreadPool(THREAD_NUMBER);

		while (true) {
			try {
				Socket connection = server.accept();
				pool.submit(new UserConnection(connection));
			} catch (IOException e) {
				System.out.println(this.getDate()+" 用户连接断开");
				e.printStackTrace();
			}
		}
	}


	private String getDate() {
		String format = "yyyy-MM-dd HH:mm:ss";
		Date now = new Date();
		SimpleDateFormat dateFormat = new SimpleDateFormat(format);
		return dateFormat.format(now);
	}
}
Http 요청 메시지는 TCP 수준(네트워크는 계층화됨)의 바이너리 데이터 스트림이므로 TCP를 사용하여 이 스트림을 직접 수신할 수 있습니다. 바이너리 데이터(예: 파일 업로드)의 메시지 구문 분석은 더 복잡하고 어떻게 해야 할지 모르기 때문에 여기서는 바이너리 파일이 포함되지 않은 간단한 요청을 테스트합니다. )
참고: 특정 구문 분석도 매우 복잡하기 때문에 HTTP 메시지의 구조와 관련되지만 파일 업로드와 관련되지 않으면 전체 메시지가 일부 문자 데이터이므로 모든 요청 메시지를 한 번에 읽습니다. 그런 다음 문자열로 변환하고 해당 문자열을 구문 분석에 사용합니다.
in = connection.getInputStream();
out = connection.getOutputStream();

//这个数字是随便设置的,因为要一次性读取整个请求报文,不能太小。(但是其实这个也很大了)
byte[] b = new byte[5*1024];
BufferedInputStream input = new BufferedInputStream(in);
int count = input.read(b);
String requestMessage = new String(b, 0, count);
System.out.println("====================报文分隔符上界===================");
System.out.println(requestMessage);
System.out.println("====================报文分隔符下界===================");
요청 처리 코드: UserConnection 클래스
요청 및 응답 정보 초기화 설명: 정적 초기화 블록을 사용하여 정보를 초기화하고, 사용자가 미리 구성한 xml 정보를 메모리에 읽어들이는 부분이 언급되었습니다. 더 일찍.
// 初始化配置好的信息
	static {
		try {
			requestAndResponses = RequestAndResponseResolver.listRequestAndResponse("./src/com/dragon/request_and_response.xml");
		} catch (DocumentException e) {
			e.printStackTrace();
		}
	}
요청 처리 및 응답 정보 획득 이는 시뮬레이션 호출이므로 요청 헤더에 있는 데이터의 세 부분인 요청 메서드(메서드), 요청 경로(경로), 요청에 주로 중점을 둡니다. 매개변수(param) ). GET 메소드와 POST 메소드는 별도로 처리됩니다. GET과 POST의 차이점은 위에서 간략하게 소개되었습니다. (그러나 자세한 내용은 충분하지 않으므로 인터넷의 다른 정보를 참조하면 이해할 수 있습니다.)
이 코드를 통해 GET 메소드라면 RequestAndResponse 객체에서 content_type(반환 값 데이터 유형)과 value(반환 값 데이터)를 꺼내서 로컬 변수 content_type과 value에 할당합니다.
if ("GET".compareTo(method) == 0) {
	for (RequestAndResponse r : requestAndResponses) {
		//这里需要对 get 方式时的请求进行解码,因为一些非 ASCII 码字符会被编码,比如汉字。
		path = URLDecoder.decode(path, ENCODE);
		if (r.getMethod().equals(method) && r.getPath().equals(path)) {
			content_type = r.getContent_type();
			value = r.getValue();
			break;
		}
	}
} else {
	//POST 方式,请求参数是在请求体中的,请求头和请求体中间有一个换行符。
	String param = requestMessage.substring(requestMessage.lastIndexOf(CRLF) + 2); //这里是不包括 CRLF 的两个字符的。
	for (RequestAndResponse r : requestAndResponses) {                 //因为这个get方式的 参数为空,所以这里必须是 param 在前。
		if (r.getMethod().equals(method) && r.getPath().equals(path) && param.equals(r.getParam())) {
			content_type = r.getContent_type();
			value = r.getValue();
			break;
		}
	}
}
这里介绍一个知识:URL 中的字符是特定的,不允许中文等字符的出现,所以发送请求时会对中文等字符进行编码,如果直接使用 equals 方法的,当然不会相等了,所以需要先对数据进行解码,然后再调用 equals 方法进行处理。这个是我们平时广泛使用 的东西,有时候使用浏览器可以看到带很多奇怪字符 URL,它们都是被处理过的。
举一个简单的例子:
String str = "我爱你";
String en_str = java.net.URLEncoder.encode(str, "UTF-8");
String de_str = java.net.URLDecoder.decode(en_str, "UTF-8");
System.out.println("编码字符:" + en_str);
System.out.println("解码字符:" + de_str);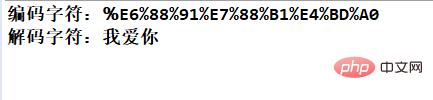
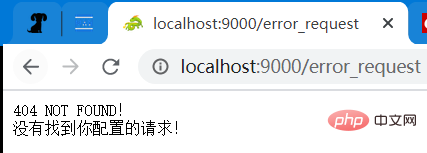
注意:这里有一个特殊的情况,如果发起了没有配置的请求方法和路径,那么程序会出错。所以,这里的 content_type 和 value 有一个默认的值,而且非常有趣!
执行响应 响应信息主要关注几点:响应信息长度(Content-Length)(按字节数计算)、响应内容类型(Content-Type)。
虽然发送的请求里不能带二进制文件,但是响应信息是可以返回文件的,而且使用 Content-Length (一次性发送),不使用 Chunked 分块发送(这里我还不太明白,而且只是模拟,应该使用一些简单的小文件。)。
下面是区分响应类型为 json (字符串) 还是 文件(二进制数据) 的代码:
如果是字符串,则 value 的值是字符串的值,如果是文件,则 value 的值为一个具体的本地路径。(不应该使用网络图片,即使修改程序可以做到也没有必要,因为这样就需要依赖网络了。)
	//这里我只处理字符串类和文件类两种响应体
	//响应体
	int len = 0;
	String responseBody = null;   //响应值是 json 数据
	File file = null; //响应值是 文件
	if (content_type.equals("application/json")) {  //如果是 json 数据,否则就是 文件类数据(图片、文档或其它文件)
		 responseBody = value;
		 len = responseBody.getBytes().length;   //响应体的字节数,注意是字节数!
	} else {
		 file = new File(value);
		 len = (int) file.length();
	}
然后就可以准备发送响应数据了,下面是发送响应的代码,注意报文的具体结构。
	//响应头
	responseHeader.append("HTTP/1.1").append(BLANK);
	responseHeader.append(200).append(BLANK);
	responseHeader.append("OK").append(CRLF);
	responseHeader.append("Server:"+"CrazyDragon").append(CRLF);
	responseHeader.append("Date:").append(BLANK).append(date).append(CRLF);
	responseHeader.append("Content-Type:").append(BLANK).append(content_type).append(CRLF);
	responseHeader.append("Content-Length:").append(BLANK).append(len).append(CRLF);
	responseHeader.append(CRLF);

	//如果 字符串变量 responseBody 不为空,则说明返回值是 json 数据(字符串)
	//否则就是文件类的流了。
	if (responseBody != null) {
		String response = responseHeader.toString() + responseBody;
		out.write(response.getBytes("UTF-8"));
	} else {
		out.write(responseHeader.toString().getBytes("UTF-8"));

		int hasRead = 0;
		byte[] data = new byte[4*1024];
		try (BufferedInputStream inputStream = new BufferedInputStream(new FileInputStream(file))) {
			while ((hasRead = inputStream.read(data)) != -1) {
				out.write(data, 0, hasRead);
			}
		}
	}
	out.flush();   //必要的刷新流操作。
User Connection 的完整代码:
package com.dragon;

import java.io.BufferedInputStream;
import java.io.File;
import java.io.FileInputStream;
import java.io.IOException;
import java.io.InputStream;
import java.io.OutputStream;
import java.net.Socket;
import java.net.URLDecoder;
import java.text.SimpleDateFormat;
import java.util.Date;
import java.util.List;
import java.util.Locale;
import java.util.TimeZone;

import org.dom4j.DocumentException;

public class UserConnection implements Runnable{
	private static final String BLANK = " ";
	private static final String CRLF = "\r\n"; //换行符,不能写反了!
	private static final String ENCODE = "UTF-8";
	private static final String default_content_type = "application/json";   //当任何匹配路径都没有时。
	private static final String default_value = "404 NOT FOUND!\n没有找到你配置的请求!";


	private static List requestAndResponses;
	private Socket connection;


	// 初始化配置好的信息
	static {
		try {
			requestAndResponses = RequestAndResponseResolver.listRequestAndResponse("./src/com/dragon/request_and_response.xml");
		} catch (DocumentException e) {
			e.printStackTrace();
		}
	}


	public UserConnection(Socket connection) {
		this.connection = connection;
	}

	@Override
	public void run() {
		InputStream in = null;
		OutputStream out = null;
		try {
			in = connection.getInputStream();
			out = connection.getOutputStream();

			//这个数字是随便设置的,因为要一次性读取整个请求报文,不能太小。(但是其实这个也很大了)
			byte[] b = new byte[5*1024];
			BufferedInputStream input = new BufferedInputStream(in);
			int count = input.read(b);
			String requestMessage = new String(b, 0, count);
			System.out.println("====================报文分隔符上界===================");
			System.out.println(requestMessage);
			System.out.println("====================报文分隔符下界===================");

			//以第一个 换行符 CRLF 为界限取出 请求路径和请求参数
			String requestLine = requestMessage.substring(0, requestMessage.indexOf(CRLF));
			String[] line = requestLine.split("\\s");
			String method = line[0];  //考虑大小写。
			String path = line[1];
			//这个数组是有三个元素,最后一个是 协议的版本,这里不需要,就不处理了。
			String content_type = default_content_type;
			String value = default_value;
			if ("GET".compareTo(method) == 0) {
			//	System.out.println("请求方式:" + method + " 请求路径(含参数):" + path);
				for (RequestAndResponse r : requestAndResponses) {
					//这里需要对 get 方式时的请求进行解码,因为一些非 ASCII 码字符会被编码,比如汉字。
					path = URLDecoder.decode(path, ENCODE);
					if (r.getMethod().equals(method) && r.getPath().equals(path)) {
						content_type = r.getContent_type();
						value = r.getValue();
						break;
					}
				}
			} else {
				//POST 方式,请求参数是在请求体中的,请求头和请求体中间有一个换行符。
				String param = requestMessage.substring(requestMessage.lastIndexOf(CRLF) + 2); //这里是不包括 CRLF 的两个字符的。
				for (RequestAndResponse r : requestAndResponses) {                 //因为这个get方式的 参数为空,所以这里必须是 param 在前。
					if (r.getMethod().equals(method) && r.getPath().equals(path) && param.equals(r.getParam())) {
						content_type = r.getContent_type();
						value = r.getValue();
						System.out.println(content_type+" "+value);
						break;
					}
				}
			}

			StringBuilder responseHeader = new StringBuilder();
			String date = this.getDate();


			//这里我只处理字符串类和文件类两种响应体
			//响应体
			int len = 0;
			String responseBody = null;   //响应值是 json 数据
			File file = null; //响应值是 文件
			if (content_type.equals("application/json")) {  //如果是 json 数据,否则就是 文件类数据(图片、文档或其它文件)
				 responseBody = value;
				 len = responseBody.getBytes().length;   //响应体的字节数,注意是字节数!
			} else {
				 file = new File(value);
				 len = (int) file.length();
			}

			//响应头
			responseHeader.append("HTTP/1.1").append(BLANK);
			responseHeader.append(200).append(BLANK);
			responseHeader.append("OK").append(CRLF);
			responseHeader.append("Server:"+"CrazyDragon").append(CRLF);
			responseHeader.append("Date:").append(BLANK).append(date).append(CRLF);
			responseHeader.append("Content-Type:").append(BLANK).append(content_type).append(CRLF);
			responseHeader.append("Content-Length:").append(BLANK).append(len).append(CRLF);
			responseHeader.append(CRLF);

			//如果 字符串变量 responseBody 不为空,则说明返回值是 json 数据(字符串)
			//否则就是文件类的流了。
			if (responseBody != null) {
				String response = responseHeader.toString() + responseBody;
				out.write(response.getBytes("UTF-8"));
			} else {
				out.write(responseHeader.toString().getBytes("UTF-8"));

				int hasRead = 0;
				byte[] data = new byte[4*1024];
				try (BufferedInputStream inputStream = new BufferedInputStream(new FileInputStream(file))) {
					while ((hasRead = inputStream.read(data)) != -1) {
						out.write(data, 0, hasRead);
					}
				}
			}
			out.flush();   //必要的刷新流操作。
		} catch (IOException e) {
			e.printStackTrace();
		} finally {
			try {
				if (in != null)
					in.close();
			} catch (IOException e) {
				e.printStackTrace();
			}
		}
	}

	private String getDate() {
		Date date = new Date();
		SimpleDateFormat format = new SimpleDateFormat("EEE, d MMM yyyy HH:mm:ss 'GMT'", Locale.CHINA);
		format.setTimeZone(TimeZone.getTimeZone("GMT")); // 设置时区为GMT
		return format.format(date);
	}
}
主程序类:Main
package com.dragon;

public class Main {
	public static void main(String[] args) {
		Server server = new Server(9000);
		server.start();
	}
}
更多的测试示例
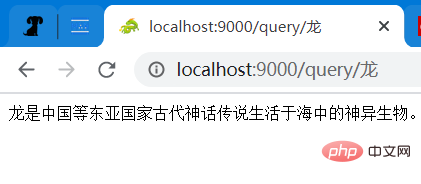
请求方式:GET 请求路径和参数:/query/龙 预期的响应类型:application/json 预期的响应值:龙是中国等东亚国家古代神话传说生活于海中的神异生物。 测试结果:
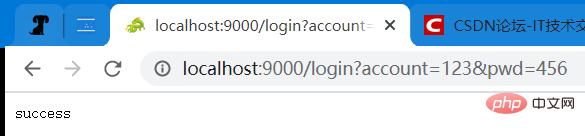
请求方式:GET 请求路径和参数:/login?account=123&pwd=456 预期的响应类型:application/json 预期的响应值:success 测试结果:
请求方式:GET 请求路径和参数:/pictures/husky.jpeg 预期的响应类型:image/jpeg 预期的响应值:一张图片(地址为:D:/DB/husky.jpeg)
请求方式:POST 请求路径:/login 请求参数:account=123&pwd=456 预期的响应类型:application/json 预期的响应值:{“result”:success} 测试结果:
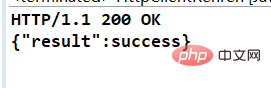
注:这是使用 HttpClient 发送的 POST 请求。

接收到的 POST 请求:

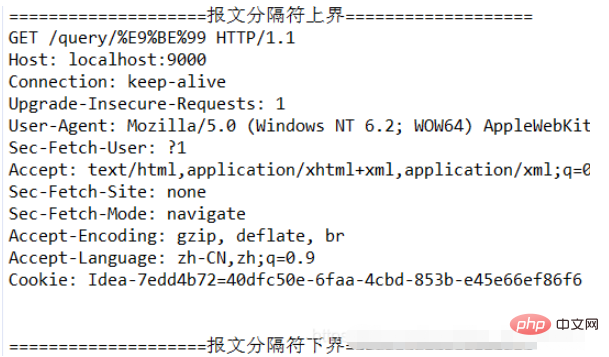
接收到的 GET 请求(含中文参数): /query/龙 注意:“龙” 已经被编码了。
위 내용은 Java에서 HttpServer 시뮬레이션 프런트 엔드 인터페이스 호출을 구현하는 방법의 상세 내용입니다. 자세한 내용은 PHP 중국어 웹사이트의 기타 관련 기사를 참조하세요!