노드가 github 제3자 로그인을 구현하는 방법에 대한 간략한 분석
- 青灯夜游앞으로
- 2022-10-26 19:23:171946검색
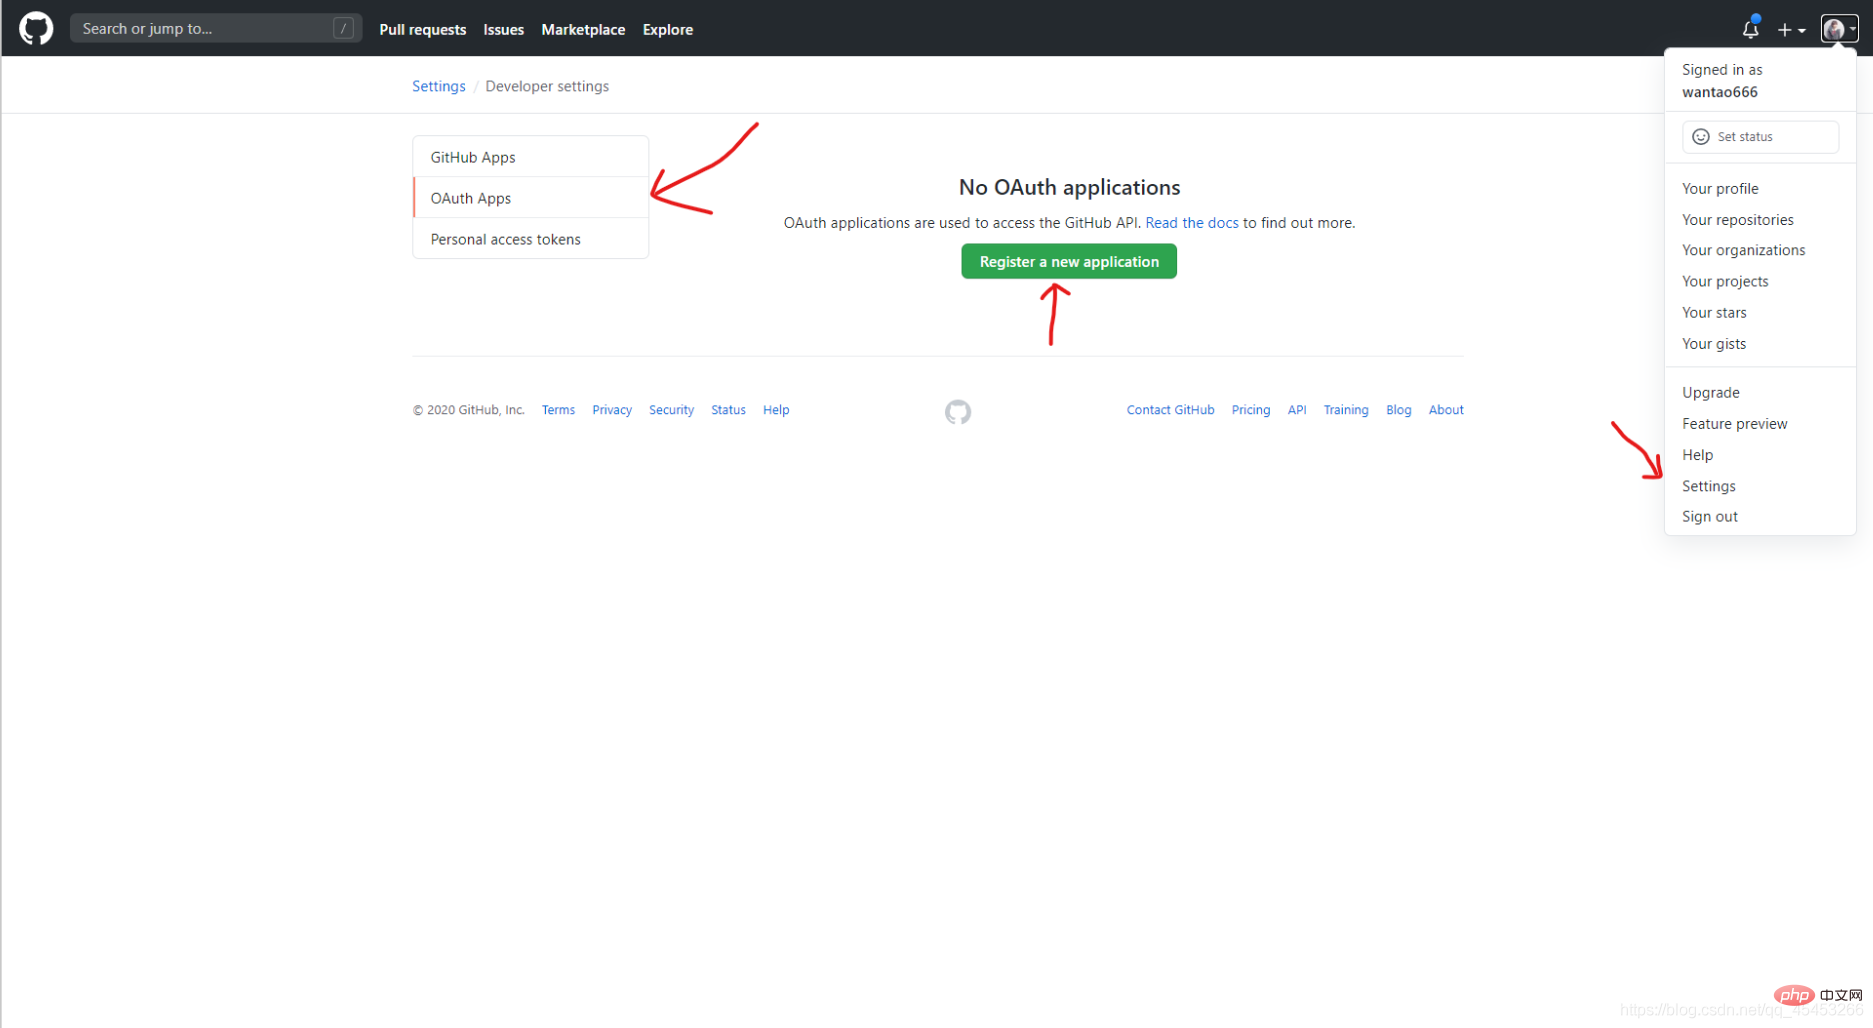
node는 github에 대한 타사 로그인을 어떻게 구현합니까? 다음 기사에서는 nodejs를 사용하여 github에 타사 로그인을 구현하는 방법을 소개합니다. 도움이 되길 바랍니다. ㅋㅋㅋ 설정=>OAuth 앱 s=> ;새 애플리케이션 등록

②신청 정보 입력

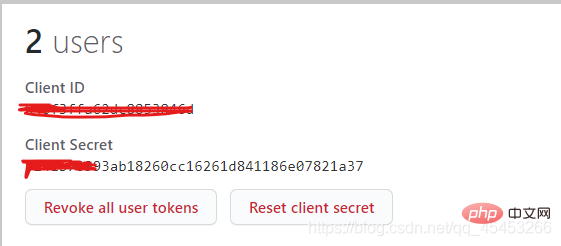
③등록 완료, Client ID 및
Client Secret을 받으세요. 노드 js 비디오 튜토리얼
】

<a href="https://github.com/login/oauth/authorize?client_id={你自己的cilent_id}&redirect_uri=http://localhost:3001/github" class="iconfont ali-icon-github"></a>으로 리디렉션됩니다. 백엔드는 코드를 가져오고 코드와 함께 github을 요청하고 토큰을 가져온 다음 토큰을 URL에 넣고 프런트 엔드에 전달합니다

router.get('/github',controller.auth.githubLogin)
const axios = require('axios')
const querystring = require('querystring')

const config = {
    client_id: "你自己的client_id",
    client_secret: "你自己的client_secret"
}
class AuthController {
    async githubLogin(ctx) {
        const code = ctx.request.query.code
        const params = {
            client_id: config.client_id,
            client_secret: config.client_secret,
            code: code
        }
        let res = await axios.post('https://github.com/login/oauth/access_token', params)
        console.log(res)
        const token = querystring.parse(res.data).access_token
        ctx.cookies.set('token', token, {
            maxAge: ctx.config.jwt.expire * 1000,
        });
        res = { ...ctx.errCode.SUCCESS, data: { token } };
        ctx.redirect('http://172.25.78.33:8081/login/success?token='+token)
    }
}
module.exports = exports = new AuthController();
4. 프런트 엔드는 임시 페이지를 생성하고 저장합니다. URL에 토큰을 추가하고 로그인 성공 페이지로 이동합니다임시 페이지는 매우 빠르게 이동하므로 기본적으로 볼 수 없습니다.
<template>
  <h1>登录成功跳转首页</h1>
</template>

<script>
import {setLoginedUser} from "@/http/axios";
export default {
  mounted() {
    setLoginedUser("github", this.$route.query.token);
    this.$message({
      message: "登录成功",
      type: "success",
    });
    this.$router.push("/home");
  },
};
</script>

<style>
</style>
3. 코드 링크
https://github.com/wantao666/nodejs-github
노드 관련 지식을 더 보려면nodejs 튜토리얼을 방문하세요!
위 내용은 노드가 github 제3자 로그인을 구현하는 방법에 대한 간략한 분석의 상세 내용입니다. 자세한 내용은 PHP 중국어 웹사이트의 기타 관련 기사를 참조하세요!
성명:
이 기사는 csdn.net에서 복제됩니다. 침해가 있는 경우 admin@php.cn으로 문의하시기 바랍니다. 삭제

