webpack에서 html 리소스를 압축하고 패키징하는 방법에 대해 이야기해보겠습니다.
- 青灯夜游앞으로
- 2022-08-09 19:44:533684검색
webpack에서 html 리소스를 어떻게 압축하고 패키징하나요? 다음 글에서는 webpack으로 HTML 리소스를 압축하고 패키징하는 방법에 대해 간략하게 소개하겠습니다. 도움이 되셨으면 좋겠습니다.

html 리소스를 패키징해야 하는 이유
코드를 작성하면 src 아래에 js 파일이 소개되고, 이때 webpack으로 패키징된 후, 엔트리 파일이 생성됩니다. html의 js 파일이 올바르지 않으므로 html의 js 파일 경로를 바꾸려면 webpack 패키징이 필요합니다.
webpack을 사용하여 html을 패키징할 때의 이점은 다음과 같습니다.
(1) 패키징된 js 파일은 자동으로 html에 도입될 수 있습니다
(2) html이 패키징된 후에도 여전히 빌드 폴더에 생성되고 패키지된 js 파일이 함께 배치됩니다. 온라인에 접속할 때 패키지 및 생성된 폴더만 온라인 환경에 복사하면 됩니다
(3)은 html 파일을 압축하는 데 도움이 됩니다
에서 html 리소스를 압축하고 패키지하는 방법 webpack
1. 플러그인 설치
webpack은 기본적으로 JS 및 JSON 파일만 이해할 수 있으며, 다른 유형의 파일 패키징을 지원하려면 해당 플러그인이나 로더를 설치해야 합니다.
HTML 파일을 패키징하려면 먼저 html-webpack-plugin 플러그인을 설치해야 합니다. html-webpack-plugin插件:
npm install html-webpack-plugin -D
这个插件的作用:
默认在出口下创建一个html文件,然后导入所有的JS/CSS资源
我们也可以自己指定一个html文件,在此html文件中加入资源
2、webpack.config.js配置
安装好html-webpack-plugin插件后,需要在webpack.config.js文件中进行配置:
 // ...
 // 1. 引入插件
 const HtmlWebpackPlugin = require('html-webpack-plugin');

 module.exports = {
   // ...
   // 2. 在plugins中配置插件
   plugins: [
     new HtmlWebpackPlugin({
       template: 'index.html', // 指定入口模板文件(相对于项目根目录)
       filename: 'index.html', // 指定输出文件名和位置(相对于输出目录)
       // 关于插件的其他项配置,可以查看插件官方文档
     })
   ]
 }
详细配置链接: https://www.npmjs.com/package/html-webpack-plugin
确保入口模板文件的路径和文件名与配置一致,然后可以编译。
3、多JS入口和多HTML情况的配置
面对需要编译出多个HTML文件,且文件需要引入不同的JS文件,但默认情况下,打包后的HTML文件会引入所有打包后的JS文件,我们可以指定chunk来分配JS。
 const path = require('path');
 // 1. 引入插件
 const HtmlWebpackPlugin = require('html-webpack-plugin');
 module.exports = {
   // ...
   // 2. 配置JS入口(多入口)
   entry: {
     vendor: ['./src/jquery.min.js', './src/js/common.js'],
     index: './src/index.js',
     cart: './src/js/cart.js'
   },
   // 配置出口
   output: {
     filename: '[name].js',
     path: path.resolve(__dirname, 'build/js')
   },
   // 3. 配置插件
   plugins: [
     new HtmlWebpackPugin({
       template: 'index.html',
       filename: 'index.html',
       // 通过chunk来指定引入哪些JS文件
       chunk: ['index', 'vendor']
     }),
     // 需要编译多少个HTML,就需要new几次插件
     new HtmlWebpackPlugin({
       template: './src/cart.html',
       filename: 'cart.html',
       chunk: ['cart', 'vendor']
     })
   ]
 }
Tip: 这里需要注意的是要编译多少个HTML文件,就要new几次
HtmlWebpackPlugin。
上面的配置编译成功后,输出情况是这样的:
 build
 |__ index.html # 引入index.js和vendor.js
 |__ cart.html    # 引入cart.js和vendor.js
 |__ js
      |__ vendor.js # 由jquery.min.js和common.js生成
      |__ index.js    # 由index.js生成
      |__ cart.js       # 由cart.js生成
压缩打包html资源实例
1、webpack.config.js配置
const HTMLWebpackPlugin = require('html-webpack-plugin')
...
 plugins: [
    // html-webpack-plugin  html 打包配置 该插件将为你生成一个 HTML5 文件
    new HTMLWebpackPlugin({
      template: "./index.html", // 打包到模板的相对或绝对路径 (打包目标)
      title: '首页', // 用于生成的HTML文档的标题
      hash: true,//true则将唯一的webpack编译哈希值附加到所有包含的脚本和CSS文件中。主要用于清除缓存,
      minify: {  // 压缩html
        collapseWhitespace: true, // 折叠空白区域
        keepClosingSlash: true,  // 保持闭合间隙
        removeComments: true,   // 移除注释
        removeRedundantAttributes: true, // 删除冗余属性
        removeScriptTypeAttributes: true,  // 删除Script脚本类型属性
        removeStyleLinkTypeAttributes: true, // 删除样式链接类型属性
        useShortDoctype: true, // 使用短文档类型
        preserveLineBreaks: true, // 保留换行符
        minifyCSS: true, // 压缩文内css
        minifyJS: true, // 压缩文内js
      }
    }),
  ],
...
2、此时我们的index.html
<!DOCTYPE html>
<html lang="">
  <head>
    <meta charset="utf-8">
    <meta http-equiv="X-UA-Compatible" content="IE=edge">
    <meta name="viewport" content="width=device-width,initial-scale=1.0">
    <title>webpackDemo</title>
  </head>
  <body>
    <div id="app">
      html 打包配置
    </div>
  </body>
</html>
3、此时我们的index.js
import './../css/index.less'

function add(x,y) {
 return x+y
}
console.log(add(2,3));
3、控制台webpack键入打包,发现打包输出文件多了个index.html,内容如下
<!DOCTYPE html>
<html lang="">
  <head>
    <meta charset="utf-8">
    <meta http-equiv="X-UA-Compatible" content="IE=edge">
    <meta name="viewport" content="width=device-width,initial-scale=1.0">
    <title>webpackDemo</title>
  <script defer src="index.js"></script></head>
  <body>
    <div id="app">
      html 打包配置
    </div>
  </body>
</html>
<script defer src="index.js"></script>rrreee
- 기본적으로 내보내기 아래에 html 파일이 생성되고 모든 JS/CSS 리소스를 가져옵니다
-
 html 파일을 지정할 수도 있습니다 이 html 파일에 리소스를 추가하세요

html-webpack-plugin 플러그인을 설치한 후 , webpack.config.js를 구성해야 합니다. 파일에서 구성: 🎜rrreee🎜자세한 구성 링크: https://www.npmjs.com/package/html-webpack-plugin🎜🎜항목 템플릿 파일의 경로와 파일 이름, 구성이 일관되고 컴파일될 수 있는지 확인하세요. 🎜🎜🎜🎜3. 다중 JS 항목 및 다중 HTML 상황 구성 🎜🎜🎜🎜 여러 HTML 파일을 컴파일해야 하고 파일은 다른 JS 파일을 가져와야 하지만 기본적으로 패키지된 HTML 파일을 가져옵니다. 패키지된 모든 JS 파일에 대해
chunk를 지정하여 JS를 배포할 수 있습니다. 🎜rrreee🎜팁: 여기서 주목해야 할 것은 컴파일해야 하는 HTML 파일 수, 새로운 HtmlWebpackPlugin이 필요한 횟수입니다. 🎜🎜위 구성이 성공적으로 컴파일되면 출력은 다음과 같습니다. 🎜rrreee🎜압축 및 패키지된 HTML 리소스의 예🎜🎜🎜1. config.js 구성 🎜rrreee
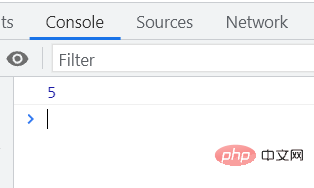
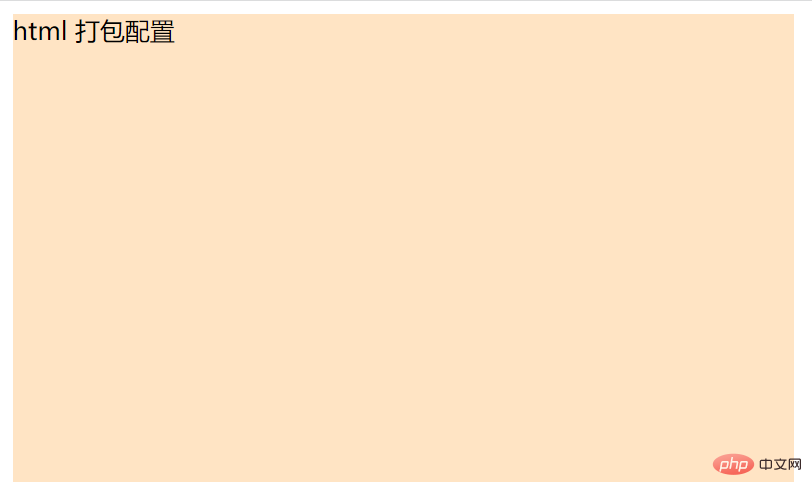
2. 이때 index.html🎜rrreee🎜3. 이번에는 index.js🎜rrreee🎜3을 입력하세요. 패키지를 찾아 패키지를 찾습니다. 출력 파일에는 추가 index.html이 있으며 내용은 다음과 같습니다🎜rrreee🎜<script defer src="index.js"></script> code>가 브라우저에 자동으로 도입됩니다🎜🎜 패키지된 출력 index.html을 열고 스타일이 적용되고 제어 장치가 정상적으로 출력되는지 확인합니다. 🎜🎜🎜🎜🎜🎜🎜🎜더 많은 프로그래밍 관련 지식을 보려면 다음을 방문하세요. 🎜프로그래밍 비디오🎜! ! 🎜
위 내용은 webpack에서 html 리소스를 압축하고 패키징하는 방법에 대해 이야기해보겠습니다.의 상세 내용입니다. 자세한 내용은 PHP 중국어 웹사이트의 기타 관련 기사를 참조하세요!


 html 파일을 지정할 수도 있습니다 이 html 파일에 리소스를 추가하세요