유용한 TP 리치 텍스트 편집기 -CKEditor를 공유하고 추천하세요
- 青灯夜游앞으로
- 2021-10-25 19:16:362962검색
이 기사에서는 사용하기 쉬운 Thinkphp 리치 텍스트 편집기인 CKEditor를 추천합니다. CKEditor 사용 방법을 소개하겠습니다.

저는 최근에 Thinkphp 백엔드 개발을 하고 있는데 Laui의 리치 텍스트 편집기를 사용하고 있습니다. Laui의 장점은 간단하고 사용하기 쉽다는 것이지만 단점도 분명합니다. 편집기에는 상대적으로 기능이 적고, 우연히 다른 기능을 발견했습니다. CKEditor 서식 있는 텍스트 편집기가 내 프로젝트에 사용되는데 꽤 광범위하다고 느껴집니다! CKEditor의 사용법을 함께 배워봅시다. [추천 관련 튜토리얼: thinkphp Framework]
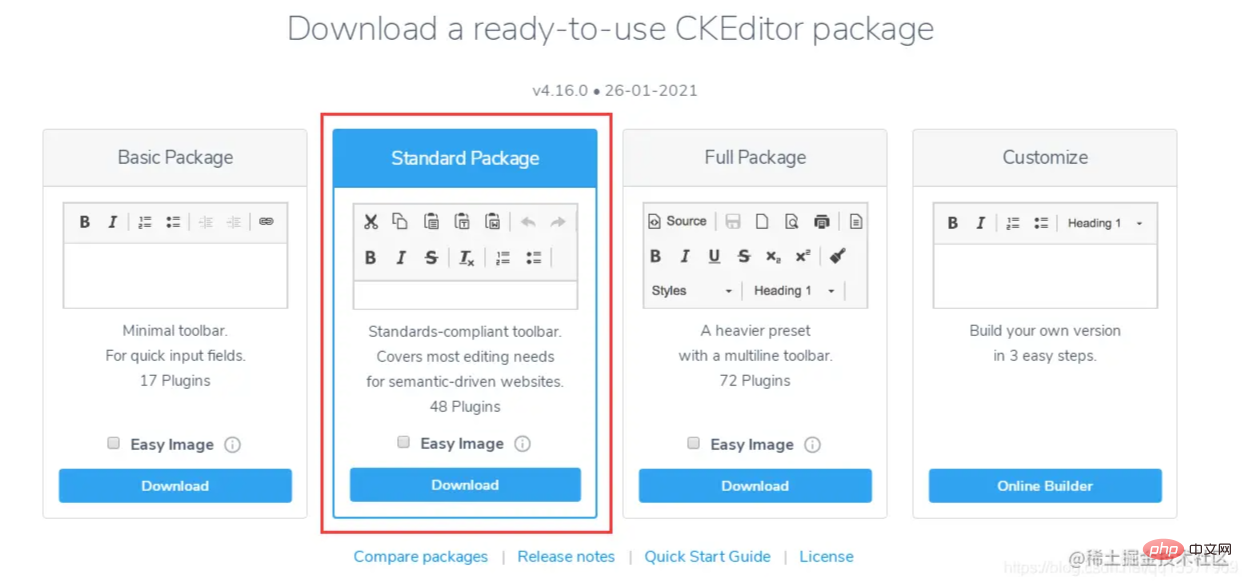
Ckeditor4 다운로드 주소(이 튜토리얼에서는 CKEditor 버전 4.16을 선택합니다):
https://ckeditor.com/ckeditor-4/download/
1. ckeditor 코어 파일 ckeditor.js를
<script type="text/javascript" src="ckeditor/ckeditor.js"></script>
2. 편집기가 사용되는 위치에 HTML 컨트롤을 삽입합니다
<textarea id="content" name="content" cols="30" rows="2"></textarea>
3. 해당 컨트롤을 편집기 코드
<script type="text/javascript">
var editor;
window.onload = function()
{
editor = CKEDITOR.replace( 'content', {
filebrowserImageUploadUrl : '{:url("@admin/article/uploadPic")}',//上传图片的后端URL地址
image_previewText : ' '///去掉图片上传预览区域显示的文字
});
};
</script>4. 업로드 기능을 활성화하세요(업로드 기능이 숨겨져 있으므로 활성화해야 합니다)
ckeditor/plugins/image/dialogs/image.js 파일에서 다음을 검색하세요: id: "Upload", Hidden:!0 , !0을 false
로 변경하세요. 5. thinkphp 백엔드에 파일을 업로드하는 방법
버전 4.10 이후 공식 문서에서는 이미지가 성공적으로 업로드된 후 json 형식이 반환되어야 합니다. 예는 다음과 같습니다:
업로드 성공 반환:
{
    "uploaded": 1,
    "fileName": "demo.jpg",
    "url": "/files/demo.jpg"
}

{
    "uploaded": 1,
    "fileName": "test.jpg",
    "url": "/files/test.jpg",
    "error": {
        "message": "A file with the same name already exists. The uploaded file was renamed to \"test.jpg\"."
    }
}
업로드 실패반환:
{
    "uploaded": 0,
    "error": {
        "message": "The file is too big."
    }
}
백엔드 업로드 이미지 코드:
/**
    * @name='上传图片'
    */
    public function uploadPic()
    {
		//注明:ckeditor是使用ajax上传图片,而不是用表单提交,因此不能使用request()->file()接收图片,只能用$_FILES
		$name = $_FILES['upload']['name'];
		$size = $_FILES['upload']['size'];
		if($size  > 1024*2*1000){
			$arr= array(
				"uploaded" => 0,
				"error"    => "上传的图片大小不能超过2M"
			);
			exit(json_encode($arr));
		}
		$extension = pathInfo($name,PATHINFO_EXTENSION);
		$types = array("jpg","bmp","gif","png");
		if(in_array($extension,$types)){
			//以日期为文件夹名,如public/uploads/20210327/
			$dateFolder = date("Ymd",time());
			$path = ROOT_PATH . 'public/uploads/'.$dateFolder.DS;
			if(!file_exists($path)){
				mkdir($path,0777,true);
			}
			$img_name  = str_replace('.','',uniqid("",TRUE)).".".$extension; //图片名称
			$save_path = $path.$img_name; //保存路径
			$img_path  = '/uploads/'.$dateFolder.DS.$img_name; //图片路径
			move_uploaded_file($_FILES['upload']['tmp_name'],$save_path);
			$arr= array(
				"uploaded" => 1,
				"fileName" => $img_name,
				"url"      => $img_path
			);
		}else{
			$arr= array(
				"uploaded" => 0,
				"error"    => "图片格式不正确(只能上传.jpg/.gif/.bmp/.png类型的文件)"
			);
		}
		return json_encode($arr);
    }
6. js
<script type="text/javascript">
var editor;
$(function() {
editor = CKEDITOR.replace('content');
})
editor.document.getBody().getText();//取得纯文本
editor.document.getBody().getHtml();//取得html文本
</script>의 ckeditor에서 콘텐츠 가져오기 7. 컬러 플러그인을 사용하세요
1 3개의 플러그인을 다운로드해야 합니다(한 개는 필수). 다운로드 주소:
https://ckeditor.com/cke4/addon/colorbutton
https:/ /ckeditor.com/cke4/addon/floatpanel
https: //ckeditor.com/cke4/addon/panelbutton
2 ckeditorplugins 디렉토리에 압축을 푼다
3.
방법 1: ckeditor/config.js 파일에 다음과 같이 플러그인 구성을 추가합니다.CKEDITOR.editorConfig = function( config ) {
...省略前面的代码
//加载插件
config.extraPlugins = 'colorbutton,panelbutton,floatpanel';
} 방법 2: js에서 편집기를 초기화할 때 플러그인 구성을 추가합니다. <script type="text/javascript">
var editor;
window.onload = function()
{
editor = CKEDITOR.replace( 'content', {
filebrowserImageUploadUrl : '{:url("@admin/article/uploadPic")}',//上传图片的后端URL地址
image_previewText : ' ',///去掉图片上传预览区域显示的文字
extraPlugins: 'colorbutton',//使用颜色插件
});
};
</script>
8. 도구 모음 구성
ckeditor/config.js 파일에 설정CKEDITOR.editorConfig = function( config ) {
//工具栏设置
config.toolbar = 'MyToolbar';
config.toolbar_Full = [
{ name: 'document', items : [ 'Source','-','Save','NewPage','DocProps','Preview','Print','-','Templates' ] },
{ name: 'clipboard', items : [ 'Cut','Copy','Paste','PasteText','PasteFromWord','-','Undo','Redo' ] },
{ name: 'editing', items : [ 'Find','Replace','-','SelectAll','-','SpellChecker', 'Scayt' ] },
{ name: 'forms', items : [ 'Form', 'Checkbox', 'Radio', 'TextField', 'Textarea', 'Select', 'Button', 'ImageButton',
'HiddenField' ] },
'/',
{ name: 'basicstyles', items : [ 'Bold','Italic','Underline','Strike','Subscript','Superscript','-','RemoveFormat' ] },
{ name: 'paragraph', items : [ 'NumberedList','BulletedList','-','Outdent','Indent','-','Blockquote','CreateDiv',
'-','JustifyLeft','JustifyCenter','JustifyRight','JustifyBlock','-','BidiLtr','BidiRtl' ] },
{ name: 'links', items : [ 'Link','Unlink','Anchor' ] },
{ name: 'insert', items : [ 'Image','Flash','Table','HorizontalRule','Smiley','SpecialChar','PageBreak','Iframe' ] },
'/',
{ name: 'styles', items : [ 'Styles','Format','Font','FontSize' ] },
{ name: 'colors', items : [ 'TextColor','BGColor' ] },
{ name: 'tools', items : [ 'Maximize', 'ShowBlocks','-','About' ] }
];
config.toolbar_Basic = [
['Bold', 'Italic', '-', 'NumberedList', 'BulletedList', '-', 'Link', 'Unlink','-','About']
];
//自定义
config.toolbar_MyToolbar =[
//加粗 斜体, 下划线 穿过线 下标字 上标字
['Bold','Italic','Underline','Strike','Subscript','Superscript'],
// 数字列表 实体列表 减小缩进 增大缩进
['NumberedList','BulletedList','-','Outdent','Indent'],
// 左对齐 居中对齐 右对齐 两端对齐
['JustifyLeft','JustifyCenter','JustifyRight','JustifyBlock'],
//超链接 取消超链接 锚点
['Link','Unlink','Anchor'],
//图片 flash 表格 水平线 表情 特殊字符 分页符
['Image','Flash','Table','HorizontalRule','Smiley','SpecialChar','PageBreak'],
'/',
// 样式 格式 字体 字体大小
['Styles','Format','Font','FontSize'],
//文本颜色 背景颜色
['TextColor','BGColor'],
//全屏 显示区块 源码
['Maximize', 'ShowBlocks','-','Source']
],
config.format_tags = 'p;h1;h2;h3;h4;h5;h6;pre';
config.removeButtons = 'Underline,Subscript,Superscript';
config.removeDialogTabs = 'image:advanced;link:advanced';
//加载插件
config.extraPlugins = 'colorbutton,panelbutton,floatpanel';
};더 많은 프로그래밍 관련 지식을 보려면 프로그래밍 비디오를 방문하세요! !
위 내용은 유용한 TP 리치 텍스트 편집기 -CKEditor를 공유하고 추천하세요의 상세 내용입니다. 자세한 내용은 PHP 중국어 웹사이트의 기타 관련 기사를 참조하세요!


