Linux PHP에 mysql 데이터베이스를 설치하는 방법
- 藏色散人원래의
- 2020-07-18 09:12:493054검색
Linux PHP에 mysql 데이터베이스를 설치하는 방법: 먼저 Linux 방화벽을 끄고 mysql 공식 웹사이트에서 적절한 mysql 버전을 다운로드한 다음 현재 mysql 디렉터리에 디렉터리 액세스 권한을 설정하고 마지막으로 mysql 상태를 확인하세요.

1 먼저 Linux 방화벽을 끄고
chkconfig iptables off
2
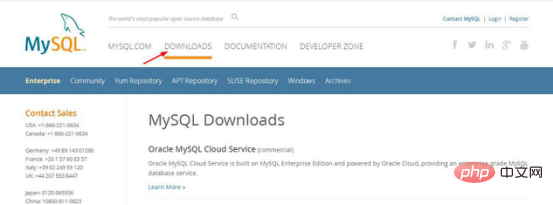
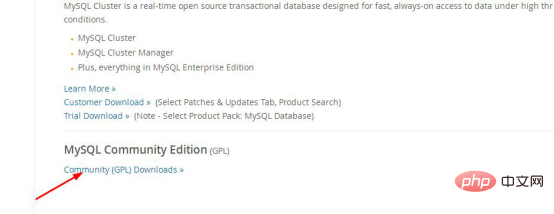
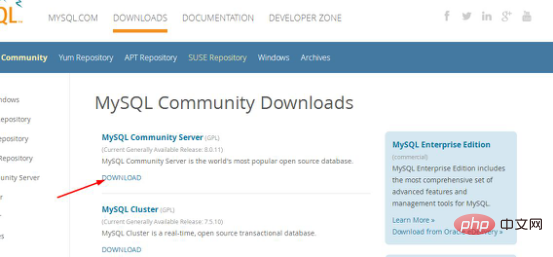
从mysql官网上下载自己适合的mysql版本
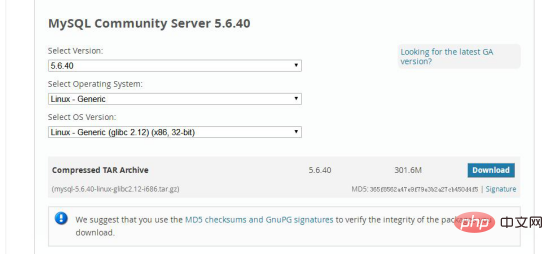
https://dev.mysql.com/downloads/mysql/5.6.html#downloads 명령을 실행하고 mysql을 입력합니다. 공식 홈페이지에서


3. 다운로드한 mysql 파일
mysql-5.6.40-linux-glibc2.12-i686.tar.gz을 클릭합니다.
다운로드한 mysql 압축 파일을 /usr/local에 넣습니다. Linux 폴더의 파일에 압축을 푼 후
tar -zxvf mysql-5.6.40-linux-glibc2.12-i686.tar.gz
압축 해제된 파일의 이름을 mysql
mv mysql-5.6.40-linux-glibc2.12-i686 mysql
4로 변경합니다. mysql 사용자 그룹과 user
groupadd mysql
useradd -r -g mysql mysql
5를 생성하고 mysql 디렉토리에 들어가 MySQL 구성
cp support-files/my-medium.cnf /etc/my.cnf
或:
cp support-files/my-default.cnf /etc/my.cnf
是否覆盖?按y 回车
을 추가합니다. 6, /etc/my.cnf 파일을 편집합니다.
vi /etc/my.cnf
my.cnf 파일에서 관련 구성을 추가하거나 수정하고, 변경이 완료된 후 저장하고 종료합니다.
 1 # For advice on how to change settings please see 2 # http://dev.mysql.com/doc/refman/5.6/en/server-configuration-defaults.html 3 # *** DO NOT EDIT THIS FILE. It's a template which will be copied to the 4 # *** default location during install, and will be replaced if you 5 # *** upgrade to a newer version of MySQL. 6  7 [mysqld] 8  9 # Remove leading # and set to the amount of RAM for the most important data10 # cache in MySQL. Start at 70% of total RAM for dedicated server, else 10%.11 # innodb_buffer_pool_size = 128M12 13 # Remove leading # to turn on a very important data integrity option: logging14 # changes to the binary log between backups.15 # log_bin16 17 # These are commonly set, remove the # and set as required.18 basedir = /usr/local/mysql19 datadir = /usr/local/mysql/data20 port = 330621 # server_id = .....22 socket = /tmp/mysql.sock23 character-set-server = utf824 skip-name-resolve25 log-err = /usr/local/mysql/data/error.log26 pid-file = /usr/local/mysql/data/mysql.pid27 28 # Remove leading # to set options mainly useful for reporting servers.29 # The server defaults are faster for transactions and fast SELECTs.30 # Adjust sizes as needed, experiment to find the optimal values.31 # join_buffer_size = 128M32 # sort_buffer_size = 2M33 # read_rnd_buffer_size = 2M
34 35 sql_mode=NO_ENGINE_SUBSTITUTION,STRICT_TRANS_TABLES
7. 현재 mysql 디렉토리(뒤에 나오는 내용 참고) 8. 데이터를 초기화하고(데이터베이스를 초기화하기 위한 mysql_install_db 실행 파일이 mysql/bin 또는 mysql/scripts 아래에 있음) mysql/bin 또는 mysql/scripts 디렉토리에 들어가서 다음 명령을 실행합니다.
chown -R mysql .
chgrp -R mysql .
scripts/mysql_install_db --user=mysql
chown -R root .
chown -R mysql data
9. mysql을 시작하고 /usr/local/mysql/bin 디렉토리에 들어가서 다음 명령을 실행합니다../mysql_install_db --verbose --user=root --defaults-file=/etc/my.cnf --datadir=/usr/local/mysql/data --basedir=/usr/local/mysql --pid-file=/usr/local/mysql/data/mysql.pid --tmpdir=/tmp
./mysqld_safe --defaults-file=/etc/my.cnf --socket=/tmp/mysql.sock --user=root &
10. 새로운 쉘 인터럽트가 열린 후 mysql 디렉토리에 들어가서 실행합니다. 다음 명령
注意,如果光标停留在屏幕上,表示启动成功,需要我们先关闭shell终端,再开启一个新的shell终端,不要执行退出操作。如果出现 mysql ended这样的语句,表示Mysql没有正常启动,你可以到log中查找问题.
<span style="color: #000000;">cp /usr/local/mysql/support-files/mysql.server /etc/init.d/mysqld
cp /usr/local/mysql/support-files/mysql.server /etc/rc.d/init.d/mysql<br/></span>
linux를 다시 시작
chmod 700 /etc/init.d/mysql
chkconfig --add mysqld
chkconfig --level 2345 mysqld on
chown mysql:mysql -R /usr/local/mysql/
mysql 상태 보기
reboot
11. 원격 액세스 권한 추가
(1) mysql 명령 추가
service mysqld status
(2) 액세스 권한 변경
ln -s /usr/local/mysql/bin/mysql /usr/bin (mysql的安装路径)
Exit mysql
登录mysql,执行下面命令
mysql -uroot -p
密码为空直接回车,运行以下两条命令
GRANT ALL PRIVILEGES ON *.* TO 'root'@'%' IDENTIFIED BY 'duan' with grant option;
Flush privileges;
리눅스 다시 시작 and you're done
exit
참고: mysql에 로컬로 액세스할 때 루트 계정에는 기본적으로 비밀번호가 없으며 포트 번호는 기본적으로 3306으로 설정됩니다. 루트 계정 비밀번호를 변경해야 하는 경우 다음 명령을 실행하세요. /usr/local/mysql/bin 디렉토리
reboot
관련 내용은
PHP 중국어 홈페이지를 방문해주세요!
위 내용은 Linux PHP에 mysql 데이터베이스를 설치하는 방법의 상세 내용입니다. 자세한 내용은 PHP 중국어 웹사이트의 기타 관련 기사를 참조하세요!

