집 >운영 및 유지보수 >리눅스 운영 및 유지 관리 >Linux Shell에서 컬 및 wget과 함께 프록시 IP를 사용하는 방법에 대한 튜토리얼
Linux Shell에서 컬 및 wget과 함께 프록시 IP를 사용하는 방법에 대한 튜토리얼
- 巴扎黑원래의
- 2017-08-15 13:41:262495검색
이 기사에서는 Linux Shell에서 컬 및 wget과 함께 프록시 IP를 사용하는 방법에 대한 관련 정보를 주로 소개합니다. 기사에서는 샘플 코드를 통해 이를 자세히 소개합니다. 공부나 업무에 필요한 모든 사람에게 학습할 가치가 있습니다. 아래 편집자와 함께.
머리말
Linux 셸에는 웹 페이지를 크롤링하는 두 가지 매우 실용적인 명령이 있다는 것을 누구나 알고 있습니다. 이 명령은 컬과 wget입니다. 이 기사에서는 Linux 셸의 컬과 wget에 대해 자세히 소개합니다. 프록시 IP 사용과 관련된 내용은 모든 사람이 참고하고 연구할 수 있도록 공유됩니다. 아래에서는 자세히 설명하지 않겠습니다. 함께 살펴보겠습니다.
curl 및 wget은 프록시를 사용합니다
curl은 http, https, Socks4, Socks5
wget은 http, https
을 지원합니다. 프록시 예:
#!/bin/bash
#
# curl 支持 http、https、socks4、socks5
# wget 支持 http、https
#
# 米扑代理示例:
# http://proxy.mimvp.com/demo2.php
#
# 米扑代理购买:
# http://proxy.mimvp.com
#
# mimvp.com
# 2015-11-09


# http代理格式   http_proxy=http://IP:Port
# https代理格式   https_proxy=http://IP:Port

{'http': 'http://120.77.176.179:8888'}
curl -m 30 --retry 3 -x http://120.77.176.179:8888 http://proxy.mimvp.com/exist.php     # http_proxy
wget -T 30 --tries 3 -e "http_proxy=http://120.77.176.179:8888" http://proxy.mimvp.com/exist.php   # http_proxy

{'https': 'http://46.105.214.133:3128'}
curl -m 30 --retry 3 --proxy-insecure -x http://46.105.214.133:3128 -k https://proxy.mimvp.com/exist.php     # https_proxy
wget -T 30 --tries 3 --no-check-certificate -e "https_proxy=http://46.105.214.133:3128" https://proxy.mimvp.com/exist.php # https_proxy


# curl 支持socks
{'socks4': '101.255.17.145:1080'}
curl -m 30 --retry 3 --socks4 101.255.17.145:1080 http://proxy.mimvp.com/exist.php

{'socks5': '82.164.233.227:45454'}
curl -m 30 --retry 3 --socks5 82.164.233.227:45454 http://proxy.mimvp.com/exist.php


# wget 不支持socks
wget 구성 파일 설정 프록시
vim ~/.wgetrc

http_proxy=http://120.77.176.179:8888:8080
https_proxy=http://12.7.17.17:8888:8080
use_proxy = on
wait = 30

wget -T 30 --tries 3 http://proxy.mimvp.com
쉘 세트 임시 로컬 프록시
# proxy no auth
export http_proxy=http://120.77.176.179:8888:8080
export https_proxy=http://12.7.17.17:8888:8080

# proxy auth
export http_proxy=http://username:password@120.77.176.179:8888:8080
export https_proxy=http://username:password@12.7.17.17:8888:8080


# 取消设置
unset http_proxy
unset https_proxy
쉘 세트 시스템 글로벌 프록시
# 修改 /etc/profile,保存并重启服务器
sudo vim /etc/profile  # 所有人有效
或
sudo vim ~/.bashrc  # 所有人有效
或
vim ~/.bash_profile  # 个人有效


# proxy no auth
export http_proxy=http://120.77.176.179:8888:8080
export https_proxy=http://12.7.17.17:8888:8080

# proxy auth
export http_proxy=http://username:password@120.77.176.179:8888:8080
export https_proxy=http://username:password@12.7.17.17:8888:8080

source /etc/profile
或
source ~/.bashrc
或
source ~/.bash_profile


sudo reboot
미푸 에이전트 예시
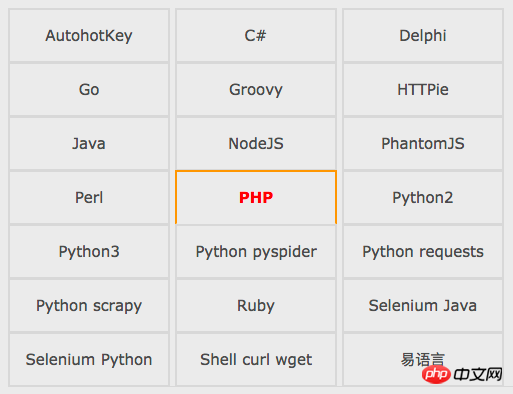
Mipu 프록시 예제에는 Python, Java, PHP, C#, Go, Perl, Ruby, Shell, NodeJS, PhantomJS, Groovy, Delphi, Yi Language 및 10개 이상의 프로그래밍 언어 또는 스크립트가 포함됩니다. 사용 가능한 실행 예제의 수는 웹 크롤링, 데이터 수집, 자동화된 테스트 및 기타 분야를 용이하게 하기 위해 프록시 IP를 사용하는 올바른 방법을 자세히 설명합니다.

위 내용은 Linux Shell에서 컬 및 wget과 함께 프록시 IP를 사용하는 방법에 대한 튜토리얼의 상세 내용입니다. 자세한 내용은 PHP 중국어 웹사이트의 기타 관련 기사를 참조하세요!

