Android UI 컨트롤 시리즈: AutoCompleteTextView(자동 프롬프트)
- 黄舟원래의
- 2017-01-19 09:34:532221검색
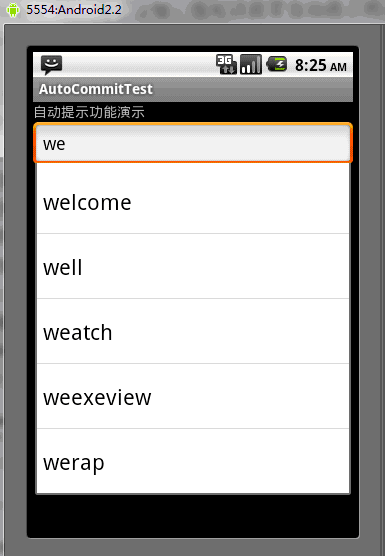
AutoCompleteTextView의 기능은 바이두나 구글이 검색창에 정보를 입력하면 입력한 정보 가까이에 팝업되는 프롬프트 정보와 유사합니다. 물론 여기에는 일부 어댑터가 필요합니다.
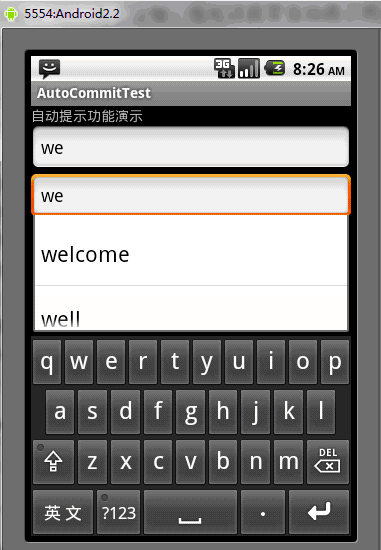
는 Android에서 두 개의 스마트 입력 상자를 제공합니다. MultiAutoCompleteTextView와 AutoCompleteTextView입니다. 해당 기능은 AutoCompleteTextView와 거의 동일합니다. MultiAutoCompleteTextView는 항상 입력 상자에 새로운 선택 값을 추가할 수 있다는 것입니다. 작성하는 방법도 다르므로 setAdapter 다음에 setTokenizer()를 호출해야 합니다. 아래에서 자세히 소개하겠습니다.
1. AutoCompleteTextView
1. 소개
사용자가 정보를 입력하면 팝업으로 표시되는 편집 가능한 텍스트 보기입니다. 프롬프트 목록은 사용자가 항목을 선택하여 입력을 완료할 수 있는 드롭다운 메뉴에 나타납니다. 프롬프트 목록은 데이터 어댑터에서 얻은 데이터입니다.
2. 중요 방법
clearListSelection(): 선택한 목록 항목 지우기
dismissDropDown(): 드롭다운 메뉴가 있으면 닫습니다
getAdapter(): 어댑터 얻기
3. 생성 지침
(1) 레이아웃 파일
<AutoCompleteTextView
 android:id="@+id/edit"
 android:layout_width="match_parent"
 android:layout_height="wrap_content" />
(2) 프로그램
어댑터 인스턴스화
ArrayAdapter<String> adapter = new ArrayAdapter<String>(this,android.R.layout.simple_dropdown_item_1line, strs);
어댑터 설정
edit.setAdapter(adapter);
2. MultiAutoCompleteTextView
1. 소개
는 AutoCompleteTextView를 상속하고 AutoCompleteTextView의 길이를 확장합니다.
2. 중요한 방법
enoughToFilter(): 텍스트 길이가 임계값을 초과하는 경우 필터링
performValidation(): 전체 텍스트를 검증하는 대신 하위 클래스 메서드는 각 개별 텍스트 토큰의 유효성을 검사합니다.
setTokenizer(MultiAutoCompleteTextView.Tokenizer t); 사용자가 입력할 때 토크나이저 설정을 사용하여 관련 텍스트 범위를 결정합니다.
3. 사용 지침
(1) 레이아웃 파일
<MultiAutoCompleteTextView
 android:id="@+id/edit1"
 android:layout_width="match_parent"
 android:layout_height="wrap_content" />
(2) 프로그램
어댑터 인스턴스화
ArrayAdapter<String> adapter = new ArrayAdapter<String>(this,android.R.layout.simple_dropdown_item_1line, strs);
범위 결정
edit1.setTokenizer(new MultiAutoCompleteTextView.CommaTokenizer())
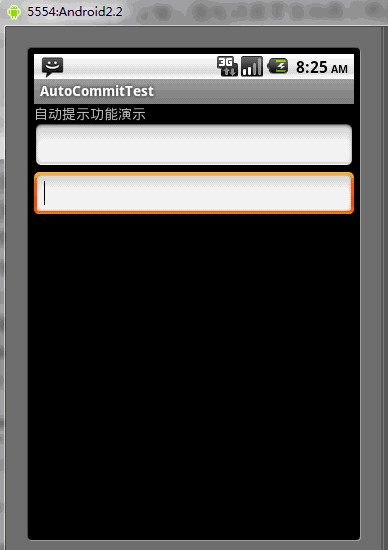
다음은 example
AutoCommitTest.java
package org.hualang.auto;

import android.app.Activity;
import android.os.Bundle;
import android.widget.ArrayAdapter;
import android.widget.AutoCompleteTextView;
import android.widget.MultiAutoCompleteTextView;

public class AutoCommitTest extends Activity {
    /** Called when the activity is first created. */
        private static final String[] autoString=new String[]{"welcome","well",
                "weatch","weexeview","werap"};
    @Override
    public void onCreate(Bundle savedInstanceState) {
        super.onCreate(savedInstanceState);
        setContentView(R.layout.main);
        //关联关键字
        ArrayAdapter<String> adapter=new ArrayAdapter<String>(this,
                        android.R.layout.simple_dropdown_item_1line,
                        autoString);
        AutoCompleteTextView autocomplete=(AutoCompleteTextView)findViewById(R.id.auto);
        autocomplete.setAdapter(adapter);
        MultiAutoCompleteTextView multi=(MultiAutoCompleteTextView) findViewById(R.id.multi);
        //将adapter添加到AutoCompleteTextView中
        multi.setAdapter(adapter);
        multi.setTokenizer(new MultiAutoCompleteTextView.CommaTokenizer());
    }
}
main.xml
<?xml version="1.0" encoding="utf-8"?>
<LinearLayout xmlns:android="http://schemas.android.com/apk/res/android"
    android:orientation="vertical"
    android:layout_width="fill_parent"
    android:layout_height="fill_parent"
    >
<TextView
    android:layout_width="fill_parent"
    android:layout_height="wrap_content"
    android:text="自动提示功能演示"
    />
<AutoCompleteTextView
        android:id="@+id/auto"
        android:layout_width="fill_parent"
        android:layout_height="wrap_content"
/>
<MultiAutoCompleteTextView
        android:id="@+id/multi"
        android:layout_width="fill_parent"
        android:layout_height="wrap_content"
/>
</LinearLayout>
실행 결과는 다음과 같습니다.


위는 Android UI 컨트롤 시리즈의 내용입니다: AutoCompleteTextView(자동 프롬프트). 내용은 PHP 중국어 홈페이지(www.php.cn)를 주목해주세요!

