PHP 이미지 처리 라이브러리 Grafika에 대한 자세한 튜토리얼
- 高洛峰원래의
- 2016-11-08 14:17:153177검색
이미지 필터링, 필터
Grafika는 개발 중 어떤 상황의 요구도 충족할 수 있도록 11가지 필터 기능을 제공합니다.
작동 방법은 다음과 같습니다. 적용: 사진에 필터 효과를 적용할 수 있습니다
사진을 흐리게 합니다
사진을 흐리게 하려면 Blur 매개변수를 사용합니다
블러 값 범위는 0~100입니다. 값이 클수록 이미지가 더 흐려집니다.
use Grafika\Grafika;
$editor = Grafika::createEditor();
$editor->open( $image, 'yanying-smaller.jpg' );
$filter = Grafika::createFilter('Blur', 50); // 模糊度为10,模糊度取值为0-100
$editor->apply( $image, $filter ); // 将滤镜应用到图片
$editor->save($image,'yanying-blur.jpg');
이미지 블러 매개변수를 50으로 조정합니다


use Grafika\Grafika;
$editor = Grafika::createEditor();
$editor->open( $image, 'yanying-smaller.jpg' );
$filter = Grafika::createFilter('Brightness', -50);
$editor->apply( $image, $filter );
$editor->save($image,'333/yanying-Brightness-1.jpg');



use Grafika\Grafika;
$editor = Grafika::createEditor();
$editor->open( $image, 'yanying-smaller.jpg' );
$filter = Grafika::createFilter('Colorize', -50,50,-50);
$editor->apply( $image, $filter );
$editor->save($image,'333/yanying-Colorize.jpg');


use Grafika\Grafika;
$editor = Grafika::createEditor();
$editor->open( $image, 'yanying-smaller.jpg' );
$filter = Grafika::createFilter('Contrast', 50);
$editor->apply( $image, $filter );
$editor->save($image,'333/yanying-Contrast.jpg');

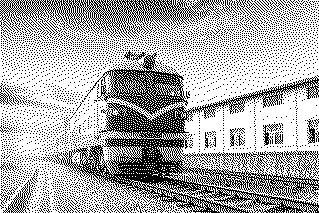
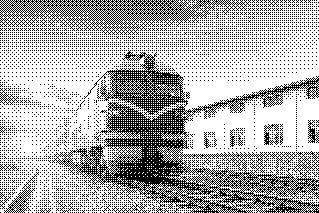
这里的Gamma功能是校正图像色阶,使得图像看起来颜色更加正确
这里的数字值取值范围只有最小值没有最大值只要 >=1.0都可以
use Grafika\Grafika;
$editor = Grafika::createEditor();
$editor->open( $image, 'yanying-smaller.jpg' );
$filter = Grafika::createFilter('Gamma', 2.0);
$editor->apply( $image, $filter );
$editor->save($image,'333/yanying-Gamma.jpg');


图片灰度
使用Grayscale使图片所有的色彩丢弃,只保留黑白两种颜色,没有取值。
use Grafika\Grafika;
$editor = Grafika::createEditor();
$editor->open( $image, 'yanying-smaller.jpg' );
$filter = Grafika::createFilter('Grayscale');
$editor->apply( $image, $filter );
$editor->save($image,'333/yanying-Grayscale.jpg');


图像反色处理
图像反色,也就是弄得和胶片似得。
使用Invert参数可以达到图像反色效果,也没有可选值
use Grafika\Grafika;
$editor = Grafika::createEditor();
$editor->open( $image, 'yanying-smaller.jpg' );
$filter = Grafika::createFilter('Invert');
$editor->apply( $image, $filter );
$editor->save($image,'333/yanying-Invert.jpg');


图片像素化、栅格化
就是把矢量图形转换成像素点组成的点阵图形,也叫栅格化。搞ps的应该都清楚
该参数有个取值范围只要大于或者等于1就可以,如果值越大,像素点也就越大
use Grafika\Grafika;
$editor = Grafika::createEditor();
$editor->open( $image, 'yanying-smaller.jpg' );
$filter = Grafika::createFilter('Pixelate',10);
$editor->apply( $image, $filter );
$editor->save($image,'333/yanying-Pixelate-10.jpg');
我们取值5和取值10对比下



图片锐化
图片锐化就是补偿图像的轮廓,增强图像的边缘及灰度跳变的部分,使图像变得清晰。
使用参数Sharpen可以处理锐化,其取值为1-100(包含)。
use Grafika\Grafika;
$editor = Grafika::createEditor();
$editor->open( $image, 'yanying-smaller.jpg' );
$filter = Grafika::createFilter('Sharpen',50);
$editor->apply( $image, $filter );
$editor->save($image,'333/yanying-Sharpen.jpg');
我们取值50,看下效果

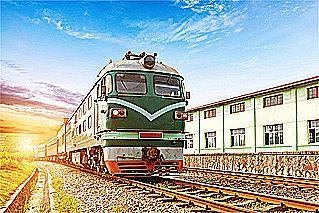
图像查找边缘
通过数学计算检测出图像的边缘,在ps中较为常用。
这里使用Sobel参数达到相同效果,没有值可选
use Grafika\Grafika;
$editor = Grafika::createEditor();
$editor->open( $image, 'yanying-smaller.jpg' );
$filter = Grafika::createFilter('Sobel');
$editor->apply( $image, $filter );
$editor->save($image,'333/yanying-Sobel.jpg');
성명:
본 글의 내용은 네티즌들의 자발적인 기여로 작성되었으며, 저작권은 원저작자에게 있습니다. 본 사이트는 이에 상응하는 법적 책임을 지지 않습니다. 표절이나 침해가 의심되는 콘텐츠를 발견한 경우 admin@php.cn으로 문의하세요.

