집 >백엔드 개발 >C#.Net 튜토리얼 >C#의 목록 상자
C#의 목록 상자
- WBOYWBOYWBOYWBOYWBOYWBOYWBOYWBOYWBOYWBOYWBOYWBOYWB원래의
- 2024-09-03 15:28:171096검색
C#의 ListBox는 단일 또는 여러 요소에 대해 작동하기 위해 ListBox에 요소 목록을 추가하는 것으로 정의됩니다. 드롭다운 상자와 목록 상자의 차이점은 드롭다운 상자는 한 번에 하나의 요소만 선택할 수 있지만 목록 상자의 경우 한 번에 하나 또는 여러 요소를 선택할 수 있다는 것입니다. ListBox는 다양한 유형의 메서드, 속성 및 이벤트를 제공합니다. 이 ListBox는 시스템 아래에 지정됩니다. Windows.Forms 패키지(네임스페이스).
ListBox 클래스에는 C#의 3가지 다른 컬렉션 유형이 포함되어 있습니다. 그들은
- ListBox.ObjectCollection: 이 컬렉션 클래스는 ListBox 컨트롤의 모든 요소를 보유합니다.
- ListBox.SelectedObjectCollection: 이 컬렉션 클래스는 ListBox 컨트롤에서 선택한 항목의 컬렉션을 보유합니다.
- ListBox.SelectedIndexCollection: 이 컬렉션 클래스는 선택한 인덱스 컬렉션을 보유합니다. 이러한 요소는 ListBox.ObjectCollection 인덱스의 하위 집합이며 ListBox 컨트롤에서 특별히 선택된 인덱스입니다.
C#의 목록 상자 유형은 무엇인가요?
- 단일 선택 ListBox: ListBox는 목록에서 단일 요소만 선택할 수 있습니다.
- 다중 선택 ListBox: ListBox는 목록에서 여러 요소를 선택할 수 있습니다.
C#의 ListBox 필수 구성 요소:
- PC에 .Net 라이브러리가 설치되어 있어야 합니다
- Visual Studio 설정
C#에서 ListBox를 만드는 방법은 무엇입니까?
ListBox는 두 가지 방법으로 만들 수 있습니다.
- 디자인타임
- 런타임
1. 디자인타임
처음에는 코드 없이도 매우 쉽게 만들 수 있습니다. 프로젝트 생성 단계
1단계: Visual Studio 열기
파일=>새로 만들기=>프로젝트를 클릭하세요

=>Windows Form 응용 프로그램을 선택한 다음
프로젝트 구조를 더 잘 이해하려면 아래 이미지를 참조하세요.
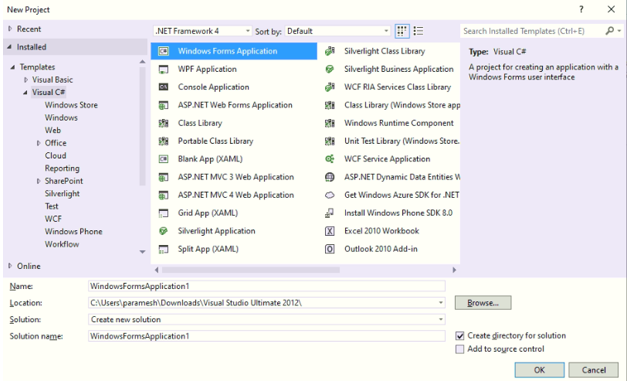
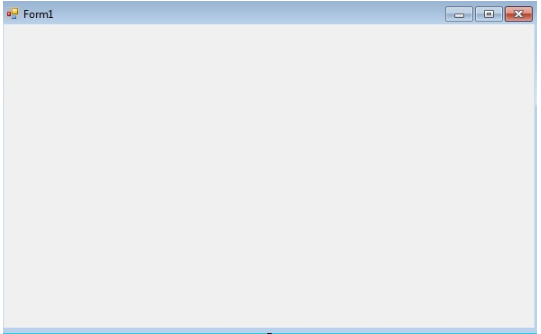
프로젝트 이름을 지정하고 OK를 누르면 아래와 같이 Form1.cs(Design) 탭이 나옵니다
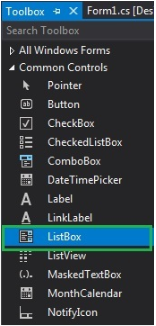
2단계: Visual Studio 왼쪽 또는 보기에서 도구 상자를 선택합니다. 그런 다음 위 이미지와 같이 필요한 요소를 Form1.cs(Design)에 끌어다 놓습니다.
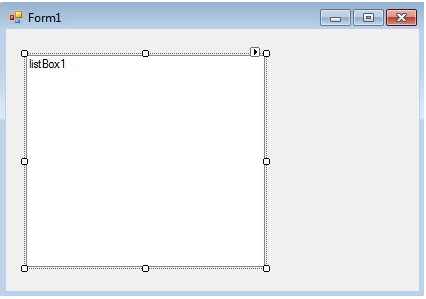
3단계: 끌어서 놓은 후 Visual Studio 오른쪽에서 속성을 선택하고 Text 속성에 이름을 지정합니다. 두 번째nd 런타임 메소드에서 코드를 작성하는 데 사용됩니다.
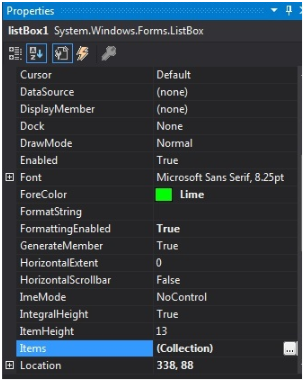
출력:
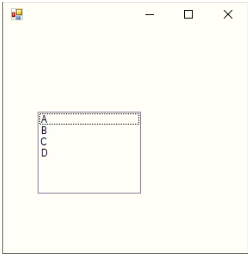
2. 런타임
위 방법대로 직접 하는 것은 아닙니다. 우리는 ListBox를 생성하기 위한 몇 가지 프로그램을 작성했습니다. 이것은 매우 간단합니다. 먼저 ListBox, Label, TextField, Button 등과 같은 모든 필수 요소를 끌어서 놓습니다. 놓은 요소 중 하나를 두 번 클릭하면 작업 메서드를 요소로 하는 C# 코드가 표시됩니다. 그 요소들과 관련이 있기를 원합니다. ListBox를 생성하기 위한 런타임 프로젝트 코드를 생성하는 단계
1단계: ListBox() 생성자를 사용하여 ListBox 컨트롤을 만듭니다.
구문:
ListBox listBox = new ListBox();
2단계: ListBox 속성을 생성한 후 Font, Font.Size, Color 등 ListBox의 속성을 요소로 설정하려는 경우
구문:
listBox.Location = new Point(200, 100);
listBox.Size = new Size(100, 90);
listBox.ForeColor = Color.Red;
3단계: ListBox에 요소를 추가합니다.
구문:
listBox.Items.Add("A");
listBox.Items.Add("B");
listBox.Items.Add("C");
listBox.Items.Add("D");
4단계: 양식에 이 ListBox를 추가합니다.
구문:
this.Controls.Add(listBox);
C#의 목록 상자 예
아래에 언급된 예시는 다음과 같습니다
예제 #1 – ListBox 생성 및 요소 추가
코드:
//importing C# required libraries
using System;
using System.Collections.Generic;
using System.ComponentModel;
using System.Data;
using System.Drawing;
using System.Linq;
using System.Text;
using System.Windows.Forms;
//namespace is project name
namespace WindowsFormsApplication26
{
//creating class extends from Form class
public partial class Form1 : Form
{
//constrcutor
public Form1()
{
//initializing components
InitializeComponent();
//Creating list box and add some properties and values to the List Box
listBox2.ForeColor = Color.Red;
listBox2.Items.Add("Java");
listBox2.Items.Add("Python");
listBox2.Items.Add("C++");
listBox2.Items.Add("C");
listBox2.Items.Add("C#");
listBox2.Items.Add("Spring");
listBox2.Items.Add("JavaFX");
listBox2.SelectionMode = SelectionMode.MultiSimple;
}
//method for selectedIndex change operation
private void listBox2_SelectedIndexChanged(object sender, EventArgs e)
{
}
}
}
출력:
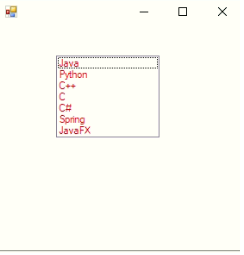
예제 #2 – 사용자가 버튼을 클릭하여 목록 상자에 추가된 값을 입력합니다
코드:
//importing C# required libraries
using System;
using System.Collections.Generic;
using System.ComponentModel;
using System.Data;
using System.Drawing;
using System.Linq;
using System.Text;
using System.Windows.Forms;
//namespace is project name
namespace WindowsFormsApp25
{
//creating class extends from Form class
public partial class Form1 : Form
{
//constrcutor
public Form1()
{
//initializing components
InitializeComponent();
}
//saving the enter values into List box
private void buttonSave_Click(object sender, EventArgs e)
{
//If user enter any values then if block executes
if (this.textBoxName.Text != "")
{
NameList.Items.Add(this.textBoxName.Text);
this.textBoxName.Focus();
this.textBoxName.Clear();
}
//If user did not enter any values then else block executes
else
{
MessageBox.Show("Please enter a name to add..","Error",MessageBoxButtons.OK,MessageBoxIcon.Information);
this.textBoxName.Focus();
}
}
}
}
출력:
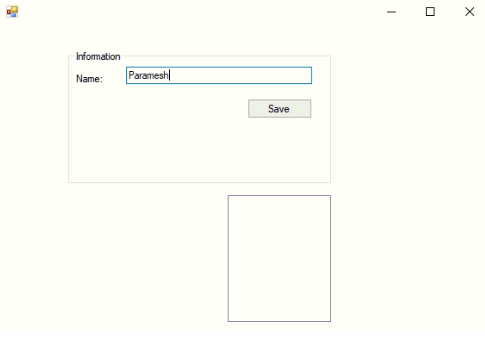
값을 입력하기 전:
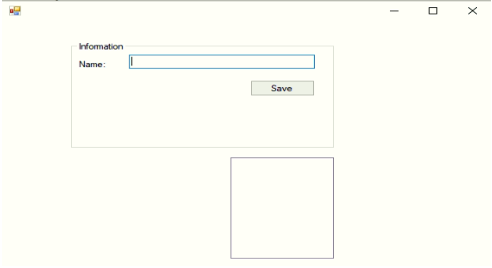
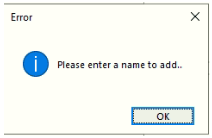
아무 값도 입력하지 않고 저장 버튼을 클릭하세요.
값을 입력한 후:
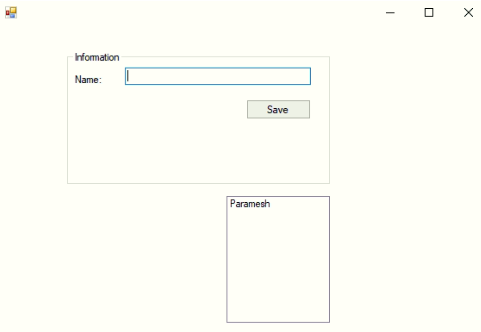
After entering a value and clicking the save button:
Example #3 – Delete, Change the font of List Box values
Code:
//importing C# required libraries
using System;
using System.Collections.Generic;
using System.ComponentModel;
using System.Data;
using System.Drawing;
using System.Linq;
using System.Text;
using System.Windows.Forms;
//namespace is project name
namespace WindowsFormsApp25
{
//creating class extends from Form class
public partial class Form1 : Form
{
//constrcutor
public Form1()
{
//initializing components
InitializeComponent();
}
//saving the enter values into List box
private void buttonSave_Click(object sender, EventArgs e)
{
//If user enter any values then if block executes
if (this.textBoxName.Text != "")
{
NameList.Items.Add(this.textBoxName.Text);
this.textBoxName.Focus();
this.textBoxName.Clear();
}
//If user did not enter any values then else block executes
else
{
MessageBox.Show("Please enter a name to add..","Error",MessageBoxButtons.OK,MessageBoxIcon.Information);
this.textBoxName.Focus();
}
}
//Removing the selected elements
private void button2_Click(object sender, EventArgs e)
{
if (this.NameList.SelectedIndex >= 0)
{
this.NameList.Items.RemoveAt(this.NameList.SelectedIndex);
}
}
//Setting List box selected values font
private void button3_Click(object sender, EventArgs e)
{
if (fontDialog1.ShowDialog() == DialogResult.OK)
{
NameList.Font = fontDialog1.Font;
}
}
}
}
Output:
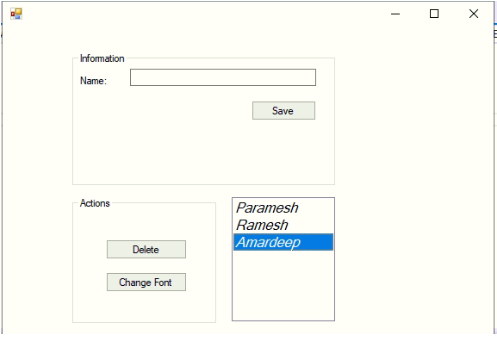
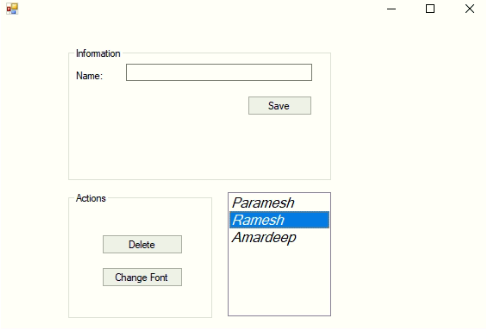
After adding 3 names:
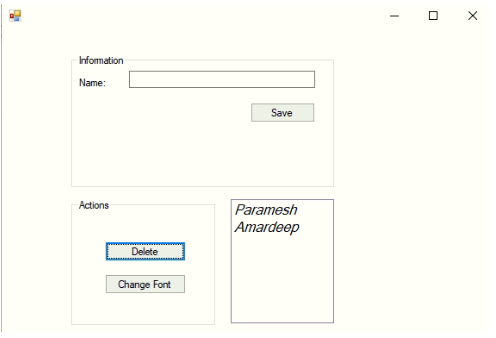
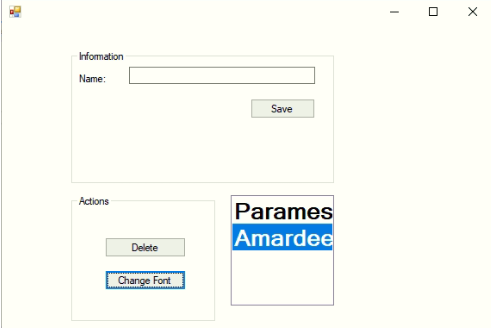
Deleting selected element:
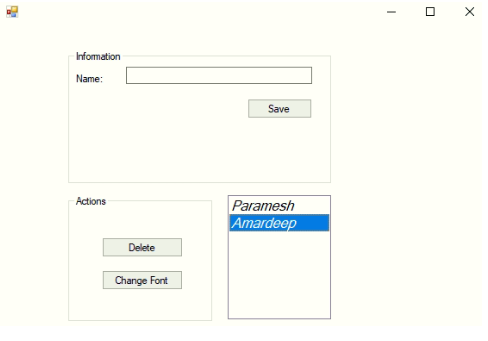
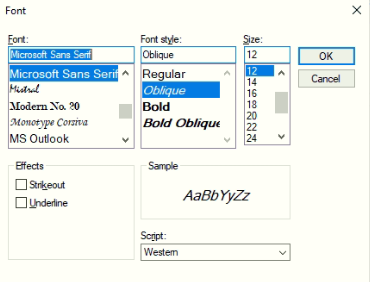
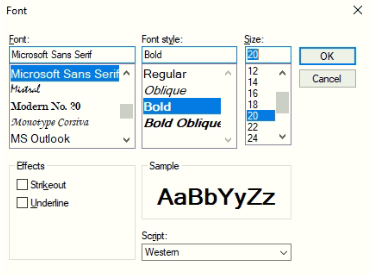
Change the font of the values:
Conclusion
C# List box is used to add multiple elements to perform any specific operation. List Boxes are used to select a single value or multiple values at a time. In C# List Box can be created using Design-Time and Run-Time methods.
위 내용은 C#의 목록 상자의 상세 내용입니다. 자세한 내용은 PHP 중국어 웹사이트의 기타 관련 기사를 참조하세요!

