TouchListener PK OnTouchEvent + マルチタッチ
このセクションの紹介:
タイトルの通り、このセクションでは TouchListener と OnTouchEvent の比較と、マルチタッチの知識ポイントをお届けします。 TouchListener はリスニングに基づいていますが、OnTouchEvent はコールバックに基づいています。 2 つの簡単な例を使用して、理解を深めてみましょう。 みんな理解あるよ!
1. リスニングに基づく TouchListener
コード例:
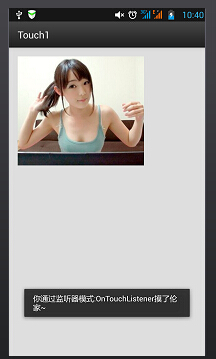
実装レンダリング:

実装コード: main.xml
xmlns:tools="http://schemas.android.com/tools"
android:layout_width="match_parent"
android:layout_height="match_parent"
android:paddingLeft="@dimen/activity_horizontal_margin"
android:paddingRight="@dimen/activity_horizontal_margin"
android:paddingTop="@dimen/activity_vertical_margin"
android:paddingBottom="@dimen/activity_vertical_margin"
tools:context= " .MyActivity">
<ImageView
android:layout_width="wrap_content"
android:layout_height="wrap_content"
android:id="@+id/imgtouch"
android:background="../style/画像 /touch"/>
</RelativeLayout>
MainActivity.java
private ImageView imgtouch;
@Override
protected void onCreate(Bundle savedInstanceState) {
super.onCreate(savedInstanceState);
setContentView(R.layout.activity_my);
imgtouch = (ImageView)findViewById(R.id.imgtouch);
imgtouch.setOnTouchListener(new View.OnTouchListener() {
@Override
public boolean onTouch(View v, MotionEvent event) {
Toast.makeText(getApplicationContext(),"你通过监听器模式:OnTouchListener摸了伦家~" ,Toast.LENGTH_LONG).show();
return true;
});
}
}
コード分析:
は、ImageViewを設定してから、onTouchListenerを書き換えるだけです。実際、フレームレイアウトセクションにこれの例があることを覚えておいてください。指は可愛い?
OnTouchListener 関連のメソッドとプロパティ:
onTouch(View v, MotionEvent イベント): ここでのパラメーターは、タッチ イベントをトリガーするコンポーネントとタッチ イベント イベントです。 イベントの種類、トリガー時間、その他の情報を含む、トリガーとなるイベントの詳細情報をカプセル化します。たとえば、event.getX()、event.getY()
2. コールバックベースの onTouchEvent() メソッド
次のように、タッチ アクションのタイプを判断し、event.getAction() を使用して再度判断することもできます。 Press Event
event.getAction == MotionEvent.ACTION_MOVE: 移動イベント
event.getAction == MotionEvent.ACTION_UP: ポップアップイベント
もタッチ イベントですが、onTouchEvent はカスタム ビュー向けです。このメソッドはすべてのビュー クラスでオーバーライドされ、このタッチ イベントはコールバックに基づいています。つまり、返される値が false の場合、イベントは伝播し続けます。もちろん、後で詳しく説明しますが、onTouchEvent は onTouchListener と似ていますが、前者の処理メカニズムは使用されません。後者はリスニングモードです。
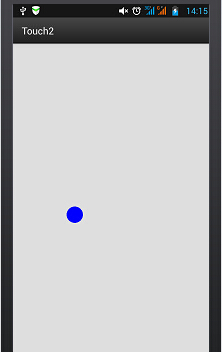
コード例:単純なビューを定義し、指で移動できる小さな青い円を描画します
実装コード:
MyView.javapublic float X = 50;
public float Y = 50;
//创建画笔
ペイント paint = new Paint();
public MyView(Context context,AttributeSet set)
{
super(context,set);
}
@Override
public void onDraw(Canvas canvas) {
super.onDraw(canvas);
paint.setColor(Color.BLUE);
canvas.drawCircle(X,Y,30,paint);
}
@Override
public boolean onTouchEvent(MotionEvent event) {
this.X = event.getX();
this.Y = event.getY();
// 通知组件进行重绘
this.invalidate();
true を返します。
}
}
main.xml:
xmlns:tools="http:// schemas.android.com/tools"
android:layout_width="match_parent"
android:layout_height="match_parent"
tools:context=".MyActivity">
<example.jay.com.touch2.MyView
android:layout_width="wrap_content"
android:layout_height="wrap_content" />
</RelativeLayout>
実装レンダリング:

指を使ってタッチして移動します~
3. マルチタッチ
原理:
いわゆるマルチタッチとは、画面上で複数の指を操作することを意味します。たとえば、多くの画像ブラウザはズーム機能をサポートしています。理論上、Android システム自体は最大 256 本の指のタッチを処理できます。もちろん、これは携帯電話のハードウェアのサポートによって異なりますが、マルチタッチをサポートする携帯電話は通常 2 ~ 4 ポイントをサポートします。もっと持っている人もいます!最初の 2 つのポイントで MotionEvent が使用されていることがわかり、MotionEvent はタッチ イベントを表します。まず、3 つの単一要素に加えて、event.getAction() と MotionEvent.ACTION_MASK に基づいて、それがどのような種類の操作であるかを判断できます。上記で紹介したポイント操作のほかに、2 つのマルチポイント専用操作があります:
- MotionEvent.ACTION_POINTER_DOWN: 画面上のポイントがすでに押されていて、別のポイントが押されたときにトリガーされます。
- MotionEvent.ACTION_POINTER_UP: 画面上の複数のポイントが押されて、そのうちの 1 つのポイントが放されたとき (つまり、最後ではないポイントが放されたとき) にトリガーされます。
簡単なプロセスは次のようになります:
- 1 本の指で画面に触れると、ACTION_DOWN イベントがトリガーされます
- 次に、別の指も画面に触れると、ACTION_POINTER_DOWN イベントがトリガーされます。他の指のタッチ、トリガーを継続します
- 指が画面から離れた場合、ACTION_POINTER_UP イベントをトリガーし、指が離れ続けた場合、トリガーを継続します
- 最後の指が画面を離れたとき、ACTION_UP イベントをトリガーします
- そしてプロセス全体を通して、ACTION_MOVE イベントが継続的にトリガーされます
event.getX(int) またはevent.getY(int) を通じてさまざまなタッチポイントの位置を取得できます。 たとえば、event.getX(0) は最初の接触点の X 座標を取得でき、event.getX(1) は 2 番目の接触点の X 座標を取得できます... さらに、MotionEvent オブジェクトの getPointerCount() メソッドを呼び出すことで、現在何本の指が触れているかを確認することもできます~
コード例:
さて、最も一般的な 1 本の指でドラッグする画像を作成しましょう。指のドラッグ 画像のズームの例を参照してください:
実装レンダリング:

実装コード:
<RelativeLayout xmlns:android="http://schemas.android.com/apk/res/android"
android:layout_width ="match_parent"
android:layout_height="match_parent" >
<ImageView
android:id="@+id/img_test"
android:layout_width="match_parent"
android:layout_height="match_parent"
アンドロイド: scaleType="matrix"
android:src="@drawable/pic1" />
</RelativeLayout>
MainActivity.java
import android.app.Activity;
import android.graphics.Matrix;
import android.graphics.PointF;
import android.os.Bundle;
import android.util。 FloatMath;
import android.view.MotionEvent;
import android.view.View;
import android.view.View.OnTouchListener;
import android.widget.ImageView;
public class MainActivity extends Activityimplements OnTouchListener {
privateImageView img_test ;
// ズーム コントロール
private Matrix matrix = new Matrix();
private Matrix SavedMatrix = new Matrix();
// さまざまな状態の表現:
private static Final int NONE = 0; DRAG = 1;
private static Final int ZOOM = 2;
private int mode = NONE;
// 最初に押された点、2 つの接触点の焦点、および事故を引き起こした 2 本の指の間の距離を定義します。
private PointF startPoint = new PointF();
private PointF MidPoint = new PointF()
* @see android.app.Activity #onCreate(android.os.Bundle)
*/
@Override
protected void onCreate(Bundle SavedInstanceState) {
super.onCreate(savedInstanceState);
setContentView(R.layout.activity_main) ;
img_test = (ImageView) findViewById(R.id.img_test);
img_test.setOnTouchListener (this);
} @override
public boolean ontouch(view v、motionevent event){
mimageviewview=(i mageview)v; case MotionEvent.ACTION_DOWN:
matrix.set(view.getImageMatrix());
savedMatrix.set(matrix);
startPoint.set(event.getX(), event.getY());
モード = DRAG;
休憩;
// 双指
case MotionEvent.ACTION_POINTER_DOWN:
oriDis = distance(event);
if (oriDis> 10f) {
savedMatrix.set(マトリックス);
midPoint = middle(event);
mode = ZOOM;
}
break;
// 手指放开
case MotionEvent.ACTION_UP:
case MotionEvent.ACTION_POINTER_UP:
mode = NONE;
break;
// 单指滑動イベント
case MotionEvent.ACTION_MOVE:
if (mode == DRAG) {
// 是一个手指拖动
matrix.set(savedMatrix);
matrix.postTranslate(event.getX() - startPoint.x, event.getY() - startPoint.y);
} else if (モード == ZOOM) {
// 两个手指滑動
float newDist = distance(event);
if (newDist > 10f) {
matrix.set(savedMatrix);
floatscale = newD ist / oriDis;
Matrix.postScale(scale,scale,midPoint.x,midPoint.y );
}
rturetrue;イベント.getX(0) + イベント.getX(1);
float y = イベント.getY(0) + イベント.getY(1);
新しい PointF(x / 2, y / 2) を返します;
}
}
このセクションの概要:
わかりました、
TouchListener について
そして OnTouchEvent
とマルチタッチについて説明します~


