iOSの自動レイアウト
IOS 自動レイアウト
はじめに
自動レイアウトは iOS 6.0 で導入され、IOS6.0 以降のみをサポートします。これは、複数のデバイス用のインターフェイスを作成するのに役立ちます。
インスタンスの手順
1. 単純なビュー ベースのアプリケーションを作成します
2. ViewController.m のファイル コンテンツを以下のように変更します
#import "ViewController.h"@interface ViewController ()@property (nonatomic, strong) UIButton *leftButton;@property (nonatomic, strong) UIButton *rightButton;@property (nonatomic, strong) UITextField *textfield;@end@implementation ViewController- (void)viewDidLoad{    [super viewDidLoad];    UIView *superview = self.view;    /*1. Create leftButton and add to our view*/    self.leftButton = [UIButton buttonWithType:UIButtonTypeRoundedRect];    self.leftButton.translatesAutoresizingMaskIntoConstraints = NO;    [self.leftButton setTitle:@"LeftButton" forState:UIControlStateNormal];    [self.view addSubview:self.leftButton];
    /* 2. Constraint to position LeftButton's X*/    NSLayoutConstraint *leftButtonXConstraint = [NSLayoutConstraint
    constraintWithItem:self.leftButton attribute:NSLayoutAttributeCenterX
    relatedBy:NSLayoutRelationGreaterThanOrEqual toItem:superview attribute:    NSLayoutAttributeCenterX multiplier:1.0 constant:-60.0f];    /* 3. Constraint to position LeftButton's Y*/    NSLayoutConstraint *leftButtonYConstraint = [NSLayoutConstraint
    constraintWithItem:self.leftButton attribute:NSLayoutAttributeCenterY
    relatedBy:NSLayoutRelationEqual toItem:superview attribute:    NSLayoutAttributeCenterY multiplier:1.0f constant:0.0f];
    /* 4. Add the constraints to button's superview*/    [superview addConstraints:@[ leftButtonXConstraint,
    leftButtonYConstraint]];
    /*5. Create rightButton and add to our view*/    self.rightButton = [UIButton buttonWithType:UIButtonTypeRoundedRect];    self.rightButton.translatesAutoresizingMaskIntoConstraints = NO;    [self.rightButton setTitle:@"RightButton" forState:UIControlStateNormal];    [self.view addSubview:self.rightButton];
    /*6. Constraint to position RightButton's X*/    NSLayoutConstraint *rightButtonXConstraint = [NSLayoutConstraint
    constraintWithItem:self.rightButton attribute:NSLayoutAttributeCenterX
    relatedBy:NSLayoutRelationGreaterThanOrEqual toItem:superview attribute:    NSLayoutAttributeCenterX multiplier:1.0 constant:60.0f];    /*7. Constraint to position RightButton's Y*/
    rightButtonXConstraint.priority = UILayoutPriorityDefaultHigh;    NSLayoutConstraint *centerYMyConstraint = [NSLayoutConstraint
    constraintWithItem:self.rightButton attribute:NSLayoutAttributeCenterY
    relatedBy:NSLayoutRelationGreaterThanOrEqual toItem:superview attribute:    NSLayoutAttributeCenterY multiplier:1.0f constant:0.0f];    [superview addConstraints:@[centerYMyConstraint,
    rightButtonXConstraint]];   //8. Add Text field    self.textfield = [[UITextField alloc]initWithFrame:    CGRectMake(0, 100, 100, 30)];    self.textfield.borderStyle = UITextBorderStyleRoundedRect;    self.textfield.translatesAutoresizingMaskIntoConstraints = NO;    [self.view addSubview:self.textfield];    //9. Text field Constraints    NSLayoutConstraint *textFieldTopConstraint = [NSLayoutConstraint
    constraintWithItem:self.textfield attribute:NSLayoutAttributeTop
    relatedBy:NSLayoutRelationGreaterThanOrEqual toItem:superview
    attribute:NSLayoutAttributeTop multiplier:1.0 constant:60.0f];    NSLayoutConstraint *textFieldBottomConstraint = [NSLayoutConstraint
    constraintWithItem:self.textfield attribute:NSLayoutAttributeTop
    relatedBy:NSLayoutRelationGreaterThanOrEqual toItem:self.rightButton
    attribute:NSLayoutAttributeTop multiplier:0.8 constant:-60.0f];    NSLayoutConstraint *textFieldLeftConstraint = [NSLayoutConstraint
    constraintWithItem:self.textfield attribute:NSLayoutAttributeLeft
    relatedBy:NSLayoutRelationEqual toItem:superview attribute:    NSLayoutAttributeLeft multiplier:1.0 constant:30.0f];    NSLayoutConstraint *textFieldRightConstraint = [NSLayoutConstraint
    constraintWithItem:self.textfield attribute:NSLayoutAttributeRight
    relatedBy:NSLayoutRelationEqual toItem:superview attribute:    NSLayoutAttributeRight multiplier:1.0 constant:-30.0f];    [superview addConstraints:@[textFieldBottomConstraint ,
    textFieldLeftConstraint, textFieldRightConstraint,
    textFieldTopConstraint]];   }- (void)didReceiveMemoryWarning{    [super didReceiveMemoryWarning];    // Dispose of any resources that can be recreated.}@end
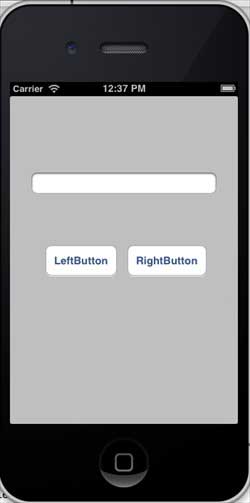
出力
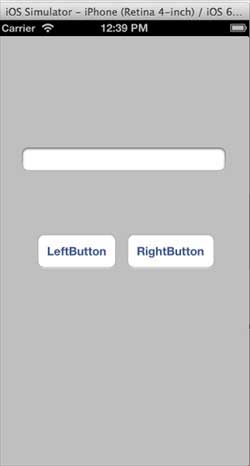
アプリケーションを実行すると、iPhone シミュレータに次の出力が表示されます。

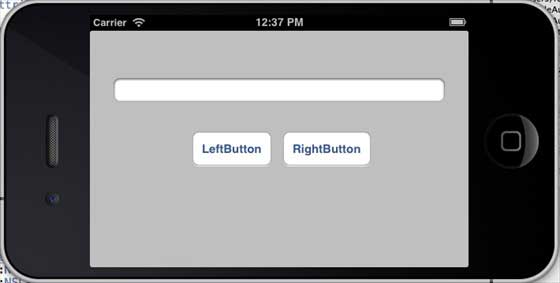
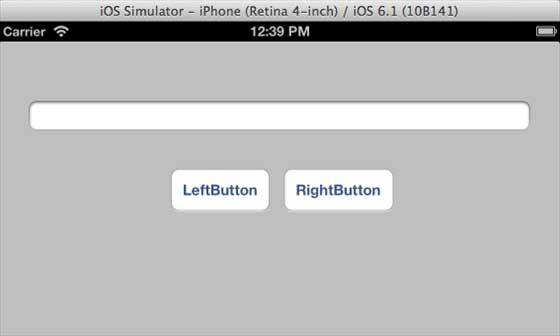
シミュレータを横向きに変更すると、出力は次のようになります

 ##シミュレーション デバイスが水平方向の場合、出力結果は次のようになります。


