
ホームページ >バックエンド開発 >Python チュートリアル >Python に基づいた自動ドキュメント整理ツールを実装する方法
Python に基づいた自動ドキュメント整理ツールを実装する方法

- 王林転載
- 2023-05-13 15:13:251630ブラウズ
アプリケーション シナリオ
個人のファイル整理: 個人は、自分のコンピュータに大量の写真、ビデオ、ドキュメント ファイルを保存しています。これらのファイルはさまざまなフォルダに分散している可能性があります。これらのファイルを別のフォルダに整理するには、このプログラムを使用します。フォルダーに分割され、ファイルの種類に応じて分類されているため、管理と検索が簡単になります。
バッチ ファイル処理: ビデオ ファイルを特定の形式に変換したり、画像ファイルを特定のサイズに縮小したりするなど、フォルダー内のすべてのファイルをバッチで処理する必要があります。
データ バックアップ: 重要なデータを外部ストレージ デバイスにバックアップし、写真を 1 つのフォルダーにバックアップする、ドキュメント ファイルを別のフォルダーにバックアップするなど、ファイルの種類に応じて保存します。
サーバー ファイルの整理: 多数のファイルが含まれるサーバーの場合、このプログラムを使用してファイルを対応するフォルダーに整理し、管理と検索を容易にすることができます。
データ クリーンアップ: ダウンロード フォルダー内の一時ファイルのクリーンアップやゴミ箱の削除など、コンピューター上の不要なファイルをクリーンアップします。
ログ処理: 特定の種類のログ ファイルを異なるフォルダーに整理して、簡単に表示および分析できるようにします。
ソース コード
import os
import shutil
import wx

class FileOrganizer(wx.Frame):
    def __init__(self, parent, title):
        super(FileOrganizer, self).__init__(parent, title=title, size=(500, 300))

        panel = wx.Panel(self)
        self.current_dir = os.getcwd()

        # 创建按钮用来选择文件夹
        select_folder_btn = wx.Button(panel, label="选择文件夹", pos=(10, 10))
        select_folder_btn.Bind(wx.EVT_BUTTON, self.on_select_folder)

        # 创建按钮用来开始整理文件夹
        organize_btn = wx.Button(panel, label="整理文件夹", pos=(10, 50))
        organize_btn.Bind(wx.EVT_BUTTON, self.on_organize)

        # 创建文本框显示当前文件夹路径
        self.dir_text = wx.StaticText(panel, label=self.current_dir, pos=(10, 100))

        self.Show()

    def on_select_folder(self, event):
        dlg = wx.DirDialog(self, "选择文件夹", style=wx.DD_DEFAULT_STYLE)
        if dlg.ShowModal() == wx.ID_OK:
            self.current_dir = dlg.GetPath()
            self.dir_text.SetLabel(self.current_dir)
        dlg.Destroy()

    def on_organize(self, event):
        # 创建文件夹
        photos_dir = os.path.join(self.current_dir, "photos")
        if not os.path.exists(photos_dir):
            os.makedirs(photos_dir)

        documents_dir = os.path.join(self.current_dir, "documents")
        if not os.path.exists(documents_dir):
            os.makedirs(documents_dir)

        videos_dir = os.path.join(self.current_dir, "videos")
        if not os.path.exists(videos_dir):
            os.makedirs(videos_dir)

        shortcuts_dir = os.path.join(self.current_dir, "shortcuts")
        if not os.path.exists(shortcuts_dir):
            os.makedirs(shortcuts_dir)

        # 遍历文件夹
        for filename in os.listdir(self.current_dir):
            filepath = os.path.join(self.current_dir, filename)
            if os.path.isfile(filepath):
                ext = os.path.splitext(filename)[1].lower()
                if ext in (".jpg", ".jpeg", ".png", ".gif"):
                    shutil.move(filepath, os.path.join(photos_dir, filename))
                elif ext in (".doc", ".docx", ".pdf", ".txt"):
                    shutil.move(filepath, os.path.join(documents_dir, filename))
                elif ext in (".mp4", ".avi", ".mov", ".wmv"):
                    shutil.move(filepath, os.path.join(videos_dir, filename))
                elif ext == ".lnk":
                    shutil.move(filepath, os.path.join(shortcuts_dir, filename))

        wx.MessageBox("文件夹整理完成!", "提示", wx.OK | wx.ICON_INFORMATION)

if __name__ == "__main__":
    app = wx.App()
    FileOrganizer(None, title="文件整理工具")
    app.MainLoop()
ソース コードの説明
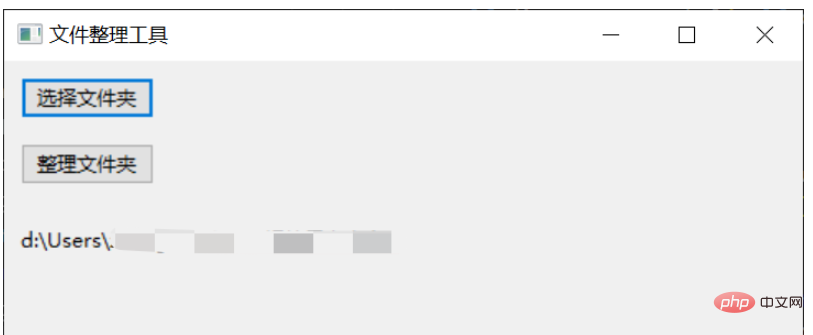
このコードでは、2 つのボタンとテキスト ボックスを含む wxPython GUI インターフェイスを作成しました。 「フォルダの選択」ボタンをクリックすると、整理するフォルダを選択するダイアログが表示されますので、「フォルダの整理」ボタンをクリックするとフォルダの整理が始まります。
まず、写真、ドキュメント、ビデオ、ショートカットの 4 つのフォルダーを作成しました。これらのフォルダーが存在しない場合は、os.makedirs() 関数を使用してこれらのフォルダーを作成します。
次に、os.listdir() 関数を使用して、フォルダー内のすべてのファイルを反復処理します。ファイルがフォルダーではなくファイルである場合は、ファイルの拡張子を取得し、拡張子に基づいてファイルを適切なフォルダーに移動します。 shutil.move() 関数を使用して、ファイルを元の場所から新しい場所に移動します。
最後に、配置が完了した後に wx.MessageBox() 関数を使用してプロンプト ボックスをポップアップ表示します。
このコードは、第 1 レベルのディレクトリ内のファイルのみを処理できることに注意してください。サブディレクトリ内のファイルを処理する必要がある場合は、再帰関数を使用してそれを実現する必要があります。
効果は次のとおりです
以上がPython に基づいた自動ドキュメント整理ツールを実装する方法の詳細内容です。詳細については、PHP 中国語 Web サイトの他の関連記事を参照してください。