ホームページ >バックエンド開発 >Python チュートリアル >Python での Tkinter の使用法を 1 つの記事で理解する
Python での Tkinter の使用法を 1 つの記事で理解する
- WBOYWBOYWBOYWBOYWBOYWBOYWBOYWBOYWBOYWBOYWBOYWBOYWB転載
- 2022-07-04 14:00:264577ブラウズ
この記事では、Python に関する関連知識を提供します。主に Tkinter の関連問題を整理します。Tkinter は、ウィンドウのデザインに Python を使用するモジュールです。一緒に見てみましょう。みんな。
[関連する推奨事項: Python3 ビデオ チュートリアル]
1. はじめに
1.1. Tkinter とは
- #Tkinter は、Python を使用してウィンドウをデザインするためのモジュールです。 Tkinter モジュール (「Tk インターフェイス」) は、Python の標準 Tk GUI ツールキットへのインターフェイスです。 Python 特有の GUI インターフェースとしてはイメージウィンドウ、Tkinter は Python 付属の編集可能な GUI インターフェースですが、Windows の使い始めと使い方に慣れることが非常に必要です。
- Python3.7 のインストール
- エディタをインストールし、そのデモを行います。 Visual Studio Code を使用します
- #最初に tkinter ライブラリをインポートします
import tkinter as tk # 在代码里面导入库,起一个别名,以后代码里面就用这个别名root = tk.Tk() # 这个库里面有Tk()这个方法,这个方法的作用就是创建一个窗口上記の 2 行のコードを実行しただけでは、main 関数が 1 つしかなく、上から下に実行すると消えてしまうため、プログラムを実行しても応答がありません。このウィンドウも消えます。すぐにできるようにする必要があります。ウィンドウを表示したままにし、ループを追加します。
- 作成されたウィンドウの名前は root です。このルートを使用してこれを操作できます。後は窓。
root.mainloop() # 加上这一句,就可以看见窗口了上記の 3 行のコードを実行すると、ウィンドウが表示されます
 3.2. ウィンドウにタイトルを付けます
root.title('演示窗口')
 3.3. ウィンドウの設定
- 次のコードを通じて、画面上のウィンドウの長さ、幅、位置を設定できます
- #
root.geometry("300x100+630+80") # 长x宽+x*y
3.3. ボタンの作成とボタンへのクリック イベントの追加
- Button(root) を記述する必要があります。これは、次のことを意味します。作成したボタンはこのウィンドウに配置されます。
btn1 = tk.Button(root)
btn1["text"] = "点击"
btn1.pack() # 按钮在窗口里面的定位
from tkinter import messageboxdef test(e):
    messagebox.showinfo("窗口名称","点击成功")
btn1.bind("<button-1>",test) #第一个参数为:按鼠标左键的事件 第二个参数为:要执行的方法的名字</button-1>ボタン コンポーネントにはメソッド binding() があります。このメソッドは次のことができます。バインディングの実現
import tkinter as tkfrom tkinter import messagebox
root = tk.Tk()  # 创建窗口root.title('演示窗口')root.geometry("300x100+630+80")  # 长x宽+x*ybtn1 = tk.Button(root)  # 创建按钮,并且将按钮放到窗口里面btn1["text"] = "点击"  # 给按钮一个名称btn1.pack()  # 按钮布局def test(e):
    '''创建弹窗'''
    messagebox.showinfo("窗口名称", "点击成功")btn1.bind("", test)  # 将按钮和方法进行绑定,也就是创建了一个事件root.mainloop()  # 让窗口一直显示,循环
3.4. ウィンドウ内のコンポーネントのレイアウト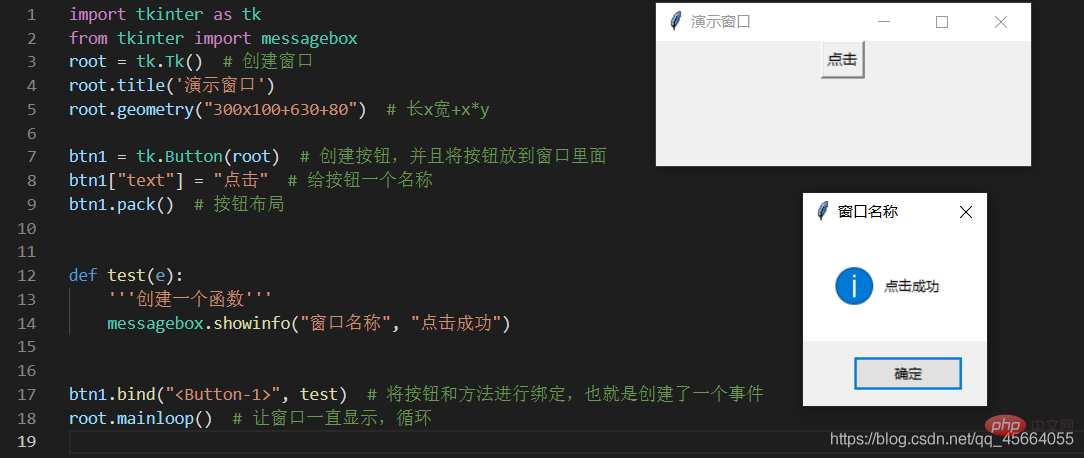
-
pack
这个布局管理器,要么将组件垂直的排列,要么水平的排列
grid
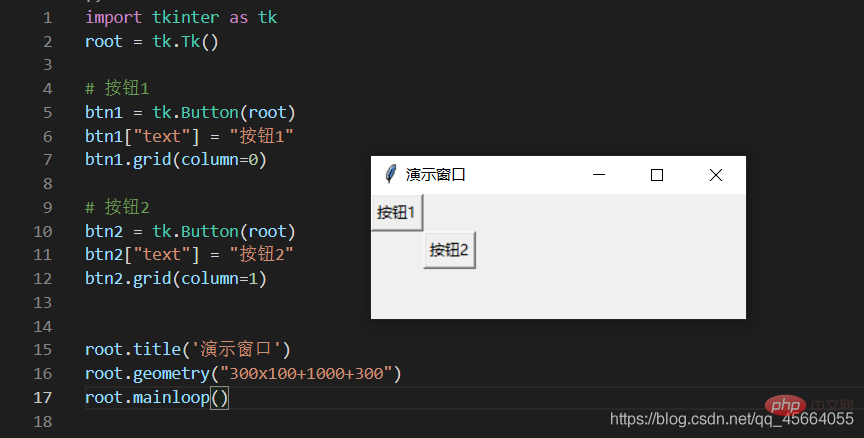
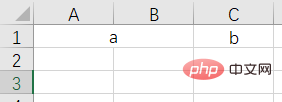
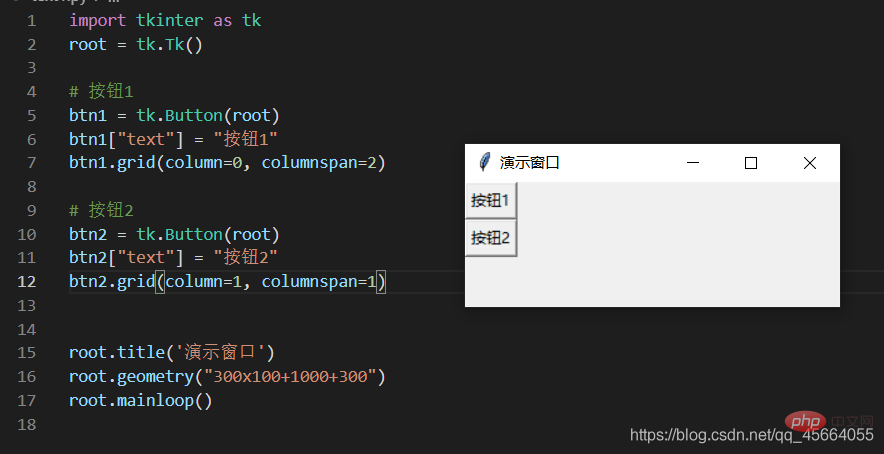
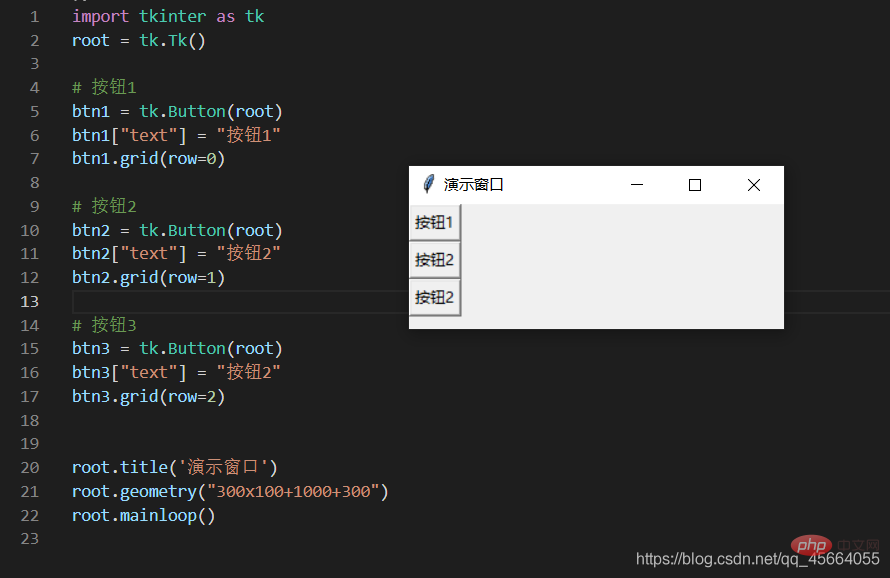
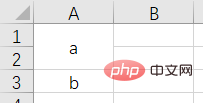
Grid(网格)布局管理器会将控件放置到一个二维的表格里。
主控件被分割成一系列的行和列,表格中的每个单元(cell)都可以放置一个控件。
| 説明 | ||||||||||||
|---|---|---|---|---|---|---|---|---|---|---|---|---|
| #columnspan | ||||||||||||
| ##row | セルの行番号 (0 から始まる正の整数) | |||||||||||
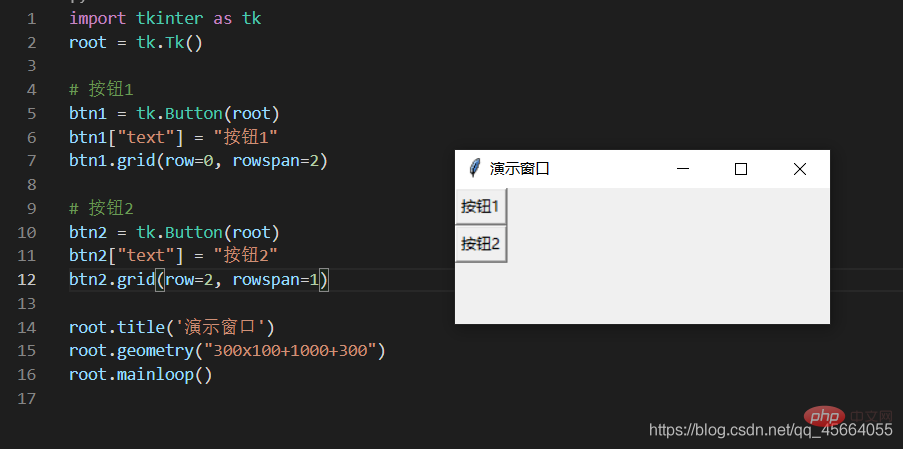
| rowspan | 複数の行にまたがる、スパンする行数、正の整数 | |||||||||||
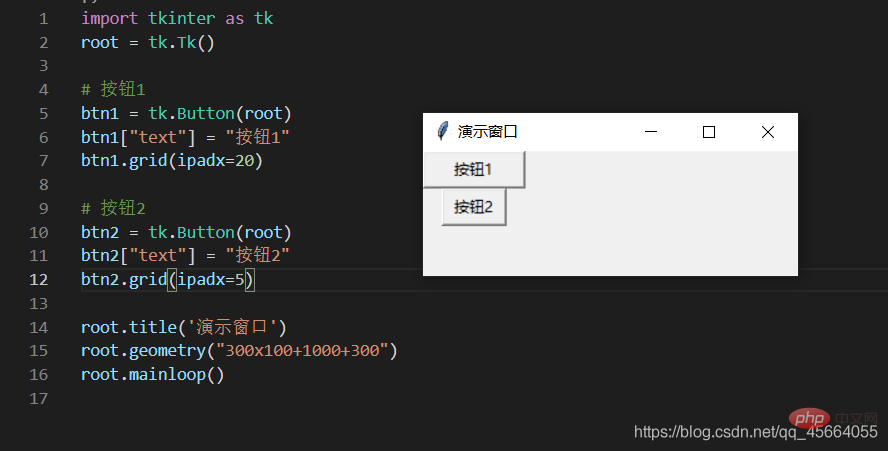
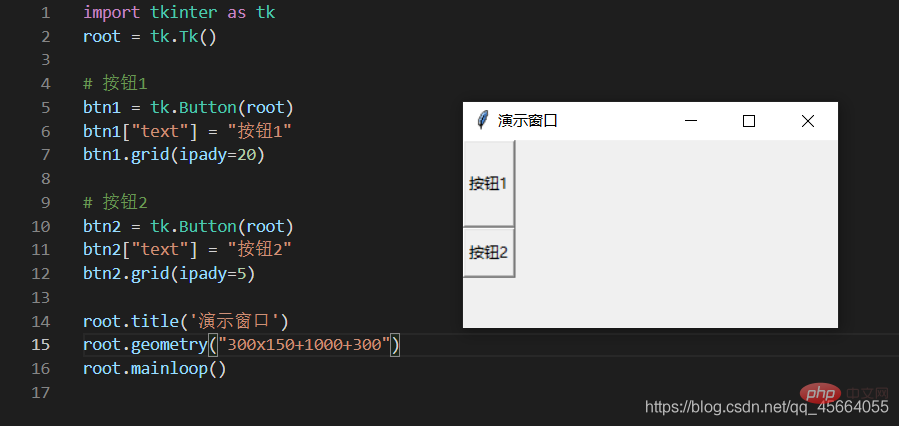
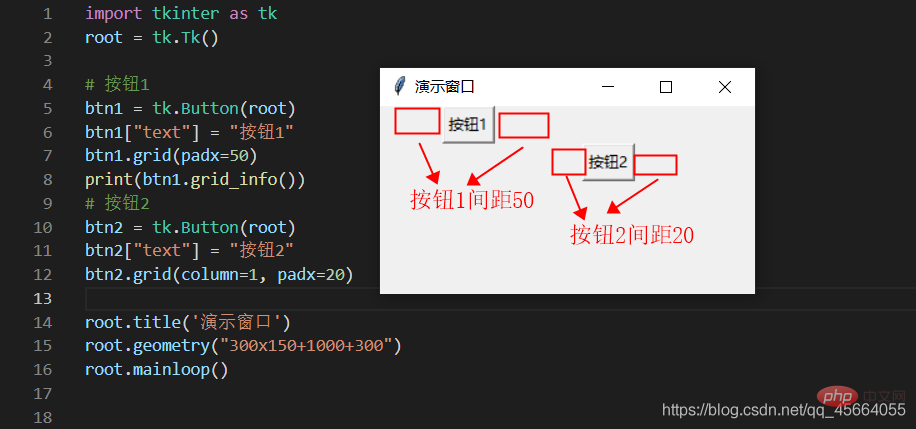
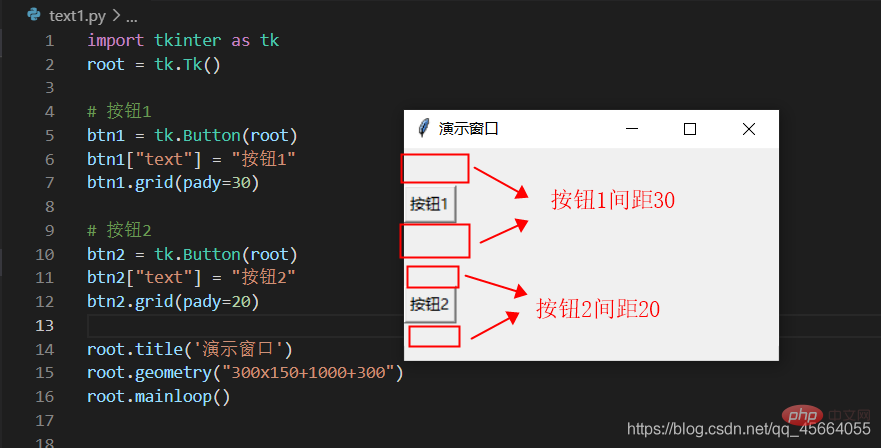
| ipadx、ipady | サブコンポーネント間の間隔を x 方向または y 方向に設定します。デフォルトの単位はピクセルです。非浮動小数点数、デフォルトは 0.0 | |||||||||||
| padx、pady | および x 方向または y 方向の平行コンポーネント間の間隔、デフォルトの単位は次のとおりです。ピクセル、非浮動小数点数、デフォルトは 0.0 | |||||||||||
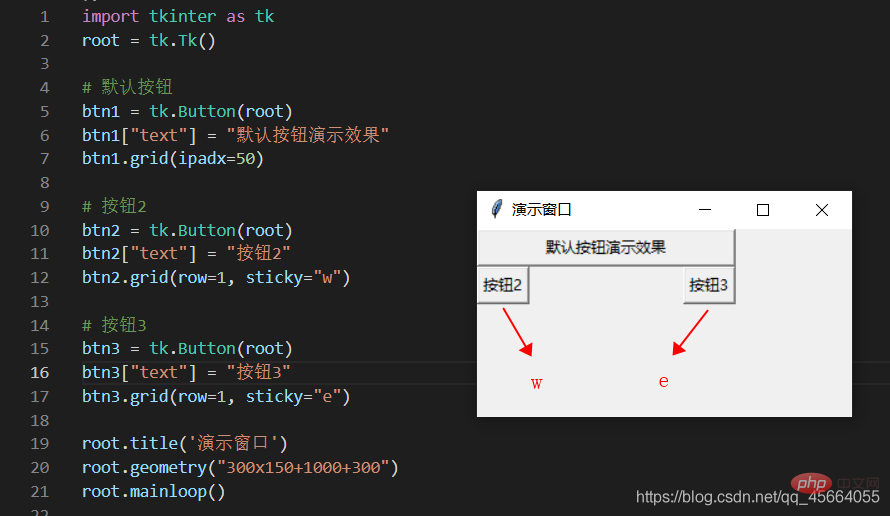
| sticky | コンポーネントはその場所の近くにあります セルの特定のフィートは南東に対応します。北西、中央、四隅。東 = "e"、南 = "s"、西 = "w"、北 = "n"、"ne"、"se"、"sw"、"nw"; | |||||||||||
| 选项 | 说明 |
|---|---|
| x,y | 组件左上角的绝对坐标(相当于窗口) |
| relx ,rely | 组件左上角的坐标(相对于父容器) |
| width , height | 组件的宽度和高度 |
| relwidth , relheight | 组件的宽度和高度(相对于父容器) |
| anchor | 对齐方式,左对齐“w”,右对齐“e”,顶对齐“n”,底对齐“s” |
import tkinter as tk
root = tk.Tk()but1 = tk.Button(root, text="按钮1")but1.place(relx=0.2, x=100, y=20, relwidth=0.2, relheight=0.5)root.title('演示窗口')root.geometry("300x150+1000+300")root.mainloop()

四、Tkinter基本控件介绍
4.1、封装
import tkinter as tk# from tkinter import ttk -下拉选择框class GUI:

    def __init__(self):
        self.root = tk.Tk()
        self.root.title('演示窗口')
        self.root.geometry("500x200+1100+150")
        self.interface()

    def interface(self):
        """"界面编写位置"""
        passif __name__ == '__main__':
    a = GUI()
    a.root.mainloop()
4.2、文本显示_Label
    def interface(self):
        """"界面编写位置"""
        self.Label0 = tk.Label(self.root, text="文本显示")
        self.Label0.grid(row=0, column=0)
4.3、按钮显示_Button
    def interface(self):
        """"界面编写位置"""
        self.Button0 = tk.Button(self.root, text="按钮显示")
        self.Button0.grid(row=0, column=0)
4.4、输入框显示_Entry
    def interface(self):
        """"界面编写位置"""
        self.Entry0 = tk.Entry(self.root)
        self.Entry0.grid(row=0, column=0)
4.5、文本输入框显示_Text
# pack布局
    def interface(self):
        """"界面编写位置"""
        self.w1 = tk.Text(self.root, width=80, height=10)
        self.w1.pack(pady=0, padx=30)# grid布局
    def interface(self):
        """"界面编写位置"""
        self.w1 = tk.Text(self.root, width=80, height=10)
        self.w1.grid(row=1, column=0)
4.6、复选按钮_Checkbutton
    def interface(self):
        """"界面编写位置"""
        self.Checkbutton01 = tk.Checkbutton(self.root, text="名称")
        self.Checkbutton01.grid(row=0, column=2)
4.7、单选按钮_Radiobutton
    def interface(self):
        """"界面编写位置"""
        self.Radiobutton01 = tk.Radiobutton(self.root, text="名称")
        self.Radiobutton01.grid(row=0, column=2)
4.8、下拉选择框_Combobox
def interface(self):
        """"界面编写位置"""
        values = ['1', '2', '3', '4']
        self.combobox = ttk.Combobox(
            master=self.root,  # 父容器
            height=10,  # 高度,下拉显示的条目数量
            width=20,  # 宽度
            state='',  # 设置状态 normal(可选可输入)、readonly(只可选)、 disabled(禁止输入选择)
            cursor='arrow',  # 鼠标移动时样式 arrow, circle, cross, plus...
            font=('', 15),  # 字体、字号
            textvariable='',  # 通过StringVar设置可改变的值
            values=values,  # 设置下拉框的选项
            )
        self.combobox.grid(padx=150)
4.9、菜单-主菜单、子菜单
import tkinter as tkfrom tkinter import Menuclass GUI:

    def __init__(self):
        self.root = tk.Tk()
        self.root.title('演示窗口')
        self.root.geometry("500x200+1100+150")
        # 创建主菜单实例
        self.menubar = Menu(self.root)
        # 显示菜单,将root根窗口的主菜单设置为menu
        self.root.config(menu=self.menubar)
        self.interface()

    def interface(self):
        """"界面编写位置"""
        # 在 menubar 上设置菜单名,并关联一系列子菜单
        self.menubar.add_cascade(label="文件", menu=self.papers())
        self.menubar.add_cascade(label="查看", menu=self.about())

    def papers(self):
        """
        fmenu = Menu(self.menubar): 创建子菜单实例
        tearoff=1: 1的话多了一个虚线,如果点击的话就会发现,这个菜单框可以独立出来显示
        fmenu.add_separator(): 添加分隔符"--------"
        """
        fmenu = Menu(self.menubar, tearoff=0)
        # 创建单选框
        for item in ['新建', '打开', '保存', '另存为']:
            fmenu.add_command(label=item)

        return fmenu    def about(self):
        amenu = Menu(self.menubar, tearoff=0)
        # 添加复选框
        for item in ['项目复选框', '文件扩展名', '隐藏的项目']:
            amenu.add_checkbutton(label=item)

        return amenuif __name__ == '__main__':
    a = GUI()
    a.root.mainloop()
五、组件使用方法介绍
5.1、按钮(Button)绑定事件
    def interface(self):
        """"界面编写位置"""
        self.Button0 = tk.Button(self.root, text="运行", command=self.event)
        self.Button0.grid(row=0, column=0)

		self.Button1 = tk.Button(self.root, text="退出", command=self.root.destroy, bg="Gray")  # bg=颜色
        self.Button1.grid(row=0, column=1, sticky="e", ipadx=10)


    def event(self):
        """按钮事件"""
        print("运行成功")
5.2、输入框(Entry)内容获取
    def interface(self):
        """"界面编写位置"""
        self.entry00 = tk.StringVar()
        self.entry00.set("默认信息")

        self.entry0 = tk.Entry(self.root, textvariable=self.entry00)
        self.entry0.grid(row=1, column=0)

        self.Button0 = tk.Button(self.root, text="运行", command=self.event)
        self.Button0.grid(row=0, column=0)

    def event(self):
        """按钮事件,获取文本信息"""
        a = self.entry00.get()
        print(a)
5.2、文本输入框(Text),写入文本信息和清除文本信息
    def interface(self):
        """"界面编写位置"""
        self.Button0 = tk.Button(self.root, text="清除", command=self.event)
        self.Button0.grid(row=0, column=0)

        self.w1 = tk.Text(self.root, width=80, height=10)
        self.w1.grid(row=1, column=0)
        self.w1.insert("insert", "默认信息")

    def event(self):
        '''清空输入框'''
        self.w1.delete(1.0, "end")
5.3、获取复选按钮(Checkbutton)的状态
  def interface(self):
        """"界面编写位置"""
        self.Button0 = tk.Button(self.root, text="确定", command=self.event)
        self.Button0.grid(row=0, column=0)

        self.v1 = tk.IntVar()
        self.Checkbutton01 = tk.Checkbutton(self.root, text="复选框", command=self.Check_box, variable=self.v1)
        self.Checkbutton01.grid(row=1, column=0)

        self.w1 = tk.Text(self.root, width=80, height=10)
        self.w1.grid(row=2, column=0)

    def event(self):
        '''按钮事件,获取复选框的状态,1表示勾选,0表示未勾选'''
        a = self.v1.get()
        self.w1.insert(1.0, str(a)+'\n')

    def Check_box(self):
        '''复选框事件'''
        if self.v1.get() == 1:
            self.w1.insert(1.0, "勾选"+'\n')
        else:
            self.w1.insert(1.0, "未勾选"+'\n')
5.4、清除控件
    def interface(self):
        """"界面编写位置"""
        self.Button0 = tk.Button(self.root, text="确定", command=self.event)
        self.Button0.grid(row=0, column=0)

        self.Label0 = tk.Label(self.root, text="文本显示")
        self.Label0.grid(row=1, column=0)

        self.Entry0 = tk.Entry(self.root)
        self.Entry0.grid(row=2, column=0)

        self.w1 = tk.Text(self.root, width=80, height=10)
        self.w1.grid(row=3, column=0)

    def event(self):
        '''按钮事件,清除Label、Entry、Text组件'''
        a = [self.Label0, self.Entry0, self.w1]
        for i in a:
            i.grid_forget()
5.5、清除复选框勾选状态
    def interface(self):
        """"界面编写位置"""
        self.Button0 = tk.Button(self.root, text="确定", command=self.event)
        self.Button0.grid(row=0, column=0)

        self.v1 = tk.IntVar()
        self.Checkbutton01 = tk.Checkbutton(self.root, text="复选框", command=self.Check_box, variable=self.v1)
        self.Checkbutton01.grid(row=1, column=0)

        self.w1 = tk.Text(self.root, width=80, height=10)
        self.w1.grid(row=2, column=0)

    def event(self):
        '''按钮事件,清除复选框勾选状态'''
        self.Checkbutton01.deselect()

    def Check_box(self):
        '''复选框事件'''
        if self.v1.get() == 1:
            self.w1.insert(1.0, "勾选"+'\n')
        else:
            self.w1.insert(1.0, "未勾选"+'\n')
5.6、文本框(Text)内容获取
    def interface(self):
        """"界面编写位置"""
        self.Button0 = tk.Button(self.root, text="确定", command=self.event)
        self.Button0.grid(row=0, column=0)

        self.w1 = tk.Text(self.root, width=80, height=10)
        self.w1.grid(row=1, column=0)

    def event(self):
        a = self.w1.get('0.0', 'end')
        print(a)
5.7、下拉选择框绑定事件
    def interface(self):
        """"界面编写位置"""
        self.value = tk.StringVar()
        self.value.set('2')  # 默认值
        values = ['1', '2', '3', '4']
        self.combobox = ttk.Combobox(
            master=self.root,  # 父容器
            height=10,  # 高度,下拉显示的条目数量
            width=20,  # 宽度
            state='',  # 设置状态 normal(可选可输入)、readonly(只可选)、 disabled(禁止输入选择)
            cursor='arrow',  # 鼠标移动时样式 arrow, circle, cross, plus...
            font=('', 15),  # 字体
            textvariable=self.value,  # 通过StringVar设置可改变的值
            values=values,  # 设置下拉框的选项
            )
        # 绑定事件,下拉列表框被选中时,绑定pick()函数
        self.combobox.bind(">", self.pick)
        self.combobox.grid(padx=150)

    def pick(self, *args):  # 处理事件,*args表示可变参数
        print('选中的数据:{}'.format(self.combobox.get()))
        print('value的值:{}'.format(self.value.get()))
六、Tkinter使用多线程
6.1、为什么要使用多线程
- 以下为单线程运行
    def interface(self):
        """"界面编写位置"""
        self.Button0 = tk.Button(self.root, text="确定", command=self.event)
        self.Button0.grid(row=0, column=0)

        self.w1 = tk.Text(self.root, width=80, height=10)
        self.w1.grid(row=1, column=0)

    def event(self):
        '''按钮事件,一直循环'''
        a = 0
        while True:
            a += 1
            self.w1.insert(1.0, str(a)+'\n')
单线程下,主线程需要运行窗口,如果这个时候点击“确定”按钮,主线程就会去执行event方法,那界面就会出现“无响应”状态,如果要界面正常显示,那我们就需要用到多线程(threading)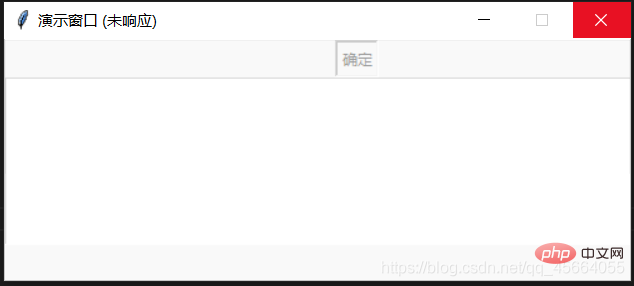
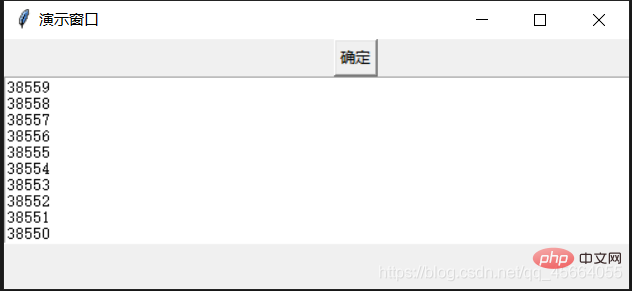
- 多线程,完整代码
import tkinter as tkimport threading  # 导入多线程模块class GUI:

    def __init__(self):
        self.root = tk.Tk()
        self.root.title('演示窗口')
        self.root.geometry("500x200+1100+150")
        self.interface()

    def interface(self):
        """"界面编写位置"""
        self.Button0 = tk.Button(self.root, text="确定", command=self.start)
        self.Button0.grid(row=0, column=0)

        self.w1 = tk.Text(self.root, width=80, height=10)
        self.w1.grid(row=1, column=0)

    def event(self):
        '''按钮事件,一直循环'''
        a = 0
        while True:
            a += 1
            self.w1.insert(1.0, str(a)+'\n')

    def start(self):
        self.T = threading.Thread(target=self.event)  # 多线程
        self.T.setDaemon(True)  # 线程守护,即主进程结束后,此线程也结束。否则主进程结束子进程不结束
        self.T.start()  # 启动if __name__ == '__main__':
    a = GUI()
    a.root.mainloop()
七、Tkinter多线程暂停和继续
import tkinter as tkimport threadingfrom time import sleep

event = threading.Event()class GUI:

    def __init__(self):
        self.root = tk.Tk()
        self.root.title('演示窗口')
        self.root.geometry("500x200+1100+150")
        self.interface()

    def interface(self):
        """"界面编写位置"""
        self.Button0 = tk.Button(self.root, text="启动", command=self.start)
        self.Button0.grid(row=0, column=0)

        self.Button0 = tk.Button(self.root, text="暂停", command=self.stop)
        self.Button0.grid(row=0, column=1)

        self.Button0 = tk.Button(self.root, text="继续", command=self.conti)
        self.Button0.grid(row=0, column=2)

        self.w1 = tk.Text(self.root, width=70, height=10)
        self.w1.grid(row=1, column=0, columnspan=3)

    def event(self):
        '''按钮事件,一直循环'''
        while True:
            sleep(1)
            event.wait()
            self.w1.insert(1.0, '运行中'+'\n')

    def start(self):
        event.set()
        self.T = threading.Thread(target=self.event)
        self.T.setDaemon(True)
        self.T.start()

    def stop(self):
        event.clear()
        self.w1.insert(1.0, '暂停'+'\n')

    def conti(self):
        event.set()
        self.w1.insert(1.0, '继续'+'\n')if __name__ == '__main__':
    a = GUI()
    a.root.mainloop()
八、Tkinter文件之间的调用
8.1、准备工作
- a.py文件 - -界面逻辑+线程
- b.py 文件 - -业务逻辑
- 以上文件在同一个目录下
8.2、方法
# a.py 文件import tkinter as tkimport threadingfrom b import logic  # 调用b文件中的logic类class GUI:
    def __init__(self):
        self.root = tk.Tk()
        self.root.title('演示窗口')
        self.root.geometry("500x260+1100+150")
        self.interface()

    def interface(self):
        """"界面编写位置"""
        self.Button0 = tk.Button(self.root, text="确定执行", command=self.start, bg="#7bbfea")
        self.Button0.grid(row=0, column=1, pady=10)

        self.entry00 = tk.StringVar()
        self.entry00.set("")

        self.entry0 = tk.Entry(self.root, textvariable=self.entry00)
        self.entry0.grid(row=1, column=1, pady=15)

        self.w1 = tk.Text(self.root, width=50, height=8)
        self.w1.grid(row=2, column=0, columnspan=3, padx=60)

    def seal(self):
        '''把b文件的类单独写一个方法'''
        a = self.entry00.get()
        w1 = self.w1
        logic().event(a, w1)

    def start(self):
        '''子线程无法直接执行b的类,需要把b文件单独写一个方法,然后执行'''
        self.T = threading.Thread(target=self.seal)
        self.T.setDaemon(True)
        self.T.start()if __name__ == '__main__':
    a = GUI()
    a.root.mainloop()
# b.py 文件import timeclass logic():
    def __init__(self):
        pass

    def main(self, a, x):
        while True:
            y = int(a)+int(x)
            self.w1.insert(1.0, str(y)+'\n')
            time.sleep(1)
            x += 1

    def event(self, a, w1):
        '''调用main的方法'''
        self.w1 = w1
        x = 1
        self.main(a, x)
【相关推荐:Python3视频教程 】
以上がPython での Tkinter の使用法を 1 つの記事で理解するの詳細内容です。詳細については、PHP 中国語 Web サイトの他の関連記事を参照してください。


