ホームページ >ウェブフロントエンド >uni-app >uni-app 入門チュートリアル: データ バインディング、スタイル バインディング、イベント処理
uni-app 入門チュートリアル: データ バインディング、スタイル バインディング、イベント処理
- coldplay.xixi転載
- 2021-01-07 10:01:083629ブラウズ

はじめに
- 1. テンプレート構文とデータ バインディング
- 1. 変数の宣言とレンダリング
- 2. 条件付きレンダリング
- 1.クラス構文
- 2.スタイル構文 3 . ケース - 動的なメニュー切り替え
- #3. イベントとイベント バインディング
##1.uni-app イベント - 2.イベントバインディング
- 3.イベントパラメータの受け渡し
- 概要
序文
1. テンプレート構文とデータ バインディング
1. 変数の宣言とレンダリング
変数を使用する前に、次のことを行う必要があります。宣言 最初に、通常はデータ ブロック内で行います。たとえば、hello uniapp プロジェクトのindex.vue で定義されているタイトル変数は次のとおりです:
data() {
    return {
        title: 'Hello'
    }},
スクリプト言語ブロック変数のデータ ブロックを使用し、{{}} を使用してテンプレート言語ブロックのビューで変数を呼び出し、基本的なデータ型を含む複数の型の変数をバインドできます。配列など
最初に基本的なデータ呼び出しをテストします。index.vue は次のとおりです: <pre class="brush:php;toolbar:false"><template>
<view class="content">
<image class="logo" src="/static/logo.png"></image>
<view class="text-area">
<text class="title">{{title}}</text>
</view>
<view class="red">
hello-{{name}} </view>
</view></template><script>
export default {
data() {
return {
title: 'Hello',
name: 'Corley'
}
},
onLoad() {
console.log('index onload')
},
onShow() {
console.log('index onshow')
},
onHide() {
console.log('index onhide')
},
methods: {
}
}</script><style>
.content {
display: flex;
flex-direction: column;
align-items: center;
justify-content: center;
}
.logo {
height: 200rpx;
width: 200rpx;
margin-top: 200rpx;
margin-left: auto;
margin-right: auto;
margin-bottom: 50rpx;
}
.text-area {
display: flex;
justify-content: center;
}
.title {
font-size: 36rpx;
color: #8f8f94;
}</style></pre>
<!-- -->表示:
宣言された変数はすべて 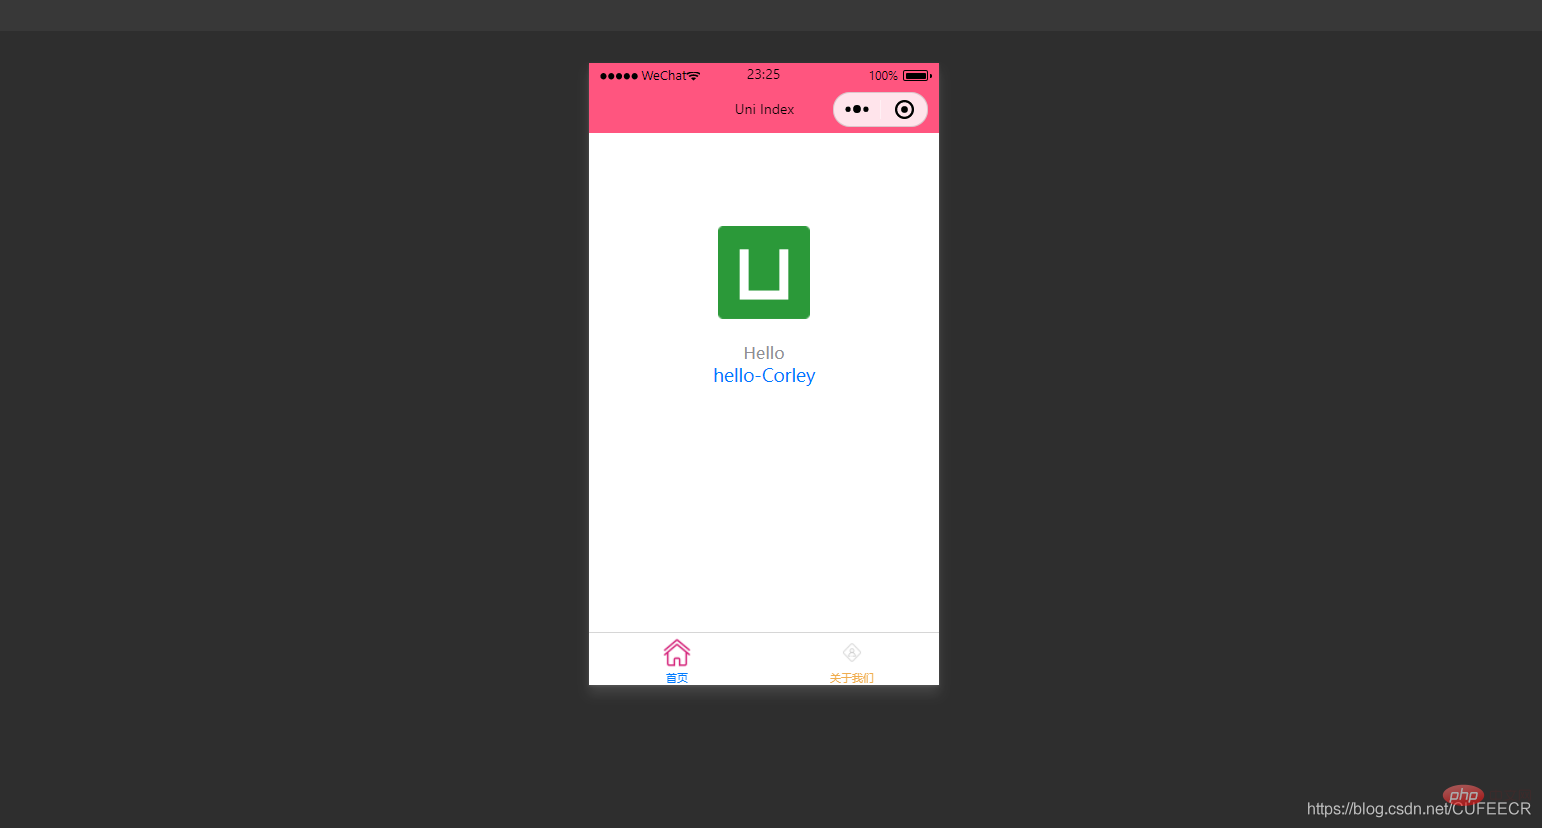 応答
応答
同期的に変更されます
、index.vue は次のとおりです:<template>
<view class="content">
<image class="logo" src="/static/logo.png"></image>
<view class="text-area">
<text class="title">{{title}}</text>
</view>
<view class="red">
hello-{{name}}-{{age}} </view>
</view></template><script>
var _self;
export default {
data() {
return {
title: 'Hello',
name: 'Corley',
age: 18
}
},
onLoad() {
_self = this;
setTimeout(function(){
_self.age = 20
}, 3000);
},
onShow() {
console.log('index onshow')
},
onHide() {
console.log('index onhide')
},
methods: {
}
}</script><style>
.content {
display: flex;
flex-direction: column;
align-items: center;
justify-content: center;
}
.logo {
height: 200rpx;
width: 200rpx;
margin-top: 200rpx;
margin-left: auto;
margin-right: auto;
margin-bottom: 50rpx;
}
.text-area {
display: flex;
justify-content: center;
}
.title {
font-size: 36rpx;
color: #8f8f94;
}</style>
表示: onLoad
ステージに入ると、レンダリングされた age 変数も表示されることがわかります。変化して20になります。 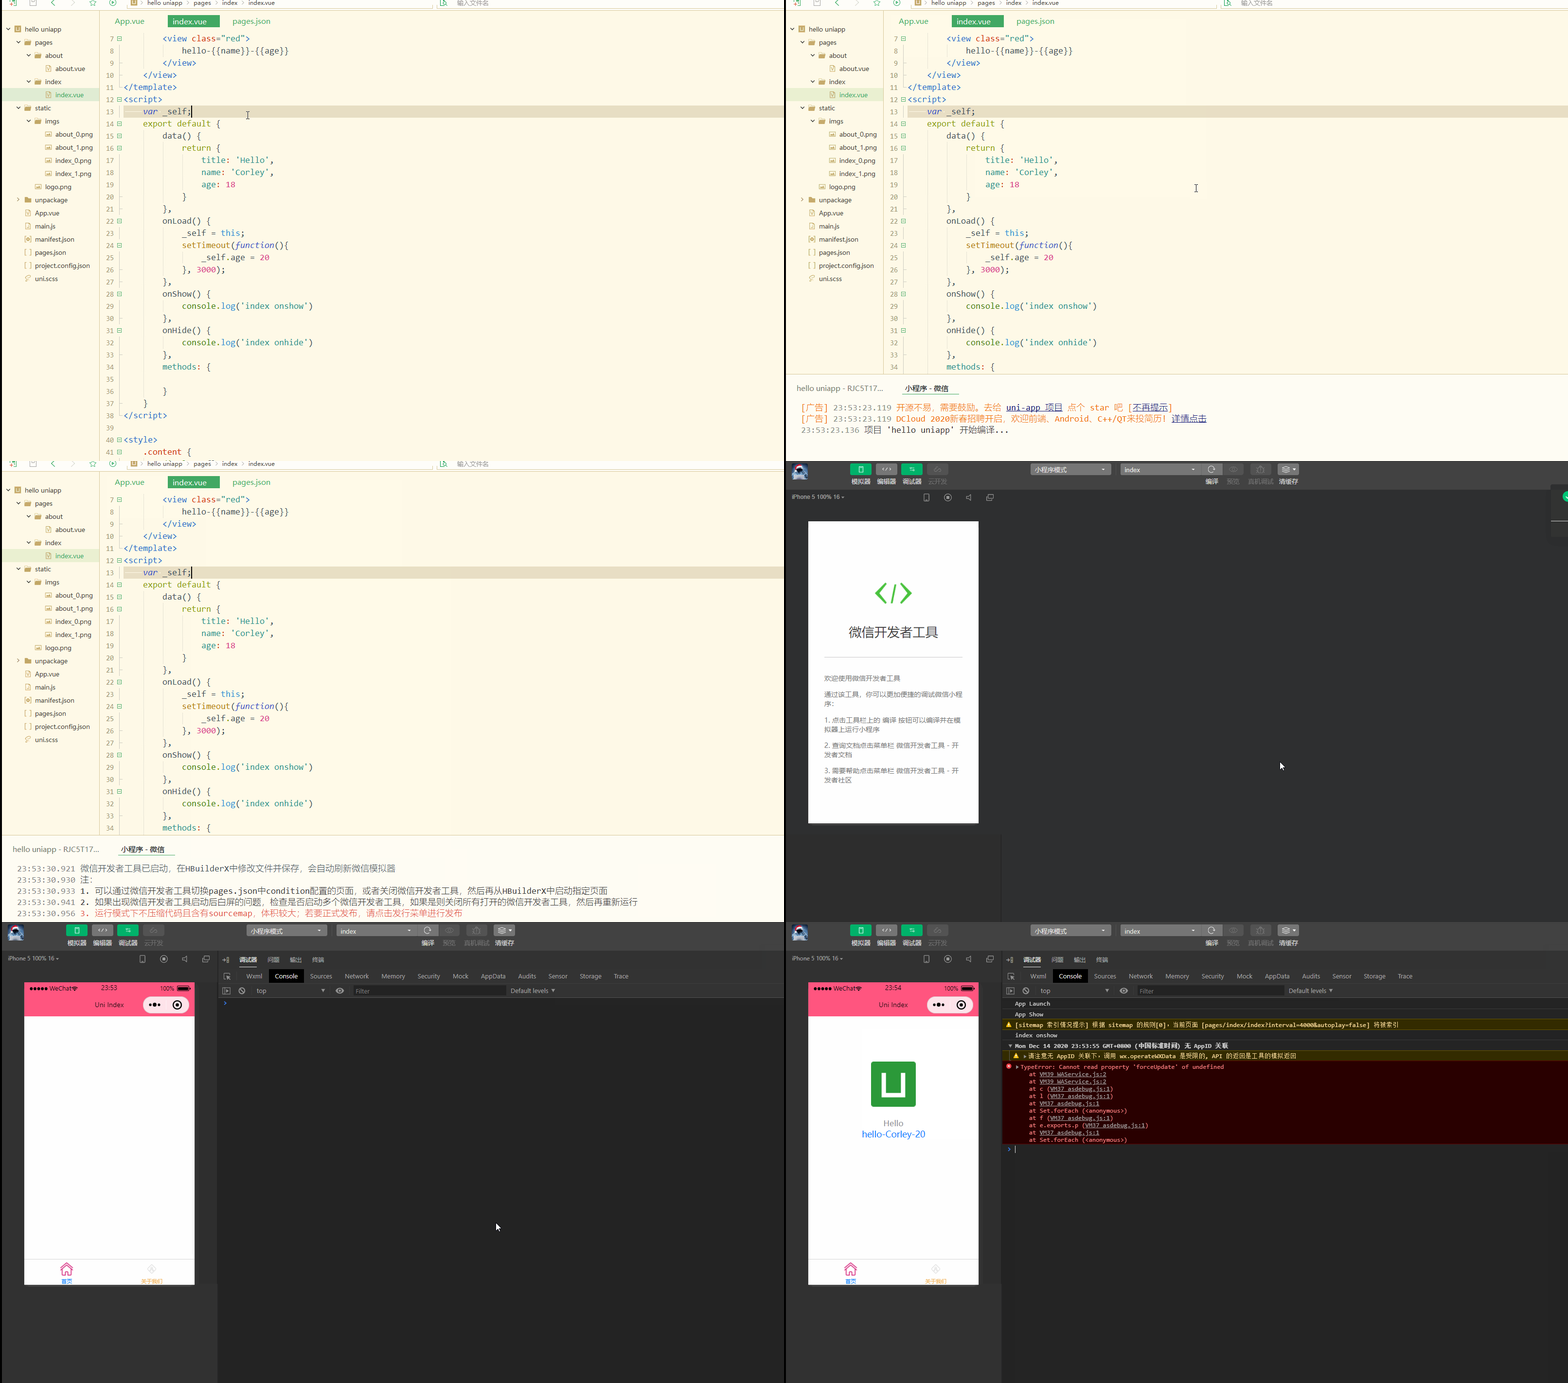
<template>
	<view class="content">
		<image class="logo" src="/static/logo.png"></image>
		<view class="text-area">
			<text class="title">{{title}}</text>
		</view>
		<view class="red">
			{{students[0]}}<br>
			{{students[0].name}}		</view>
	</view></template><script>
	var _self;
	export default {
		data() {
			return {
				title: 'Hello',
				name: 'Corley',
				age: 18,
				students: [{
						name: "张三",
						age: 18
					},
					{
						name: "李四",
						age: 20
					}
				]
			}
		},
		onLoad() {
			_self = this;
			setTimeout(function() {
				_self.age = 20
			}, 3000);
		},
		onShow() {
			console.log('index onshow')
		},
		onHide() {
			console.log('index onhide')
		},
		methods: {

		}
	}</script><style>
	.content {
		display: flex;
		flex-direction: column;
		align-items: center;
		justify-content: center;
	}

	.logo {
		height: 200rpx;
		width: 200rpx;
		margin-top: 200rpx;
		margin-left: auto;
		margin-right: auto;
		margin-bottom: 50rpx;
	}

	.text-area {
		display: flex;
		justify-content: center;
	}

	.title {
		font-size: 36rpx;
		color: #8f8f94;
	}</style>
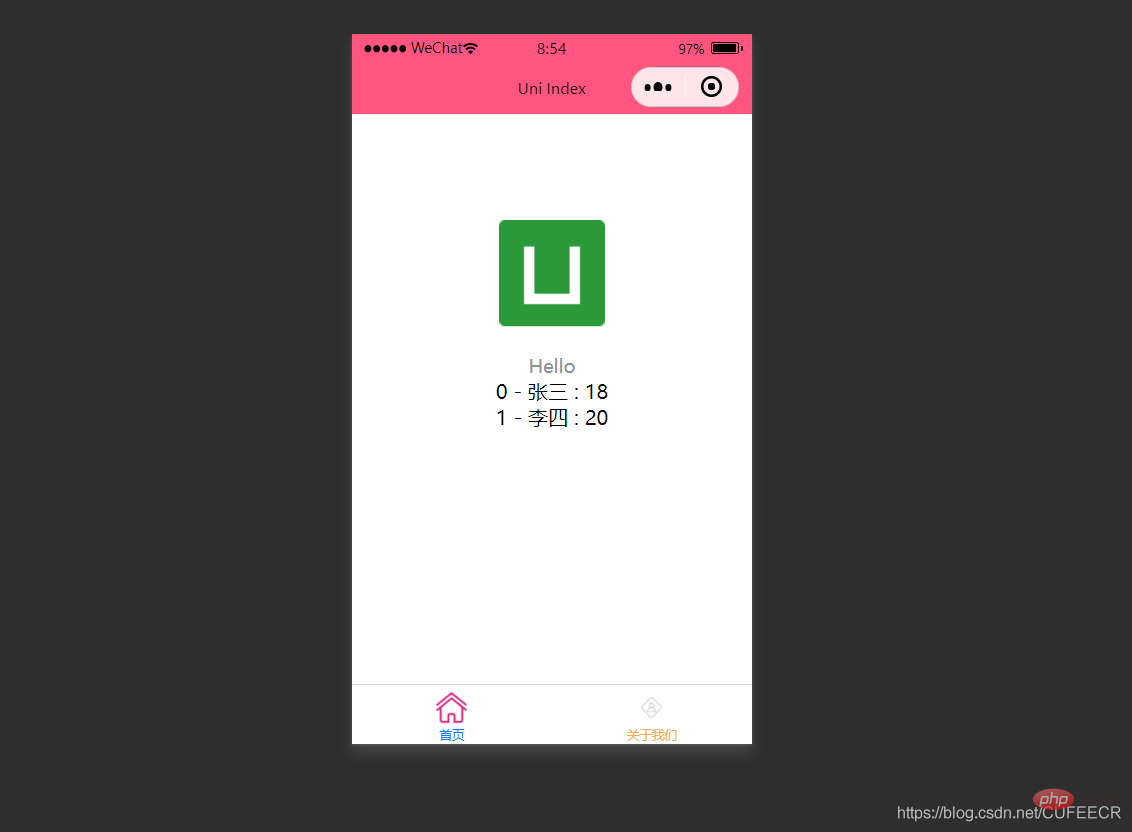
表示: また、ループを使用して配列を走査します。つまり、v-for
を使用して走査します。 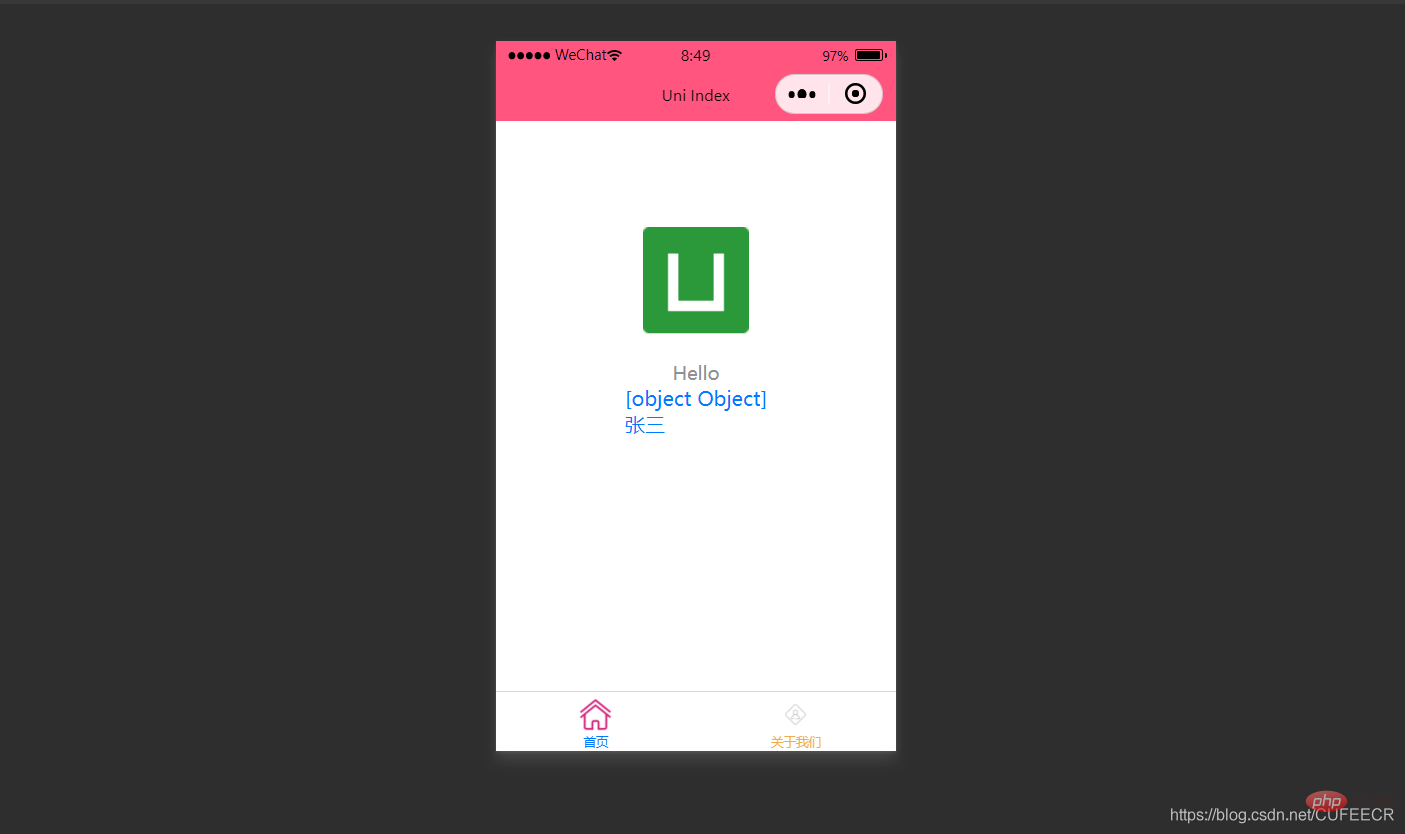 index.vue は次のとおりです:
<template>
	<view class="content">
		<image class="logo" src="/static/logo.png"></image>
		<view class="text-area">
			<text class="title">{{title}}</text>
		</view>
		<view v-for="(item, index) in students">
			{{index}} - {{item.name}} : {{item.age}}		</view>
	</view></template><script>
	var _self;
	export default {
		data() {
			return {
				title: 'Hello',
				name: 'Corley',
				age: 18,
				students: [{
						name: "张三",
						age: 18
					},
					{
						name: "李四",
						age: 20
					}
				]
			}
		},
		onLoad() {
			_self = this;
			setTimeout(function() {
				_self.age = 20
			}, 3000);
		},
		onShow() {
			console.log('index onshow')
		},
		onHide() {
			console.log('index onhide')
		},
		methods: {

		}
	}</script><style>
	.content {
		display: flex;
		flex-direction: column;
		align-items: center;
		justify-content: center;
	}

	.logo {
		height: 200rpx;
		width: 200rpx;
		margin-top: 200rpx;
		margin-left: auto;
		margin-right: auto;
		margin-bottom: 50rpx;
	}

	.text-area {
		display: flex;
		justify-content: center;
	}

	.title {
		font-size: 36rpx;
		color: #8f8f94;
	}</style>
Display:
 2. 条件付きレンダリング
v-if を使用して、特定の条件が満たされた場合にのみ要素をレンダリングすることを指します。
は次のとおりです:<template>
<view class="content">
<image class="logo" src="/static/logo.png"></image>
<view class="text-area">
<text class="title">{{title}}</text>
</view>
<view v-if="show1">
show1... </view>
<view v-if="show2">
show2... </view>
</view></template><script>
var _self;
export default {
data() {
return {
title: 'Hello',
name: 'Corley',
age: 18,
show1: true,
show2: false
}
},
onLoad() {
_self = this;
setTimeout(function() {
_self.age = 20
}, 3000);
},
onShow() {
console.log('index onshow')
},
onHide() {
console.log('index onhide')
},
methods: {
}
}</script><style>
.content {
display: flex;
flex-direction: column;
align-items: center;
justify-content: center;
}
.logo {
height: 200rpx;
width: 200rpx;
margin-top: 200rpx;
margin-left: auto;
margin-right: auto;
margin-bottom: 50rpx;
}
.text-area {
display: flex;
justify-content: center;
}
.title {
font-size: 36rpx;
color: #8f8f94;
}</style>
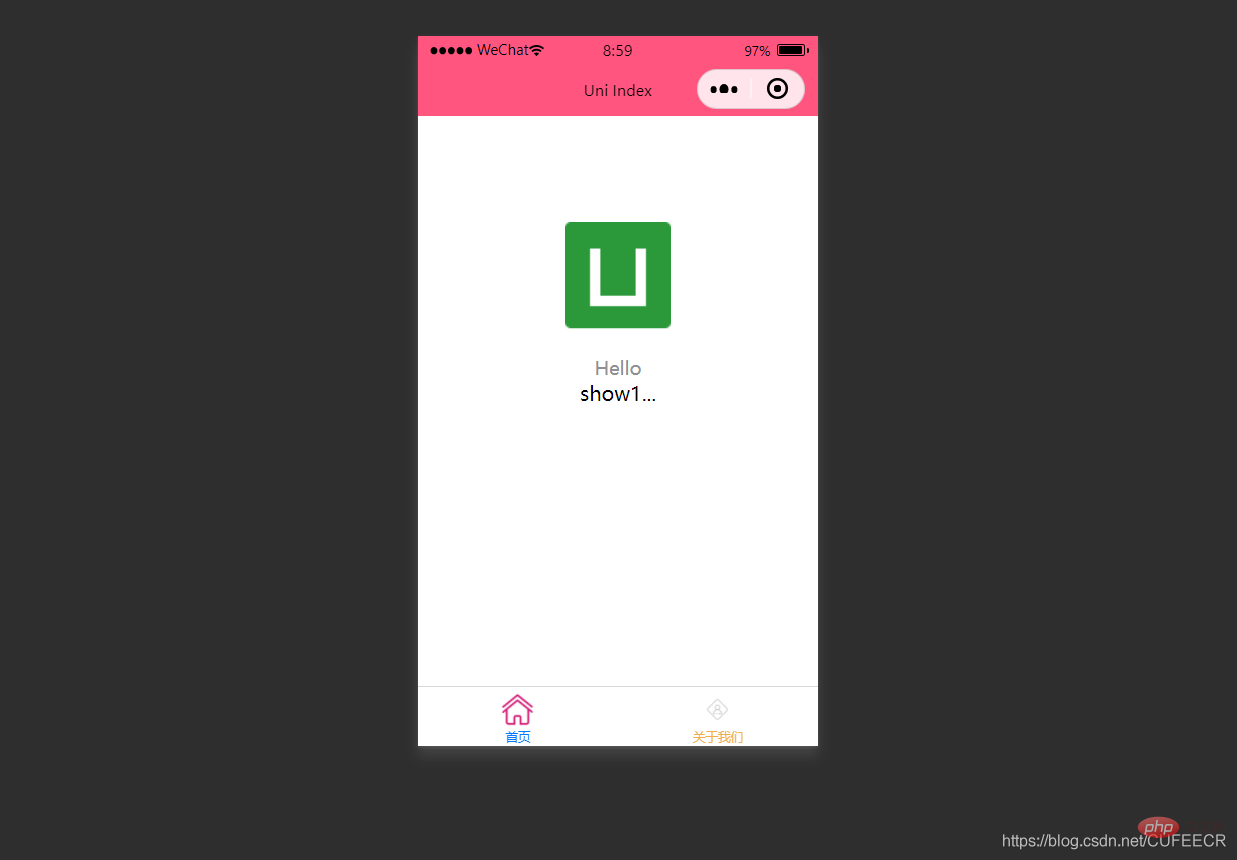
Display: このとき、 に渡された値を基にレンダリングするかどうかを判断します。 v-if
。 
:hidden 属性は、次のように要素を非表示にするかどうかを定義するために使用されます:
<template>
	<view class="content">
		<image class="logo" src="/static/logo.png"></image>
		<view class="text-area">
			<text class="title">{{title}}</text>
		</view>
		<view :hidden="show1">
			show1...		</view>
		<view :hidden="show2">
			show2...		</view>
	</view></template><script>
	var _self;
	export default {
		data() {
			return {
				title: 'Hello',
				name: 'Corley',
				age: 18,
				show1: true,
				show2: false
			}
		},
		onLoad() {
			_self = this;
			setTimeout(function() {
				_self.age = 20
			}, 3000);
		},
		onShow() {
			console.log('index onshow')
		},
		onHide() {
			console.log('index onhide')
		},
		methods: {

		}
	}</script><style>
	.content {
		display: flex;
		flex-direction: column;
		align-items: center;
		justify-content: center;
	}

	.logo {
		height: 200rpx;
		width: 200rpx;
		margin-top: 200rpx;
		margin-left: auto;
		margin-right: auto;
		margin-bottom: 50rpx;
	}

	.text-area {
		display: flex;
		justify-content: center;
	}

	.title {
		font-size: 36rpx;
		color: #8f8f94;
	}</style>
Display: v-if
と 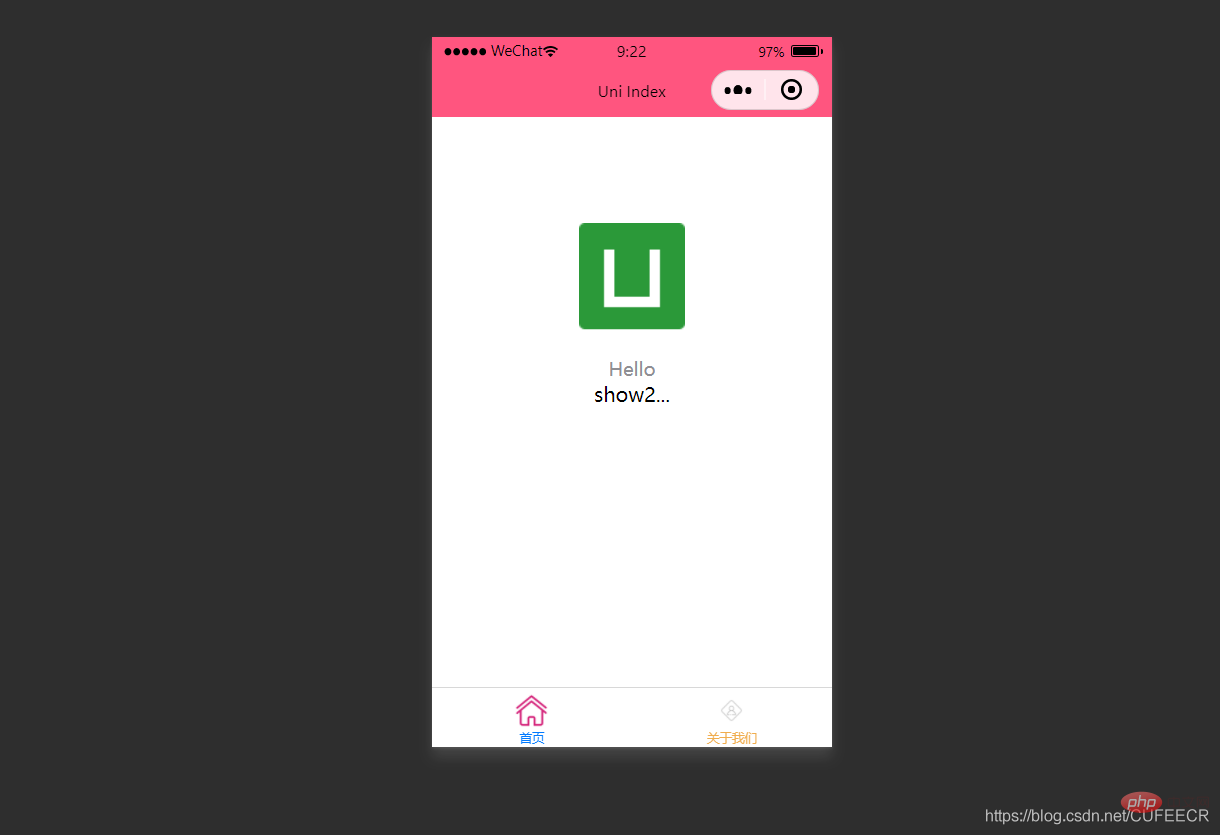 :hidden
v-if は以下に基づいて決定されます。条件 を表示するかどうか、
:hiddenが表示されますが、を表示するかどうかは条件によって決まります。必要に応じて選択できます。 2. クラスとスタイルのバインディング前述したように、テンプレート言語ブロックのタグの style 属性を通じてスタイルを直接定義することも、スタイル言語ブロックのセレクターを使用してスタイルを定義し、それをテンプレート言語ブロックで使用します。
パフォーマンスを節約するために、クラスとスタイルの式をコンパイラを介して ユニアプリにハードコーディングできます。また、条件判断を使用して特定のスタイルを表示するかどうかを決定できます。 。
1.class syntaxclass は次の構文メソッドをサポートします:
<!-- 1 --><view class="static" v-bind:class="{ active: isActive, 'text-danger': hasError }">111</view><!-- 2 --><view class="static" v-bind:class="[isActive ? activeClass : '', errorClass]">222</view><!-- 3 --><view class="static" v-bind:class="[{ active: isActive }, errorClass]">333</view><!-- 4 --><view :class="{ active: isActive }">444</view><!-- 5 --><view class="static" :class="[activeClass, errorClass]">555</view>
そのうち、最初の 3 つは完全な形式で、最後の 2 つは完全な形式ですForm; isActive ? activeClass: ''
は三項演算子
です。
index.vue は次のとおりです: <pre class="brush:php;toolbar:false"><template>
<view class="content">
<image class="logo" src="/static/logo.png"></image>
<view class="text-area">
<text class="title">{{title}}</text>
</view>
<view :class="{&#39;red&#39; : isRed}">
class bind 2... </view>
<view :class="[isBlue ? &#39;blue&#39; : &#39;red&#39;]">
class bind 3... </view>
</view></template><script>
export default {
data() {
return {
title: 'Hello',
name: 'Corley',
age: 18,
isRed: true,
isBlue: true
}
},
onLoad() {
},
onShow() {
console.log('index onshow')
},
onHide() {
console.log('index onhide')
},
methods: {
}
}</script><style>
.content {
display: flex;
flex-direction: column;
align-items: center;
justify-content: center;
}
.logo {
height: 200rpx;
width: 200rpx;
margin-top: 200rpx;
margin-left: auto;
margin-right: auto;
margin-bottom: 50rpx;
}
.text-area {
display: flex;
justify-content: center;
}
.title {
font-size: 36rpx;
color: #8f8f94;
}
.blue {
color: #007AFF;
}</style></pre>表示:
コンパイルと選択の後、wxml が WeChat 開発者に表示されることがわかります。 tools レンダリングされたクラスの値です。
2.style 構文 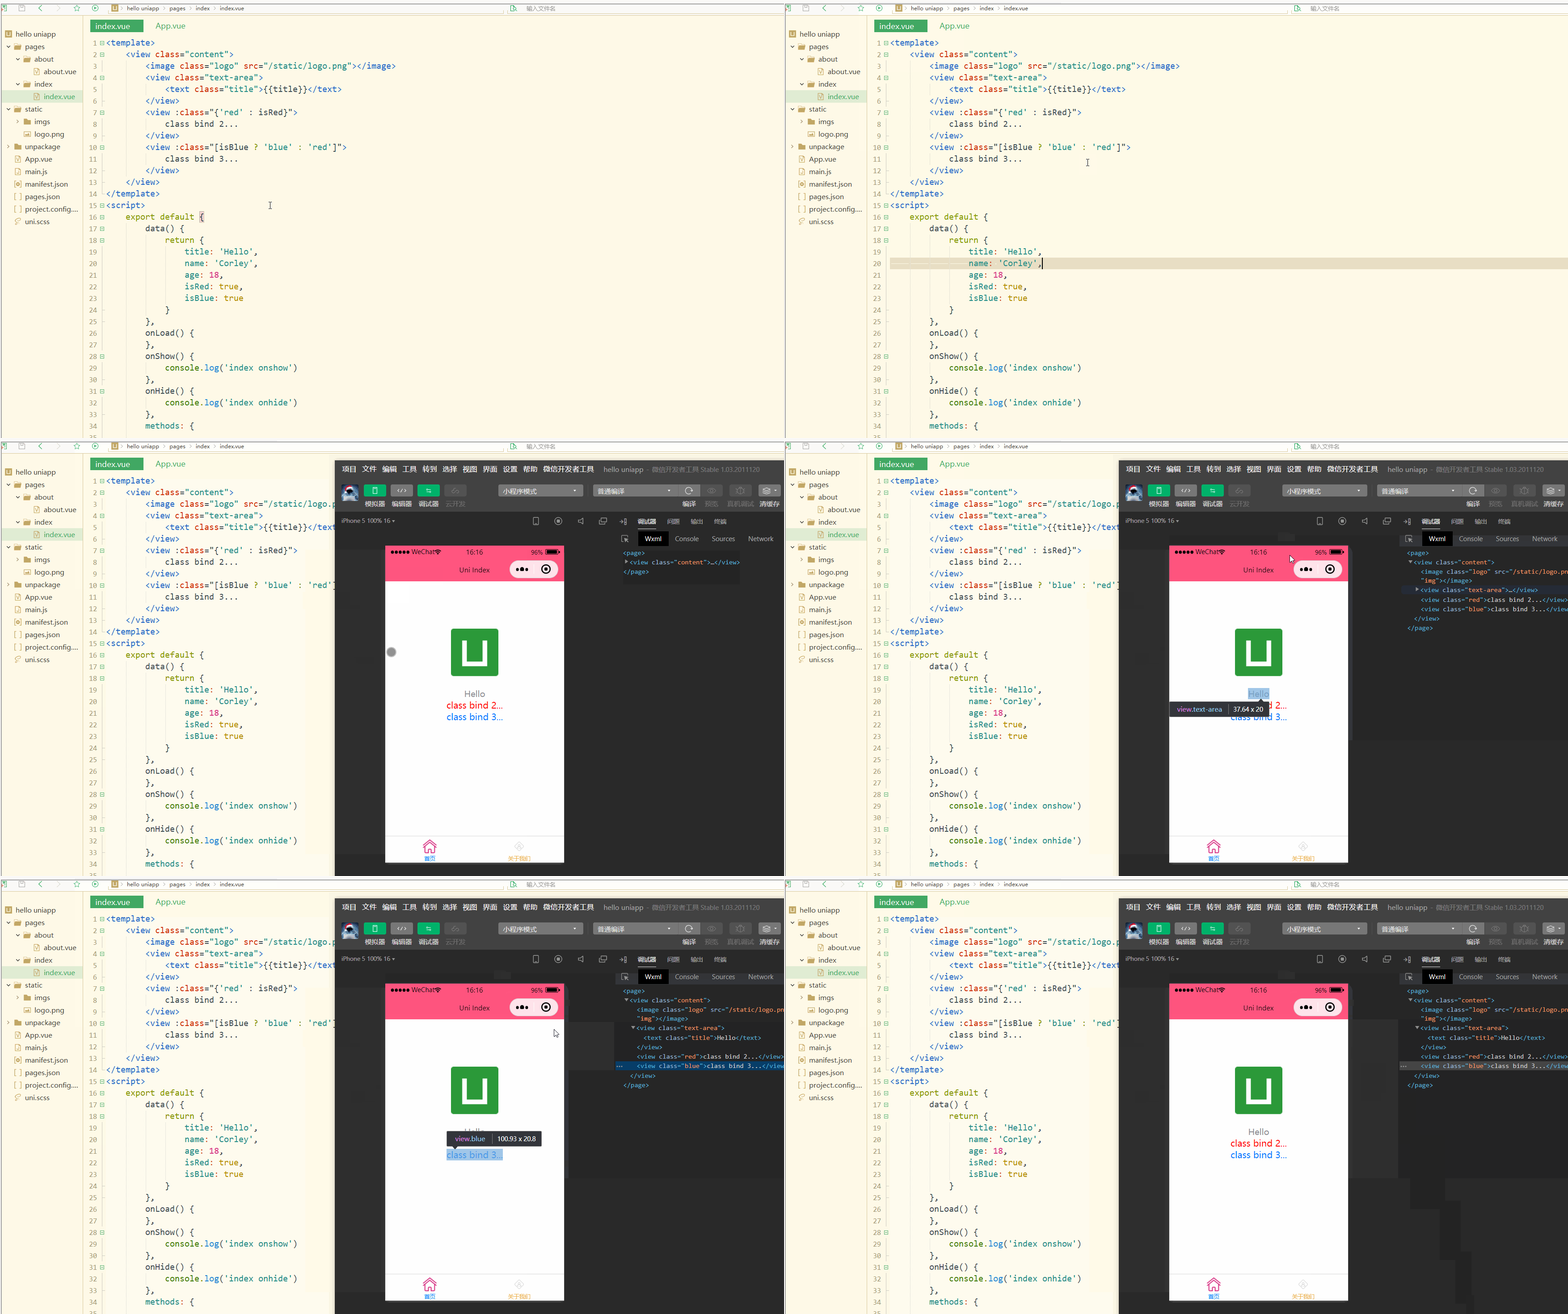
style は次の構文をサポートします:
<!-- 1 --><view v-bind:style="{ color: activeColor, fontSize: fontSize + 'px' }">111</view><!-- 2 --><view v-bind:style="[{ color: activeColor, fontSize: fontSize + 'px' }]">222</view><!-- 3 --><view :style="{ color: activeColor, fontSize: fontSize + 'px' }">333</view><!-- 4 --><view :style="[{ color: activeColor, fontSize: fontSize + 'px' }]">444</view>
このうち、最初の 2 つは完全な形式で、最後の 2 つは省略形 。 index.vue は次のとおりです:
<template>
<view class="content">
<image class="logo" src="/static/logo.png"></image>
<view class="text-area">
<text class="title">{{title}}</text>
</view>
<view style="font-size: 10px;">
style static... </view>
<view :style="{fontSize: fontSize+'px'}">
class dynamic... </view>
</view></template><script>
var _self;
export default {
data() {
return {
title: 'Hello',
name: 'Corley',
age: 18,
fontSize: 20
}
},
onLoad() {
_self = this;
setTimeout(function(){
_self.fontSize = 30;
}, 3000)
},
onShow() {
console.log('index onshow')
},
onHide() {
console.log('index onhide')
},
methods: {
}
}</script><style>
.content {
display: flex;
flex-direction: column;
align-items: center;
justify-content: center;
}
.logo {
height: 200rpx;
width: 200rpx;
margin-top: 200rpx;
margin-left: auto;
margin-right: auto;
margin-bottom: 50rpx;
}
.text-area {
display: flex;
justify-content: center;
}
.title {
font-size: 36rpx;
color: #8f8f94;
}
.blue {
color: #007AFF;
}</style>
Display:
明らかに、スタイルは動的に変更できます。
需要注意,uni-app不支持 Vue官方文档中Class 与 Style 绑定 中的 classObject 和 styleObject 语法,但是可以用 computed 方法生成 class 或者 style 字符串,插入到页面中,如下:
<template>
	<view>
		<!-- 支持 -->
		<view class="container" :class="computedClassStr"></view>
		<view class="container" :class="{active: isActive}"></view>
		<!-- 不支持 -->
		<view class="container" :class="computedClassObject"></view>
	</view>    </template>
3.案例–动态菜单切换
本案例实现动态切换导航栏。
先展示横向排列的导航栏,index.vue如下:
<template>
	<view>
		<view v-for="(item, index) in menus" class="menu">
			{{item}}		</view>
	</view></template><script>
	var _self;
	export default {
		data() {
			return {
				menus: [
					'新闻', '汽车', '读书'
				]
			}
		},
		onLoad() {

		},
		onShow() {
			console.log('index onshow')
		},
		onHide() {
			console.log('index onhide')
		},
		methods: {

		}
	}</script><style>
	.menu {
		padding: 10px;
		float: left;
		margin: 5px;
		line-height: 36px;
	}</style>
显示: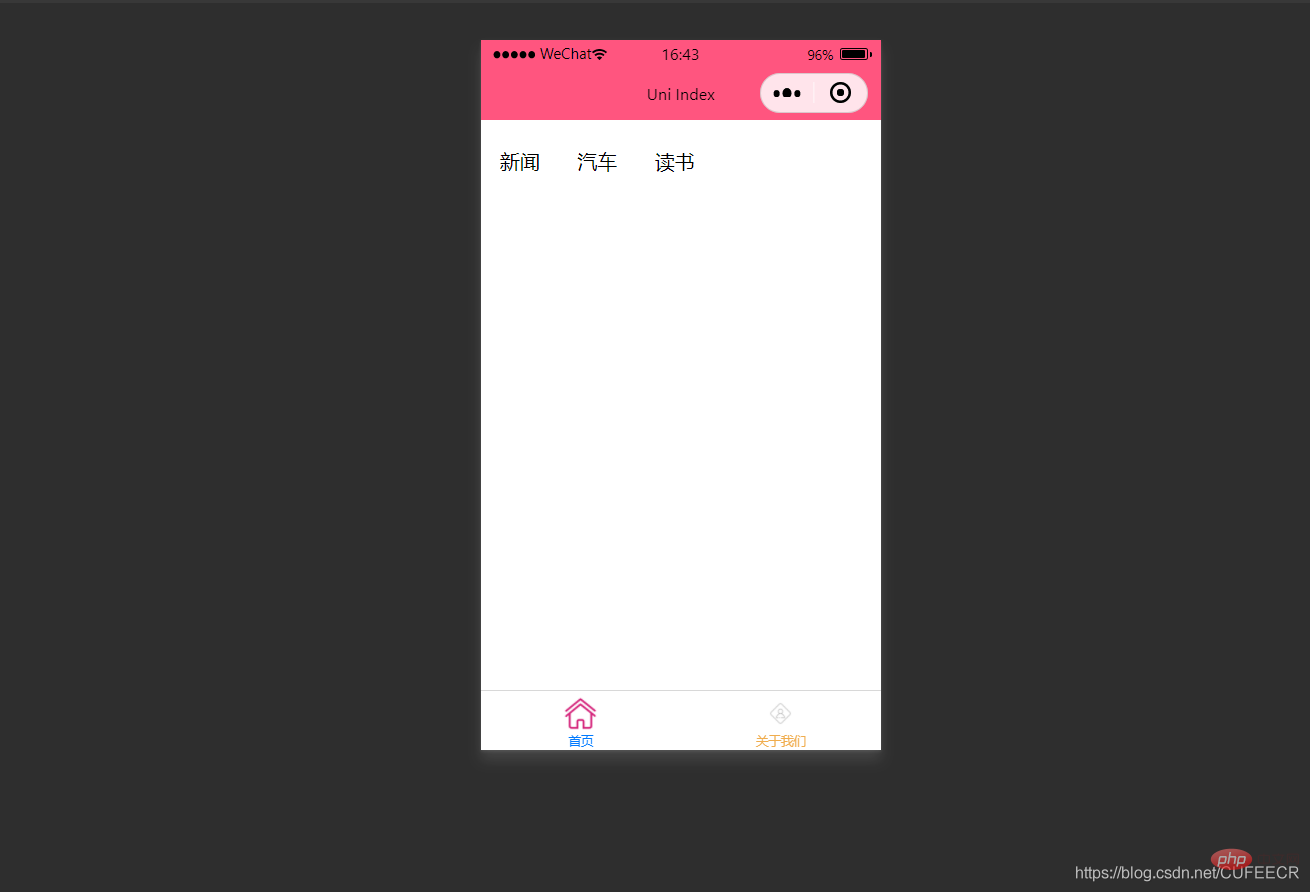
此时已经可以将导航栏横向展示了。
再实现当前的导航栏显示不一样的颜色,如下:
<template>
<view>
<view v-for="(item, index) in menus" class="menu" :class="[activeIndex==index?'menuActive':'']">
{{item}} </view>
</view></template><script>
var _self;
export default {
data() {
return {
menus: [
'新闻', '汽车', '读书'
],
activeIndex: 0
}
},
onLoad() {
},
onShow() {
console.log('index onshow')
},
onHide() {
console.log('index onhide')
},
methods: {
}
}</script><style>
.menu {
padding: 10px;
float: left;
margin: 5px;
line-height: 36px;
}
.menuActive {
color: #FF0000 !important;
}</style>
显示: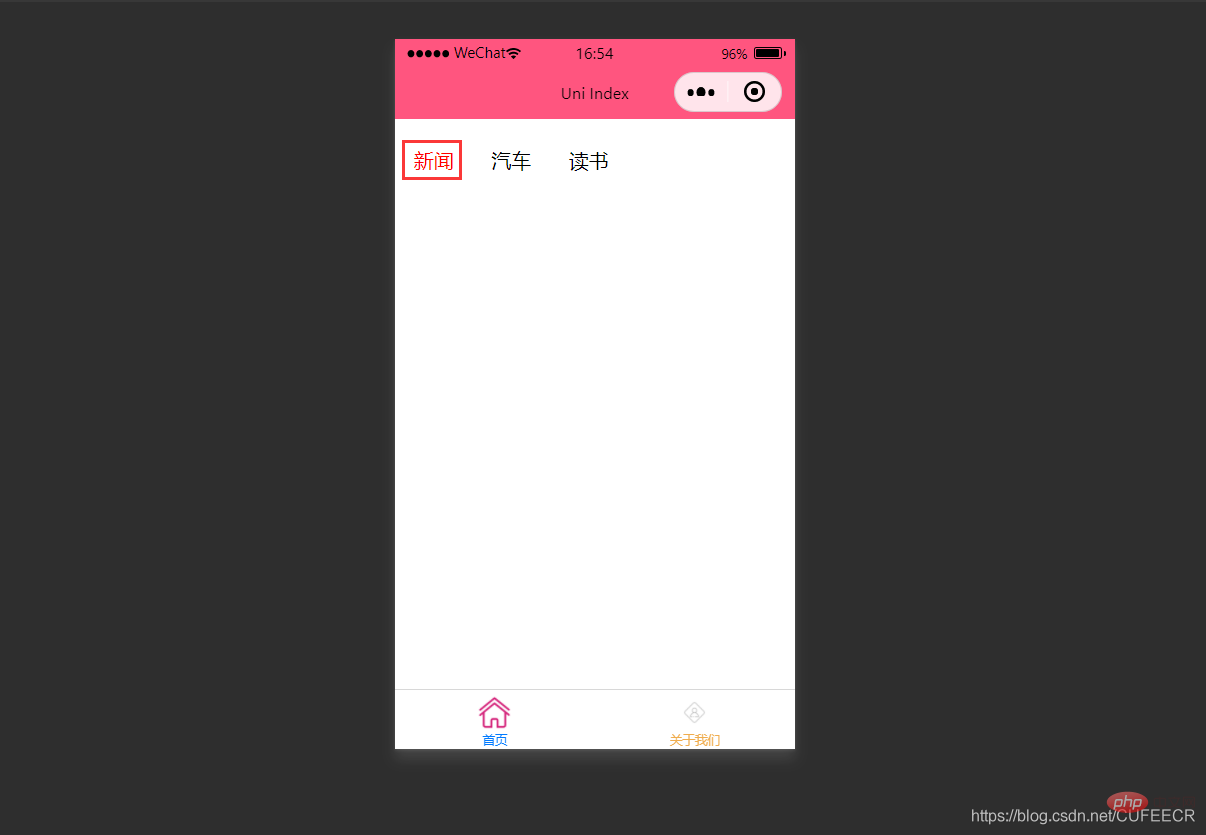
此时,第1个导航栏变为红色。
进一步实现点击时,颜色动态变化,如下:
<template>
<view>
<view v-for="(item, index) in menus" class="menu" :class="[activeIndex==index?'menuActive':'']" @click="menuClick" :id="index">
{{item}} </view>
</view></template><script>
var _self;
export default {
data() {
return {
menus: [
'新闻', '汽车', '读书'
],
activeIndex: 0
}
},
onLoad() {
_self = this
},
onShow() {
console.log('index onshow')
},
onHide() {
console.log('index onhide')
},
methods: {
menuClick: function(e){
var aid = e.target.id;
console.log(aid);
_self.activeIndex = aid;
}
}
}</script><style>
.menu {
padding: 10px;
float: left;
margin: 5px;
line-height: 36px;
}
.menuActive {
color: #FF0000 !important;
}</style>
使用了事件来达到动态切换的效果。
显示: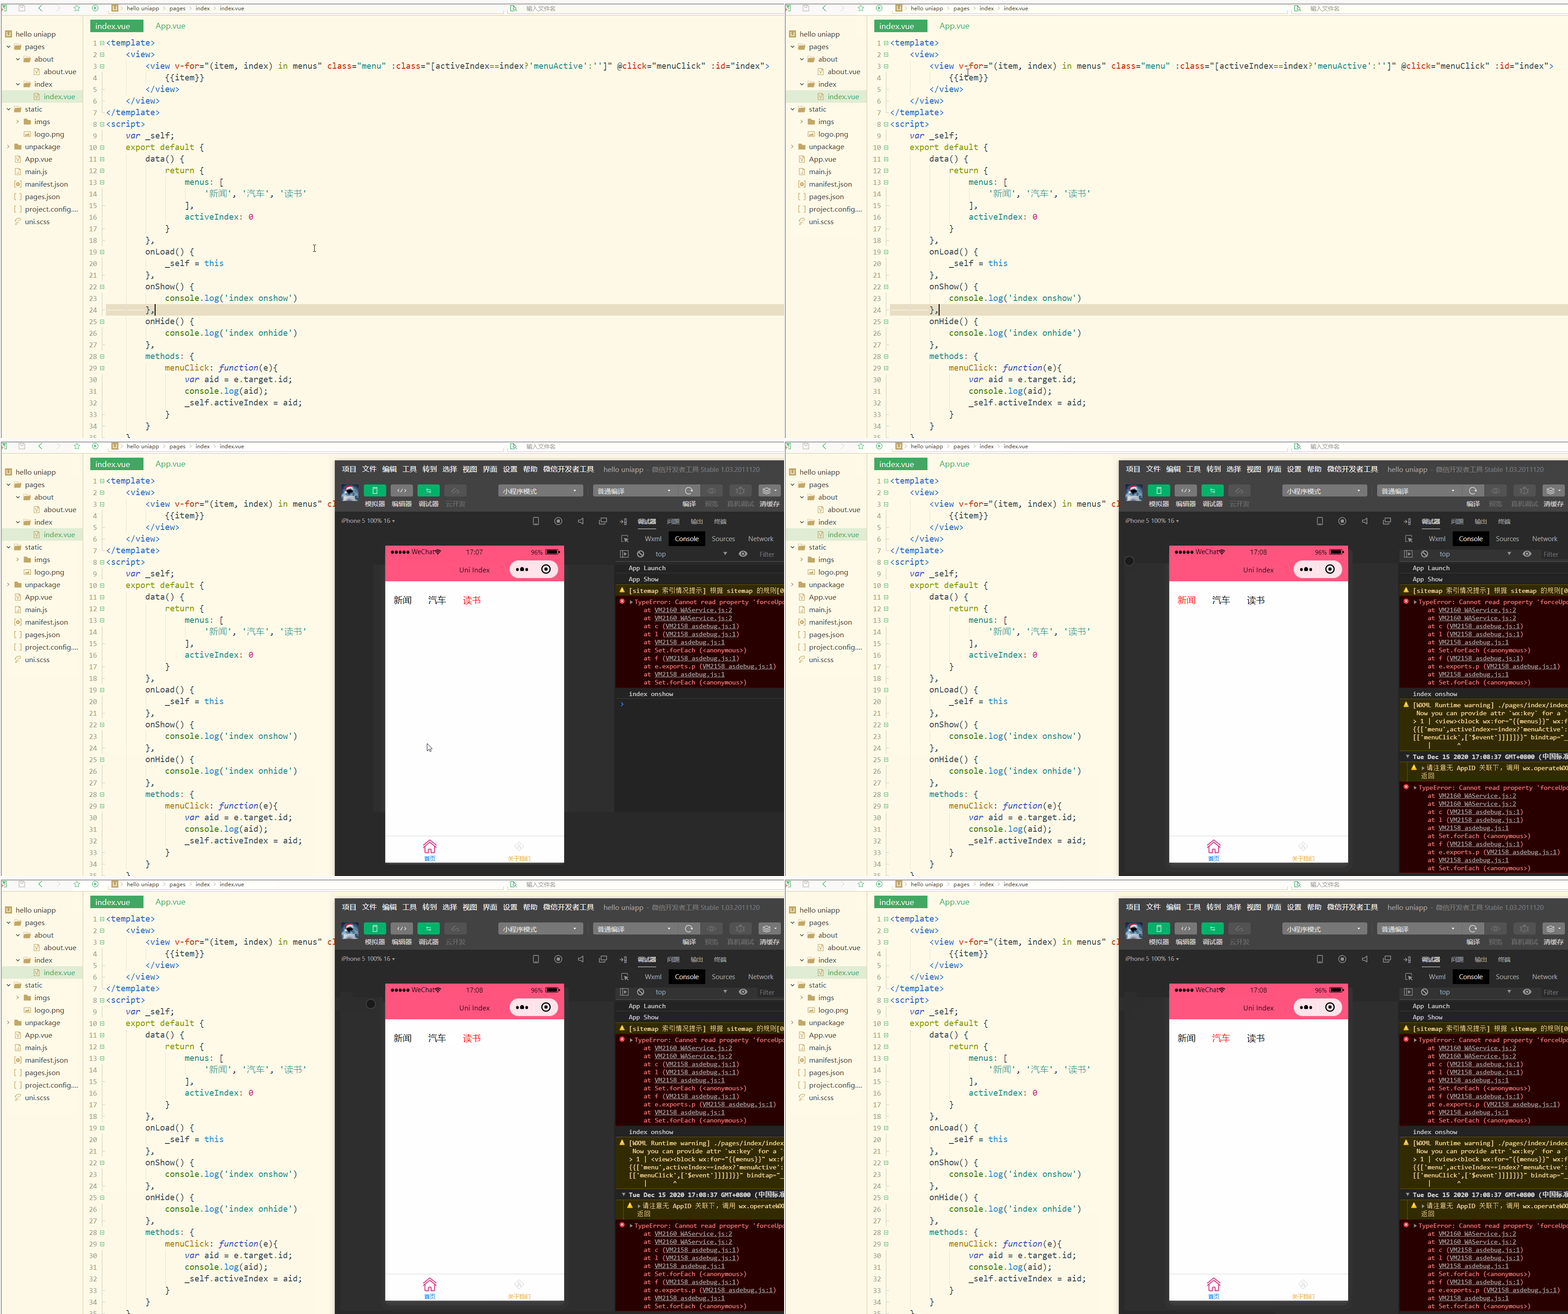
可以看到,点击不同的导航栏实现了颜色同步变化的效果。
三、事件和事件绑定
1.uni-app事件
事件映射表定义了WEB事件和uni-app事件之间的对应关系,具体如下:
| Web事件 | uni-app事件 | 说明 |
|---|---|---|
| click | ‘tap’ | 被点击 |
| touchstart | ‘touchstart’ | 手指开始在元素上触摸时 |
| touchmove | ‘touchmove’ | 移动 |
| touchcancel | ‘touchcancel’ | 取消 |
| touchend | ‘touchend’ | 结束 |
| tap | ‘tap’ | 单机 |
| longtap | ‘longtap’ | 长按 |
| input | ‘input’ | 输入 |
| change | ‘change’ | 改变 |
| submit | ‘submit’ | 表单提交 |
| blur | ‘blur’ | 失焦 |
| focus | ‘focus’ | 聚焦 |
| reset | ‘reset’ | 表单重置 |
| confirm | ‘confirm’ | 确认 |
| columnchange | ‘columnchange’ | 字段变化 |
| linechange | ‘linechange’ | 行比那花 |
| error | ‘error’ | 错误 |
| scrolltoupper | ‘scrolltoupper’ | 滚动到顶部 |
| scrolltolower | ‘scrolltolower’ | 滚动到底部 |
| scroll | ‘scroll’ | 滚动 |
说明:
(1)在 input 和 textarea 中 change 事件会被转为 blur 事件;
(2)列表中没有的原生事件也可以使用,例如map组件的regionchange 事件直接在组件上添加@regionchange修饰即可,同时这个事件也非常特殊,它的 event type 有 begin 和 end 两个,导致我们无法在handleProxy 中区分到底是什么事件,所以在监听此类事件的时候同时监听事件名和事件类型,即<map @regionchange="functionName" @end="functionName" @begin="functionName"><map>;
(3)由于平台的差异,bind 和 catch 事件同时绑定时,只会触发 bind,catch 不会被触发,使用时需要注意。
(4)件修饰符:
- 使用stop会阻止冒泡,但是同时绑定了一个非冒泡事件,会导致该元素上的 catchEventName 失效;
- prevent 可以直接结束事件,因为uni-app里没有什么默认事件,比如 submit 并不会跳转页面;
- self 没有可以判断的标识;
- once 也不能做,因为uni-app没有 removeEventListener, 虽然可以直接在 handleProxy 中处理,但是并不优雅;
(5)按键修饰符:
uni-app运行在手机端,没有键盘事件,所以不支持按键修饰符。
2.事件绑定
使用@对元素进行事件绑定,当事件被触发时,会导致相应的操作。
index.vue如下:
<template>
	<view>
		<view class="demo" @click="clickTest" @longtap="longtap"></view>
	</view></template><script>
	var _self;
	export default {
		data() {
			return {
			}
		},
		onLoad() {
			_self = this
		},
		onShow() {
			console.log('index onshow')
		},
		onHide() {
			console.log('index onhide')
		},
		methods: {
			clickTest : function(e){
				console.log("click")
			},
			longtap : function(e){
				console.log("longtap")
			},
		}
	}</script><style>
	.demo {
		width: 600rpx;
		height: 600rpx;
		background: #DD524D;
	}</style>
显示: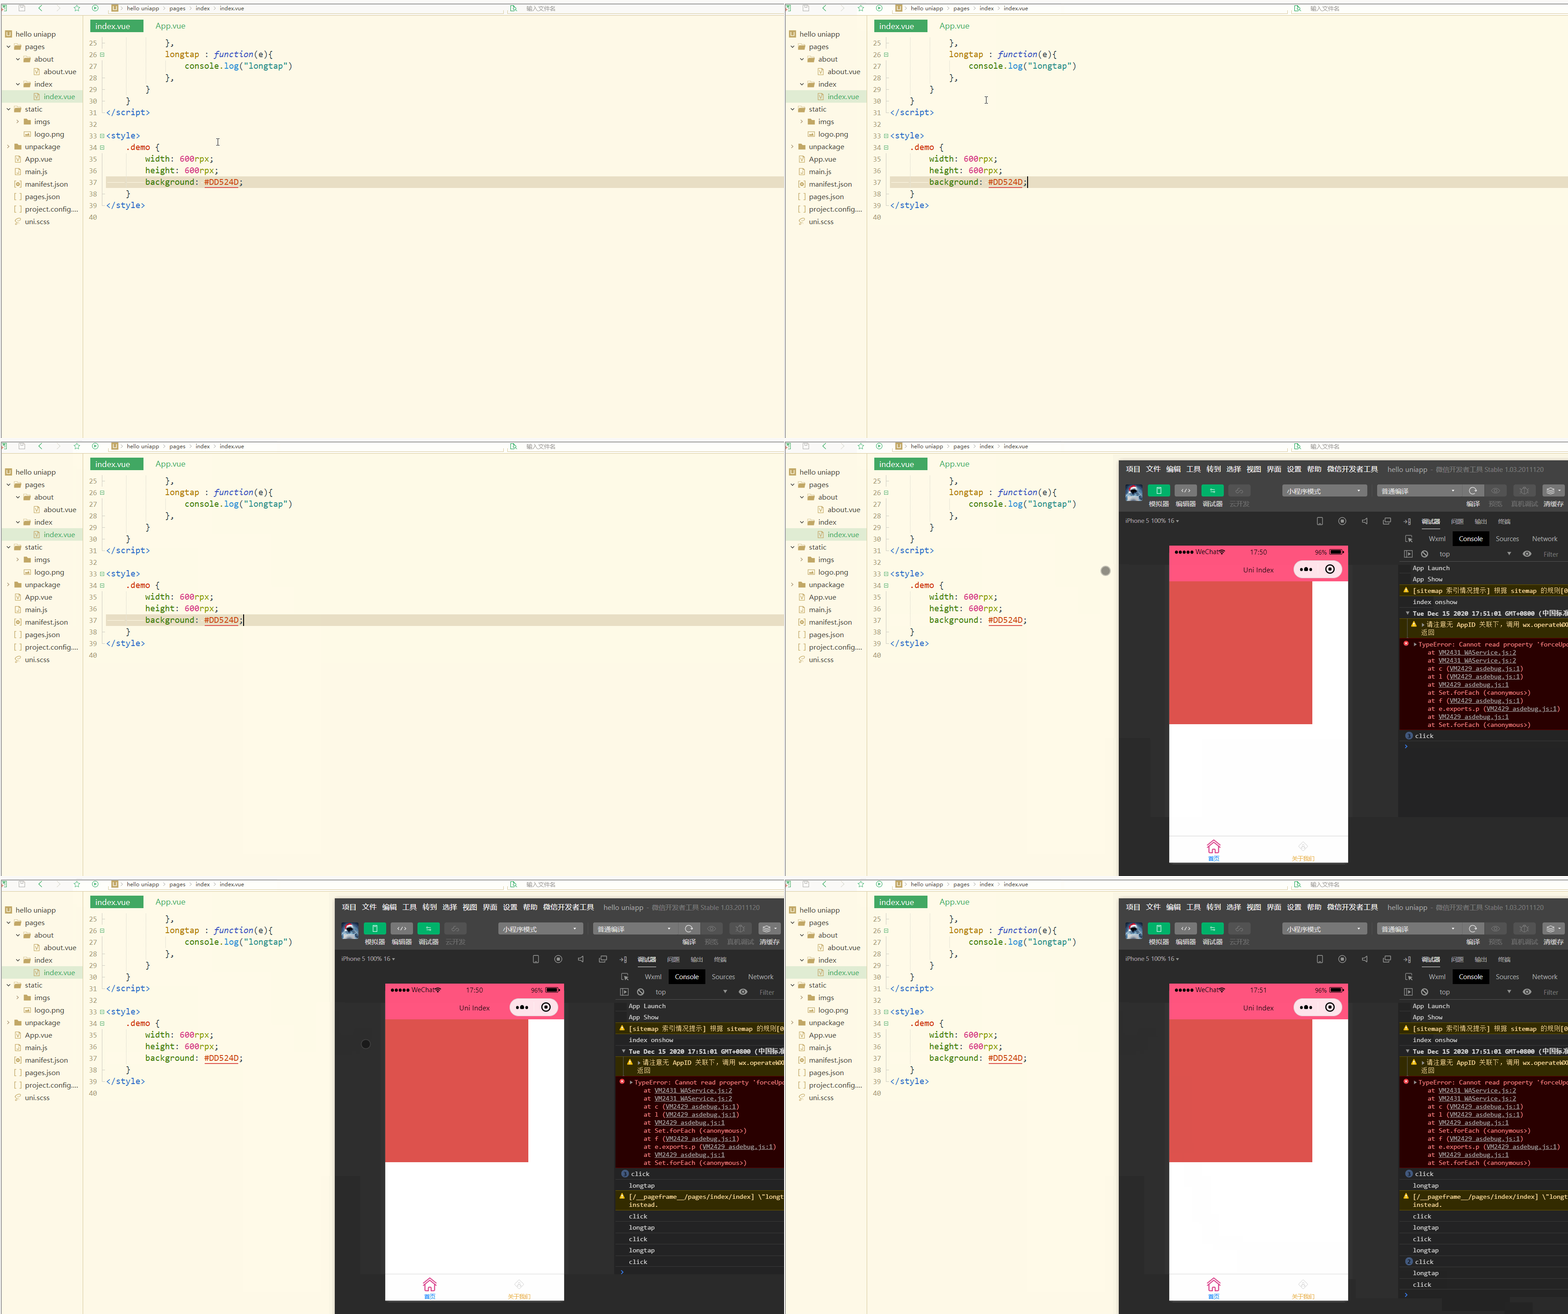
可以看到,在进行点击和长按时,会触发不同的事件、执行不同的操作。
可以在小程序中观察对应事件对象,并利用此对象获取更多信息。
3.事件传参
在触发事件时,还可以传入动态参数。
如下:
<template>
	<view>
		<view v-for="(item, index) in students" class="persons" @click="menuClick" v-bind:id="index">{{index}} - {{item.name}}</view>
	</view></template><script>
	var _self;
	export default {
		data() {
			return {
				students: [{
						name: "张三",
						age: 18
					},
					{
						name: "李四",
						age: 20
					}
				]
			}
		},
		onLoad() {
			_self = this
		},
		onShow() {
			console.log('index onshow')
		},
		onHide() {
			console.log('index onhide')
		},
		methods: {
			menuClick: function(e) {
				console.log(e);
				console.log(e.target.id);
			},
		}
	}</script><style>
	.demo {
		width: 600rpx;
		height: 600rpx;
		background: #DD524D;
	}</style>
显示: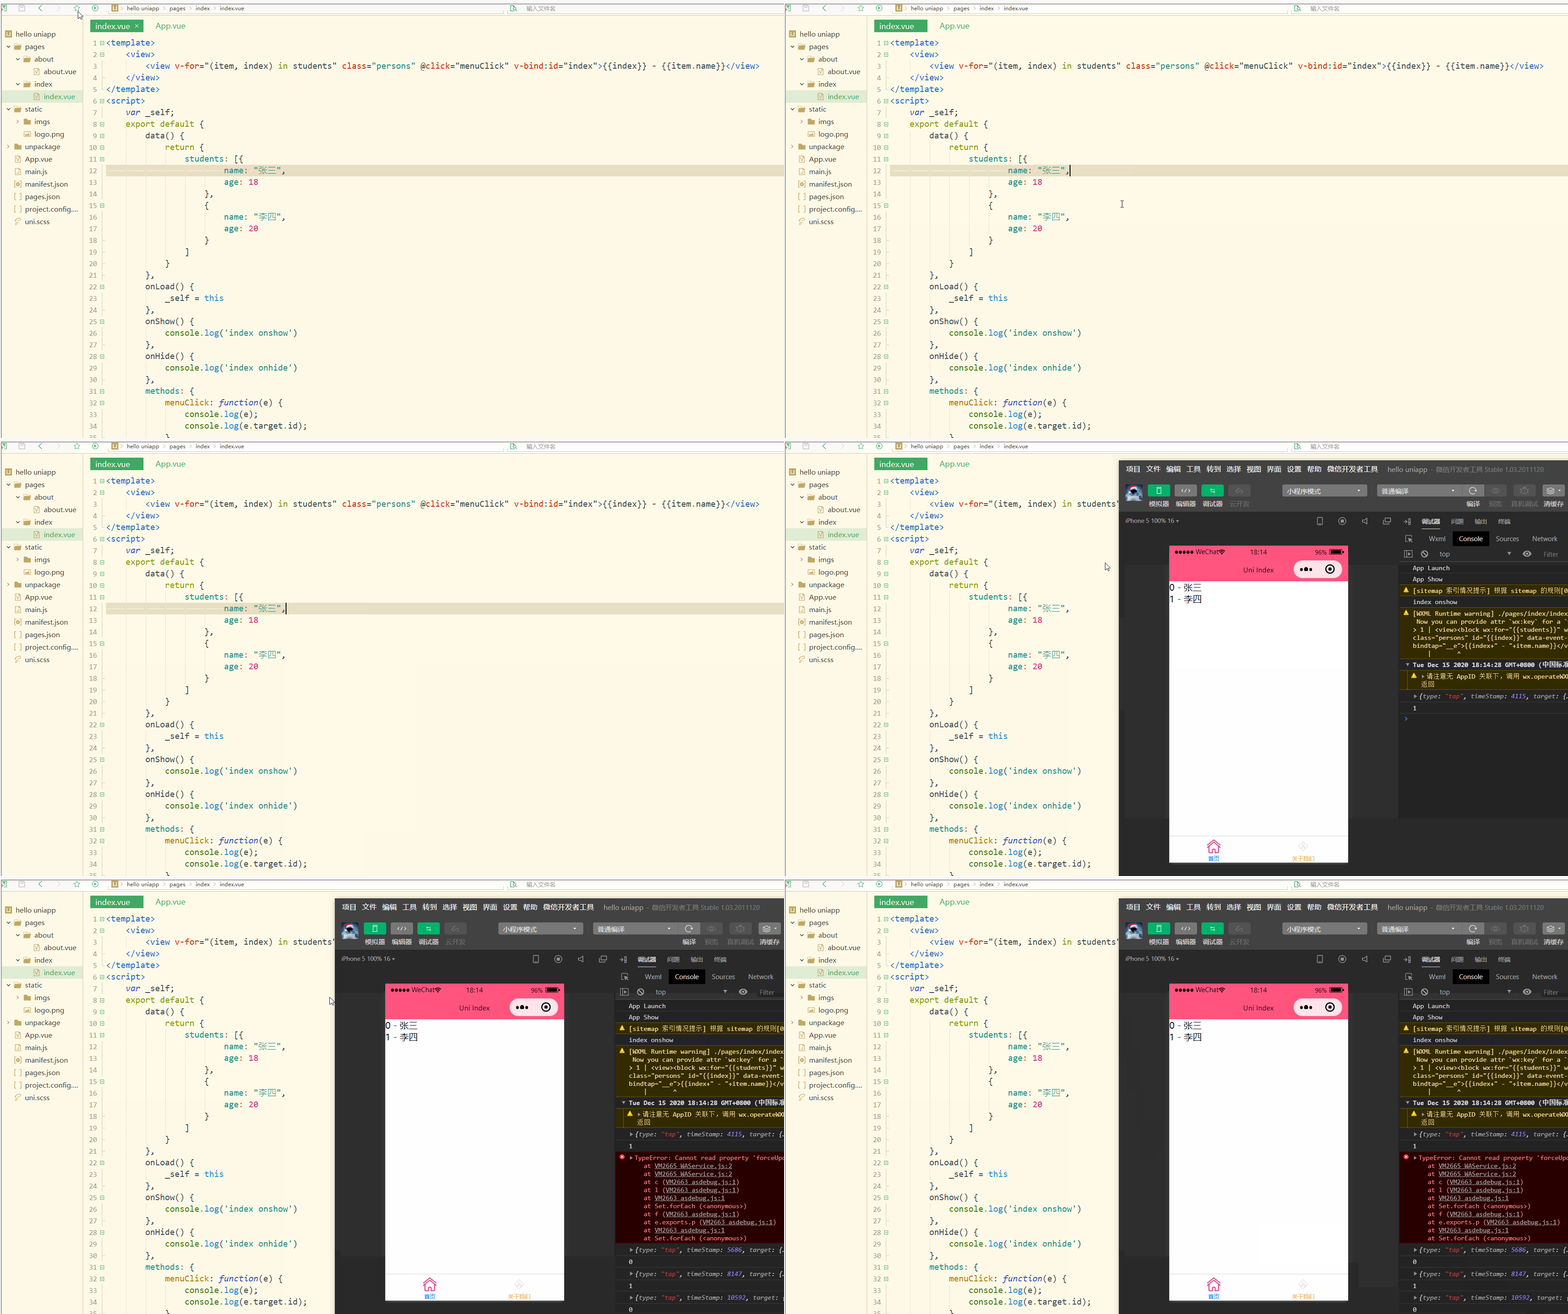
可以看到,在进行点击时,控制台打印出了事件对象和e.target.id的值。
再如:
<template>
	<view>
		<view class="demo" id="outid" @click="clickTest" @longtap="longtap">
			<view id="inid" style="width: 400rpx;height: 400rpx;background: #007AFF;"></view>
		</view>
	</view></template><script>
	var _self;
	export default {
		data() {
			return {
			}
		},
		onLoad() {
			_self = this
		},
		onShow() {
			console.log('index onshow')
		},
		onHide() {
			console.log('index onhide')
		},
		methods: {
			clickTest : function(e){
				console.log(e.currentTarget.id)
				console.log(e.target.id)
			},
			longtap : function(e){
				console.log("longtap")
			},
		}
	}</script><style>
	.demo {
		width: 600rpx;
		height: 600rpx;
		background: #DD524D;
	}</style>
显示: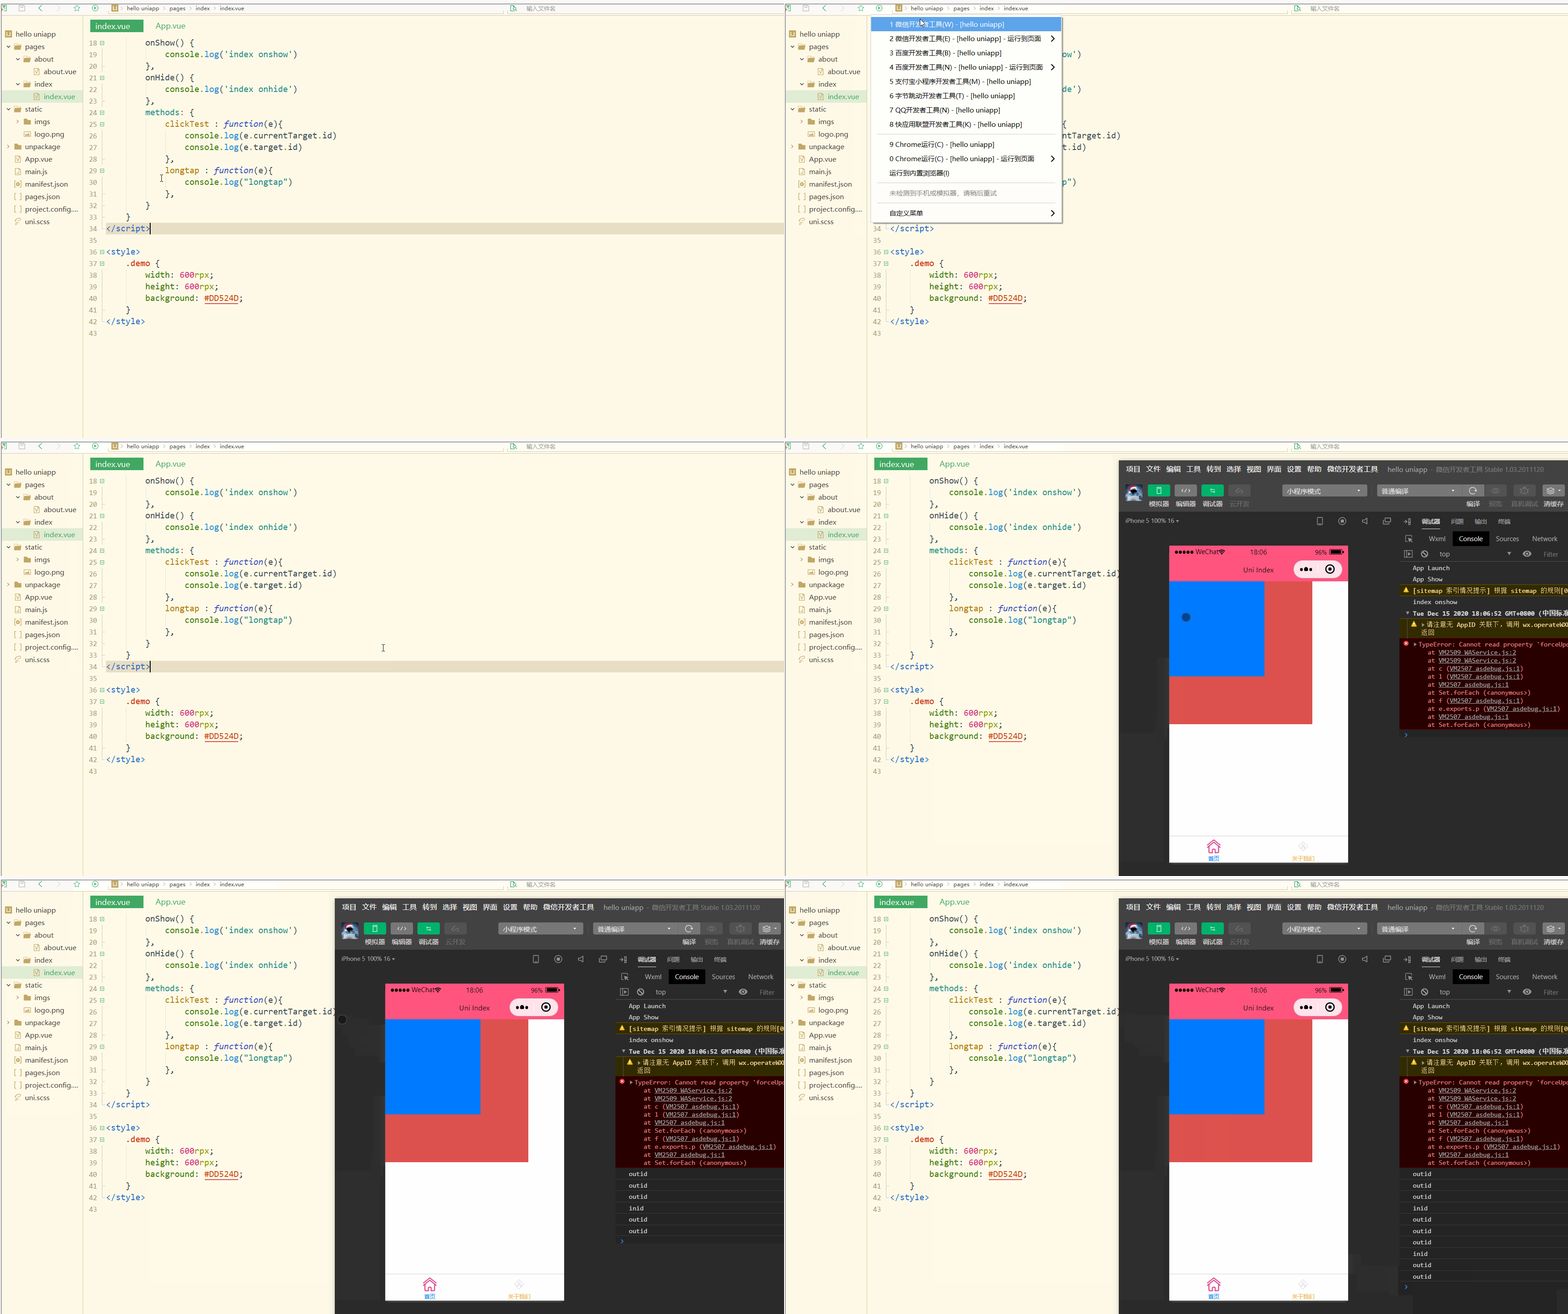
可以看到,在点击外部红色区域时,打印的两个id值相同;
而在点击内部蓝色区域时,e.target变为内部的view元素,所以打印出的也是inid,所以在使用属性传参时尽量使用e.currentTarget。
总结
在uni-app中,不论是对于数据(变量),还是对于以class或style定义的样式,亦或定义的事件,都可以进行动态绑定、同步变化,这些特性有利于更高效地开发出所需功能,大大降低了开发成本。
以上がuni-app 入門チュートリアル: データ バインディング、スタイル バインディング、イベント処理の詳細内容です。詳細については、PHP 中国語 Web サイトの他の関連記事を参照してください。

