ホームページ >ウェブフロントエンド >CSSチュートリアル >CSSを使用してダイアログバブルを作成する方法
CSSを使用してダイアログバブルを作成する方法
- 不言オリジナル
- 2018-12-07 11:31:594717ブラウズ
WeChat や QQ を通じて他のユーザーとチャットすると、ダイアログ バブルが表示されます。では、このダイアログ バブルはどのように実装されるのでしょうか。この記事ではよく見かけるダイアログバブルをCSSを使って作成する方法を紹介します。具体的な内容を見ていきましょう。
まず、作成する必要があるダイアログ ボックスの効果を見てみましょう
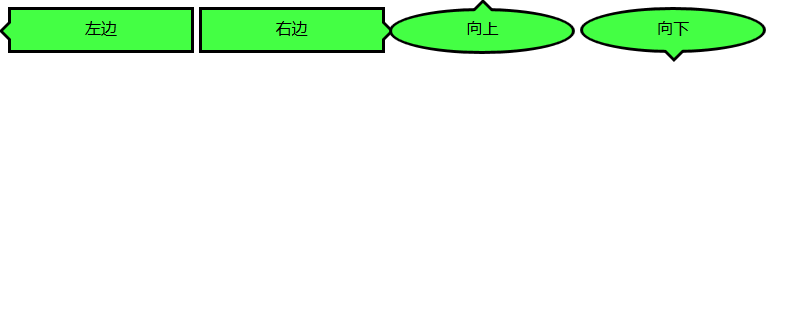
次に、これらのタイプのダイアログを見てみましょうバブルの実装方法
見てみましょう左向き矢印のダイアログバブルの実装方法
まずフレームを作成する必要があります
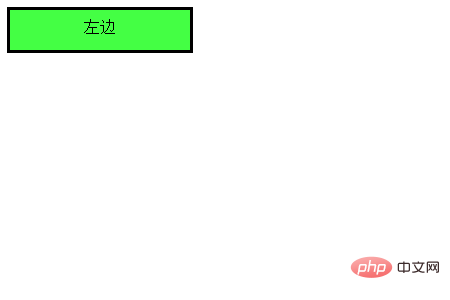
コードは次のとおりです
HTML コード
<div class="balloon-left">
左边
</div>
CSS コード
 .balloon-left {
  position: relative;
  display: inline-block;
  padding: 0 15px;
  width: auto;
  min-width: 150px;
  height: 40px;
  line-height: 34px;
  text-align: center;
  background: #44FF44;
  border: 3px solid #000000;
  z-index: 0;
}
次に、:before を使用して次のようにします。矢印の部分と:の後に矢印を作成します。 側面の
#CSS コード
.balloon-left:before {
  border-style: solid;
  border-width: 10px 10px 10px 0;
  border-color: transparent #44FF44 transparent transparent;
  content: "";
  position: absolute;
  top: 50%; left: -8px;
  margin-top: -9px;
  display: block;
  width: 0px;
  height: 0px;
  z-index: 0;
}
.balloon-left:after {
  border-style: solid;
  border-width: 11px 11px 11px 0;
  border-color: transparent #000000 transparent transparent;
  content: "";
  position: absolute;
  top: 50%; left: -12px;
  margin-top: -10px;
  display: block;
  width: 0px;
  height: 0px;
  z-index: -1;
}
は次のように実行されます。 ##これで最初のダイアログ バブルが完成です。
上記の方法を使用して、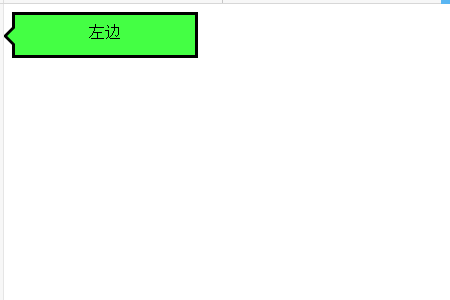 右向きの矢印を持つダイアログ バブルを作成しましょう
##コードは次のとおりです
HTML コード
<div class="balloon-right">
  右边
</div>
CSS コード
.balloon-right {
  position: relative;
  display: inline-block;
  padding: 0 15px;
  width: auto;
  min-width: 150px;
  height: 40px;
  line-height: 34px;
  text-align: center;
  background: #44FF44;
  border: 3px solid #000000;
  z-index: 0;
}
.balloon-right:before {
  border-style: solid;
  border-width: 10px 0 10px 10px;
  border-color: transparent transparent transparent #44FF44;
  content: "";
  position: absolute;
  top: 50%; right: -8px;
  margin-top: -9px;
  display: block;
  width: 0px;
  height: 0px;
  z-index: 0;
}
.balloon-right:after {
  border-style: solid;
  border-width: 11px 0 11px 11px;
  border-color: transparent transparent transparent #000000;
  content: "";
  position: absolute;
  top: 50%; right: -12px;
  margin-top: -10px;
  display: block;
  width: 0px;
  height: 0px;
  z-index: -1;
}
上記のコードを実行すると、次のような効果が得られます。右に向かうバブルです 最後に、矢印の左右のダイアログバブルについて話しましょう
バブルを滑らかにするために、border-radius 属性を使用する必要があります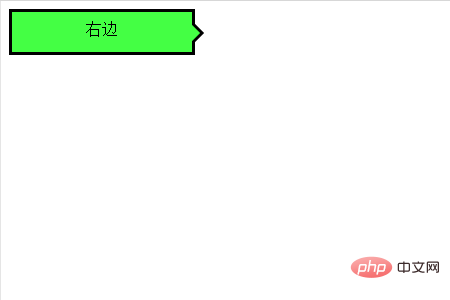
<div class="balloon-top">向上</div>
  <div class="balloon-bottom">向下</div>
CSS コード
.balloon-top {
  position: relative;
  display: inline-block;
  padding: 0 15px;
  width: auto;
  min-width: 150px;
  height: 40px;
  line-height: 32px;
  text-align: center;
  background: #44FF44;
  border: 3px solid #000000;
  z-index: 0;
  border-radius: 60%;
}
.balloon-top:before {
  border-style: solid;
  border-width: 0 10px 10px 10px;
  border-color: transparent transparent #44FF44 transparent;
  content: "";
  position: absolute;
  top: -8px; left: 50%;
  margin-left: -9px;
  display: block;
  width: 0px;
  height: 0px;
  z-index: 0;
}
.balloon-top:after {
  border-style: solid;
  border-width: 0 11px 11px 11px;
  border-color: transparent transparent #000000 transparent;
  content: "";
  position: absolute;
  top: -12px; left: 50%;
  margin-left: -10px;
  display: block;
  width: 0px;
  height: 0px;
  z-index: -1;
}
.balloon-bottom {
  position: relative;
  display: inline-block;
  padding: 0 15px;
  width: auto;
  min-width: 150px;
  height: 40px;
  line-height: 34px;
  text-align: center;
  background-color: #44FF44;
  border: 3px solid #000000;
  z-index: 0;
  border-radius: 60%;
}
.balloon-bottom:before {
  content: "";
  position: absolute;
  bottom: -8px; left: 50%;
  margin-left: -9px;
  width: 0px;
  height: 0px;
  border-style: solid;
  border-width: 10px 10px 0 10px;
  border-color: #44FF44 transparent transparent transparent;
  z-index: 0;
}
.balloon-bottom:after {
  border-style: solid;
  border-width: 11px 11px 0 11px;
  border-color: #000000 transparent transparent transparent;
  content: "";
  position: absolute;
  bottom: -12px; left: 50%;
  margin-left: -10px;
  width: 0px;
  height: 0px;
  z-index: -1;
}
効果は次のとおりです
#概要
CSS 部分は少し複雑ですが、理解できます。上記の例では、色や形をカスタマイズしてさまざまな種類のダイアログ バブルを作成しています。
この記事はここで終了です。さらに興味深いコンテンツについては、php 中国語 Web サイトの 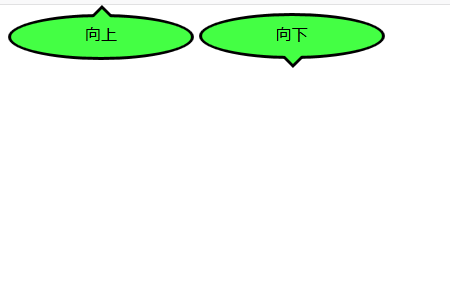 CSS ビデオ チュートリアル
以上がCSSを使用してダイアログバブルを作成する方法の詳細内容です。詳細については、PHP 中国語 Web サイトの他の関連記事を参照してください。
声明:
この記事の内容はネチズンが自主的に寄稿したものであり、著作権は原著者に帰属します。このサイトは、それに相当する法的責任を負いません。盗作または侵害の疑いのあるコンテンツを見つけた場合は、admin@php.cn までご連絡ください。

