ホームページ >ウェブフロントエンド >jsチュートリアル >Angular を始めましょう。ToDoList の Angular バージョンについて本当に知っていますか?
Angular を始めましょう。ToDoList の Angular バージョンについて本当に知っていますか?
- 寻∝梦オリジナル
- 2018-09-07 17:19:322079ブラウズ
この記事は angularjs を始めるための記事です まだ angularjs を理解していない場合は、今すぐこの記事を読んでください。
(1) 基本スキル Angular クイックスタートに取り組む前にドキュメントを読まないでください。 それから開始します~
- 前提条件
ノードをインストールします。バージョン、ノード 6.9.x と npm 3.x.x に注意する必要があります。
- 次に、Angular CLI をグローバルにインストールします。
npm install -g @angular/cli
- プロジェクトを作成します
ng new ng-first
- 開発サーバーを起動します
cd ng-first
ng serve --open
ブラウザが自動的に http://localhost:4200/ を開き、ng ロゴが表示されます(マニュアルおかしい)。
- コンポーネントの作成
この操作では、ファイルを直接作成し、ルート コンポーネントで構成します。
ng g component components/todolist

- サービスの作成
隊列を整えて、もう 1 つ。
ng g service services/storage
- 頑張って挨拶しましょう
国際慣例に従って、まずは挨拶しましょう!
カスタム コンポーネント app-todolist を app.component に挿入します。この名前は、todolist.component.ts のセレクター「app-todolist」によって異なります。<!--app.component.html--> <app-todolist></app-todolist>
続けて、todolist.component.ts で変数 msg を定義します。この構文は ts のデフォルトのルーチンです。(手で顔を覆う、実はTSが苦手です)
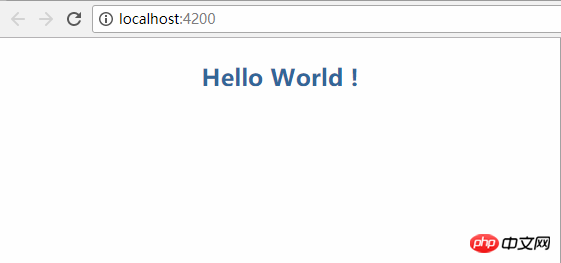
//todolist.component.ts export class TodolistComponent implements OnInit { public msg: any = 'Hello World !'; constructor() { } ngOnInit() { } }todolist.component.htmlにデータをバインド//todolist.component.html <h3> {{msg}} </h3>/*todolist.component.css*/ h3{ text-align: center; color: #369; }ブラウザに切り替えて、バンバンバン!
さて、本題にいきましょう。
なんと恥知らず)。
これは HTML です。todolist.component.html に直接コピーし、未使用のコードをいくつか削除します。<!--todolist.component.html--> <header> <section> <label>ToDoList</label> <input> </section> </header> <section> <h2>正在进行 <span>1</span> </h2> <ol> <li> <input> <p>记得吃药</p> <a>-</a> </li> </ol> <h2>已经完成 <span>1</span> </h2> <ul> <li> <input> <p>记得吃饭</p> <a>-</a> </li> </ul> </section> <footer> Copyright © 2014 todolist.cn <a>clear</a> </footer>これは CSS スタイルです。これを todolist.component.css に直接コピーし、本文のスタイルを src ディレクトリのstyles.css にコピーします。
/*todolist.component.css*/
header {height:50px;background:#333;background:rgba(47,47,47,0.98);}
section{margin:0 auto;}
label{float:left;width:100px;line-height:50px;color:#DDD;font-size:24px;cursor:pointer;font-family: "Helvetica Neue",Helvetica,Arial,sans-serif;}
header input{float:right;width:60%;height:24px;margin-top:12px;text-indent:10px;border-radius:5px;box-shadow: 0 1px 0 rgba(255,255,255,0.24), 0 1px 6px rgba(0,0,0,0.45) inset;border:none}
input:focus{outline-width:0}
h2{position:relative;}
span{position:absolute;top:2px;right:5px;display:inline-block;padding:0 5px;height:20px;border-radius:20px;background:#E6E6FA;line-height:22px;text-align:center;color:#666;font-size:14px;}
ol,ul{padding:0;list-style:none;}
li input{position:absolute;top:2px;left:10px;width:22px;height:22px;cursor:pointer;}
p{margin: 0;}
li p input{top:3px;left:40px;width:70%;height:20px;line-height:14px;text-indent:5px;font-size:14px;}
li{height:32px;line-height:32px;background: #fff;position:relative;margin-bottom: 10px;
    padding:0 45px;border-radius:3px;border-left: 5px solid #629A9C;box-shadow: 0 1px 2px rgba(0,0,0,0.07);}
ol li{cursor:move;}
ul li{border-left: 5px solid #999;opacity: 0.5;}
li a{position:absolute;top:2px;right:5px;display:inline-block;width:14px;height:12px;border-radius:14px;border:6px double #FFF;background:#CCC;line-height:14px;text-align:center;color:#FFF;font-weight:bold;font-size:14px;cursor:pointer;}
footer{color:#666;font-size:14px;text-align:center;}
footer a{color:#666;text-decoration:none;color:#999;}
@media screen and (max-device-width: 620px) {section{width:96%;padding:0 2%;}}
@media screen and (min-width: 620px) {section{width:600px;padding:0 10px;}}
rree コピーすると、ページは次のようになります。 
(マニュアル面白い)です。
/*src/styles.css*/
body {margin:0;padding:0;font-size:16px;background: #CDCDCD;}
//todolist.component.ts
export class TodolistComponent implements OnInit {
  public todo: any = '';
  public todoList = [];

  constructor() { }

  ngOnInit() {
  }

  addTodo(e) {
    let todoObj = {
      todo: this.todo,
      done: false
    }

    if (e.keyCode == 13) {  //表示回车按钮
      this.todoList.push(todoObj);
      this.todo = '';       //清空输入框
    }
  }
}
[(ngModel)]はAngular構文であり、todoを入力ボックスにバインドするために使用されます。 データ フローは双方向です。属性から入力ボックスへ、そして入力ボックスから属性に戻ります。 このステップで、コンソールはエラーを報告しました。 解決策は、FormsModule モジュールの使用を選択する必要があるということです。
<!--todolist.component.html--> <header> <section> <label>ToDoList</label> <input> </section> </header>ループに追加するものリストをループするための組み込み命令 *ngFor を追加します。
import { BrowserModule } from '@angular/platform-browser';
import { NgModule } from '@angular/core';
import { FormsModule } from '@angular/forms';  //NgModel lives here

@NgModule({

  imports: [
    BrowserModule,
    FormsModule  //import the FormsModule before binding with [(ngModel)]
  ],

})
追加されたアイテムがご覧になれます。 <h2>正在进行
<span>{{todoList.length}}</span>
</h2>
<ol>
<li>
<input>
<p>{{item.todo}}</p>
<a>-</a>
</li>
</ol>追加した項目と完了した項目を2つの配列に分割(または1つの配列に入れてControl) Doneの値を基に表示するかどうか)ですが、2つに分けた方が操作しやすいと思います。
<h2>正在进行
    <span>{{todoList.length}}</span>
  </h2>
  <ol>
    <li>
      <input>
      <p>{{item.todo}}</p>
      <a>-</a>
    </li>
  </ol>
已经完成
{{doneList.length}}
-
{{item.todo}}
-
待って、ページを更新してください。おっと、入力したばかりの項目が消えています。 (さらに詳しく知りたい場合は、PHP 中国語 Web サイト
AngularJS 開発マニュアル にアクセスして学習してください)
どこでも簡単に使用できるサービスを作成します。
  public doneList = [];  //再声明一个已完成的数组

  deleteTodo(index, done) {
    if (done) {
      this.todoList.splice(index, 1);
    } else {
      this.doneList.splice(index, 1);
    }
  }

  changeTodo(index, done) {
    if (done) {
      var tempTodo = this.todoList[index]
      this.doneList.push(tempTodo);
      this.todoList.splice(index, 1);
    } else {
      var tempDone = this.doneList[index]
      this.todoList.push(tempDone);
      this.doneList.splice(index, 1);
    }

  }
サービスを使用するには、それを注入するだけです。
//storage.service.ts
export class StorageService {

  constructor() { }

  setItem(key, value) {
    localStorage.setItem(key, JSON.stringify(value))
  }
  getItem(key) {
    return JSON.parse(localStorage.getItem(key))
  }

}
はい、簡単に楽しく使えます。 データをlocalStorageに保存しますカプセル化されたサービスを使用するには、this.storageを使用します。 各操作後にデータを保存します。ちょっと味気ないですね~
//todolist.component.ts
import { StorageService } from '../../services/storage.service'  //导入服务
...
constructor(private storage: StorageService) { } //注入服务
初期イベント OnInitインターフェースのフックメソッドはngOnInitと呼ばれ、Angularはコンポーネント作成直後にこれを呼び出します。 私の理解では、vueでのマウントに似ているということでしょうか? そうです
それでは完了です!还有页脚的clear按钮
<!--todolist.component.html-->
<footer>
  Copyright © 2014 todolist.cn
  <a>clear</a>
</footer>
clearData() {
    localStorage.clear();
    this.todoList = [];
    this.doneList = [];
  }
说在后面的话
还有拖拽排序的的功能,不写了。
好了,以上就是本篇文章的内容(想看更多就到PHP中文网AngularJS使用手册中学习),有问题的可以在下方留言提问。
以上がAngular を始めましょう。ToDoList の Angular バージョンについて本当に知っていますか?の詳細内容です。詳細については、PHP 中国語 Web サイトの他の関連記事を参照してください。


