
ホームページ >ウェブフロントエンド >jsチュートリアル >Angular 開発の実践サーバーサイドレンダリング_AngularJS
Angular 開発の実践サーバーサイドレンダリング_AngularJS

- 不言オリジナル
- 2018-03-31 17:25:581853ブラウズ
この記事は主に Angular 開発の実践のサーバーサイドレンダリングを紹介しています。非常に優れた内容なので、参考にさせていただきます。見てみましょう
Angular Universal
Angular は、サーバーサイドレンダリングのためのフロントエンドとバックエンドの同型ソリューションのセットを提供します。これは、Angular アプリケーションを実行するテクノロジーである Angular Universal (統合プラットフォーム) です。サーバー。
標準の Angular アプリケーションがブラウザーで実行され、ユーザーの操作に応じて DOM でページをレンダリングします。
Angular Universal は、サーバー側レンダリング (SSR) と呼ばれるプロセスを通じて、サーバー上に静的なアプリケーション ページを生成します。
これらのページを生成し、ブラウザーからの要求に応じて直接応答できます。 ページを HTML ファイルに事前生成し、それをサーバーの静的ファイルとして提供することもできます。
仕組み
ユニバーサル アプリケーションを作成するには、platform-server パッケージをインストールする必要があります。 platform-server パッケージは、サーバー側の DOM 実装、XMLHttpRequest、およびその他の低レベル機能を提供しますが、ブラウザーには依存しなくなりました。 platform-server 包。 platform-server 包提供了服务端的 DOM 实现、XMLHttpRequest 和其它底层特性,但不再依赖浏览器。
你要使用 platform-server 模块而不是 platform-browser 模块来编译这个客户端应用,并且在一个 Web 服务器上运行这个 Universal 应用。
服务器(下面的示例中使用的是 Node Express 服务器)会把客户端对应用页面的请求传给 renderModuleFactory 函数。
renderModuleFactory 函数接受一个模板 HTML 页面(通常是 index.html)、一个包含组件的 Angular 模块和一个用于决定该显示哪些组件的路由作为输入。
该路由从客户端的请求中传给服务器。 每次请求都会给出所请求路由的一个适当的视图。
renderModuleFactory 在模板中的 7ab1d477d2ef4cffc4b2f0ef9c222635 标记中渲染出哪个视图,并为客户端创建一个完成的 HTML 页面。
最后,服务器就会把渲染好的页面返回给客户端。
为什么要服务端渲染
三个主要原因:
帮助网络爬虫(SEO)
提升在手机和低功耗设备上的性能
迅速显示出第一个页面
帮助网络爬虫(SEO)
Google、Bing、百度、Facebook、Twitter 和其它搜索引擎或社交媒体网站都依赖网络爬虫去索引你的应用内容,并且让它的内容可以通过网络搜索到。
这些网络爬虫可能不会像人类那样导航到你的具有高度交互性的 Angular 应用,并为其建立索引。
Angular Universal 可以为你生成应用的静态版本,它易搜索、可链接,浏览时也不必借助 JavaScript。它也让站点可以被预览,因为每个 URL 返回的都是一个完全渲染好的页面。
启用网络爬虫通常被称为搜索引擎优化 (SEO)。
提升手机和低功耗设备上的性能
有些设备不支持 JavaScript 或 JavaScript 执行得很差,导致用户体验不可接受。 对于这些情况,你可能会需要该应用的服务端渲染、无 JavaScript 的版本。 虽然有一些限制,不过这个版本可能是那些完全没办法使用该应用的人的唯一选择。
快速显示首页
快速显示首页对于吸引用户是至关重要的。
如果页面加载超过了三秒中,那么 53% 的移动网站会被放弃。 你的应用需要启动的更快一点,以便在用户决定做别的事情之前吸引他们的注意力。
使用 Angular Universal,你可以为应用生成“着陆页”,它们看起来就和完整的应用一样。 这些着陆页是纯 HTML,并且即使 JavaScript 被禁用了也能显示。 这些页面不会处理浏览器事件,不过它们可以用 routerLink 在这个网站中导航。
在实践中,你可能要使用一个着陆页的静态版本来保持用户的注意力。 同时,你也会在幕后加载完整的 Angular 应用。 用户会认为着陆页几乎是立即出现的,而当完整的应用加载完之后,又可以获得完全的交互体验。
示例解析
下面将基于我在GitHub上的示例项目 angular-universal-starter 来进行讲解。
这个项目与第一篇的示例项目一样,都是基于 Angular CLI进行开发构建的,因此它们的区别只在于服务端渲染所需的那些配置上。
安装工具
在开始之前,下列包是必须安装的(示例项目均已配置好,只需 npm install 即可):
@angular/platform-server- Universal 的服务端元件。-
クライアント アプリケーションをコンパイルし、Web サーバー上でユニバーサル アプリケーションを実行するには、@nguniversal/module-map-ngfactory-loaderplatform-browserモジュールの代わりにplatform-serverモジュールを使用する必要があります。 🎜🎜サーバー (以下の例では Node Express サーバーが使用されています) は、アプリケーション ページに対するクライアントのリクエストをrenderModuleFactory関数に渡します。 🎜🎜renderModuleFactory 関数は、テンプレート HTML ページ (通常はindex.html)、コンポーネントを含む Angular モジュール、およびどのコンポーネントを表示するかを決定するルートを入力として受け入れます。 🎜🎜このルートはクライアントのリクエストからサーバーに渡されます。 各リクエストは、リクエストされたルートの適切なビューを提供します。 🎜🎜renderModuleFactory は、テンプレートの7ab1d477d2ef4cffc4b2f0ef9c222635タグ内のビューをレンダリングし、クライアント用の完成した HTML ページを作成します。 🎜🎜最後に、サーバーはレンダリングされたページをクライアントに返します。 🎜🎜🎜サーバーサイドレンダリングを行う理由🎜🎜🎜主な理由は 3 つあります: 🎜- 🎜 Web クローラーを支援 (SEO) 🎜
- 🎜 パフォーマンスの向上携帯電話や低電力デバイスで🎜
- 🎜最初のページを素早く表示🎜
npm installだけです): 🎜- 🎜
@angular/platform-server- Universal のサーバー コンポーネント。 🎜 - 🎜
@nguniversal/module-map-ngfactory-loader- サーバー側のレンダリング環境で遅延読み込みを処理するために使用されます。 🎜 @nguniversal/express-engine- Universal 应用的 Express 引擎。ts-loader- 用于对服务端应用进行转译。express- Node Express 服务器
使用下列命令安装它们:
npm install --save @angular/platform-server @nguniversal/module-map-ngfactory-loader ts-loader @nguniversal/express-engine express
项目配置
配置工作有:
创建服务端应用模块:src/app/app.server.module.ts
修改客户端应用模块:src/app/app.module.ts
创建服务端应用的引导程序文件:src/main.server.ts
修改客户端应用的引导程序文件:src/main.ts
创建 TypeScript 的服务端配置:src/tsconfig.server.json
修改 @angular/cli 的配置文件:.angular-cli.json
创建 Node Express 的服务程序:server.ts
创建服务端预渲染的程序:prerender.ts
创建 Webpack 的服务端配置:webpack.server.config.js
1、创建服务端应用模块:
src/app/app.server.module.tsimport { NgModule } from '@angular/core'; import { ServerModule, ServerTransferStateModule } from '@angular/platform-server'; import { ModuleMapLoaderModule } from '@nguniversal/module-map-ngfactory-loader'; import { AppBrowserModule } from './app.module'; import { AppComponent } from './app.component'; // 可以注册那些在 Universal 环境下运行应用时特有的服务提供商 @NgModule({ imports: [ AppBrowserModule, // 客户端应用的 AppModule ServerModule, // 服务端的 Angular 模块 ModuleMapLoaderModule, // 用于实现服务端的路由的惰性加载 ServerTransferStateModule, // 在服务端导入,用于实现将状态从服务器传输到客户端 ], bootstrap: [AppComponent], }) export class AppServerModule { }服务端应用模块(习惯上叫作 AppServerModule)是一个 Angular 模块,它包装了应用的根模块 AppModule,以便 Universal 可以在你的应用和服务器之间进行协调。 AppServerModule 还会告诉 Angular 再把你的应用以 Universal 方式运行时,该如何引导它。
2、修改客户端应用模块:
src/app/app.module.ts@NgModule({ imports: [ AppRoutingModule, BrowserModule.withServerTransition({appId: 'my-app'}), TransferHttpCacheModule, // 用于实现服务器到客户端的请求传输缓存,防止客户端重复请求服务端已完成的请求 BrowserTransferStateModule, // 在客户端导入,用于实现将状态从服务器传输到客户端 HttpClientModule ], declarations: [ AppComponent, HomeComponent ], providers: [], bootstrap: [AppComponent] }) export class AppBrowserModule { constructor(@Inject(PLATFORM_ID) private platformId: Object, @Inject(APP_ID) private appId: string) { // 判断运行环境为客户端还是服务端 const platform = isPlatformBrowser(platformId) ? 'in the browser' : 'on the server'; console.log(`Running ${platform} with appId=${appId}`); } }将
NgModule的元数据中 BrowserModule 的导入改成 BrowserModule.withServerTransition({appId: 'my-app'}),Angular 会把 appId 值(它可以是任何字符串)添加到服务端渲染页面的样式名中,以便它们在客户端应用启动时可以被找到并移除。此时,我们可以通过依赖注入(
@Inject(PLATFORM_ID)及@Inject(APP_ID))取得关于当前平台和 appId 的运行时信息:constructor(@Inject(PLATFORM_ID) private platformId: Object, @Inject(APP_ID) private appId: string) { // 判断运行环境为客户端还是服务端 const platform = isPlatformBrowser(platformId) ? 'in the browser' : 'on the server'; console.log(`Running ${platform} with appId=${appId}`); }3、创建服务端应用的引导程序文件:
src/main.server.ts该文件导出服务端模块:
export { AppServerModule } from './app/app.server.module';4、修改客户端应用的引导程序文件:
src/main.ts监听 DOMContentLoaded 事件,在发生 DOMContentLoaded 事件时运行我们的代码,以使 TransferState 正常工作
import { enableProdMode } from '@angular/core';
import { platformBrowserDynamic } from '@angular/platform-browser-dynamic';

import { AppBrowserModule } from './app/app.module';
import { environment } from './environments/environment';

if (environment.production) {
  enableProdMode();
}

// 在 DOMContentLoaded 时运行我们的代码,以使 TransferState 正常工作
document.addEventListener('DOMContentLoaded', () => {
  platformBrowserDynamic().bootstrapModule(AppBrowserModule);
});
5、创建 TypeScript 的服务端配置:
src/tsconfig.server.json{ "extends": "../tsconfig.json", "compilerOptions": { "outDir": "../out-tsc/app", "baseUrl": "./", "module": "commonjs", "types": [ "node" ] }, "exclude": [ "test.ts", "**/*.spec.ts" ], "angularCompilerOptions": { "entryModule": "app/app.server.module#AppServerModule" } }与
tsconfig.app.json的差异在于:module 属性必须是 commonjs,这样它才能被 require() 方法导入你的服务端应用。
angularCompilerOptions 部分有一些面向 AOT 编译器的选项:
entryModule - 服务端应用的根模块,其格式为 path/to/file#ClassName。
6、修改 @angular/cli 的配置文件:
.angular-cli.json在
apps下添加:{ "platform": "server", "root": "src", "outDir": "dist/server", "assets": [ "assets", "favicon.ico" ], "index": "index.html", "main": "main.server.ts", "test": "test.ts", "tsconfig": "tsconfig.server.json", "testTsconfig": "tsconfig.spec.json", "prefix": "", "styles": [ "styles.scss" ], "scripts": [], "environmentSource": "environments/environment.ts", "environments": { "dev": "environments/environment.ts", "prod": "environments/environment.prod.ts" } }7、创建 Node Express 的服务程序:
server.tsimport 'zone.js/dist/zone-node'; import 'reflect-metadata'; import { enableProdMode } from '@angular/core'; import * as express from 'express'; import { join } from 'path'; import { readFileSync } from 'fs'; // Faster server renders w/ Prod mode (dev mode never needed) enableProdMode(); // Express server const app = express(); const PORT = process.env.PORT || 4000; const DIST_FOLDER = join(process.cwd(), 'dist'); // Our index.html we'll use as our template const template = readFileSync(join(DIST_FOLDER, 'browser', 'index.html')).toString(); // * NOTE :: leave this as require() since this file is built Dynamically from webpack const {AppServerModuleNgFactory, LAZY_MODULE_MAP} = require('./dist/server/main.bundle'); // Express Engine import { ngExpressEngine } from '@nguniversal/express-engine'; // Import module map for lazy loading import { provideModuleMap } from '@nguniversal/module-map-ngfactory-loader'; // Our Universal express-engine (found @ https://github.com/angular/universal/tree/master/modules/express-engine) app.engine('html', ngExpressEngine({ bootstrap: AppServerModuleNgFactory, providers: [ provideModuleMap(LAZY_MODULE_MAP) ] })); app.set('view engine', 'html'); app.set('views', join(DIST_FOLDER, 'browser')); /* - Example Express Rest API endpoints - app.get('/api/**', (req, res) => { }); */ // Server static files from /browser app.get('*.*', express.static(join(DIST_FOLDER, 'browser'), { maxAge: '1y' })); // ALl regular routes use the Universal engine app.get('*', (req, res) => { res.render('index', {req}); }); // Start up the Node server app.listen(PORT, () => { console.log(`Node Express server listening on http://localhost:${PORT}`); });8、创建服务端预渲染的程序:
prerender.ts// Load zone.js for the server. import 'zone.js/dist/zone-node'; import 'reflect-metadata'; import { readFileSync, writeFileSync, existsSync, mkdirSync } from 'fs'; import { join } from 'path'; import { enableProdMode } from '@angular/core'; // Faster server renders w/ Prod mode (dev mode never needed) enableProdMode(); // Import module map for lazy loading import { provideModuleMap } from '@nguniversal/module-map-ngfactory-loader'; import { renderModuleFactory } from '@angular/platform-server'; import { ROUTES } from './static.paths'; // * NOTE :: leave this as require() since this file is built Dynamically from webpack const {AppServerModuleNgFactory, LAZY_MODULE_MAP} = require('./dist/server/main.bundle'); const BROWSER_FOLDER = join(process.cwd(), 'browser'); // Load the index.html file containing referances to your application bundle. const index = readFileSync(join('browser', 'index.html'), 'utf8'); let previousRender = Promise.resolve(); // Iterate each route path ROUTES.forEach(route => { const fullPath = join(BROWSER_FOLDER, route); // Make sure the directory structure is there if (!existsSync(fullPath)) { mkdirSync(fullPath); } // Writes rendered HTML to index.html, replacing the file if it already exists. previousRender = previousRender.then(_ => renderModuleFactory(AppServerModuleNgFactory, { document: index, url: route, extraProviders: [ provideModuleMap(LAZY_MODULE_MAP) ] })).then(html => writeFileSync(join(fullPath, 'index.html'), html)); });9、创建 Webpack 的服务端配置:
webpack.server.config.jsUniversal 应用不需要任何额外的 Webpack 配置,Angular CLI 会帮我们处理它们。但是由于本例子的 Node Express 的服务程序是 TypeScript 应用(server.ts及prerender.ts),所以要使用 Webpack 来转译它。这里不讨论 Webpack 的配置,需要了解的移步 Webpack官网
// Work around for https://github.com/angular/angular-cli/issues/7200

const path = require('path');
const webpack = require('webpack');

module.exports = {
  entry: {
    server: './server.ts', // This is our Express server for Dynamic universal
    prerender: './prerender.ts' // This is an example of Static prerendering (generative)
  },
  target: 'node',
  resolve: {extensions: ['.ts', '.js']},
  externals: [/(node_modules|main\..*\.js)/,], // Make sure we include all node_modules etc
  output: {
    path: path.join(__dirname, 'dist'), // Puts the output at the root of the dist folder
    filename: '[name].js'
  },
  module: {
    rules: [
      {test: /\.ts$/, loader: 'ts-loader'}
    ]
  },
  plugins: [
    new webpack.ContextReplacementPlugin(
      /(.+)?angular(\\|\/)core(.+)?/, // fixes WARNING Critical dependency: the request of a dependency is an expression
      path.join(__dirname, 'src'), // location of your src
      {} // a map of your routes
    ),
    new webpack.ContextReplacementPlugin(
      /(.+)?express(\\|\/)(.+)?/, // fixes WARNING Critical dependency: the request of a dependency is an expression
      path.join(__dirname, 'src'),
      {}
    )
  ]
};
测试配置
通过上面的配置,我们就制作完成一个可在服务端渲染的 Angular Universal 应用。
在 package.json 的 scripts 区配置 build 和 serve 有关的命令:
{
  "scripts": {
    "ng": "ng",
    "start": "ng serve -o",
    "ssr": "npm run build:ssr && npm run serve:ssr",
    "prerender": "npm run build:prerender && npm run serve:prerender",
    "build": "ng build",
    "build:client-and-server-bundles": "ng build --prod && ng build --prod --app 1 --output-hashing=false",
    "build:prerender": "npm run build:client-and-server-bundles && npm run webpack:server && npm run generate:prerender",
    "build:ssr": "npm run build:client-and-server-bundles && npm run webpack:server",
    "generate:prerender": "cd dist && node prerender",
    "webpack:server": "webpack --config webpack.server.config.js --progress --colors",
    "serve:prerender": "cd dist/browser && http-server",
    "serve:ssr": "node dist/server"
  }
}
开发只需运行
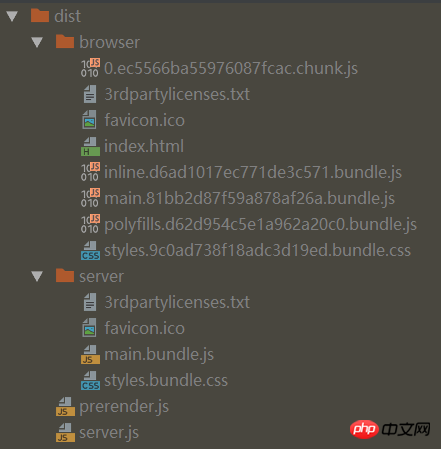
npm run start执行npm run ssr编译应用程序,并启动一个Node Express来为应用程序提供服务http://localhost:4000dist目录:

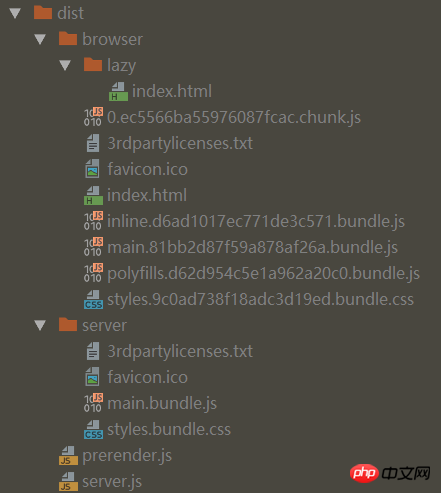
执行npm run prerender - 编译应用程序并预渲染应用程序文件,启动一个演示http服务器,以便您可以查看它
http://localhost:8080注意: 要将静态网站部署到静态托管平台,您必须部署dist/browser文件夹, 而不是dist文件夹
dist目录:
根据项目实际的路由信息并在根目录的
static.paths.ts中配置,提供给 prerender.ts 解析使用。export const ROUTES = [ '/', '/lazy' ];
因此,从dist目录可以看到,服务端预渲染会根据配置好的路由在 browser 生成对应的静态index.html。如
/对应/index.html,/lazy对应/lazy/index.html。服务器到客户端的状态传输
在前面的介绍中,我们在
app.server.module.ts中导入了ServerTransferStateModule,在app.module.ts中导入了BrowserTransferStateModule和TransferHttpCacheModule。这三个模块都与服务器到客户端的状态传输有关:
ServerTransferStateModule:在服务端导入,用于实现将状态从服务器传输到客户端BrowserTransferStateModule:在客户端导入,用于实现将状态从服务器传输到客户端TransferHttpCacheModule:用于实现服务器到客户端的请求传输缓存,防止客户端重复请求服务端已完成的请求
使用这几个模块,可以解决 http请求在服务端和客户端分别请求一次 的问题。
比如在
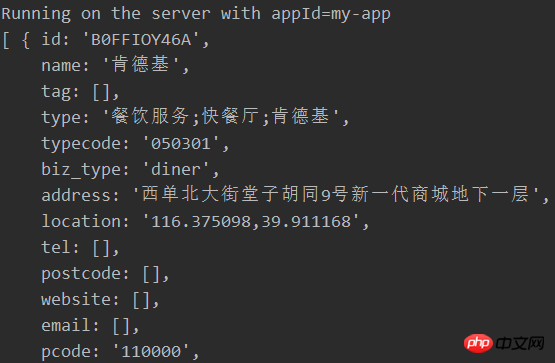
home.component.ts中有如下代码:import { Component, OnDestroy, OnInit } from '@angular/core'; import { HttpClient } from '@angular/common/http'; import { Observable } from 'rxjs/Observable'; @Component({ selector: 'app-home', templateUrl: './home.component.html', styleUrls: ['./home.component.scss'] }) export class HomeComponent implements OnInit, OnDestroy { constructor(public http: HttpClient) { } ngOnInit() { this.poiSearch(this.keyword, '北京市').subscribe((data: any) => { console.log(data); }); } ngOnDestroy() { } poiSearch(text: string, city?: string): Observable<any> { return this.http.get(encodeURI(`http://restapi.amap.com/v3/place/text?keywords=${text}&city=${city}&offset=20&key=55f909211b9950837fba2c71d0488db9&extensions=all`)); } }代码运行之后,
服务端请求并打印:
客户端再一次请求并打印:
方法1:使用
TransferHttpCacheModule使用
TransferHttpCacheModule很简单,代码不需要改动。在app.module.ts中导入之后,Angular自动会将服务端请求缓存到客户端,换句话说就是服务端请求到数据会自动传输到客户端,客户端接收到数据之后就不会再发送请求了。方法2:使用
BrowserTransferStateModule该方法稍微复杂一些,需要改动一些代码。
调整
home.component.ts代码如下:import { Component, OnDestroy, OnInit } from '@angular/core'; import { makeStateKey, TransferState } from '@angular/platform-browser'; import { HttpClient } from '@angular/common/http'; import { Observable } from 'rxjs/Observable'; const KFCLIST_KEY = makeStateKey('kfcList'); @Component({ selector: 'app-home', templateUrl: './home.component.html', styleUrls: ['./home.component.scss'] }) export class HomeComponent implements OnInit, OnDestroy { constructor(public http: HttpClient, private state: TransferState) { } ngOnInit() { // 采用一个标记来区分服务端是否已经拿到了数据,如果没拿到数据就在客户端请求,如果已经拿到数据就不发请求 const kfcList:any[] = this.state.get(KFCLIST_KEY, null as any); if (!this.kfcList) { this.poiSearch(this.keyword, '北京市').subscribe((data: any) => { console.log(data); this.state.set(KFCLIST_KEY, data as any); // 存储数据 }); } } ngOnDestroy() { if (typeof window === 'object') { this.state.set(KFCLIST_KEY, null as any); // 删除数据 } } poiSearch(text: string, city?: string): Observable<any> { return this.http.get(encodeURI(`http://restapi.amap.com/v3/place/text?keywords=${text}&city=${city}&offset=20&key=55f909211b9950837fba2c71d0488db9&extensions=all`)); } }使用
const KFCLIST_KEY = makeStateKey('kfcList')创建储存传输数据的 StateKey在
HomeComponent的构造函数中注入TransferState在
ngOnInit中根据this.state.get(KFCLIST_KEY, null as any)判断数据是否存在(不管是服务端还是客户端),存在就不再请求,不存在则请求数据并通过this.state.set(KFCLIST_KEY, data as any)存储传输数据在
ngOnDestroy中根据当前是否客户端来决定是否将存储的数据进行删除
相关推荐:

以上がAngular 開発の実践サーバーサイドレンダリング_AngularJSの詳細内容です。詳細については、PHP 中国語 Web サイトの他の関連記事を参照してください。