
ホームページ >ウェブフロントエンド >jsチュートリアル >Javascript技術における4種類の依存性注入について詳しく解説 stack_javascriptスキル
Javascript技術における4種類の依存性注入について詳しく解説 stack_javascriptスキル

- WBOYWBOYWBOYWBOYWBOYWBOYWBOYWBOYWBOYWBOYWBOYWBOYWBオリジナル
- 2016-05-16 15:14:081449ブラウズ
オブジェクト指向プログラミングで制御反転 (IoC) を実現するための最も一般的な技術手段の 1 つとして、依存性注入 (DI) は OOP プログラミングで長い間普及してきました。たとえば、J2EE には有名なリーダー Spring がいます。当然のことながら、JavaScript コミュニティでもいくつかの積極的な試みが行われています。有名な AngularJS は主に DI に基づいて実装されています。残念ながら、JavaScript はリフレクション メカニズムがなく、アノテーション構文をサポートしていない動的言語であるため、長い間独自の Spring フレームワークを持っていませんでした。もちろん、ECMAScript ドラフトが急速な反復期間に入ると、JavaScript コミュニティではさまざまな方言やフレームワークが出現し、優勢になっています。優れた JavascriptDI フレームワークが登場するのは時間の問題であることが予想されます。
この記事は、inversify.js を例として、JavaScript での一般的な依存関係注入方法をまとめたもので、次の 4 つのセクションに分かれています。
1. インジェクター、キャッシュ、関数パラメーター名に基づく依存関係の注入
2. AngularJS
のダブルインジェクターに基づく依存関係の注入
3. TypeScript
でのデコレーターとリフレクションに基づく依存関係の注入
4. inversify.js - Javascript テクノロジー スタックの IoC コンテナー
1. インジェクター、キャッシュ、関数パラメーター名に基づく依存関係の注入
JavaScript はネイティブにリフレクション (Reflection) 構文をサポートしていませんが、Function.prototype の toString メソッドは別の方法を提供し、実行時に関数の内部構造をスパイできるようにします。toString メソッドは文字列形式 関数キーワードを含む関数定義全体を返します。この完全な関数定義から開始して、正規表現を使用して関数に必要なパラメーターを抽出することで、関数の実行依存関係をある程度知ることができます。
たとえば、Student クラスの write メソッドの関数シグネチャ write(notebook, pencil) は、その実行がノートブック オブジェクトと鉛筆オブジェクトに依存していることを示しています。したがって、まず Notebook オブジェクトと Pencil オブジェクトをキャッシュに保存し、次にインジェクターを通じて必要な依存関係を write メソッドに提供します。
var cache = {};
// 通过解析Function.prototype.toString()取得参数名
function getParamNames(func) {
 var paramNames = func.toString().match(/^function\s*[^\(]*\(\s*([^\)]*)\)/m)[1];
 paramNames = paramNames.replace(/ /g, '');
 paramNames = paramNames.split(',');
 return paramNames;
}
var injector = {
 // 将func作用域中的this关键字绑定到bind对象上,bind对象可以为空
 resolve: function (func, bind) {
  // 取得参数名
  var paramNames = getParamNames(func);
  var params = [];
  for (var i = 0; i < paramNames.length; i++) {
   // 通过参数名在cache中取出相应的依赖
   params.push(cache[paramNames[i]]);
  }
  // 注入依赖并执行函数
  func.apply(bind, params);
 }
};

function Notebook() {}
Notebook.prototype.printName = function () {
 console.log('this is a notebook');
};

function Pencil() {}
Pencil.prototype.printName = function () {
 console.log('this is a pencil');
};

function Student() {}
Student.prototype.write = function (notebook, pencil) {
 if (!notebook || !pencil) {
  throw new Error('Dependencies not provided!');
 }
 console.log('writing...');
};
// 提供notebook依赖
cache['notebook'] = new Notebook();
// 提供pencil依赖
cache['pencil'] = new Pencil();
var student = new Student();
injector.resolve(student.write, student); // writing...
function Injector() {
 this._cache = {};
}

Injector.prototype.put = function (name, obj) {
 this._cache[name] = obj;
};

Injector.prototype.getParamNames = function (func) {
 var paramNames = func.toString().match(/^function\s*[^\(]*\(\s*([^\)]*)\)/m)[1];
 paramNames = paramNames.replace(/ /g, '');
 paramNames = paramNames.split(',');
 return paramNames;
};

Injector.prototype.resolve = function (func, bind) {
 var self = this;
 var paramNames = self.getParamNames(func);
 var params = paramNames.map(function (name) {
  return self._cache[name];
 });
 func.apply(bind, params);
};

var injector = new Injector();

var student = new Student();
injector.put('notebook', new Notebook());
injector.put('pencil', new Pencil())
injector.resolve(student.write, student); // writing...
比如现在要执行Student类上的另一个方法function draw(notebook, pencil, eraser),因为injector的cache中已经有了notebook和pencil对象,我们只需要将额外的eraser也存放到cache中:
function Eraser() {}
Eraser.prototype.printName = function () {
 console.log('this is an eraser');
};

// 为Student增加draw方法
Student.prototype.draw = function (notebook, pencil, eraser) {
 if (!notebook || !pencil || !eraser) {
  throw new Error('Dependencies not provided!');
 }
 console.log('drawing...');
};

injector.put('eraser', new Eraser());
injector.resolve(student.draw, student);
依存関係の注入により、関数の実行と、関数が依存するオブジェクトの作成ロジックが分離されます。
二. AngularJS中基于双Injector的依赖注入
熟悉AngularJS的同学很快就能联想到,在injector注入之前,我们在定义module时还可以调用config方法来配置随后会被注入的对象。典型的例子就是在使用路由时对$routeProvider的配置。也就是说,不同于上一小节中直接将现成对象(比如new Notebook())存入cache的做法,AngularJS中的依赖注入应该还有一个"实例化"或者"调用工厂方法"的过程。
这就是providerInjector、instanceInjector以及他们各自所拥有的providerCache和instanceCache的由来。
在AngularJS中,我们能够通过依赖注入获取到的injector通常是instanceInjector,而providerInjector则是以闭包中变量的形式存在的。每当我们需要AngularJS提供依赖注入服务时,比如想要获取notebook,instanceInjector会首先查询instanceCache上是存在notebook属性,如果存在,则直接注入;如果不存在,则将这个任务转交给providerInjector;providerInjector会将"Provider"字符串拼接到"notebook"字符串的后面,组成一个新的键名"notebookProvider",再到providerCache中查询是否有notebookProvider这个属性,如有没有,则抛出异常Unknown Provider异常:
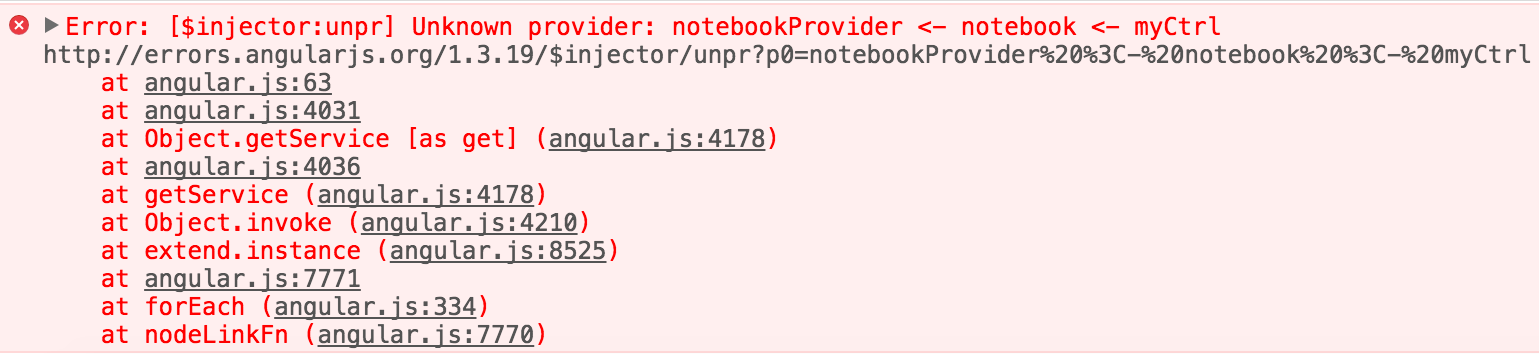
如果有,则将这个provider返回给instanceInjector;instanceInjector拿到notebookProvider后,会调用notebookProvider上的工厂方法$get,获取返回值notebook对象,将该对象放到instanceCache中以备将来使用,同时也注入到一开始声明这个依赖的函数中。过程描述起来比较复杂,可以通过下面的图示来说明:

需要注意的是,AngularJS中的依赖注入方式也是有缺陷的:利用一个instanceInjector单例服务全局的副作用就是无法单独跟踪和控制某一条依赖链条,即使在没有交叉依赖的情况下,不同module中的同名provider也会产生覆盖,这里就不详细展开了。
另外,对于习惯于Java和C#等语言中高级IoC容器的同学来说,看到这里可能觉得有些别扭,毕竟在OOP中,我们通常不会将依赖以参数的形式传递给方法,而是作为属性通过constructor或者setters传递给实例,以实现封装。的确如此,一、二节中的依赖注入方式没有体现出足够的面向对象特性,毕竟这种方式在Javascript已经存在多年了,甚至都不需要ES5的语法支持。希望了解Javascript社区中最近一两年关于依赖注入的研究和成果的同学,可以继续往下阅读。
三. TypeScript中基于装饰器和反射的依赖注入
笔者本身对于Javascript的各种方言的学习并不是特别热情,尤其是现在EMCAScript提案、草案更新很快,很多时候借助于polyfill和babel的各种preset就能满足需求了。但是TypeScript是一个例外(当然现在Decorator也已经是提案了,虽然阶段还比较早,但是确实已经有polyfill可以使用)。上文提到,Javascript社区中迟迟没有出现一款优秀的IoC容器和自身的语言特性有关,那就依赖注入这个话题而言,TypeScript给我们带来了什么不同呢?至少有下面这几点:
* TypeScript增加了编译时类型检查,使Javascript具备了一定的静态语言特性
* TypeScript支持装饰器(Decorator)语法,和传统的注解(Annotation)颇为相似
* TypeScript支持元信息(Metadata)反射,不再需要调用Function.prototype.toString方法
下面我们就尝试利用TypeScript带来的新语法来规范和简化依赖注入。这次我们不再向函数或方法中注入依赖了,而是向类的构造函数中注入。
TypeScript支持对类、方法、属性和函数参数进行装饰,这里需要用到的是对类的装饰。继续上面小节中用到的例子,利用TypeScript对代码进行一些重构:
class Pencil {
 public printName() {
  console.log('this is a pencil');
 }
}

class Eraser {
 public printName() {
  console.log('this is an eraser');
 }
}

class Notebook {
 public printName() {
  console.log('this is a notebook');
 }
}

class Student {
 pencil: Pencil;
 eraser: Eraser;
 notebook: Notebook;
 public constructor(notebook: Notebook, pencil: Pencil, eraser: Eraser) {
  this.notebook = notebook;
  this.pencil = pencil;
  this.eraser = eraser;
 }
 public write() {
  if (!this.notebook || !this.pencil) {
   throw new Error('Dependencies not provided!');
  }
  console.log('writing...');
 }
 public draw() {
  if (!this.notebook || !this.pencil || !this.eraser) {
   throw new Error('Dependencies not provided!');
  }
  console.log('drawing...');
 }
}
下面是injector和装饰器Inject的实现。injector的resolve方法在接收到传入的构造函数时,会通过name属性取出该构造函数的名字,比如class Student,它的name属性就是字符串"Student"。再将Student作为key,到dependenciesMap中去取出Student的依赖,至于dependenciesMap中是何时存入的依赖关系,这是装饰器Inject的逻辑,后面会谈到。Student的依赖取出后,由于这些依赖已经是构造函数的引用而非简单的字符串了(比如Notebook、Pencil的构造函数),因此直接使用new语句即可获取这些对象。获取到Student类所依赖的对象之后,如何把这些依赖作为构造函数的参数传入到Student中呢?最简单的莫过于ES6的spread操作符。在不能使用ES6的环境下,我们也可以通过伪造一个构造函数来完成上述逻辑。注意为了使instanceof操作符不失效,这个伪造的构造函数的prototype属性应该指向原构造函数的prototype属性。
var dependenciesMap = {};
var injector = {
 resolve: function (constructor) {
  var dependencies = dependenciesMap[constructor.name];
  dependencies = dependencies.map(function (dependency) {
   return new dependency();
  });
  // 如果可以使用ES6的语法,下面的代码可以合并为一行:
  // return new constructor(...dependencies);
  var mockConstructor: any = function () {
   constructor.apply(this, dependencies);
  };
  mockConstructor.prototype = constructor.prototype;
  return new mockConstructor();
 }
};
function Inject(...dependencies) {
 return function (constructor) {
  dependenciesMap[constructor.name] = dependencies;
  return constructor;
 };
}
injector和装饰器Inject的逻辑完成后,就可以用来装饰class Student并享受依赖注入带来的乐趣了:
// 装饰器的使用非常简单,只需要在类定义的上方添加一行代码
// Inject是装饰器的名字,后面是function Inject的参数
@Inject(Notebook, Pencil, Eraser)
class Student {
 pencil: Pencil;
 eraser: Eraser;
 notebook: Notebook;
 public constructor(notebook: Notebook, pencil: Pencil, eraser: Eraser) {
  this.notebook = notebook;
  this.pencil = pencil;
  this.eraser = eraser;
 }
 public write() {
  if (!this.notebook || !this.pencil) {
   throw new Error('Dependencies not provided!');
  }
  console.log('writing...');
 }
 public draw() {
  if (!this.notebook || !this.pencil || !this.eraser) {
   throw new Error('Dependencies not provided!');
  }
  console.log('drawing...');
 }
}
var student = injector.resolve(Student);
console.log(student instanceof Student); // true
student.notebook.printName(); // this is a notebook
student.pencil.printName(); // this is a pencil
student.eraser.printName(); // this is an eraser
student.draw(); // drawing
student.write(); // writing
利用装饰器,我们还可以实现一种比较激进的依赖注入,下文称之为RadicalInject。RadicalInject对原代码的侵入性比较强,不一定适合具体的业务,这里也一并介绍一下。要理解RadicalInject,需要对TypeScript装饰器的原理和Array.prototype上的reduce方法理解比较到位。
function RadicalInject(...dependencies){
 var wrappedFunc:any = function (target: any) {
  dependencies = dependencies.map(function (dependency) {
   return new dependency();
  });
  // 使用mockConstructor的原因和上例相同
  function mockConstructor() {
   target.apply(this, dependencies);
  }
  mockConstructor.prototype = target.prototype;

  // 为什么需要使用reservedConstructor呢?因为使用RadicalInject对Student方法装饰之后,
  // Student指向的构造函数已经不是一开始我们声明的class Student了,而是这里的返回值,
  // 即reservedConstructor。Student的指向变了并不是一件不能接受的事,但是如果要
  // 保证student instanceof Student如我们所期望的那样工作,这里就应该将
  // reservedConstructor的prototype属性指向原Student的prototype
  function reservedConstructor() {
   return new mockConstructor();
  }
  reservedConstructor.prototype = target.prototype;
  return reservedConstructor;
 }
 return wrappedFunc;
}
使用RadicalInject,原构造函数实质上已经被一个新的函数代理了,使用上也更为简单,甚至都不需要再有injector的实现:
@RadicalInject(Notebook, Pencil, Eraser)
class Student {
 pencil: Pencil;
 eraser: Eraser;
 notebook: Notebook;
 public constructor() {}
 public constructor(notebook: Notebook, pencil: Pencil, eraser: Eraser) {
  this.notebook = notebook;
  this.pencil = pencil;
  this.eraser = eraser;
 }
 public write() {
  if (!this.notebook || !this.pencil) {
   throw new Error('Dependencies not provided!');
  }
  console.log('writing...');
 }
 public draw() {
  if (!this.notebook || !this.pencil || !this.eraser) {
   throw new Error('Dependencies not provided!');
  }
  console.log('drawing...');
 }
}
// 不再出现injector,直接调用构造函数
var student = new Student();
console.log(student instanceof Student); // true
student.notebook.printName(); // this is a notebook
student.pencil.printName(); // this is a pencil
student.eraser.printName(); // this is an eraser
student.draw(); // drawing
student.write(); // writing
由于class Student的constructor方法需要接收三个参数,直接无参调用new Student()会造成TypeScript编译器报错。当然这里只是分享一种思路,大家可以暂时忽略这个错误。有兴趣的同学也可以使用类似的思路尝试代理一个工厂方法,而非直接代理构造函数,以避免这类错误,这里不再展开。
AngularJS2团队为了获得更好的装饰器和反射语法的支持,一度准备另起炉灶,基于AtScript(AtScript中的"A"指的就是Annotation)来进行新框架的开发。但最终却选择拥抱TypeScript,于是便有了微软和谷歌的奇妙组合。
当然,需要说明的是,在缺少相关标准和浏览器厂商支持的情况下,TypeScript在运行时只是纯粹的Javascript,下节中出现的例子会印证这一点。
四. inversify.js——Javascript技术栈中的IoC容器
其实从Javascript出现各种支持高级语言特性的方言就可以预见到,IoC容器的出现只是早晚的事情。比如博主今天要介绍的基于TypeScript的inversify.js,就是其中的先行者之一。
inversity.js比上节中博主实现的例子还要进步很多,它最初设计的目的就是为了前端工程师同学们能在Javascript中写出符合SOLID原则的代码,立意可谓非常之高。表现在代码中,就是处处有接口,将"Depend upon Abstractions. Do not depend upon concretions."(依赖于抽象,而非依赖于具体)表现地淋漓尽致。继续使用上面的例子,但是由于inversity.js是面向接口的,上面的代码需要进一步重构:
interface NotebookInterface {
 printName(): void;
}
interface PencilInterface {
 printName(): void;
}
interface EraserInterface {
 printName(): void;
}
interface StudentInterface {
 notebook: NotebookInterface;
 pencil: PencilInterface;
 eraser: EraserInterface;
 write(): void;
 draw(): void;
}
class Notebook implements NotebookInterface {
 public printName() {
  console.log('this is a notebook');
 }
}
class Pencil implements PencilInterface {
 public printName() {
  console.log('this is a pencil');
 }
}
class Eraser implements EraserInterface {
 public printName() {
  console.log('this is an eraser');
 }
}

class Student implements StudentInterface {
 notebook: NotebookInterface;
 pencil: PencilInterface;
 eraser: EraserInterface;
 constructor(notebook: NotebookInterface, pencil: PencilInterface, eraser: EraserInterface) {
  this.notebook = notebook;
  this.pencil = pencil;
  this.eraser = eraser;
 }
 write() {
  console.log('writing...');
 }
 draw() {
  console.log('drawing...');
 }
}
由于使用了inversity框架,这次我们就不用自己实现injector和Inject装饰器啦,只需要从inversify模块中引用相关对象:
import { Inject } from "inversify";

@Inject("NotebookInterface", "PencilInterface", "EraserInterface")
class Student implements StudentInterface {
 notebook: NotebookInterface;
 pencil: PencilInterface;
 eraser: EraserInterface;
 constructor(notebook: NotebookInterface, pencil: PencilInterface, eraser: EraserInterface) {
  this.notebook = notebook;
  this.pencil = pencil;
  this.eraser = eraser;
 }
 write() {
  console.log('writing...');
 }
 draw() {
  console.log('drawing...');
 }
}
这样就行了吗?还记得上节中提到TypeScript中各种概念只是语法糖吗?不同于上一节中直接将constructor引用传递给Inject的例子,由于inversify.js是面向接口的,而诸如NotebookInterface、PencilInterface之类的接口只是由TypeScript提供的语法糖,在运行时并不存在,因此我们在装饰器中声明依赖时只能使用字符串形式而非引用形式。不过不用担心,inversify.js为我们提供了bind机制,在接口的字符串形式和具体的构造函数之间搭建了桥梁:
import { TypeBinding, Kernel } from "inversify";

var kernel = new Kernel();
kernel.bind(new TypeBinding<NotebookInterface>("NotebookInterface", Notebook));
kernel.bind(new TypeBinding<PencilInterface>("PencilInterface", Pencil));
kernel.bind(new TypeBinding<EraserInterface>("EraserInterface", Eraser));
kernel.bind(new TypeBinding<StudentInterface>("StudentInterface", Student));
注意这步需要从inversify模块中引入TypeBinding和Kernel,并且为了保证返回值类型以及整个编译时静态类型检查能够顺利通过,泛型语法也被使用了起来。
说到这里,要理解new TypeBindingbae00fb37f463319be6b4d67f77ddde6("NotebookInterface", Notebook)也就很自然了:为依赖于"NotebookInterface"字符串的类提供Notebook类的实例,返回值向上溯型到NotebookInterface。
完成了这些步骤,使用起来也还算顺手:
var student: StudentInterface = kernel.resolve<StudentInterface>("StudentInterface");
console.log(student instanceof Student); // true
student.notebook.printName(); // this is a notebook
student.pencil.printName(); // this is a pencil
student.eraser.printName(); // this is an eraser
student.draw(); // drawing
student.write(); // writing
The above is all about the four types of dependency injection in the Javascript technology stack. I hope it will be helpful to everyone's learning.