
ホームページ >Java >&#&チュートリアル >Java でテスト ケースを作成する方法
Java でテスト ケースを作成する方法

- WBOYWBOYWBOYWBOYWBOYWBOYWBOYWBOYWBOYWBOYWBOYWBOYWBオリジナル
- 2024-08-12 18:40:36812ブラウズ
テスト ケースの作成は、コードの信頼性と堅牢性を確保するための基本的なスキルです。テスト ケースは、バグを特定し、コードが意図したとおりに動作することを検証するのに役立ちます。
テスト ケースは、Java、Python、C# などの任意のプログラミング言語を使用して作成できます。ただし、多くのテスターは、強力なコミュニティ サポートとプロジェクトのニーズとの整合性により、Java でテスト ケースを作成することを好みます。 Java でこれらのテスト ケースを自動化すると、テスターは実行時間を節約し、テストの初期段階でエラーを検出できるようになります。
Javaのテストケースとは何ですか?
Java は、自動テストに最もよく使用されるプログラミング言語の 1 つです。 Java でテスト ケースを作成するということは、OOP の概念に従って実装する自動化プロジェクト全体を構築することを意味します。これにより、プロジェクトとテスト ケースがより堅牢になり、コード全体が多くのクラスとメソッドに分類されるため、より保守しやすく、使いやすくなります。
自動化されたテスト ケースは、リグレッションが発生した場合に機能を迅速にテストするのに役立ち、手作業の労力を大幅に節約できます。これらのテスト ケースは、Web ページ上でいくつかのフローを実行し、アサートを使用して出力が目的の出力と一致するかどうかを検証します。
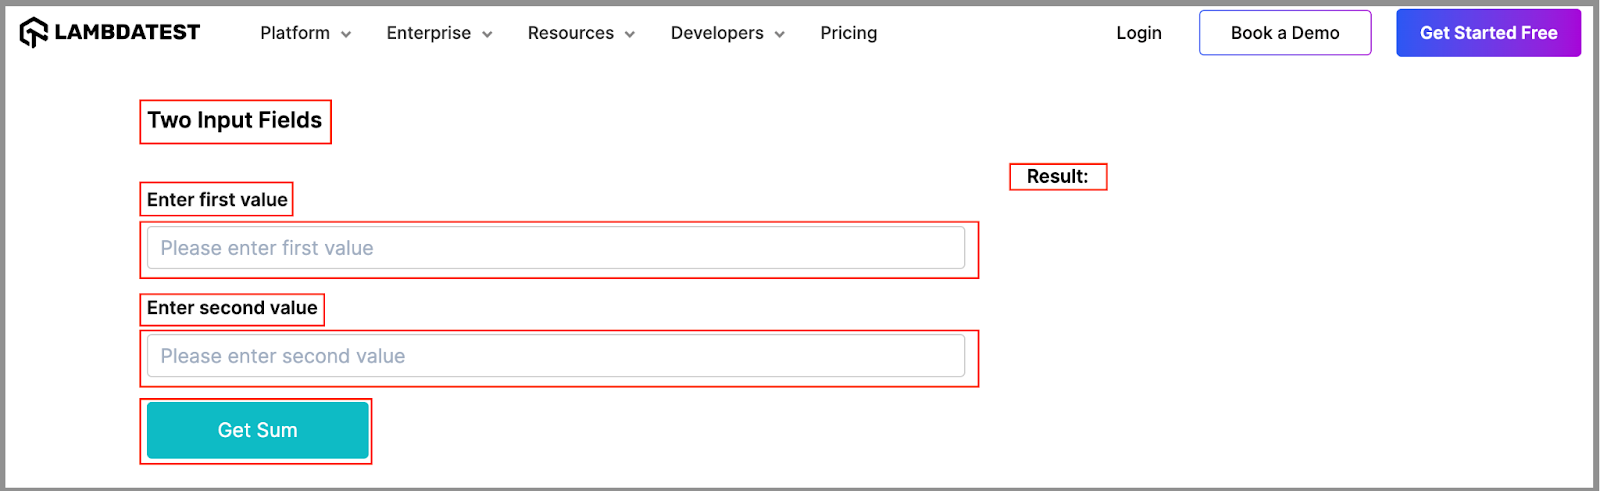
たとえば、LambdaTest Selenium Playground ページの「2 つの入力フィールド」セクションでは、いくつかのテスト ケースは次のようになります。
- すべてのラベル、テキスト入力ボックス、ボタンがページ上に存在することを確認します。

- 両方の数値を入力すると、結果の下に合計が正しく表示されることを確認します。

- 一方または両方の数値が入力されていない場合、[結果] にエラー メッセージが表示されることを確認します。

Java でテスト ケースを作成するときは、テスト フロー、テスト スコープ、名前付け、アサーション、テスト データ、グループ化、WebElement の検索など、いくつかのことを考慮する必要があります。これらはすべて正確に使用すると、優れたテストを実現します。これは、将来さらに変更が加えられた場合でも、理解しやすく維持しやすいケースです。
ただし、テスト フローを開始する最初のアクションは、Java で効果的なテスト ケースを作成する必要がある WebElement を見つけることです。
Java での WebElement の検索
Java でテスト ケースを作成する場合にもう 1 つ学ぶべきことは、WebElements を見つけることです。これは、テスト ケース フローがこれらの WebElement と対話して、データの入力、ボタンのクリック、データの取得などのアクションを実行して結果を取得するために必要です。 Selenium で WebElement ロケーター (ID、Name、CSS、XPath、linkText、 など) を検索するには複数の方法があります。
Java でテスト ケースを作成する方法を説明する前に、ロケーター戦略を使用してテスト フローで使用されるさまざまな WebElement を見つける方法を学びましょう。 XPath または ID ロケーターを使用して、このテスト ケースのすべての WebElement を見つけます。
要素を検索する最も一般的なメソッドの 1 つ、つまり、Selenium の findElement() を使用できます。

- XPath を使用して LambdaTest Selenium Playground ページから Two Input Fields ラベルを見つけるには、次の XPath 式を使用できます。
driver.findElement(By.xpath("//*[contains(text(),'Two')]"));
- XPath を使用して LambdaTest Selenium Playground ページから Enter first value ラベルを見つけるには、次の XPath 式を使用できます。
driver.findElement(By.xpath("//*[contains(text(),'first value')]"));
- XPath を使用して LambdaTest Selenium Playground ページから Enter Second value ラベルを見つけるには、次の XPath 式を使用できます。
driver.findElement(By.xpath("//*[contains(text(),'first value')]"));
- XPath を使用して LambdaTest Selenium Playground ページから Get Sum ボタンを見つけるには、次の XPath 式を使用できます。
driver.findElement(By.xpath("//*[contains(text(),'Sum')]"));
- ID を使用して LambdaTest Selenium Playground ページから 最初の値 テキストボックスを見つけるには、次の ID 式を使用できます。
driver.findElement(By.id("sum1"));
- ID を使用して LambdaTest Selenium Playground ページから 2 番目の値 テキストボックスを見つけるには、次の ID 式を使用できます。
driver.findElement(By.id("sum2"));
- ID を使用して LambdaTest Selenium Playground ページから Result ラベルを見つけるには、次の ID 式を使用できます。
driver.findElement(By.id("user-message"));
- ID を使用して LambdaTest Selenium Playground ページから 結果/エラー メッセージ を見つけるには、次の ID 式を使用できます。
driver.findElement(By.id("addmessage"));
Java でテスト ケースを作成するときに WebElement を見つける方法を学ぶには、この Selenium ロケーター ガイドを参照することもできます。

Java でテスト ケースを作成するには?
Java で効果的なテスト ケースを作成する前に、必要なライブラリとツールをすべて備えたプロジェクトをセットアップする必要があります。 Eclipse IDE を使用して、Maven プロジェクトのセットアップを示します。さらに、テストの実行を処理し、セットアップおよび破棄メソッドを実装するためのテスト フレームワークとして TestNG を追加します。
このデモでは、最初に 3 つのテスト ケースを作成して、前述の Java のすべてのテスト ケースをカバーし、該当するすべてのベスト プラクティスを実装します。
テストシナリオ 1:
Selenium Playgrounds (Simple Form Demo) の「2 つの入力フィールド」セクションに移動します
可視性のためにこのセクションのすべての WebElement をアサートします
2 つの入力フィールド ラベルのロケーターを特定します。
**最初の**と**2番目**の値ラベルのロケーターを識別します。
**最初の**と**2番目**の値入力ボックスのロケーターを特定します。
Get Sum ボタンのロケーターを特定します。
結果 ラベル。
テストシナリオ 2 :
Selenium Playgrounds (Simple Form Demo) ページの 2 つの入力フィールド セクションに移動します。
両方の入力ボックスに有効な値を入力してください。
合計を取得 ボタンをクリックします。
合計が正しいことをアサートし、**結果**ラベルの下に表示されます。
テストシナリオ 3 :
Selenium Playgrounds (Simple Form Demo) ページの 2 つの入力フィールド セクションに移動します。
いずれかの入力ボックスに値を入力します。
合計を取得 ボタンをクリックします。
アサート エラー メッセージは、Result ラベルの下に表示されます。
テスト フローが整い、ツールとライブラリを使用する準備ができたので、必要なライブラリのインストールを開始しましょう。
プロジェクトのセットアップ:
前述したように、Eclipse IDE を使用して Java でテスト ケースを作成します。ただし、任意の IDE を使用してテスト ケースを作成できます。新しい Maven プロジェクトを作成するだけです。
Eclipse IDE を起動し、[ファイル] > をクリックして新しいプロジェクト ウィザードを開きます。新規 >プロジェクト。
「ウィザード」で「Maven」を展開し、「Maven プロジェクト」を選択して、「次へ」をクリックします。
「単純なプロジェクトを作成する」チェックボックスをクリックし、「次へ」をクリックします。
この新しい Maven プロジェクト ウィザードで、グループ ID とアーティファクト ID を入力し、[完了] をクリックしてプロジェクトを作成します。ここで、グループ ID は、あるプロジェクト グループを別のプロジェクト グループから識別するのに役立つ一意の名前であり、アーティファクト ID は、作成するプロジェクトに与えられる一意の名前です。
プロジェクトが作成されると、プロジェクト構造のルート フォルダーに pom.xml ファイルが含まれます。ここでは、Java で自動化テスト ケースを作成して実行するために必要な依存関係を追加します。テスト フレームワークとして TestNG を使用するため、その依存関係を追加します。さらに、これから作成するテスト ケースには Web オートメーションが含まれるため、Selenium の依存関係を追加します。
You can fetch the latest TestNG and Selenium dependencies from the Maven Repository.
The updated pom.xml would look like the one below.
    <project xmlns="http://maven.apache.org/POM/4.0.0"
     xmlns:xsi="http://www.w3.org/2001/XMLSchema-instance"
     xsi:schemaLocation="http://maven.apache.org/POM/4.0.0 https://maven.apache.org/xsd/maven-4.0.0.xsd">
     <modelVersion>4.0.0</modelVersion>
     <groupId>demo.lambdaTest</groupId>
     <artifactId>JavaTestCase</artifactId>
     <version>0.0.1-SNAPSHOT</version>
     <dependencies>
       <dependency>
         <groupId>org.testng</groupId>
         <artifactId>testng</artifactId>
         <version>7.10.1</version>
         <scope>test</scope>
       </dependency>
       <dependency>
         <groupId>org.seleniumhq.selenium</groupId>
         <artifactId>selenium-java</artifactId>
         <version>4.21.0</version>
       </dependency>
     </dependencies>
    </project>
The next step is to add the test class files where we will write the test case in Java. Add 2 Java class files under src/test/java package.
BaseTest.java: This file will have the setup() and tearDown() methods to create and remove the *WebDriver *instances for test cases.
**TwoInputFieldTests.java: **This file will be the test class file where all the test cases discussed above will be written.
The completed BaseTest.java would look like the one below.
    package LocalGrid;


    import org.openqa.selenium.WebDriver;
    import org.openqa.selenium.chrome.ChromeDriver;
    import org.testng.annotations.*;


    public class BaseTest {
       public static WebDriver driver;

       @BeforeMethod
       public void setup()
       {
           driver = new ChromeDriver();

           System.out.println("Navigating to Two Input Field section");
           driver.get("https://www.lambdatest.com/selenium-playground/simple-form-demo");
       }

       @AfterMethod
       public void tearDown()
       {
           driver.quit();
       }
    }
Code Walkthrough:
Below is the complete code walkthrough to understand the code written in the above BaseTest.java file.
- In this class, create a WebDriver instance, which will be used to interact with the browser, then create the first method as setup() and annotate it with the @BeforeMethod. @BeforeMethod is a TestNG annotation. This annotation helps invoke this method before executing each test method, i.e., each test case. This will help create a new WebDriver instance for each test case in Java and navigate to the website.

- Initialize the driver variable with the ChromeDriver() class. This will execute all the test cases in Java on the Chrome browser.

- Use the get() method of Selenium WebDriver to navigate to the test webpage on LambdaTest Playground.

- Add the next method, tearDown(), and annotate it with @AfterMethod annotation to execute it after each test case in Java is executed. @AfterMethod is called the quit() method, which quits the driver instance and closes the open browser windows.

With this, the BaseTest file is created, and we are ready to create a test file to run the test case in Java.
Create a file called TwoInputFieldTests.java. This file will contain all the code for the test scenarios discussed earlier.
package LocalGrid;
import org.openqa.selenium.By;
import org.testng.Assert;
import org.testng.annotations.Test;
public class TwoInputFieldTests extends BaseTest
{
@Test(groups = {"uiTest"})
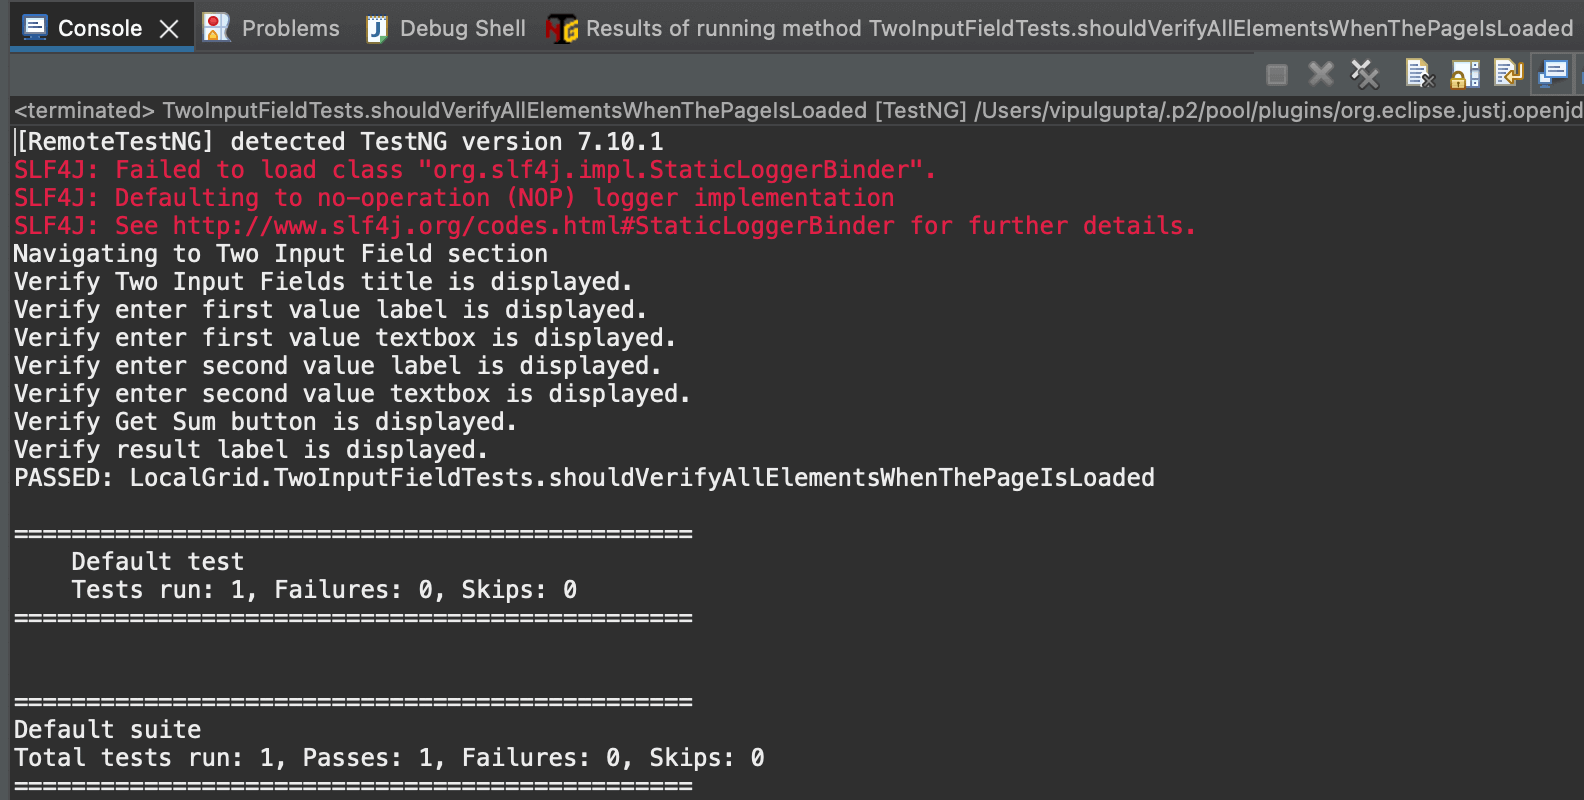
public void shouldVerifyAllElementsWhenThePageIsLoaded()
{
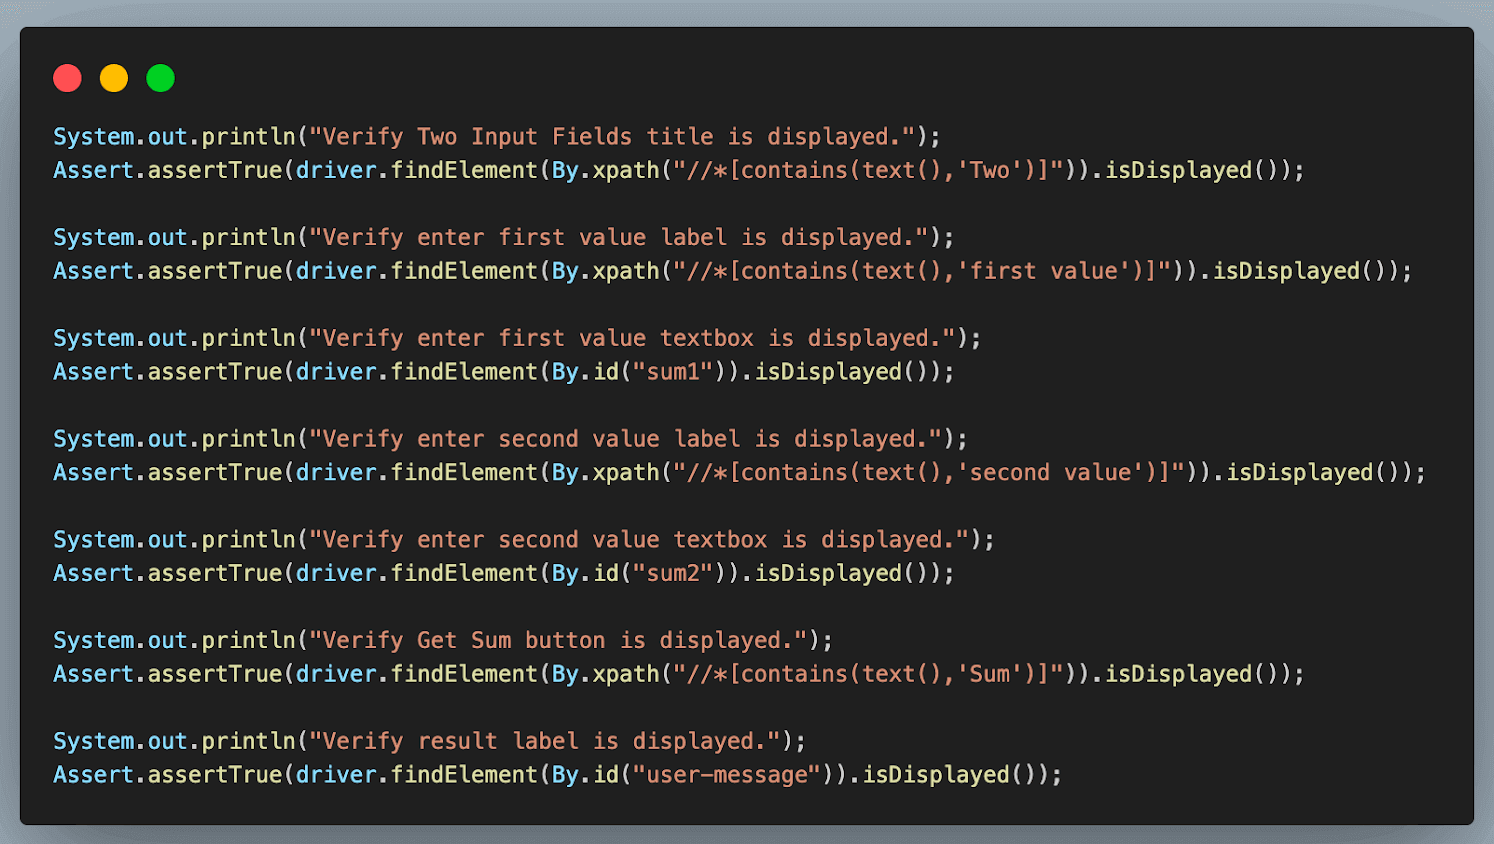
System.out.println("Verify Two Input Fields title is displayed.");
Assert.assertTrue(driver.findElement(By.xpath("//*[contains(text(),'Two')]")).isDisplayed());
System.out.println("Verify enter first value label is displayed.");
Assert.assertTrue(driver.findElement(By.xpath("//*[contains(text(),'first value')]")).isDisplayed());
System.out.println("Verify enter first value textbox is displayed.");
Assert.assertTrue(driver.findElement(By.id("sum1")).isDisplayed());
System.out.println("Verify enter second value label is displayed.");
Assert.assertTrue(driver.findElement(By.xpath("//*[contains(text(),'second value')]")).isDisplayed());
System.out.println("Verify enter second value textbox is displayed.");
Assert.assertTrue(driver.findElement(By.id("sum2")).isDisplayed());
System.out.println("Verify Get Sum button is displayed.");
Assert.assertTrue(driver.findElement(By.xpath("//*[contains(text(),'Sum')]")).isDisplayed());
System.out.println("Verify result label is displayed.");
Assert.assertTrue(driver.findElement(By.id("user-message")).isDisplayed());
}
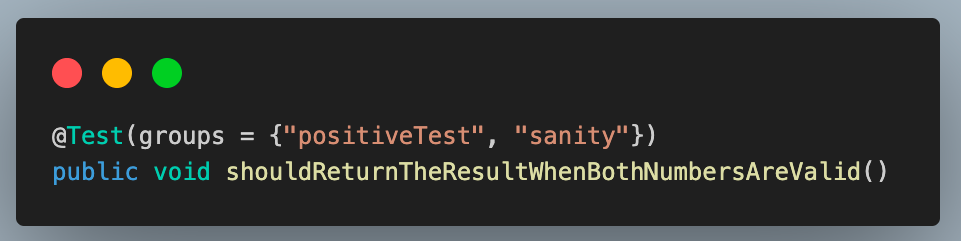
@Test(groups = {"positiveTest", "sanity"})
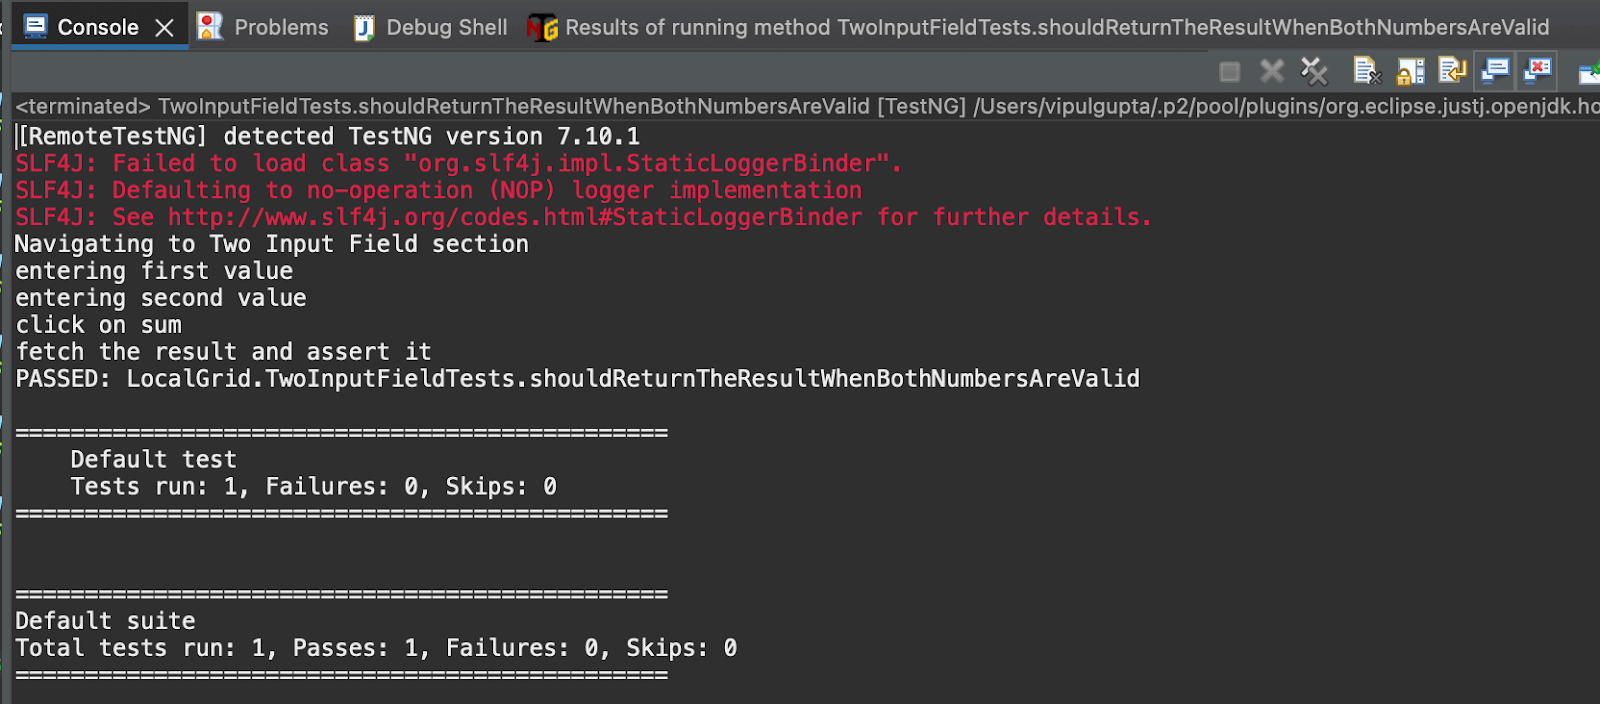
public void shouldReturnTheResultWhenBothNumbersAreValid()
{
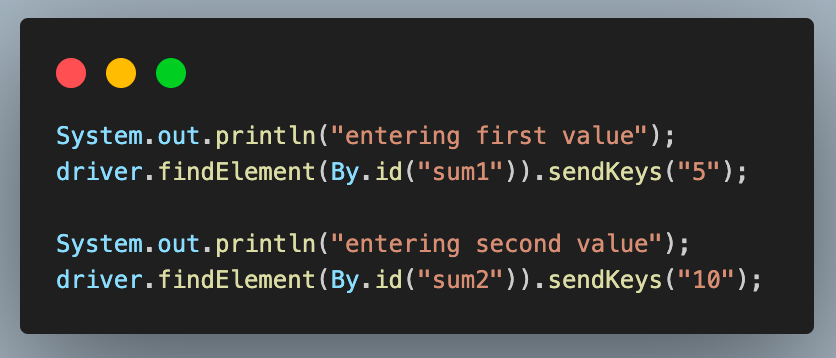
System.out.println("entering first value");
driver.findElement(By.id("sum1")).sendKeys("5");
System.out.println("entering second value");
driver.findElement(By.id("sum2")).sendKeys("10");
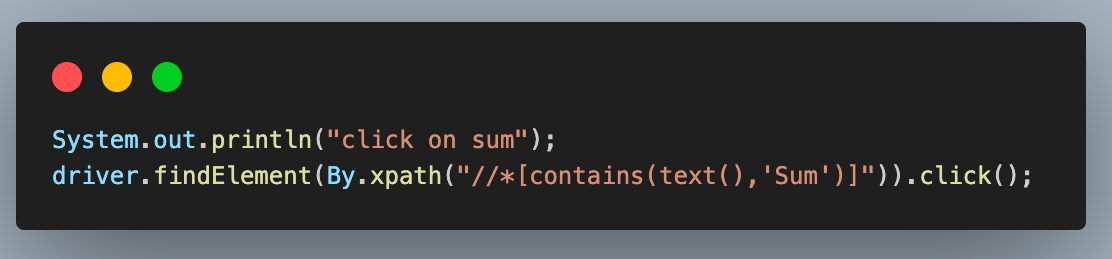
System.out.println("click on sum");
driver.findElement(By.xpath("//*[contains(text(),'Sum')]")).click();
System.out.println("fetch the result and assert it");
String result = driver.findElement(By.id("addmessage")).getText();
Assert.assertEquals(result, "15", "Sum is incorrect. Expected : 15 but Found : " + result);
}
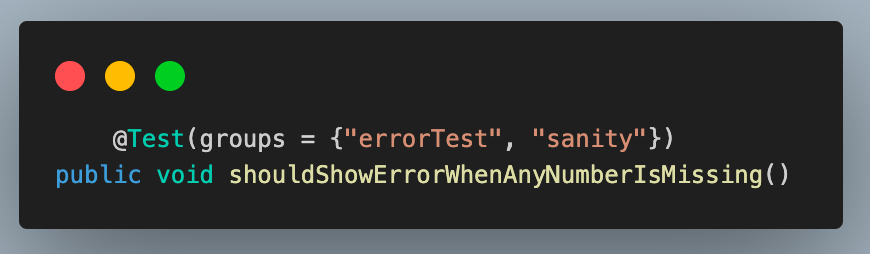
@Test(groups = {"errorTest", "sanity"})
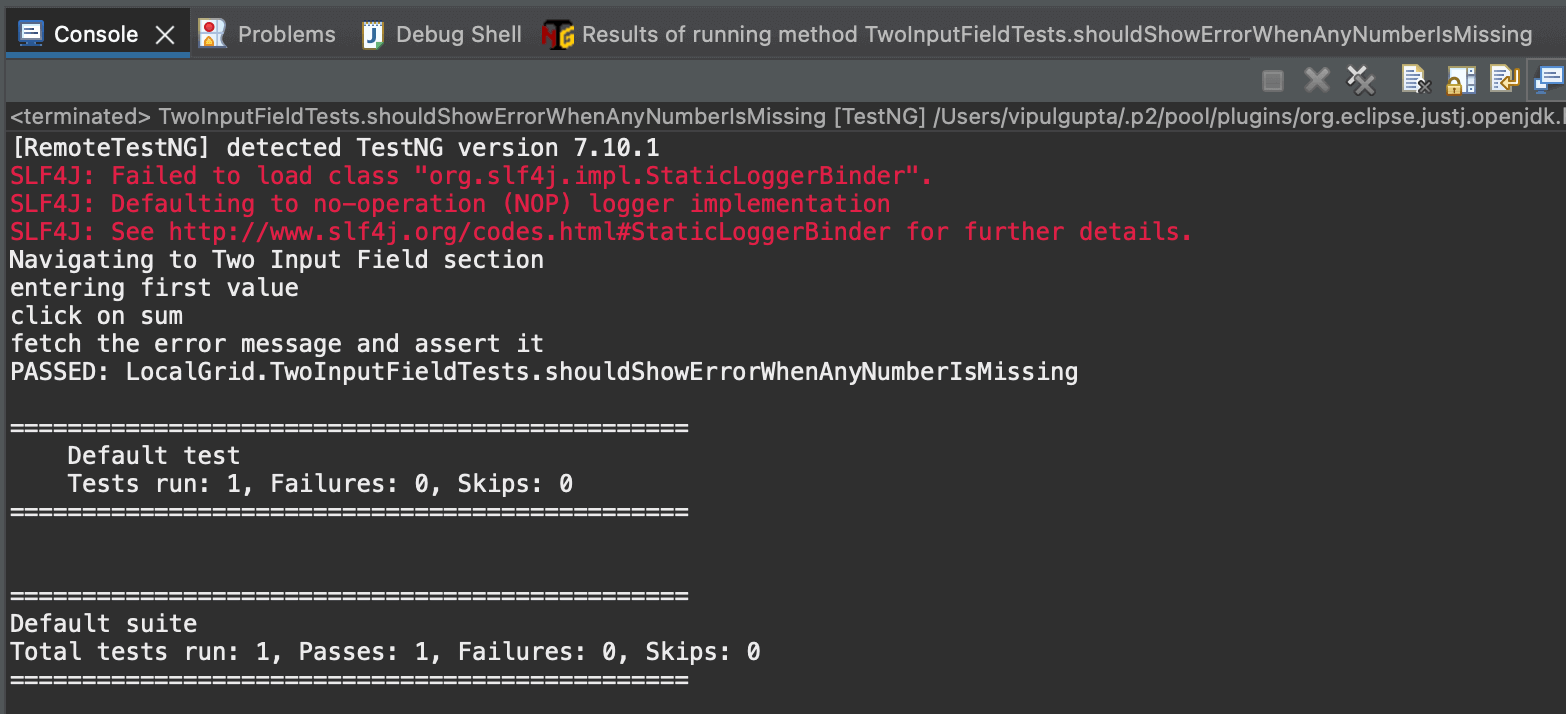
public void shouldShowErrorWhenAnyNumberIsMissing()
{
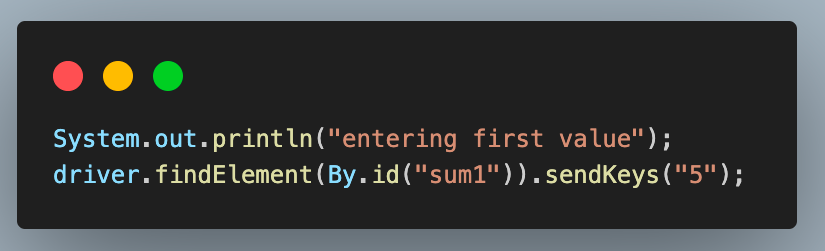
System.out.println("entering first value");
driver.findElement(By.id("sum1")).sendKeys("5");
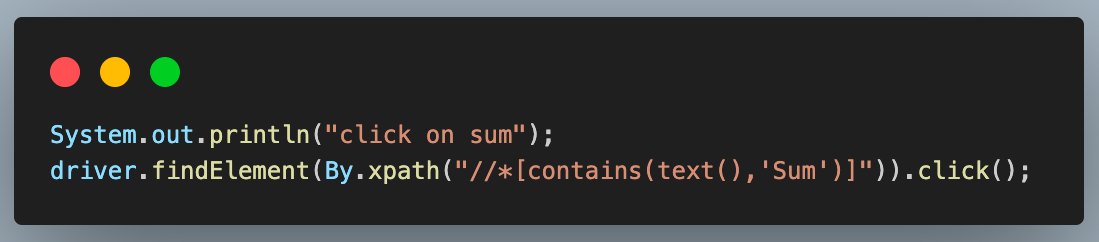
System.out.println("click on sum");
driver.findElement(By.xpath("//*[contains(text(),'Sum')]")).click();
System.out.println("fetch the error message and assert it");
String errorMessage = driver.findElement(By.id("addmessage")).getText();
String expectedError = "Entered value is not a number";
Assert.assertEquals(errorMessage, expectedError, "Incorrect error message. Expected : " + expectedError + " but Found : " + errorMessage);
}
}
``
**Code Walkthrough:**
Below is the complete code walkthrough to understand the code written in the above TwoInputFieldTests.java file.
1. Add a new class file as TwoInputFieldTests.java and extend BaseTest. This helps to inherit and access the *driver* variable and methods of the base class in all the test cases and prevents redundant code.
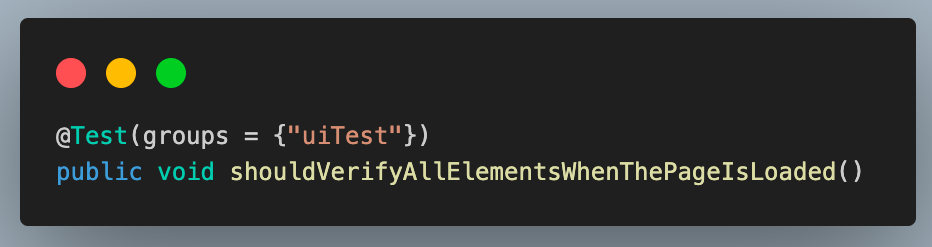
1. Add the first test case as *shouldVerifyAllElementsWhenThePageIsLoaded()* and *annotate* it with the *@Test* annotation. This annotation helps to identify a method as a test case and execute it as a TestNG case. We have used the *groups* attribute of *@Test* annotation here to mark this test as part of the *uiTests* group so that it gets executed whenever these group cases are triggered.
1. In this test case, we verify if all the Two Input Fields section elements are displayed when the web page is loaded.
1. For this, we use the *isDisplayed()* method of WebElement to check whether the element is displayed. This returns a boolean *true* value if the element is displayed and *false* if not.

1. To assert the same, we use the *assertTrue()* method of the *Assert* class. It passes if the passed value is true, meaning the element is displayed.

Assertions are crucial in the automation testing process, ensuring the software functions as expected. To learn assertTrue(), follow this guide on assertTrue() in Java and gain valuable insights.
1. Write a similar assert statement using the *isDisplayed()* method for all the web elements to verify the entire UI of this section.
1. Add the second test case as *shouldReturnTheResultWhenBothNumbersAreValid*(). Similar to the previous case, annotate it with the *@Test* annotation and add it to *positiveTest* and *sanity* groups. We have added 2 group names here, unlike 1 in the previous case. This means that this test case in Java will get executed as part of both these groups.
1. Enter the first and second values using the *sendKeys()* method. This method of Selenium WebDriver is used to enter data in any input text box field while working with web automation.
1. After entering the values, click the **Get Sum** button to get the result. For this, another method of WebDriver, *click()* is used.
1. Finally, we fetch the result using the *getText()* method and store it in a variable. This method retrieves any text value from the web page using Selenium web automation. Assert’s a*ssertEquals()* method compares this value with the expected result.
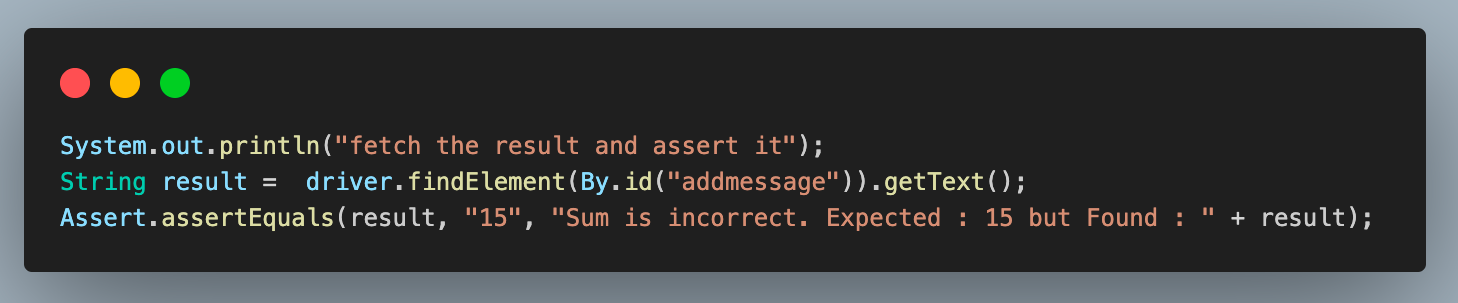
This method is used to compare two values as part of an assertion. Learn how to use asserts in TestNG correctly to help you verify and validate your actual and expected results.
1. Add the last test case and name it as *shouldShowErrorWhenAnyNumberIsMissing()*. Like the previous cases, annotate it with *@Test* and add it to the *negativeTest *and *sanity *groups.
1. Enter any one value using the *sendKeys()* method. Here, we are entering the first value field.
1. Click on the **Get Sum** button.
1. Fetch the error message using the *getText()* method and assert it to be the same as the expected error message using the *assertEquals()* method.

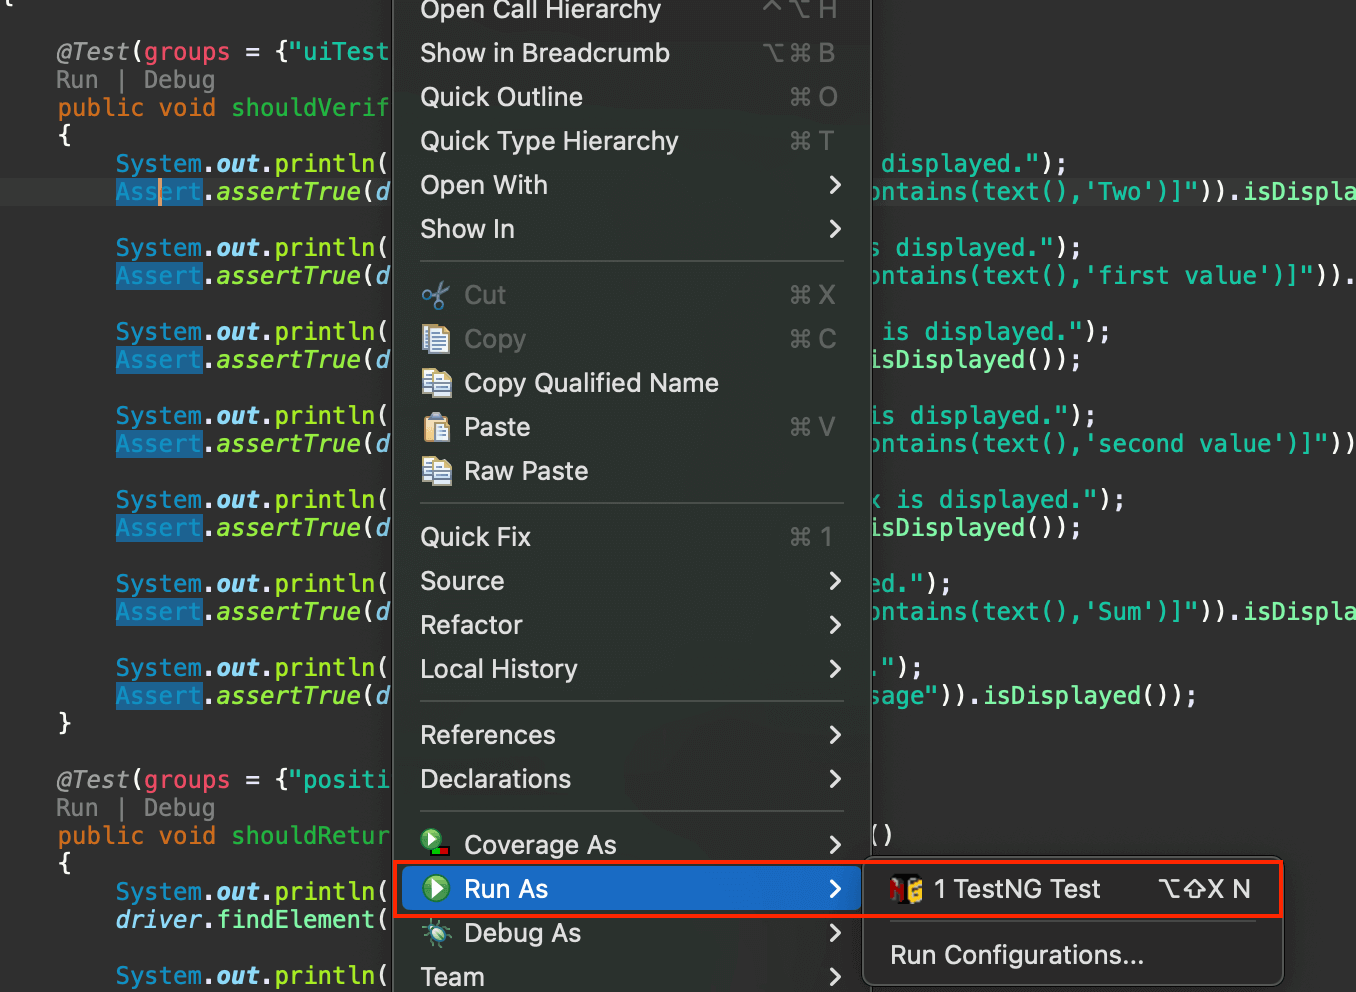
**Test Execution And Results**
Right-click > Select Run As > TestNG, Test to execute the tests individually.
**Result:**
*shouldVerifyAllElementsWhenThePageIsLoaded()*
**Result:**
*shouldReturnTheResultWhenBothNumbersAreValid()*
**Result:**
*shouldShowErrorWhenAnyNumberIsMissing()*
Running tests locally is manageable when working with up to three or four browsers and one operating system. However, this limitation makes it difficult for testers to conduct tests on more than four browsers and multiple operating systems. To address this, testers can use a cloud-based platform where they do not have to worry about maintaining test infrastructure and can conduct comprehensive cross-browser and cross-platform testing seamlessly. One such platform is LambdaTest.
It is an AI-powered test execution platform that lets you run manual and automated [cross-browser testing](https://www.lambdatest.com/cross-browser-testing?utm_source=medium&utm_medium=organic&utm_campaign=aug_12&utm_term=rj&utm_content=blog) at scale, with over 3000+ real devices, browsers, and OS combinations.
This platform provides the speed and resources to make test executions faster and more reliable. It facilitates parallel execution, allowing multiple tests to run simultaneously for large automation suites. This cloud grid platform also offers enhanced logging, maintenance, and debugging resources.
Now, let’s move the local test script to the LambdaTest platform with a few modifications to leverage all the features this cloud grid offers.
## How To Write a Test Case in Java for Cloud Execution?
Having understood the flow of writing and executing the first test case in Java using Selenium and TestNG, let us move ahead and learn how we can do the same on a cloud grid platform.
To use the LambdaTest cloud grid to run the Selenium automation test cases, we need to make some changes to the code to use Selenium *RemoteWebDriver*, which will help connect to the LambdaTest cloud grid and execute the cases over there.
Most of these changes involve configuring the WebDriver settings in BaseTest.java. The modified BaseTest.java with the cloud grid integration will look similar to the example below.
package CLoudGRid;


import java.net.*;
import java.util.HashMap;


import org.openqa.selenium.remote.RemoteWebDriver;
import org.openqa.selenium.chrome.ChromeOptions;
import org.testng.annotations.*;


public class BaseTest {
   public RemoteWebDriver driver = null;


   String username = System.getenv("LT_USERNAME") == null ? "<lambdatest_username>" : System.getenv("LT_USERNAME");
   String accessKey = System.getenv("LT_ACCESS_KEY") == null ? "<lambdatest_accesskey>" : System.getenv("LT_ACCESS_KEY");

   String status = "failed";


   @BeforeMethod
   public void setup() {
       try {
           ChromeOptions chromeOptions = new ChromeOptions();
           chromeOptions.setPlatformName("Windows 10");
           chromeOptions.setBrowserVersion("125");


           HashMap<String, Object> ltOptions = new HashMap<String, Object>();
           ltOptions.put("build", "Test case in Java");
           ltOptions.put("name", "Test case in Java");
           ltOptions.put("w3c", true);
           chromeOptions.setCapability("LT:Options", ltOptions);


           driver = new RemoteWebDriver(
                   new URL("https://" + username + ":" + accessKey + "@hub.lambdatest.com/wd/hub"), chromeOptions);


           System.out.println("Navigating to Two Input Field section");
           driver.get("https://www.lambdatest.com/selenium-playground/simple-form-demo");


       } catch (MalformedURLException e) {
           e.printStackTrace();
       }
   }


   @AfterMethod
   public void tearDown() {
       driver.executeScript("lambda-status=" + status);
       driver.quit();
   }
}
**Code Walkthrough:** Below is the complete code walkthrough to understand the code written in the above BaseTest.java file. 1. Start by creating required class objects and variables with public access to access them in the test classes. For this, first, create an object of *RemoteWebDriver* and initialize it to null. 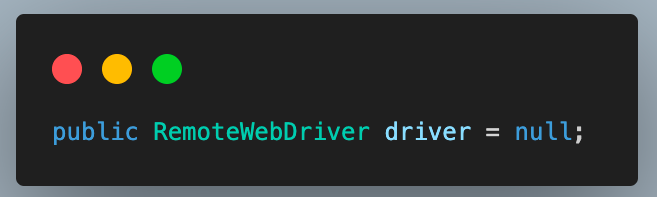 1. Next, add the username and access key for your LambdaTest account to connect to the cloud grid for test execution. You can find these in the [Password & Security](https://accounts.lambdatest.com/security) section tab.  1. You can also configure these as environment variables and directly fetch them in code instead of defining them in plain text. **For Windows:** > set LT_USERNAME=LT_USERNAME set LT_ACCESS_KEY=LT_ACCESS_KEY **For macOS and Linux:** > export LT_USERNAME=LT_USERNAME export LT_ACCESS_KEY=LT_ACCESS_KEY 1. Add a String variable as *status* and initialize it with value as *failed*. Before quitting the driver instance, this variable helps mark the test case’s final status as passed/failed on the LambdaTest dashboard. This value is updated to be *passed* in the test case if the test passes with no assertion failures or exceptions.  1. Update the code inside the *setup()* method to set the required browser properties and LambdaTest configurations to connect to the cloud grid. 2. Create an object of the *ChromeOptions *class and set the OS and browser versions.  1. Next, create a *HashMap* type variable to specify the additional browser capabilities for the LambdaTest platform. This will help to identify the dashboard test results using the build name and other details. 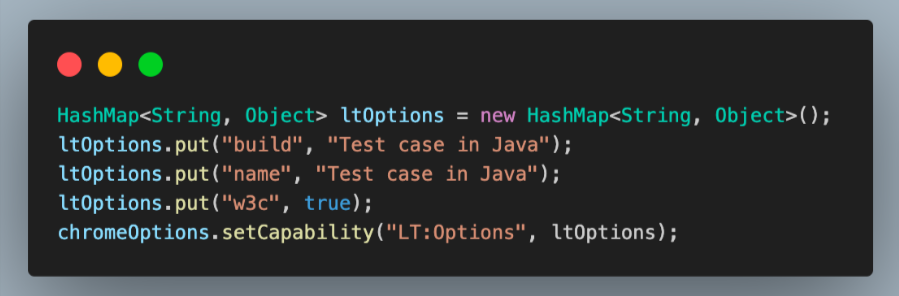 You can fetch the required browser capabilities from the LambdaTest platform by navigating to the [Automation Capabilities Generator](https://www.lambdatest.com/capabilities-generator/). This helps by offering ready-to-use code for setting up browser capabilities that can be used in execution. 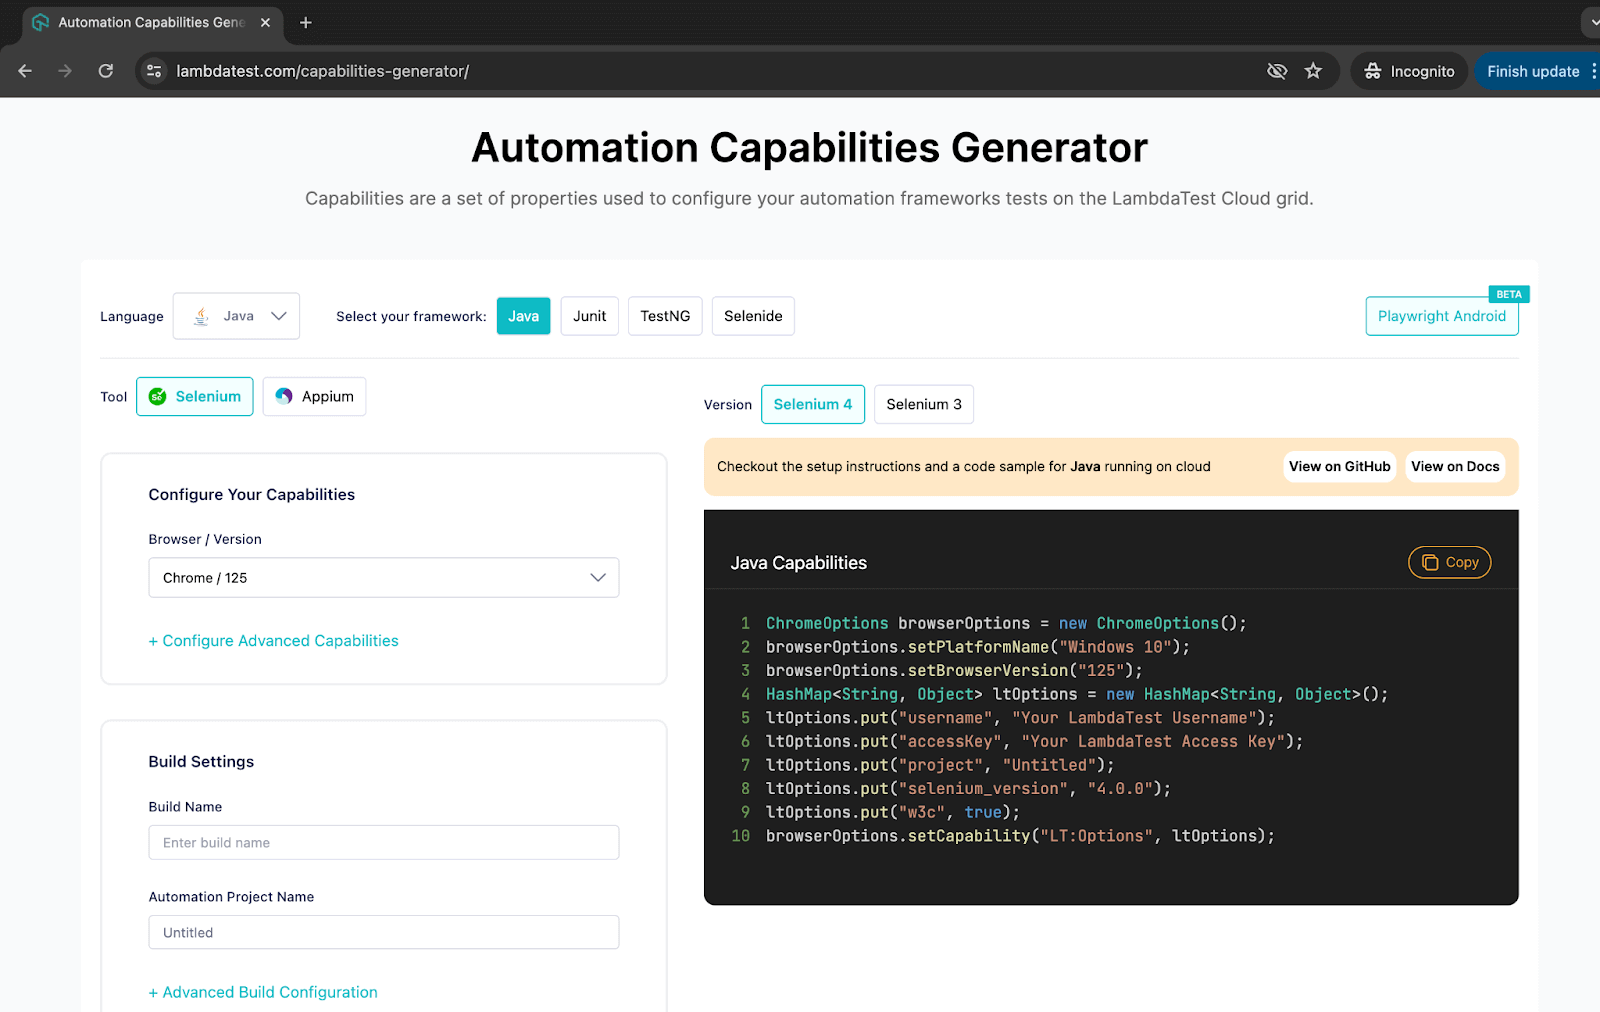 1. Finally, use the Selenium *RemoteWebDriver* to connect to the LambdaTest remote grid using your credentials and *ChromeOptions* class object containing all specified browser capabilities.  1. Use this driver to navigate the Two Input Fields page on the LambdaTest Selenium Playground for test execution.  1. Inside the *tearDown()* method, add a step to execute the script to update the test case status on the LambdaTest dashboard. 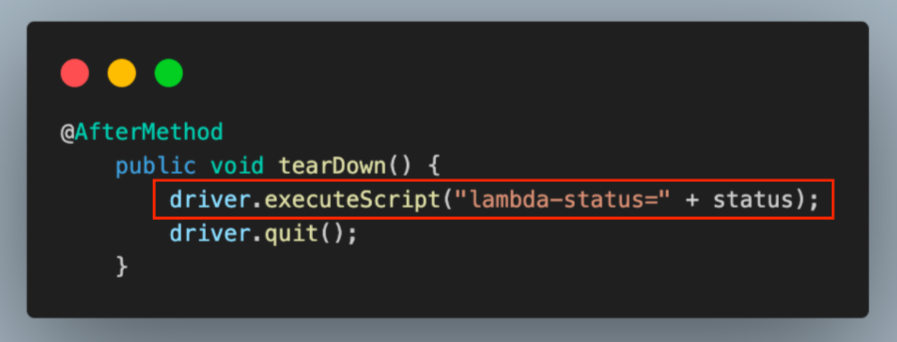 1. Next, move to the test class TwoInputFieldTests.java and add the step to update the status to *passed *after the execution of all test cases. 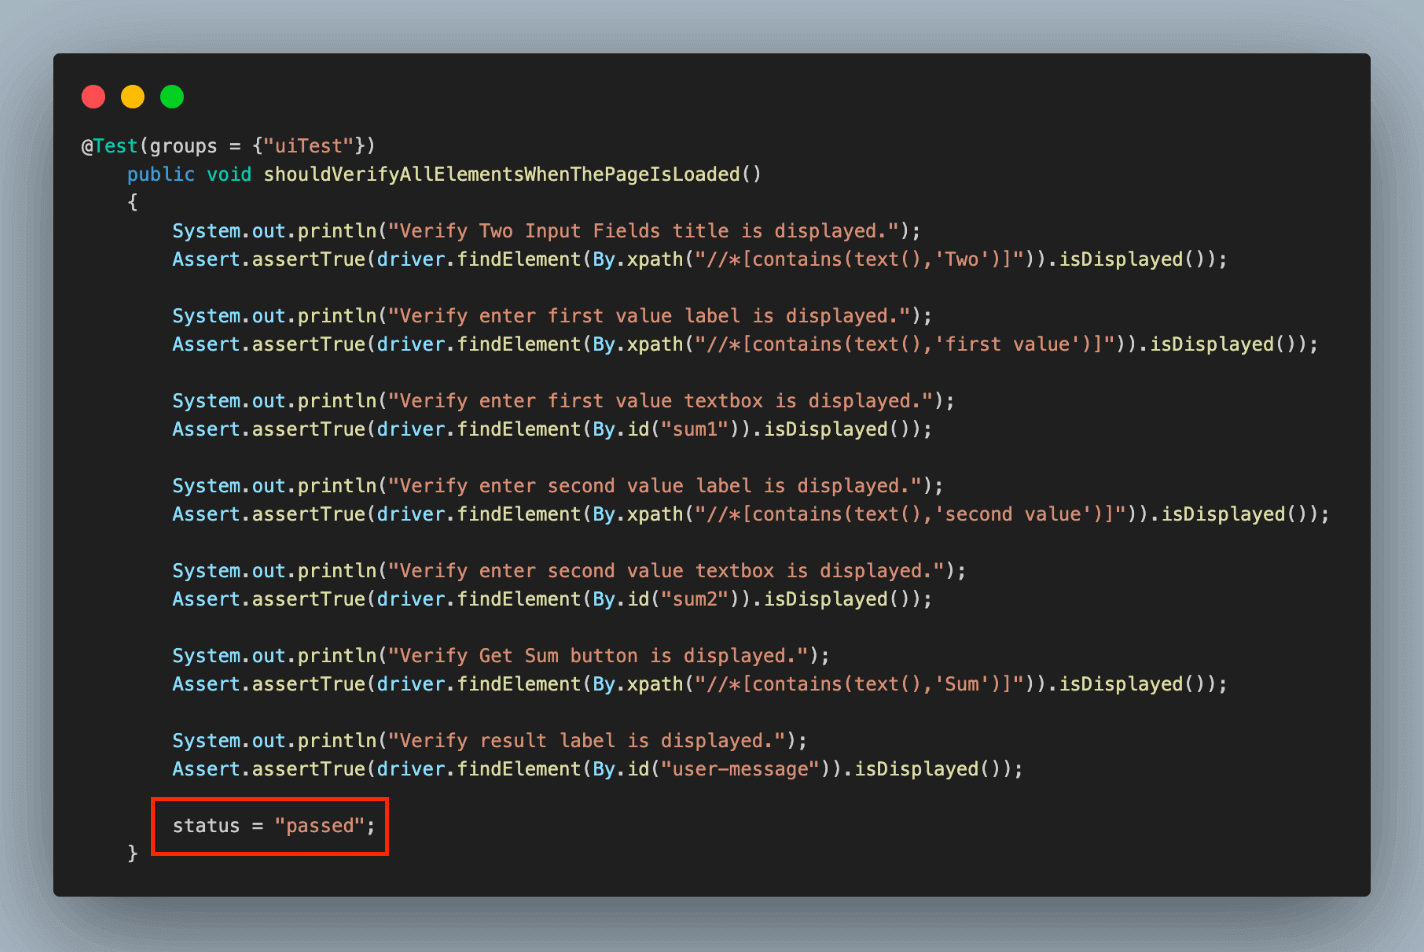 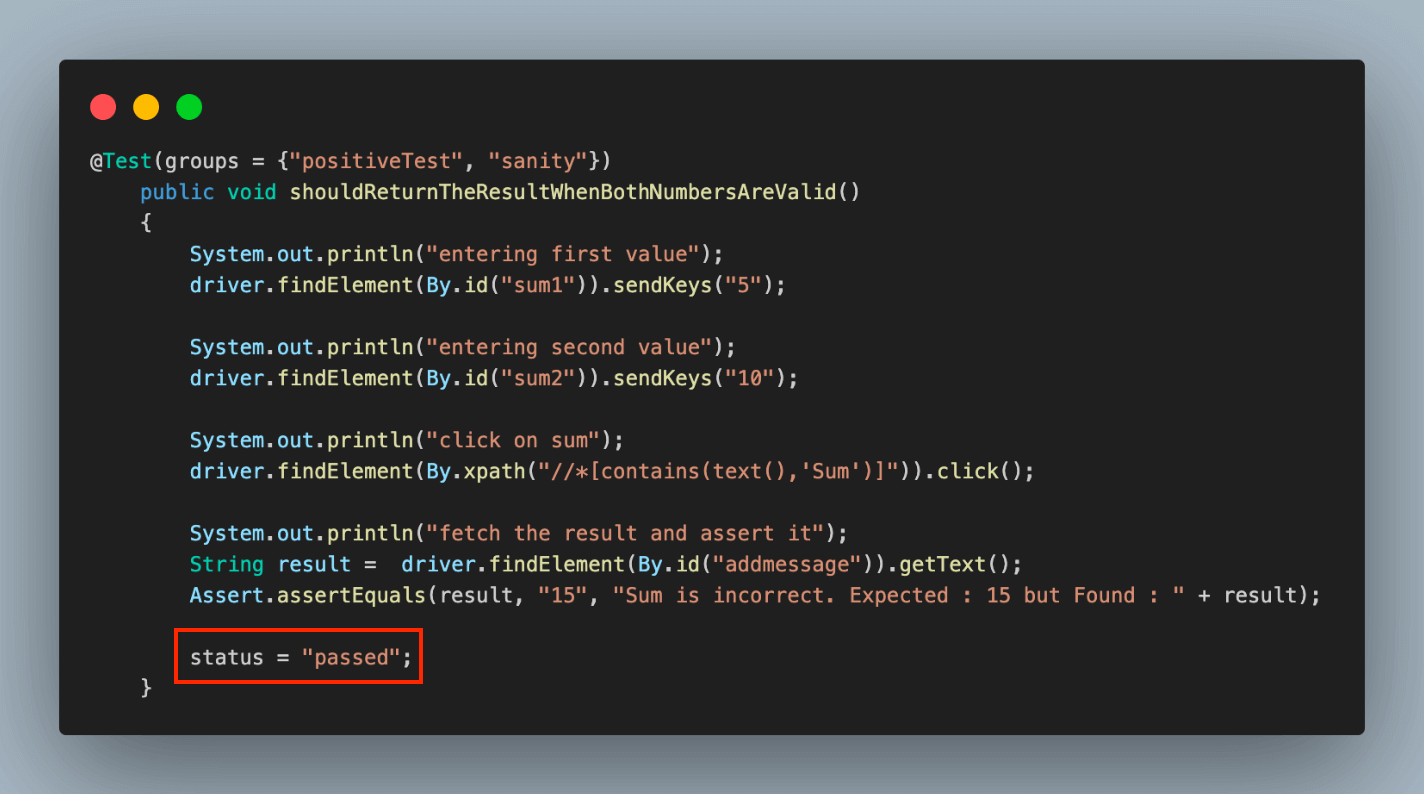 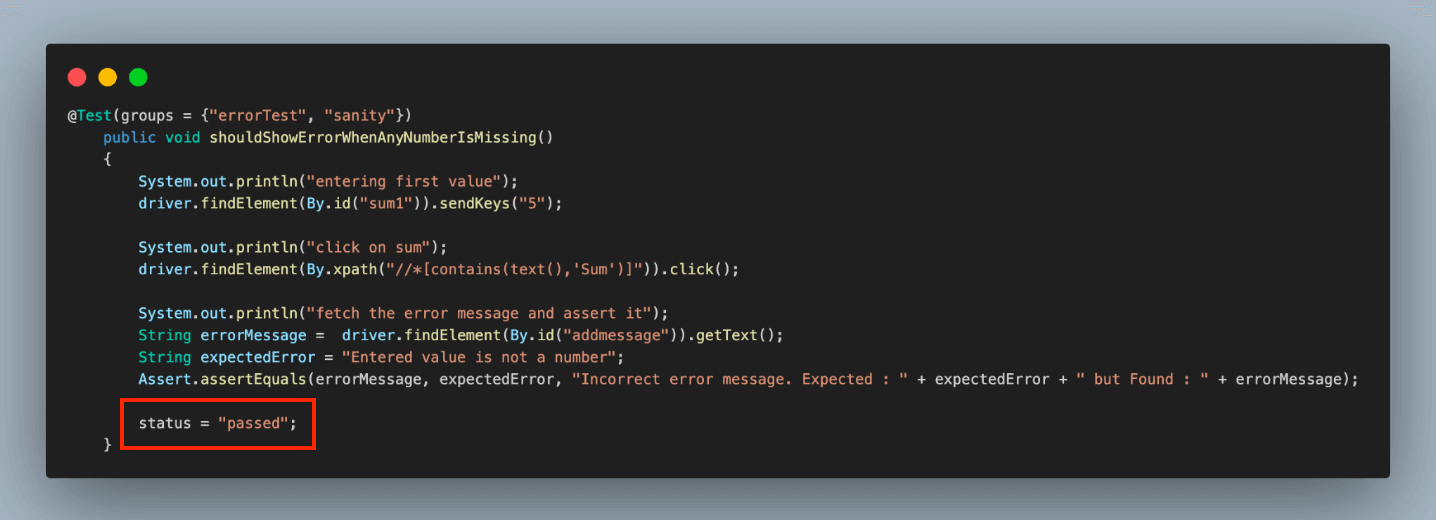 **Results:** We can execute the test cases similarly to how we did for local execution. The console output in the IDE will remain unchanged, but the primary focus will shift to monitoring the execution results on the LambdaTest dashboard. The execution results are on the LambdaTest Dashboard under the **Automation > Web Automation** tab. 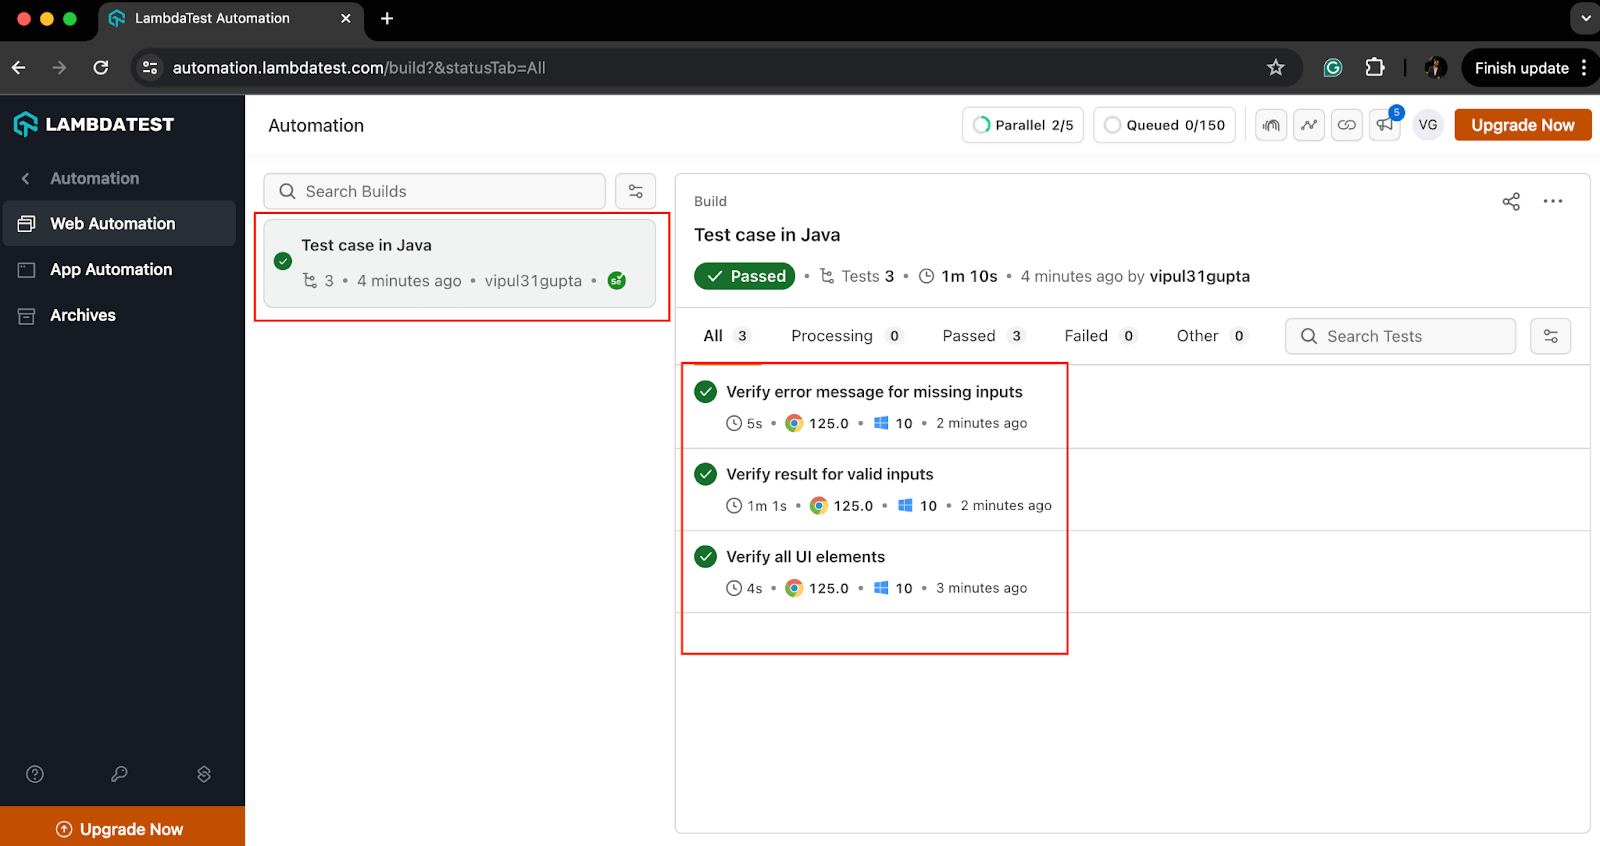 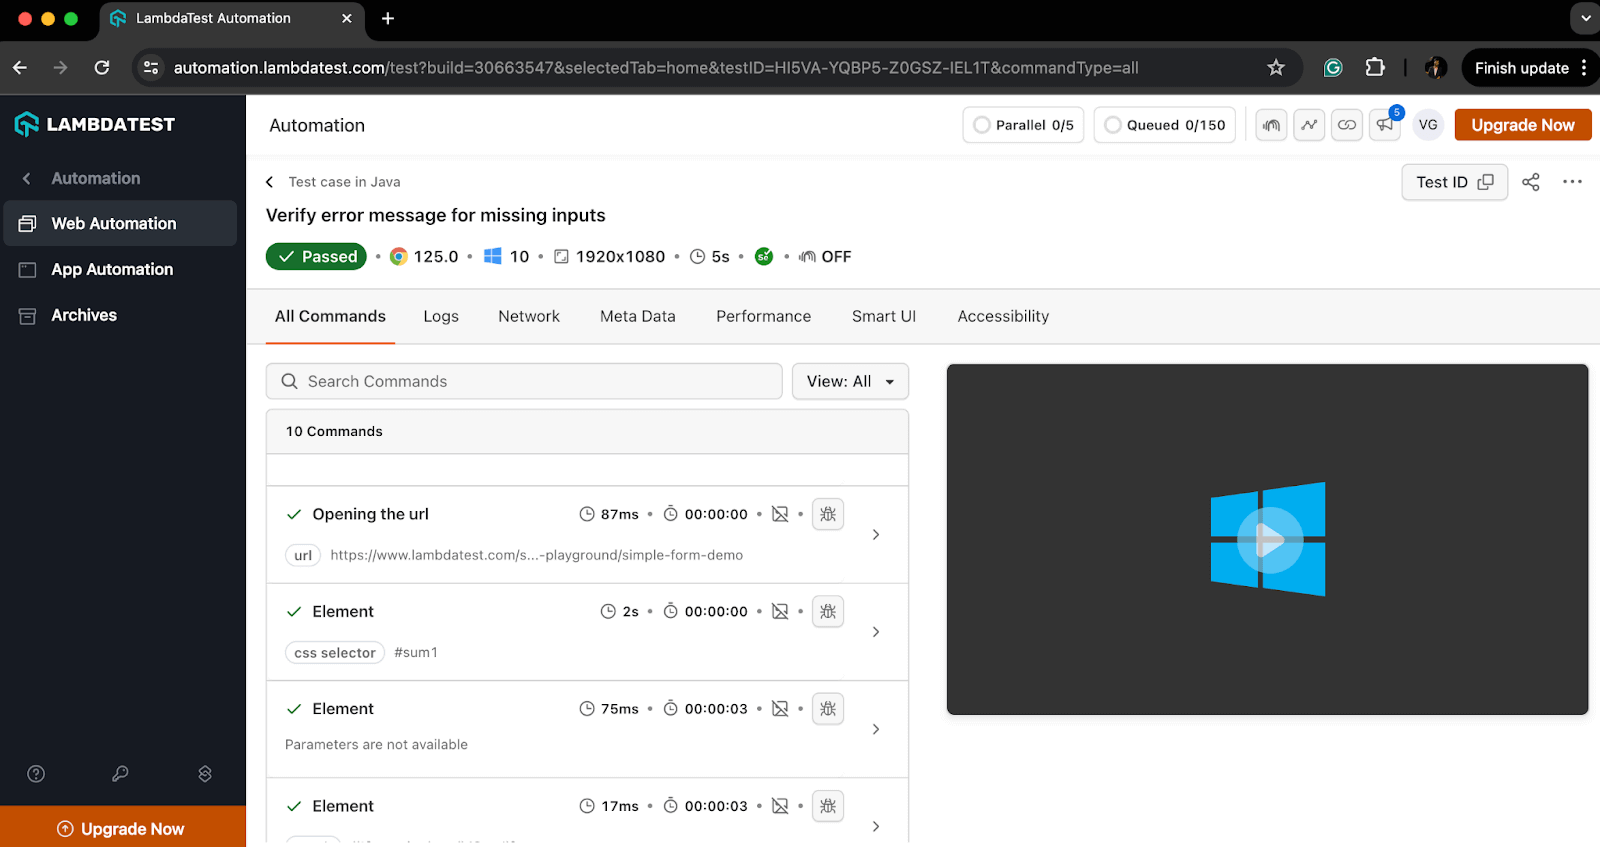 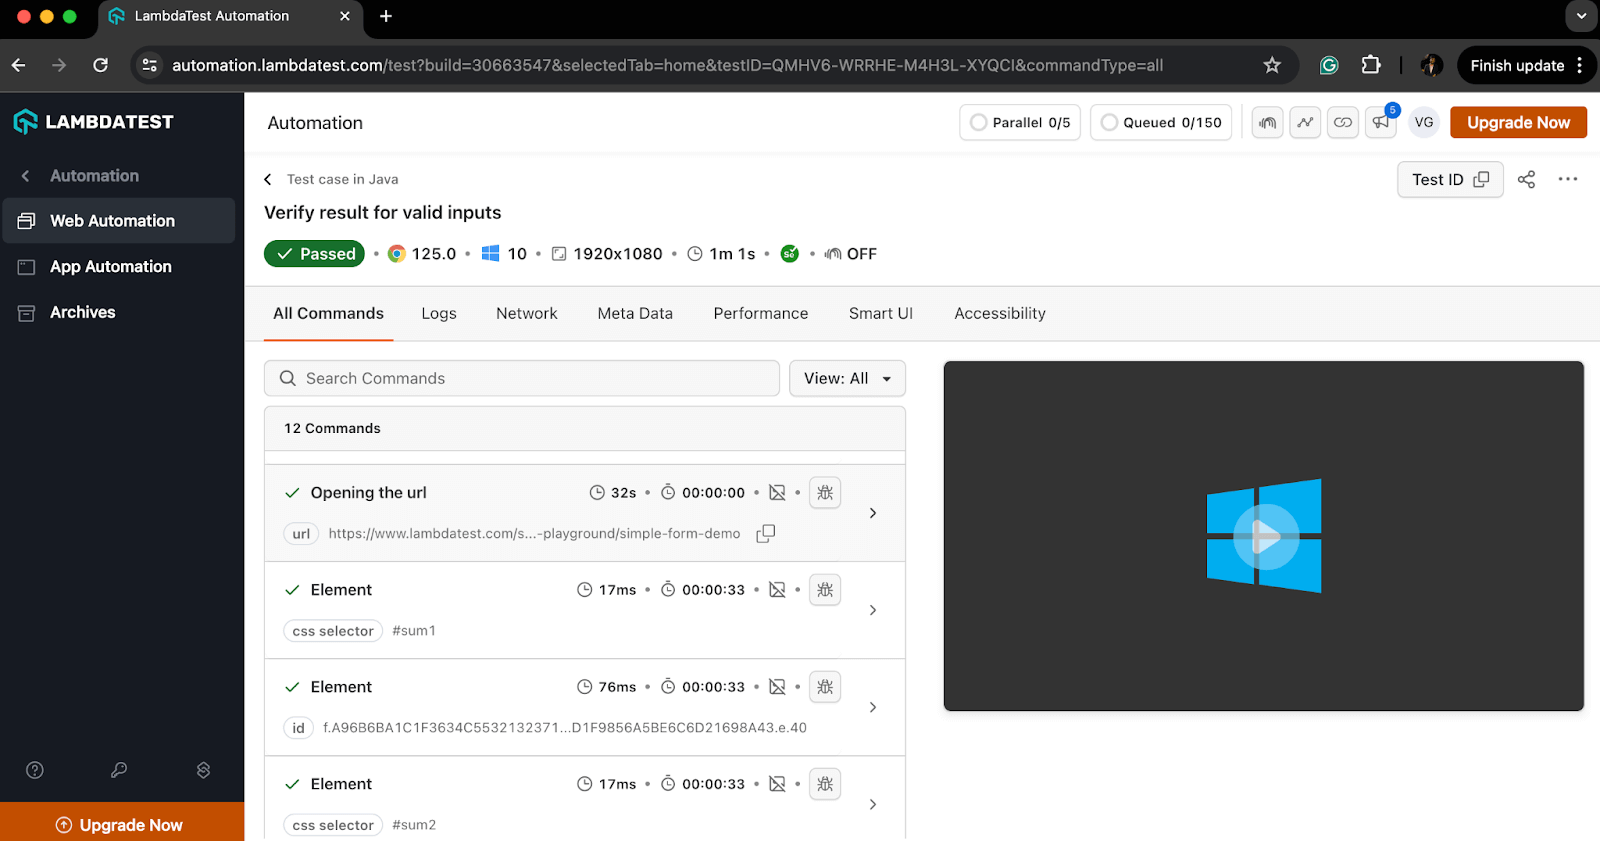 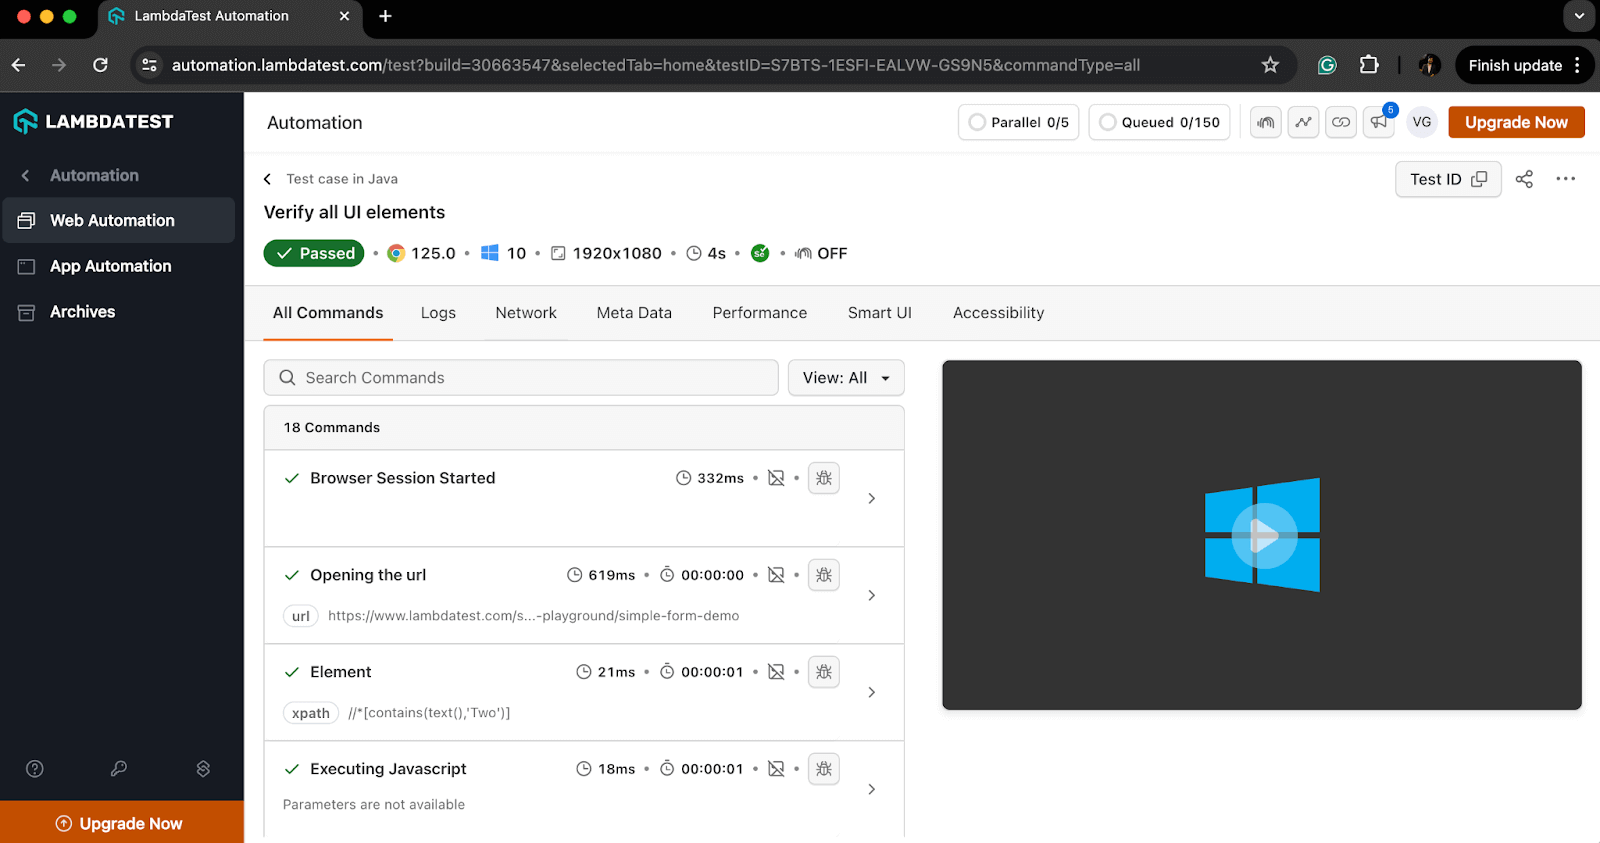 ## Best Practices for Writing Test Cases in Java All the test executions we’ve learned above are written following best practices. Adhering to these practices helps avoid repeating the same or similar mistakes and ensures a smooth test flow in your automation projects. Some of the best practices are given below. * **Understanding the Requirements** The first and foremost requirement of writing a good test case is understanding the changes and features clearly. The tester needs to know what is expected from the code based on the input. We can refer to the product requirement documentation or the acceptance cases to know the expected behavior. * **Maintainable and Reusable Code** The test cases should be readable and follow clean coding principles. This helps to keep test cases maintainable and allows quick refactoring in case of requirement changes without much hassle. * **Clear and Descriptive Test Case Names** The names should be clear and meaningful so that anyone who sees the code or test case can understand what a particular test is supposed to do. The name should be descriptive enough to describe the purpose of the test case. One of the naming conventions one can follow is *should[ExpectedResult*]*When[Condition]*. For example, *shouldReturnTheResultWhenBothNumbersAreValid *or *shouldShowErrorWhenAnyNumberIsMissing*. * **Arrange-Act-Assert Structure** Try to follow the AAA structure for your test cases for effective test management by splitting it into three parts. * **Arrange:** Define and set up the test environment and test data on which we want to execute the test. * **Act:** Write the execution steps which interact with the feature using the above data. * **Assert:** Write proper assertions which verify the actual and expected results. * **One Test Case, One Assertion** Use specific and meaningful assertions for each test case, which helps to verify the required details. One test should not be used to verify multiple flows and should not have a dependency on any other test case. For example, valid results for valid input and error responses for invalid input should be two separate test cases. You can use assertions like *assertEquals(), assertTrue(), assertFalse(), assertNotNull()*, etc., to assert to-the-point data and provide meaningful messages to better understand the failures. * **Using Setup and Teardown Methods** Use *@Before* and *@After* annotations of JUnit or TestNG, depending on your framework, to write setup and teardown methods. These methods help to prevent duplicity by making the common code, like driver setup, browser launch, driver termination, etc, reusable across all the test cases. * **Using Mock Data and Stubs for Error Cases** Mock data or stubs means to simulate a function behavior in the software to return some particular result as desired by the tester to test some particular test cases. We can use mocking frameworks like Mockito or write a stub function to mock dependencies and verify test cases for external dependency failures. * **Covering Edge and Boundary Value Cases** Write test cases to cover all the edge cases or unusual scenarios due to software or hardware downtimes. You can use mocking for such types of test cases. Also, testing for boundary values by passing various test data helps verify if the code and software function properly for limiting cases. * **Using Tags, Groups, and Categories** Use tags, groups, or categories to group the related test cases together that serve some common purpose, flow, or requirement in general. For instance, you can group all test cases for login flow, positive and negative cases, etc. ## Conclusion With this, we have concluded this blog on how to write a test case in Java. In this blog, we learned how a good test case can be written with a basic understanding of Java language and test case fundamentals like flow, assertions, and WeElement locators. We learned the working examples on local and cloud grids and understood how following the best practices makes the test case robust and reliable. Now, it’s time for you to go ahead and try writing your first [test case](https://www.lambdatest.com/learning-hub/test-case?utm_source=medium&utm_medium=organic&utm_campaign=aug_12&utm_term=rj&utm_content=blog) in Java. Happy learning!!
以上がJava でテスト ケースを作成する方法の詳細内容です。詳細については、PHP 中国語 Web サイトの他の関連記事を参照してください。