Composant Date et Heure (Partie 1)
Introduction à cette section :
Ce que cette section vous apporte, ce sont plusieurs contrôles qu'Android nous fournit pour afficher l'heure. TextClock, AnalogClock, Chronometer, et en fait il existe une DigitalClock obsolète que je n'expliquerai pas ! Bon, commençons cette section !
1. TextClock (TextClock)
TextClock est un contrôle lancé après Android 4.2 (API 17) pour remplacer DigitalClock !
TextClock peut afficher la date et l'heure actuelles au format chaîne, il est donc recommandé d'utiliser TextClock après Android 4.2.
Ce contrôle est recommandé pour une utilisation dans les systèmes Android 24 bits. TextClock propose deux formats différents. L’une consiste à afficher l’heure et la date en base 24, et l’autre consiste à afficher l’heure et la date en base 12. La plupart des gens aiment les paramètres par défaut.
Vous pouvez vérifier si le système utilise l'affichage de l'heure 24 hexadécimales en appelant : la méthode is24HourModeEnabled() fournie par TextClock ! En mode 24 décimal :
- Si l'heure n'est pas obtenue, renvoyez d'abord la valeur via getFormat24Hour();
- Si l'acquisition échoue, obtenez la valeur de retour via getFormat12Hour() ; ;
- Si ce qui précède échoue, la valeur par défaut sera utilisée
De plus, il nous fournit les méthodes suivantes, correspondant à la méthode get :
| Attribute Name | Related Method | Description |
|---|---|---|
| android:format12Hour | setFormat12Hour(CharSequence) | 设置12时制的格式 |
| android:format24Hour | setFormat24Hour(CharSequence) | 设置24时制的格式 |
| android:timeZone | setTimeZone(String) | 设置时区 |
En fait, nous passons plus de temps sur la définition de la forme temporelle, qui est la CharSequence à l'intérieur ! Voici les méthodes d'écriture et les résultats couramment utilisés :
android:layout_width="wrap_content"
android:layout_height="wrap_content"
android:format12Hour=" MM /jj/aa h:mmaa"/>
<TextClock
android:layout_width="wrap_content"
android:layout_height="wrap_content"
android:format12Hour="MMM jj, y aaa h :mmaa"/>
<TextClock
android:layout_width="wrap_content"
android:layout_height="wrap_content"
android:format12Hour="MMMM jj, aaaa h:m maa "/> ;
<TextClock
android:layout_width="wrap_content"
android:layout_height="wrap_content"
android:format12Hour="E, MMMM jj, aaaa h:mmaa"/> ;
<TextClock
android:layout_width="wrap_content"
android:layout_height="wrap_content"
android:format12Hour="EEEE, MMMM jj, aaaa h:mmaa"/>
< TextClock
android:layout_width="wrap_content"
android:layout_height="wrap_content"
android:format12Hour="Jour remarquable : 'M/d/aa"/>
Résultat d'exécution :
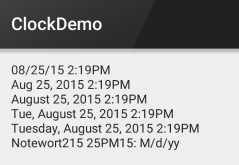
PS :De plus, minsdk doit être supérieur à ou égal à 17 !
2.AnalogClock (horloge analogique)
est comme celui présenté ci-dessous :
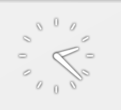
Nous pouvons trouver sur le site officiel Voir trois attributs comme celui-ci :
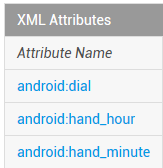
dans l'ordre : fond de table, aiguille des heures de la table, image de l'aiguille des minutes, nous pouvons le personnaliser nous-mêmes :
L'exemple de code est le suivant :
android:layout_width="100dp"
android:layout_height="100dp"
android:dial=" @mipmap/ic_c_bg"
android:hand_hour="@mipmap/zhen_shi"
android:hand_minute="@mipmap/zhen_fen" />
Résultat de course :
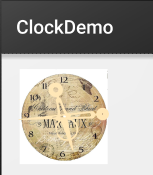
3.Chronomètre (minuterie)
Comme mentionné , c'est un simple timer, passons directement à l'exemple d'utilisation :
Exemple d'utilisation :
Code d'implémentation :
Code de mise en page :
<LinearLayout xmlns:android="http://schemas.android.com/apk/res/android"
xmlns:tools="http://schemas.android.com /tools"
android:layout_width="match_parent"
android:layout_height="match_parent"
android:orientation="vertical"
tools:context=".MainActivity">
<Chronomètre
android:id="@+id/chronometer"
android:layout_width="fill_parent"
android:layout_height="wrap_content"
android:gravity =" center"
android:textColor="#ff0000"
android:textSize="60dip" />
<LinearLayout
android:layout_width="fill_parent"
androïde : layout_height="wrap_content"
android:layout_margin="10dip"
android:orientation="horizontal">
<Button
android:id="@+id/btnStart"
android:layout_width="fill_parent"
android:layout_height="wrap_content"
android:layout_weight="1"
android:text="开始记时" />
<Bouton
android:id="@+id/btnStop"
android:layout_width="fill_parent"
android:layout_height="wrap_content"
android:layout_weight="1"
android:text="停止记时" />
<Bouton
android:id="@+id/btnReset"
android:layout_width="fill_parent"
android:layout_height="wrap_content"
android:layout_weight="1"
android:text="重置" />
<Bouton
android:id="@+id/btn_format"
android:layout_width="wrap_content"
android : layout_height="wrap_content"
android:text="格式化" />
</LinearLayout>
</LinearLayout>
MainActivity.java
classe publique MainActivity étend AppCompatActivity implémente View.OnClickListener,Chronometer.OnChronometerTickListener{
chronomètre privé Chronometer ;
bouton privé btn_start,btn_stop,btn_base,btn_format;
@Override
protected void onCreate (Bundle savedInstanceState ) {
super.onCreate(savedInstanceState);
setContentView(R.layout.activity_main);
initView();
}
private void initView() {
chronometer = (Chronomètre) findViewById(R.id.chronometer);
btn_start = (Bouton) findViewById(R.id.btnStart);
btn_stop = (Bouton) findViewById(R.id.btnStop);
btn_base = (Bouton) findViewById(R.id.btnReset);
btn_format = (Bouton) findViewById(R.id.btn_format);
chronometer.setOnChronometerTickListener(this);
btn_start. setOnClickListener(this);
btn_stop.setOnClickListener(this);
btn_base.setOnClickListener(this);
btn_format.setOnClickListener(this);
}
@Override
public void onClick(View v) {
s witch (v . getId()){
case R.id.btnStart:
chronometer.start();// Démarrer le chronométrage
pause;
case R.id.btnS top:
chronomètre. stop( );//Arrêter le timing
break;
case R.id.btnReset:
chronometer.setBase(SystemClock.elapsedRealtime());//Reset
break;
case R .id .btn_format:
chronometer.setFormat("Time:%s");//Changer le format d'affichage de l'heure
break;
}
}
@Override
public void onChronometerTick(Chronomètre chronomètre) {
String time = chronometer.getText().toString();
if(time.equals("00:00")){
Toast.makeText(MainActivity .this, "Le temps est écoulé ~", Toast.LENGTH_SHORT).show();
}
}
}
Capture d'écran du fonctionnement :
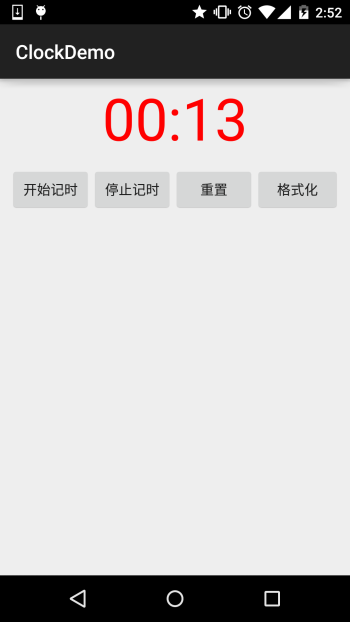
Résumé de cette section :
Cette section indique Une brève introduction aux trois composants de TextClock, AnalogClock et Chronometer est présentée dans la longueur de l'article. En fait, je n'utilise pas beaucoup ces trucs, presque jamais... C'est bien de les connaître, et leur utilisation est super simple... Ça y est, c'est tout pour cette rubrique~Merci


