Maison >développement back-end >Tutoriel Python >Conseils Python extrait et organise automatiquement les factures PDF par lots
Conseils Python extrait et organise automatiquement les factures PDF par lots
- Python当打之年avant
- 2023-08-10 15:58:202219parcourir
Cet article partage une solution de cas de bureautique Python basée sur PDF, qui est également une véritable demande soulevée par une femme financière. Jetons d'abord un coup d'œil à la demande.
Description des exigences
Il existe plusieurs factures de type PDF dans un certain dossier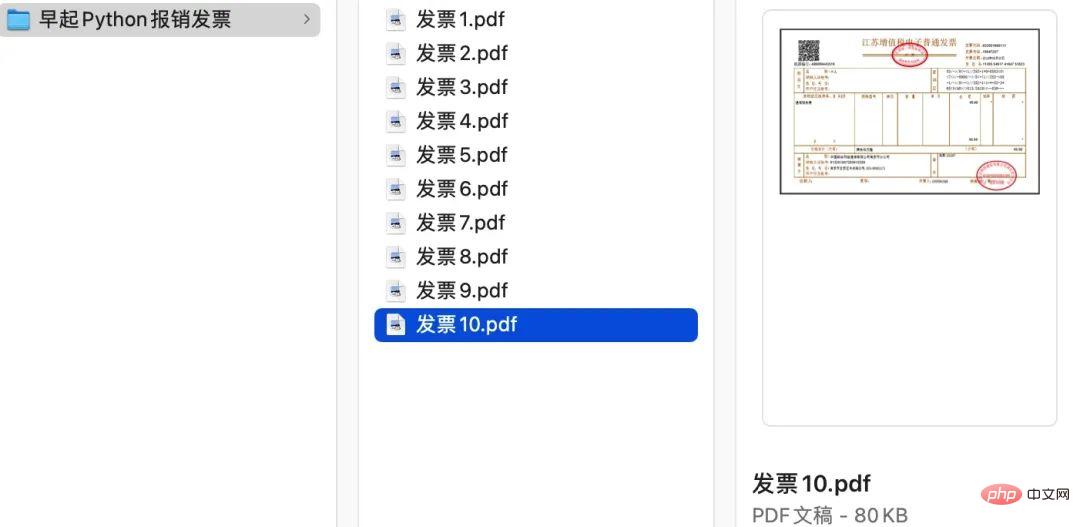
Chaque facture PDF est de type Image pure, les informations textuelles à l'intérieur ne peuvent pas être copiées manuellement (en fait, la plupart des factures peuvent être copiées partie du texte, mais nous l'expliquerons sous forme d'images), à peu près comme le montre la figure ci-dessous : 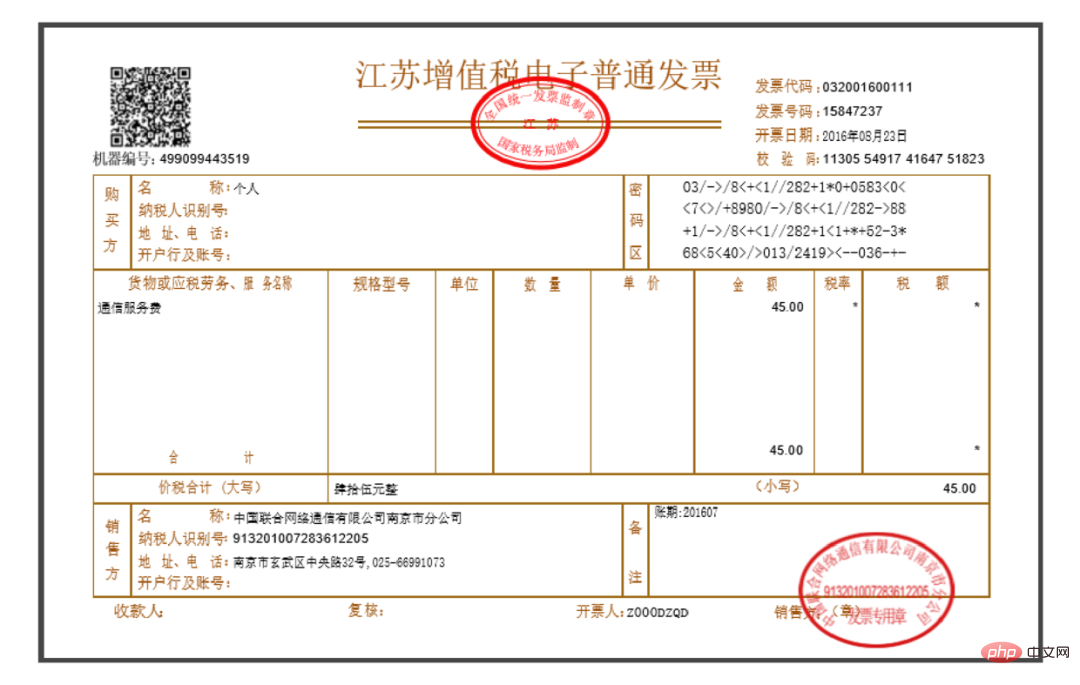
Les conditions à remplir sont : obtenir le montant total, le numéro d'identification fiscale et l'émetteur , soit les trois cases suivantes Position : 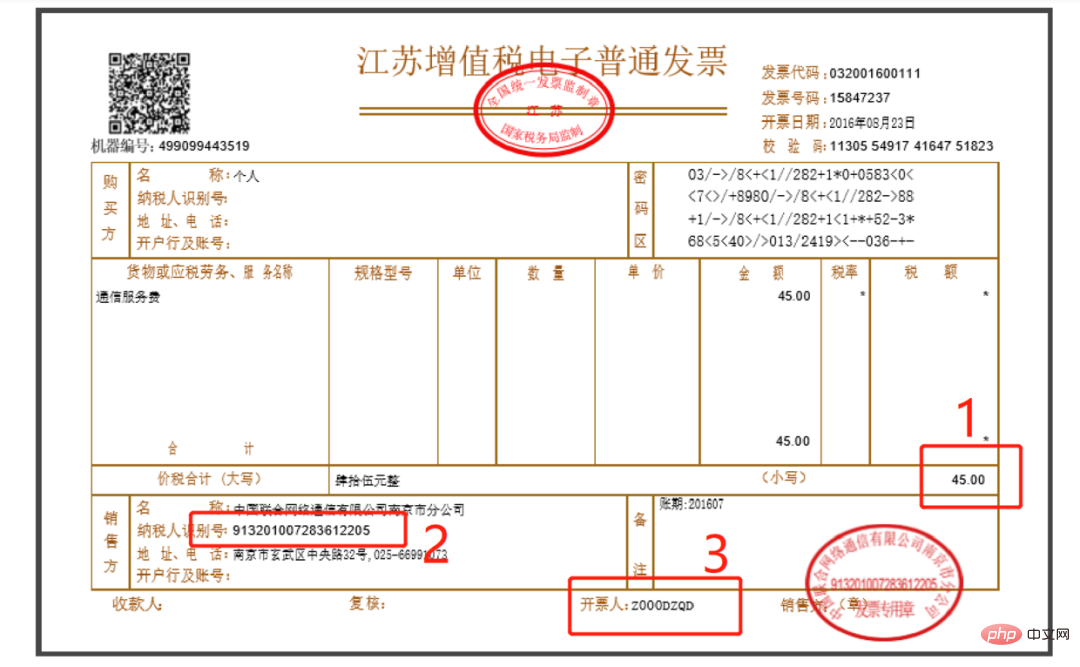
Enfin combiné avec des opérations par lots, après avoir obtenu les informations ci-dessus, stockez-les dans Excel ! 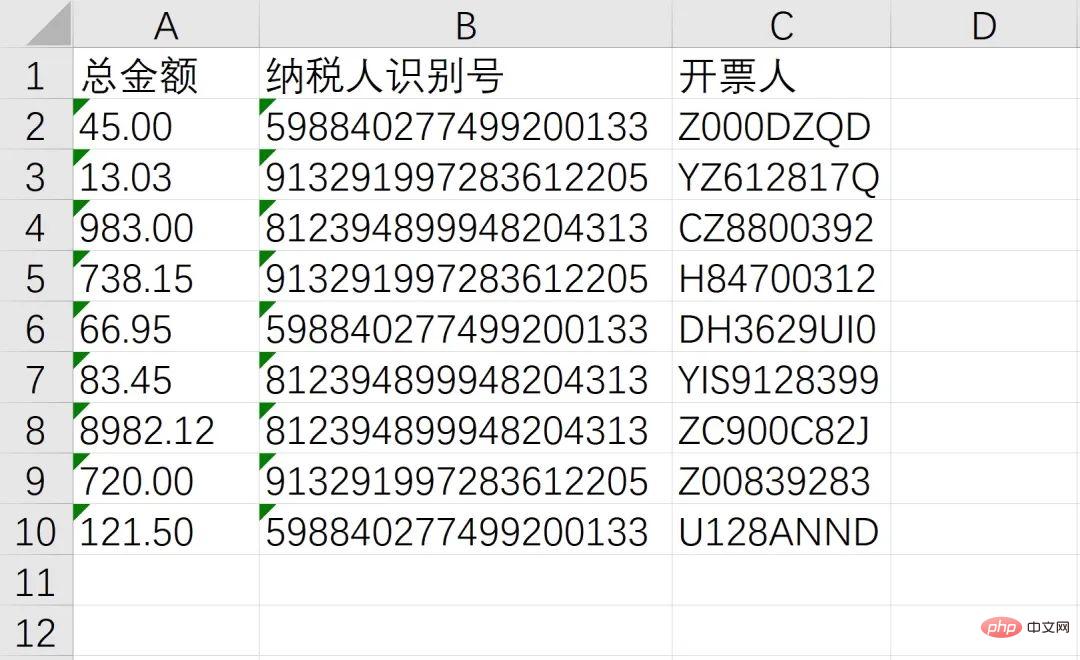
Idées et mise en œuvre du code
L'exigence est essentiellement un problème de reconnaissance d'image, car le contenu du PDF est de type image et le texte ne peut pas être extrait directement par des méthodes conventionnelles. La solution consiste à utiliser la reconnaissance optique de caractères (OCR) pour reconnaître le texte dans l'image. Mais en même temps, il convient de noter que le PDF n'est pas une image après tout. Afin de compléter l'OCR, en plus de l'OCR lui-même, vous devez également télécharger Ghostscript 和 ImageMagick 用来完成类型转换。已 Windows En prenant le système comme exemple, vous devez installer le fichier. trois logiciels suivants sur votre ordinateur :
Ghostscript32 位
Ghostscript 32 位ImageMagick 32 位tesseract-OCR 32 位三个软件的下载安装没有特殊的地方(tesseract 配置稍复杂但网络有上诸多教程,这里不再赘述),读者可自行搜索下载及配置,下面讲解代码。首先导入需要的模块:
from wand.image import Image
from PIL import Image as PI
import pyocr
import pyocr.builders
import io
import re
import os
import shutil
具体的模块用途可以参考下面具体代码。其中 wand 和 pyocr 由于是非标准库需要自行额外安装。打开命令行输入:
pip install wand
pip install pyocr
本需求还涉及对接 Excel,可考虑利用 openpyxl 库的 Workbook 用以创建新的 Excel 文件:
from openpyxl import Workbook
需求中的 发票.pdf 放在桌面上。可通过下面基于 os 模块的代码获取桌面路径:
# 获取桌面路径包装成一个函数
def GetDesktopPath():
    return os.path.join(os.path.expanduser("~"), 'Desktop')

path = GetDesktopPath() + r'\发票.pdf'
获取配置好的 tesseract
ImageMagick 32位🎜🎜 32 位<p data-tool="mdnice编辑器" style="padding-top : 8px;padding-bottom : 8px;line-height : 26px ;color: black;"> ),读者可自行搜索下载及配置,下面讲解代码。首先导入需要的模块:🎜<pre class="brush:php;toolbar:false;">tool = pyocr.get_available_tools()[0]</pre></p>
<p data-tool="mdnice编辑器" style="padding-top: 8px;padding-bottom: 8px;line-height: 26px;color: black;">具体的模块用途可以参考下面具体代码。其中 <code style="padding: 2px 4px;border-radius: 4px;margin-right: 2px;margin-left: 2px;background-color: rgba(27, 31, 35, 0.05);font-family : " operator mono consolas monaco menlo monospace break-all rgb>wand 和 pyocr本需求还涉及对接 Excel, openpyxl 库的 用以创建新的 Excel 文件:🎜image_pdf = Image(filename=path, resolution=300) image_jpeg = image_pdf.convert('jpeg')需求中的
发票.pdf 2px 4px;rayon de bordure : 4px;marge droite : 2px;marge gauche : 2px;couleur d'arrière-plan : rgba(27, 31, 35, 0,05);famille de polices : "Operator Mono", Consolas, Monaco, Menlo , monospace;word-break: break-all;color: rgb(255, 100, 65);font-size: 13px;">os "mdnice编辑器" style="padding-top: 8px;padding-bottom: 8px;line-height: 26px;color: black;">获取配置好的 tesseract 便于后面调用:🎜tool = pyocr.get_available_tools()[0]
通过 wand 模块将 PDF 文件转化为分辨率为 300 的 jpeg 图片形式:
image_pdf = Image(filename=path, resolution=300)
image_jpeg = image_pdf.convert('jpeg')
将图片解析为二进制矩阵:
image_lst = []
for img in image_jpeg.sequence:
    img_page = Image(image=img)
    image_lst.append(img_page.make_blob('jpeg'))
用 io 模块的 BytesIO 方法读取二进制内容为图片形式:
new_img = PI.open(io.BytesIO(image_lst[0]))
new_img.show()
接下来分别截取需要提取部位字符串的图片了,尽量让图片中只有需要识别的部分,获取识别出来容易简单处理获得需要的内容。
首先以总金额为例,截取图片用 image.crop((left, top, right, bottom)) 四个参数需要反复调试才能确定。经确定四个参数分别是 1600 760 1830 900,尝试截取和预览图片:
### 解析1Z开头码
left = 350
top = 600
right = 1300
bottom = 730
image_obj1 = new_img.crop((left, top, right, bottom))
image_obj1.show()
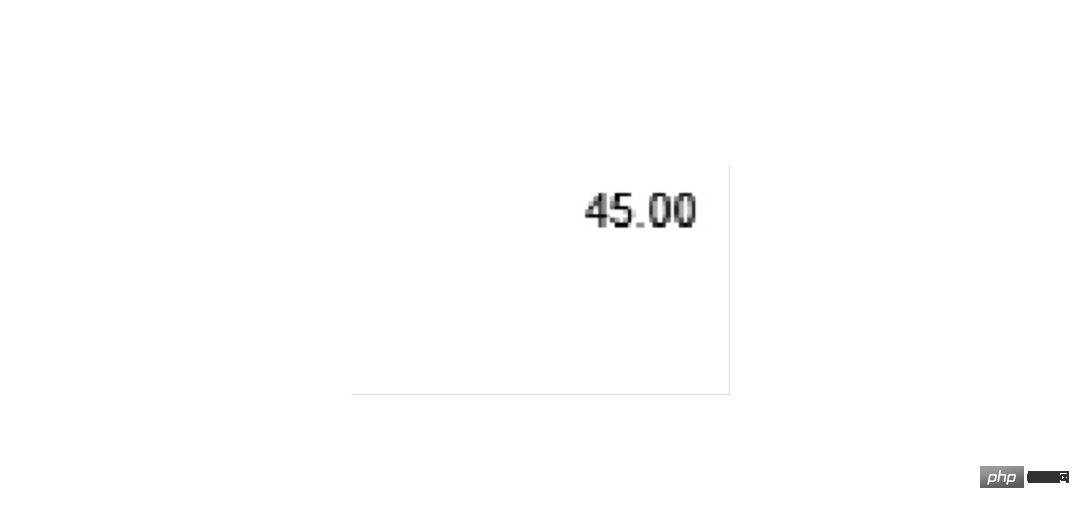
截取成功后可以交给 OCR 了,代码为 tool.image_to_string()
txt1= tool.image_to_string(image_obj1)
print(txt1)

同样,通过方位的调试就可以准确切割到需要的部分进行识别:
left = 560
top = 1260
right = 900
bottom = 1320
image_obj2 = new_img.crop((left, top, right, bottom))
# image_obj2.show()
txt2 = tool.image_to_string(image_obj2)
# print(txt2)
最后是开票人的识别
left = 1420
top = 1420
right = 1700
bottom = 1500
image_obj3 = new_img.crop((left, top, right, bottom))
# image_obj3.show()
txt3 = tool.image_to_string(image_obj3)
# print(txt3)

需要确认识别的内容是否正确,如果识别正确率欠佳可以考虑通过图片处理技术消除噪声,也可以去官网下载更高精度的训练包提高识别的正确性
至此,我们成功的识别了总金额、纳税人识别号、开票人三个消息,接下来就通过非常熟悉的 openpyxl 写入Excel,并使用 os 模块实现批量操作即可
workbook = Workbook()
sheet = workbook.active
header = ['总金额', '纳税人识别号', '开票人']
sheet.append(header)
sheet.append([txt1, txt2, txt3])
workbook.save(GetDesktopPath() + r'\汇总.xlsx')
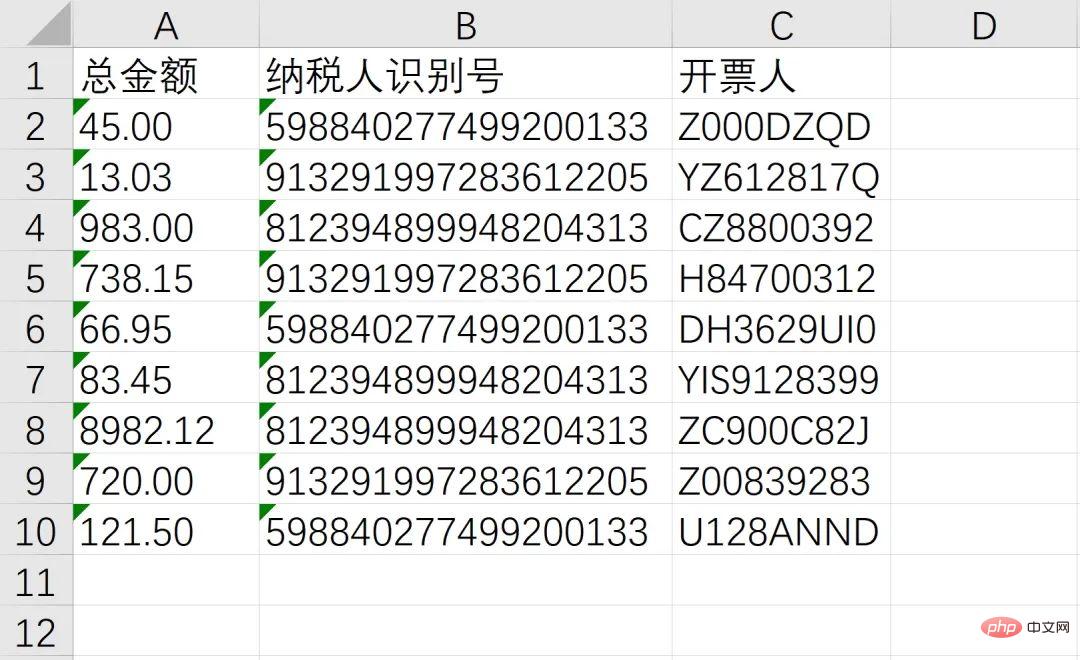
综上,整个需求就成功实现,从效果来看还是非常不错的!完整源码可由文中代码组合而成(已全部分享在文中),感兴趣的读者可以自己尝试!
最后想说的是,其实本文的案例可以衍生出很多实用的办公自动化脚本,例如
批量计算发票金额并重命名文件夹 根据发票类型批量分类 根据发票批量制作报销单 ··· ···
Ce qui précède est le contenu détaillé de. pour plus d'informations, suivez d'autres articles connexes sur le site Web de PHP en chinois!

