
Maison >interface Web >Voir.js >Comment utiliser le composant table vue3
Comment utiliser le composant table vue3

- 王林avant
- 2023-05-12 21:40:121221parcourir
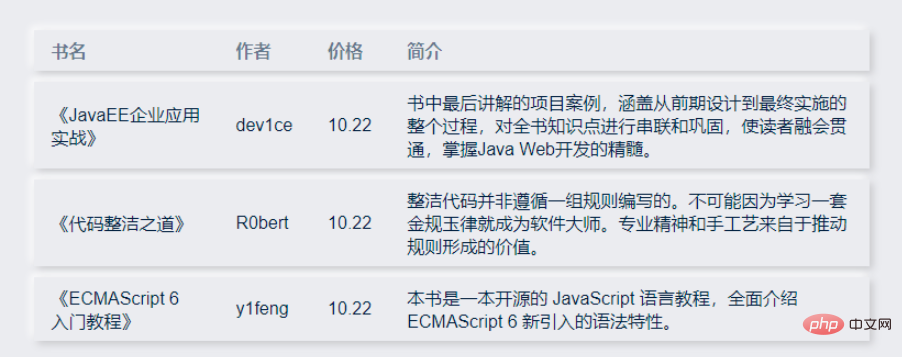
Table de base
Avant de développer le composant table, réfléchissez au type d'API que vous souhaitez utiliser. Étant donné que l'auteur utilise l'élément dans le travail de production, les styles des composants précédents sont similaires à ceux de l'élément, mais je n'ai pas l'intention de le faire. J'utilise le style element cette fois, je prévois de le changer et de l'afficher directement :
Nous attendons des utilisateurs qu'ils l'utilisent comme ceci :
<script setup>
const dataList = [
{
id: 1,
name: '《JavaEE企业应用实战》',
author: 'dev1ce',
price: '10.22',
desc: '书中最后讲解的项目案例,涵盖从前期设计到最终实施的整个过程,对全书知识点进行串联和巩固,使读者融会贯通,掌握Java Web开发的精髓。'
},
{
id: 2,
name: '《代码整洁之道》',
author: 'R0bert',
price: '10.22',
desc: '整洁代码并非遵循一组规则编写的。不可能因为学习一套金规玉律就成为软件大师。专业精神和手工艺来自于推动规则形成的价值。'
},
{
id: 3,
name: '《ECMAScript 6 入门教程》',
author: 'y1feng',
price: '10.22',
desc: '本书是一本开源的 JavaScript 语言教程,全面介绍 ECMAScript 6 新引入的语法特性。'
},
]
const columnsList = [
{
title: '书名',
key: 'name'
},
{
title: '作者',
key: 'author'
},
{
title: '价格',
key: 'price'
},
{
title: '简介',
key: 'desc'
}
]
</script>
<template>
<sanorin-table :columns="columnsList" :data="dataList"/>
</template>Écrivez le code suivant selon ceci
<script setup>
import { ref, computed } from 'vue'
import { useProp, useNeumorphism } from '../mixin/neumorphism'
const props = defineProps({
...useProp,
...{
data: { // dataList
type: Array,
default: () => [],
},
columns: { // columnsList
type: Array,
default: () => [],
},
}
})
const { baseStyleObject } = useNeumorphism(props)
let styleObject = computed(() => ({
// '--font-size': `${props.size-26}px`, '--line-height': `${props.size-20}px`, '--limit-size': `${props.size-28}px`
}))
</script>
<template>
<div :>
<table >
<thead>
<tr class="neumorphism">
<!-- 表头循环 -->
<th v-for="col in columns" :key="col.key">{{col.title}}</th>
</tr>
</thead>
<tbody>
<!-- 表体循环 -->
<tr class="neumorphism" v-for="row in data" :key="row.id">
<td v-for="col in columns" :key="col.key">
<span>
{{row[col.key]}}
</span>
</td>
</tr>
</tbody>
</table>
</div>
</template>
<script>
export default {
name: 'sanorin-table',
}
</script>
<style scoped>
@import "../../style/index.css";
@import "../../style/neumorphism.css";
table {
width: 100%;
/* border-collapse: collapse; */
empty-cells: show;
border-collapse:separate;
border-spacing:0px 10px;
}
table td,
table th {
color: var(--text-color);
padding: 8px 16px 8px 16px;
text-align: left;
}
table th {
color: var(--text-back-color) !important;
font-weight: 600;
white-space: nowrap;
}
table tr{
margin-top: 20px;
}
</style>L'effet final est :
Ensuite, après avoir mis en œuvre cela, nous avons commencé à le faire. Ensuite, commençons par réparer la tête du compteur.
En-tête de compteur fixe
La première méthode sera utilisée ici si elle ne peut pas répondre aux besoins à l'avenir, elle sera remplacée par la méthode ultérieure.
L'effet et le code sont les suivants :
<script setup>
import { ref, computed } from 'vue'
import { useProp, useNeumorphism } from '../mixin/neumorphism'
const props = defineProps({
...useProp,
...{
data: { // dataList
type: Array,
default: () => [],
},
columns: { // columnsList
type: Array,
default: () => [],
},
}
})
const { baseStyleObject } = useNeumorphism(props)
let styleObject = computed(() => ({
}))
</script>
<template>
<div class="san-table scrollbar" :>
<table>
<thead>
<tr class="neumorphism">
<!-- 表头循环 -->
<th v-for="col in columns" :key="col.key">{{col.title}}</th>
</tr>
</thead>
<tbody>
<!-- 表体循环 -->
<tr class="neumorphism" v-for="row in data" :key="row.id">
<td v-for="col in columns" :key="col.key">
<span>
{{row[col.key]}}
</span>
</td>
</tr>
</tbody>
</table>
</div>
</template>
<script>
export default {
name: 'sanorin-table',
}
</script>
<style scoped>
@import "../../style/index.css";
@import "../../style/neumorphism.css";
.san-table{
padding: 0px 20px 20px 20px;
height: 200px;
position: relative;
width: 700px;
overflow: auto;
}
table {
width: 100%;
table-layout: fixed;
empty-cells: show;
border-collapse:separate;
border-spacing:0px 10px;
}
thead {
position: sticky;
top: 10px;
}
thead:before{
position: absolute;
content: '';
width: calc(100% + var(--shadow-blur) * 2);
transform: translate(calc(var(--shadow-blur) * -1) , -10px);
height: 20px;
background-color: var(--main-color);
z-index: -1;
}
table td,
table th {
color: var(--text-color);
padding: 8px 16px 8px 16px;
text-align: left;
}
table th {
color: var(--text-back-color) !important;
font-weight: 600;
white-space: nowrap;
}
</style>Hauteur/Hauteur du fluide
Vous pouvez définir une hauteur pour la table. (hauteur)
Lorsque la quantité de données change dynamiquement, vous pouvez définir une hauteur maximale pour le tableau. (maxHeight) Spécifie la hauteur maximale de la table en définissant la propriété max-height. A ce moment, si la hauteur requise du tableau est supérieure à la hauteur maximale, une barre de défilement s'affichera.
Tant que l'attribut height ou maxHeight est défini dans l'élément sanorin-table, une table avec un en-tête fixe peut être implémentée sans code supplémentaire.
Le code est le suivant :
<script setup>
import { ref, computed, reactive } from 'vue'
import { useProp, useNeumorphism } from '../mixin/neumorphism'
const props = defineProps({
...useProp,
...{
data: { // dataList
type: Array,
default: () => [],
},
columns: { // columnsList
type: Array,
default: () => [],
},
height: {
type: Number,
},
maxHeight: {
type: Number,
}
}
})
// 高度设置
let tableHeightStyleObj = computed(() => {
let styleObj = ((e) => {
if (e.maxHeight) return { maxHeight: e.maxHeight + 'px' }
if (e.height) return { height: e.height + 'px' }
return {}
})({...props})
return styleObj
})
const { baseStyleObject } = useNeumorphism(props)
let styleObject = computed(() => ({
...tableHeightStyleObj.value
}))
</script>
<template>
<div class="san-table scrollbar" :>
<table>
<colgroup>
<col v-for="(col, index) in columns" :key="index">
</colgroup>
<thead>
<tr class="neumorphism">
<th v-for="col in columns" :key="col.key"> {{col.title}} </th>
</tr>
</thead>
<tbody>
<tr class="neumorphism" v-for="row in data" :key="row.id">
<td v-for="col in columns" :key="col.key"> {{row[col.key]}} </td>
</tr>
</tbody>
</table>
</div>
</template>
<script>
export default {
name: 'sanorin-table',
}
</script>
<style scoped>
@import "../../style/index.css";
@import "../../style/neumorphism.css";
.san-table{
padding: 0px 20px 20px 20px;
position: relative;
width: 700px;
overflow: auto;
}
table {
width: 100%;
table-layout: fixed;
empty-cells: show;
border-collapse:separate;
border-spacing:0px 10px;
}
thead {
position: sticky;
top: 10px;
}
thead:before{
position: absolute;
content: '';
width: calc(100% + var(--shadow-blur) * 2);
transform: translate(calc(var(--shadow-blur) * -1) , -10px);
height: 20px;
background-color: var(--main-color);
z-index: -1;
}
table td,
table th {
color: var(--text-color);
padding: 8px 16px 8px 16px;
text-align: left;
}
table th {
color: var(--text-back-color) !important;
font-weight: 600;
white-space: nowrap;
}
</style>Largeur de colonne personnalisée
Ensuite, ajoutez un contrôle de largeur, en espérant ajouter de la largeur à l'objet tableau passé dans les colonnes. L'exemple est le suivant :
const columnsList = [
  {
    title: '书名',
    key: 'name',
    width: 100,
  },
  {
    title: '作者',
    key: 'author',
    width: 100,
  },
  {
    title: '价格',
    key: 'price',
    width: 100,
  },
  {
    title: '简介',
    key: 'desc',
    minWidth: 350,
  }
]
J'espère obtenir les effets suivants
1. .La colonne contenant la largeur, largeur fixe, ne change pas avec le changement de largeur du navigateur
2. Les colonnes contenant minWidth rempliront automatiquement la largeur restante du tableau lorsqu'elle est supérieure à la valeur définie. Lorsqu'elle est inférieure à la valeur définie, la largeur sera fixe
3. Les colonnes qui ne contiennent pas de largeur et de minWidth, remplissent automatiquement la largeur restante du tableau
Selon nos besoins, nous devons contrôler l'affichage de la largeur de chaque colonne individuellement, puis recalculer et restituer la largeur. colonnes en temps réel lorsque la largeur du navigateur change.
Définissez d'abord une méthode pour calculer la largeur requise de chaque colonne dans la situation actuelle, puis liez-la au DOM souhaité. Ensuite, chaque fois que le tableau change/la largeur du navigateur change, la largeur du tableau peut être modifiée en temps réel.
  const initColumns = () => {
    // 计算每一列在当前情况下所要的宽度
  }
  watch(() => props.columns, () => { initColumns() });
  onMounted(() => {
    nextTick(() => {
      initColumns();
      on(window, 'resize', throttle(() => initColumns(), 400));
    });
  });
  onBeforeUnmount(() => off(window, 'resize', () => initColumns()));
Tous les codes :
<script setup>
import { ref, computed, watch, onMounted, onBeforeUnmount, nextTick } from 'vue'
import { on, off } from '../../utils/listener'
import { throttle } from "../../utils/debounce&throttle"
import { useProp, useNeumorphism } from '../mixin/neumorphism'
const table = ref() // 与html中ref=""对应,定位dom元素
const props = defineProps({
...useProp,
...{
data: { // dataList
type: Array,
default: () => [],
},
columns: { // columnsList
type: Array,
default: () => [],
},
height: { // height
type: Number,
},
maxHeight: { // 流体高度
type: Number,
},
minUnsetWidth: { // 未设置宽度时最小宽度
type: Number,
default: 80
}
}
})
// 高度设置
let tableHeightStyleObj = computed(() => {
let styleObj = ((e) => {
if (e.maxHeight) return { maxHeight: e.maxHeight + 'px' }
if (e.height) return { height: e.height + 'px' }
return {}
})({...props})
return styleObj
})
// 列宽设置
let col = ref([])
const { columns, minUnsetWidth } = props
const _min_column_width = minUnsetWidth // 未设置宽度时最小宽度
const initColumns = () => {
col.value = (() => {
let _total_width = table.value.offsetWidth // 表格dom元素总宽度
let _needed_minWidth = columns.reduce((t, v) => { // 需要的最小宽度
t += v.width || v.minWidth || _min_column_width
return t
}, 0)
// 需要的最小宽度比总宽度大,则取minWidth即可
if (_needed_minWidth >= _total_width) return columns.reduce((t, v) => {
let n = v.width || v.minWidth || _min_column_width
t = [...t, n]
return t
}, [])
// 需要的最小宽度比总宽度大,则要把minWidth加权,权重为(未分配的宽度 / minWidth之和)
let _unassigned_width = columns.reduce((t, v) => {
t += v.minWidth || 0
return t
}, 0)
let _assigned_width = _needed_minWidth - _unassigned_width
let _width_power = (_total_width - _assigned_width) / _unassigned_width
return columns.reduce((t, v) => {
let n = v.width || (v.minWidth ? (_width_power * v.minWidth).toFixed(2) : _min_column_width)
t = [...t, n]
return t
}, [])
})()
}
watch(() => props.columns, () => { initColumns() })
const throttleInitColumns = () => throttle(() => initColumns(), 400)
onMounted(() => {
nextTick(() => {
initColumns()
on(window, 'resize', throttleInitColumns)
})
})
onBeforeUnmount(() => off(window, 'resize', throttleInitColumns))
const { baseStyleObject } = useNeumorphism(props)
let styleObject = computed(() => ({
...tableHeightStyleObj.value
}))
</script>
<template>
<div class="san-table scrollbar" :>
<table ref="table">
<colgroup>
<col v-for="(item, index) in col" :key="index" :width="`${item}px`">
</colgroup>
<thead>
<tr class="neumorphism">
<th v-for="col in columns" :key="col.key"> {{col.title}} </th>
</tr>
</thead>
<tbody>
<tr class="neumorphism" v-for="row in data" :key="row.id">
<td v-for="col in columns" :key="col.key"> {{row[col.key]}} </td>
</tr>
</tbody>
</table>
</div>
</template>
<script>
export default {
name: 'sanorin-table',
}
</script>
<style scoped>
@import "../../style/index.css";
@import "../../style/neumorphism.css";
.san-table{
padding: 0px 20px 20px 20px;
position: relative;
overflow: auto;
}
table {
width: 100%;
table-layout: fixed;
empty-cells: show;
border-collapse:separate;
border-spacing:0px 10px;
}
thead {
position: sticky;
top: 10px;
}
thead:before{
position: absolute;
content: '';
width: calc(100% + var(--shadow-blur) * 2);
transform: translate(calc(var(--shadow-blur) * -1) , -10px);
height: 20px;
background-color: var(--main-color);
z-index: -1;
}
table td,
table th {
color: var(--text-color);
padding: 8px 16px 8px 16px;
text-align: left;
word-break:break-all;
}
table th {
color: var(--text-back-color) !important;
font-weight: 600;
white-space: nowrap;
}
</style>Les deux js utilisés, la limitation anti-shake et la surveillance de l'enregistrement sont également mis ici
/* 防抖节流函数 */
let timeout = null // 创建一个标记用来存放定时器的返回值
let count = 0;
export function debounce(fn, wait = 1000, immediate = false) {
  return function () {
    const args = arguments;
    if (immediate) {
      if (count == 0) {
        fn.apply(this, arguments)
        count++;
      } else {
        if (timeout) {
          clearTimeout(timeout) // 每当用户输入的时候把前一个 setTimeout clear 掉
        }
        timeout = setTimeout(() => {
          fn.apply(this, arguments)
        }, wait)
      }
    } else {
      if (timeout) {
        clearTimeout(timeout) // 每当用户输入的时候把前一个 setTimeout clear 掉
      }
      timeout = setTimeout(() => {
        fn.apply(this, arguments)
      }, wait)
    }
  }()
}
let canRun = true;
let count1 = 0;
export function throttle(fn, wait = 1000, immediate = true) {
  return function () {
    if (immediate) {
      if (count1 == 0) {
        fn.apply(this, arguments);
        count1++;
      } else {
        if (canRun) {
          canRun = false
          setTimeout(function () {
            fn.apply(this, arguments)
            canRun = true
          }, wait);
        }
      }
    } else {
      if (!canRun) return
      canRun = false
      setTimeout(function () {
        fn.apply(this, arguments)
        canRun = true
      }, wait);
    }
  }()
}
/**
* 绑定事件 on(element, event, handler)
*/
export const on = (element, event, handler) => {
if (document.addEventListener) {
if (element && event && handler) {
element.addEventListener(event, handler, false)
}
}
}
/**
* 解绑事件 off(element, event, handler)
*/
export const off = (element, event, handler) => {
if (document.removeEventListener) {
if (element && event) {
element.removeEventListener(event, handler, false)
}
}
}Ce qui précède est le contenu détaillé de. pour plus d'informations, suivez d'autres articles connexes sur le site Web de PHP en chinois!
Articles Liés
Voir plus- À propos de vue utilisant le validateur : VeeValidate3
- Quelles sont les différences entre calculé et méthode dans Vue ?
- Introduction à la méthode de désactivation de la vérification Eslint dans le projet vue
- Introduction à plusieurs méthodes de définition de modèles de composants dans Vue.js
- Quatre endroits pour implémenter AJAX dans les applications Vue