Maison >interface Web >tutoriel HTML >Attributs d'événement HTML
Attributs d'événement HTML

- WBOYWBOYWBOYWBOYWBOYWBOYWBOYWBOYWBOYWBOYWBOYWBOYWBoriginal
- 2024-09-04 16:17:27741parcourir
Dans cet article, nous discuterons en détail des attributs d'événement HTML. Les événements sont les actions effectuées à la suite de l'action de l'utilisateur. Par exemple, lorsqu’un utilisateur appuie sur un clavier pour lire les données, on parle d’événements clavier. Ces activités sont effectuées lorsqu'un utilisateur consulte un site Web et effectue un clic sur un bouton ou lorsqu'une page se charge en appuyant sur le bouton d'actualisation où le navigateur effectue des manipulations sur les pages ; on dit que toutes ces actions sont un événement. Ici, nous passerons par une compréhension de base des événements et de leur fonctionnement dans le navigateur sur les actions de l'utilisateur. Il existe différents types d'événements qui se produisent dans l'ensemble des fenêtres du navigateur et qui sont expliqués dans les sections suivantes.
Top 5 des attributs d'événement HTML
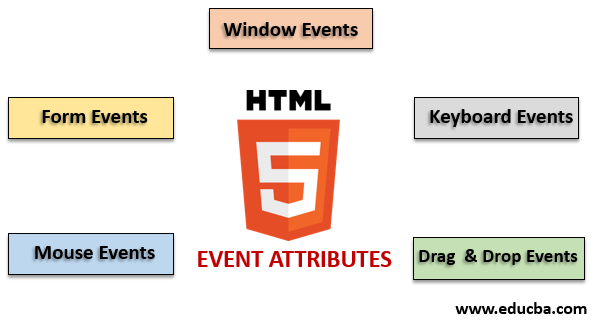
Il existe une variante différente d'événements disponibles dans le HTML. Et tous ces événements ont un petit bloc de code nommé gestionnaire d'événements qui se déclenche lorsque l'action événementielle est exécutée. Ceux-ci sont attachés aux éléments HTML. Les gestionnaires d'événements ou écouteurs d'événements jouent un rôle important dans les attributs des événements HTML. Voyons différents types d'attributs d'événement qui sont déclarés globalement et appliqués aux éléments HTML ainsi que leur travail en détail. Quatre attributs d'événement principaux sont principalement utilisés. Ce sont :
- Événement de fenêtre
- Événements de formulaire
- Événements de souris
- Événements de clavier
- Faites glisser et déposez les événements
Nous décrirons tous ces attributs un par un avec un exemple. Tout d'abord, nous irons avec.
1. Événement de fenêtre
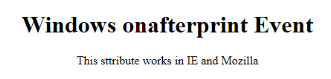
- onafterprintEvent : Cet attribut est pris en charge par toutes les balises HTML et fonctionne lorsqu'une page a commencé à s'imprimer et a un script à valeur unique. Voici un exemple de code HTML. Cet exemple montre lorsqu'un bouton est enfoncé ; il imprime un message imprimé dans un message de dialogue.
Code :
<!DOCTYPE html>
<html>
<head>
<title>
Windows onafterprint Event
</title>
</head>
<body onafterprint="myfun()">
<h1>Windows onafterprint Event </h1>
<p>This attribute works in IE and Mozilla</p>
<body style = "text-align:center">
<script>
function myfun() {
alert("Document is being printed");
}
</script>
</body>
</html>
Sortie :
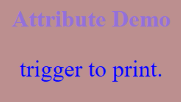
- onbeforeprint : Cela fonctionne avant l'impression. L'événement est déclenché après le processus d'impression. Vous trouverez ci-dessous l'exemple de code.
Code :
<!DOCTYPE html>
<html>
<head>
<style>
body {
color: #9370DB;
background-color: #BC8F8F;
text-align: center;
padding: 20px;
}
p {
font-size: 2rem;
}
</style>
</head>
<body onbeforeprint="get()">
<h1> Attribute Demo</h1>
<p style="color:#0000FF;">trigger to print.</p>
<div class="show"></div>
<script>
function get() {
document.body.style.background = "#00BFFF";
}
</script>
</body>
</html>
Sortie :
- onerror : Cette fonction est déclenchée lorsqu'une erreur est générée alors qu'aucun élément n'existe.
Code :
<!DOCTYPE html>
<html>
<body>
<img src="p.jpg" onerror="myFun()">
<p>hello world.</p>
<script>
function myFun() {
alert("problem with image loading.");
}
</script>
</body>
</html>
Sortie :
- onload : Cette fonction aide à charger un objet et fonctionne bien pour voir si une page Web est correctement chargée.
Code :
<!DOCTYPE html>
<html>
<head>
<title>onload event demo</title>
</head>
<body>
<img src="pic.jpg" onload="ldImg()" width="50" height="92">
<script>
function ldImg() {
alert("image loaded without error");
}
</script>
</body>
</html>
Sortie :
- onresize : Cet événement est déclenché lorsque la fenêtre du navigateur est redimensionnée, et n'importe quel élément peut être déclenché sous l'attribut resize.
Code :
<!DOCTYPE html>
<head>
<title>onresize event</title>
</head>
<body>
<script type="text/javascript">
function cmg() {
alert('welcome to educba');
}
window.onresize = cmg;
</script>
</head>
<body>
<input type="button"  value="Click the button"
onclick="alert(window.onresize);">
</body>
</html>
Sortie :
- onunload : Cet événement est déclenché lorsqu'une fenêtre de page Web est fermée ou lorsqu'un utilisateur quitte la page Web. Le code ci-dessous décharge la page lorsqu'un utilisateur quitte et lance une alerte de remerciement pour la recherche. Cet événement fonctionne parfois dans tous les navigateurs.
Code :
<!DOCTYPE html>
<html>
<body onunload="onfunc()"><h1>Welcometo educba tutorial</h1>
<p>Leave the page .</p>
<script>
function onfunc() {
alert("Thank you for searching!");
}
</script>
</body>
</html>
Sortie :
2. Événements de formulaire
Cela fonctionne avec les contrôles de formulaire. Voici les attributs qui se produisent lorsque l'utilisateur interagit avec les navigateurs.
- onblur : Cet événement se produit lorsque l'attention de l'utilisateur est éloignée de la fenêtre du formulaire. L'exemple suivant prend les entrées en minuscules et lorsque vous cliquez sur le bouton Soumettre, il transforme la sortie en majuscules.
Code :
<!DOCTYPE html>
<html>
<head>
<title> Form onblur </title>
<style>
body {
text-align:center;
}
h1 {
color:pink;
}
</style>
</head>
<body>
<h1>EDUCBA</h1>
<input type="text" name="fname" id="aaa"
onblur="myfunc()">
<button type="button">Submit</button>
<script>
function myfunc() {
var a = document.getElementById("aaa");
a.value = a.value.toUpperCase();
}
</script>
</body>
</html>
Sortie :
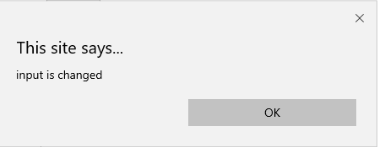

- onchange : Cet événement se produit lorsqu'un utilisateur modifie l'élément existant dans le formulaire. Cela se produit lorsqu'un élément perd le focus.
Code :
<!DOCTYPE html>
<html lang="en">
<head>
<meta charset="utf-8">
<title>HTML onchange</title>
</head>
<body>
<form name="example" action="">  <input type="text" name="rahul" onchange="alert('input is changed')"><br>
<label>select the dress color</label>
<select onchange="alert('You have changed the selection!');">
<option>pink</option>
<option>Yellow</option>
<option>White</option>
</select>
<p><strong>Note:</strong> Select any option </p>
<label>Describe yourself in short : </label>   <br/><textarea cols="15" rows="7" name="details" onchange="alert('description has changed')">   </textarea><br>
<button type="button" name="submit">Submit</button>
</form>
</body>
</html>
Sortie :
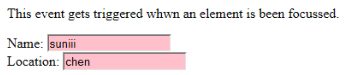
- onfocus : Cet attribut est activé lorsque l'utilisateur prête attention à l'élément sur une page Web ou lorsque la saisie est ciblée. L'exemple ci-dessous met en évidence le moment où nous saisissons une entrée dans le champ.
Code :
<!DOCTYPE html>
<html>
<body>
<p>This event gets triggered whwn an element is been focussed.</p>
Name: <input type="text" id="name" onfocus="onfoc(this.id)"><br>
Location: <input type="text" id="loc" onfocus="onfoc(this.id)">
<script>
function onfoc(a) {
document.getElementById(a).style.background = "pink";
}
</script>
</body>
</html>
Sortie :
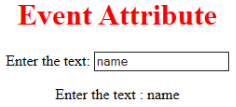
- oninput: This event triggers when the input is entered in the input field. It has been activated when the value in the text field is changed. It reflects once the value of the element is changed.
<!DOCTYPE html>
<html>
<head>
<title> HTML oninput </title>
</head>
<style>
body {
text-align:center;
}
h1 {
color:red;
}
</style>
<body>
<h1> Event Attribute </h1>
Enter the text:
<input type="text" id="EDUCBA"  oninput="myon()">
<p id= "sid"></p>
<script>
function myon()
{
var x = document.getElementById("EDUCBA").value;
document.getElementById("sid").innerHTML = "Enter the text : " +x;
}
</script>
</body>
</html>
Output:
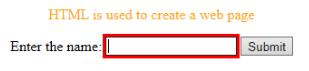

- oninvalid: This attribute calls the events when the text entered in the input type is invalid or remains empty. This event attribute must fill the input element.
Code:
<!DOCTYPE html>
<html>
<head>
<title> example oninvalid Event </title>
<style>
p {
color:orange;
}
body {
text-align:center;
}
</style>     </head>
<body>
<p> HTML is used to create a web page</p>
<form  method="get">
Enter the name:
<input type="text" oninvalid="alert('Fill the text form!');" required>
<input type="submit" value="Submit">
</form>  </body>
</html>
Output:

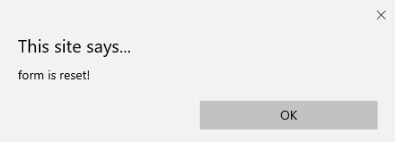
- onreset: It is fired when a form is a rest. The following example says when you submit the button, a form is processed, and again when you click to reset, the form is being reset.
Code:
<!DOCTYPE html>
<html>
<style>
body {font-family:calibri;}
label {font-variant:small-caps;}
ol {background-color:#610000; margin-top:35px;}
li {margin-top:3px; padding:3px; background-color:rose; font-size:15px;}
div {position:absolute;top:250px;left:70px; font-size:1.5em;
}
</style>
<body>
<ol>
<li>Form with input to reset and submit</li>
</ol>
<form action="" method="get" onreset="onRes()" onsubmit="onSub()">
<label>Enter input:<br /><input type="text" id="iv" oninvalid="onInva()" oninput="onInp()"></label><br /><br />
<input type="submit" value="press"> <input type="reset">
</form>
<div id="a_box"></div>
<script>
function onInva() {
alert("Input field cannot be empty!");
}
function onInp() {
var input_value = document.getElementById("iv").value;
document.getElementById("a_box").innerHTML = "Input value: <br />" + iv;
}
function onRes() {
alert("form is reset!");
}
function onSubmitEvent() {
alert("Form is loading");
location.reload();
}
</script>
</body>
</html>
Output:
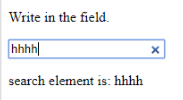
- onsearch: It works when a user presses an enter button.
Code:
<!DOCTYPE html>
<html>
<body>
<p>Write in the field.</p>
<input type="search" id="value1" onsearch="myF()">
<p id="sample"></p>
<script>
function myF() {
var k = document.getElementById("value1");
document.getElementById("sample").innerHTML = "search element is: " + k.value;
}
</script>
</body>
</html>
Output:
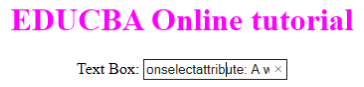
- onselect: It is triggered when a text has been selected in an input box. It throws a dialog box printing an alert message.
Code:
<!DOCTYPE html>
<html>
<head>
<title>onselect demo</title>
<style>
h1 {
color:magenta;
}
body {
text-align:center;
}
</style>
<script>
function eduhtml() {
alert("text highlighted!");
}
</script>
</head>
<body>
<h1>EDUCBA Online tutorial</h1>
Text Box: <input type="text" value="onselectattribute: A well defined portal" onselect="eduhtml()">
</body>
</html>
</html>
Output:
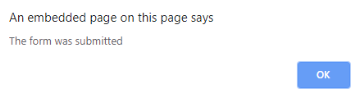
- onsubmit: The purpose of this event is to execute the action performed while pressing the submit button.
Code:
<!DOCTYPE html>
<html>
<body>
<head>
<title> Onsubmit Example</title>
</head>
<form action="demo_form.asp" onsubmit="myF()">
Enter name: <input type="text" name="fname">
<label>Email :</label>
<input id="email" name="email" type="text">
<input type="submit" value="Submit">
</form>
<script>
function myF() {
alert("The form was submitted");
}
</script>
</body>
</html>
Output:
3. Key Board Attributes
- OnKeyDown: It is triggered when a user presses a down Arrow key.
Code:
<!DOCTYPE html>
<html>
<body>
<p>Example for Onkeydown.</p>
<input type="text" onkeydown="mykedwn()">
<script>
function mykedwn() {
alert("key press is activated");
}
</script>
</body>
</html>
Output:

- OnKeyPress: This event gets triggered when the user presses any key on the keyboard. Note: some browser doesn’t support pressing any key.
Code:
<!DOCTYPE html>
<html>
<body>
<p> This example shows when a user type in the text area it triggers an event </p>
<form>
<textarea onkeypress="alert('triggering onkeypress event.')" placeholder="Place the cursor inside the textarea and press a key."  " cols="30" rows="4" style="background-color:pink;">> </textarea> </form>
</body>
</html>
Output:
- OnKeyUp: This attribute gets triggered when a user releases a cursor from the text field. Below comes the demonstration.
Code:
<!DOCTYPE html>
<html>
<body>
<p> This example transforms the character to lower case.</p>
Fill the name: <input type="text" id="jjj" onkeyup="mykey()">
<script>
function mykey() {
var g = document.getElementById("jjj");
g.value = g.value.toLowerCase();
}
</script>
</body>
</html>
Output:

4. Mouse Event Attributes
This action triggers a mouse event when a mouse is pressed either from a computer or any external devices like a smartphone or tablet. Some of the mouse events are given below:
- onclick: It is triggered when a user presses the button over the mouse. An input example is given below to show the event while clicking the mouse.
Code:
<!DOCTYPE html>
<html>
<body>
<h1>HTML onclick Event</h1>
<p> Event plays a vital role in HTML.</p>
<button onclick="oncf()">Click </button>
<p id="sample"></p>
<script>
function oncf() {
document.getElementById("sample").innerHTML = "Hello World";
}
</script>
</body>
</html>
Output:
- onmousemove: It is fired when a mouse is moved over an image in any direction.
Code:
<!doctype html>
<html>
<head><title> Event onmousemove demo</title>
</head>
<body>
<p>This event is activated when the pointer drags its direction.</p>
<body style="width:200px;height:80px;border:2px solid;" onmousemove="javascript:alert('mouse action');">Sample text</body>
</body>
</html>
Output:

- Onmouseup: This event gives a notification when a user releases a button on an output.
Code:
<!DOCTYPE html>
<html>
<head>
<style>
body {
color:  "#ff0000";
height: 120vh;
background-color: #610000;
text-align: center;
}
.polygon {
float: right;
shape-inside: polygon(0 0, 0 200px, 100px 200px);
clip-path: polygon(0 0, 0 250px, 100px 300px);
height: 200px;
width: 200px;
background: linear-gradient(to bottom left, #7CFC00, #8B008B);
}
p {
margin: 30px auto;
}
</style>
</head>
<body>
<h1>HTML onmouseup Demo</h1>
<div class="polygon" onmouseup="mupfn()"></div>
<p> click below object</p>
<script>
function mupFn() {
document.querySelector('.polygon').style.transform = 'scale(2.2)';
}
</script>
</body>
</html>
Output:
- Onmouseover: Execute a JavaScript when moving the mouse pointer over an image
Code:
<!DOCTYPE html>
<html>
<body>
<title>Example demonstrating Onmouseover.</title>
<h1 id="sample" onmouseover="A()" onmouseout="B()">Mouse over </h1>
<script>
function A() {
document.getElementById("sample").style.color = "yellow";}
function B() {
document.getElementById("sample").style.color = "green";
}
</script>
</body>
</html>
Output:
5. Drag Event Attributes
This application helps in the HTML window when the user drags the input element. Below are the different event listeners used in HTML to store dragged data.
- Ondrag: This is used when an element is being dragged from the web page.
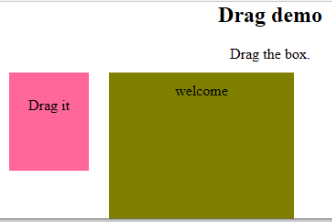
- Ondragstart: This fires when the user begins to drag from the input field. The below example demonstrates about dragging the two-target area.
Code:
<!DOCTYPE HTML>
<html>
<head>
<style type = "text/css">
#b1, #b2 {
float:left;padding:11px;margin:11px; -moz-user-select:none;
}
#b1 { background-color: #FF6699; width:65px; height:85px;  }
#b2 { background-color: #808000; width:180px; height:180px; }
</style>
<script type = "text/javascript">
function dStart(e) {
e.dataTransfer.effectAllowed = 'move';
e.dataTransfer.setData("Text", e.target.getAttribute('id'));
e.dataTransfer.setDragImage(e.target,0,0);
return true;
}
</script>
</head>
<body>
<center>
<h2>Drag demo</h2>
<div> Drag the box.</div>
<div id = "b1" draggable = "true"
ondragstart = "return dStart(e)">
<p>Drag it</p>
</div>
<div id = "b2">welcome</div>
</center>
</body>
</html>
Output:
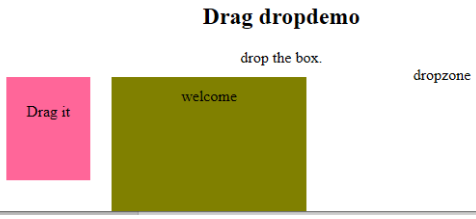
-
ondrop: Execute this attribute when a draggable element is dropped in element.
Code:
<!DOCTYPE HTML>
<html>
<head>
<style type = "text/css">
#b1, #b2 {
float:left;padding:11px;margin:11px; -moz-user-select:none;
}
#b1 { background-color: #FF6699; width:65px; height:85px;  }
#b2 { background-color: #808000; width:180px; height:180px; }
</style>
<script type = "text/javascript">
function dStart(e) {
e.dataTransfer.effectAllowed = 'move';
e.dataTransfer.setData("Text", e.target.getAttribute('id'));
e.dataTransfer.setDragImage(e.target,0,0);
return true;
}
</script>
</head>
<body>
<center>
<h2>Drag  dropdemo</h2>
<div> drop the box.</div>
<div id = "b1" draggable = "true"
ondragstart = "return dStart(e)">
<p>Drag it</p>
</div>
<div class="droptarget"
ondrop="drop(event)"
ondragover="allowDrop(event)">
</div>
<div id = "b2">welcome</div>
<span> dropzone </span>
</center>
</body>
</html>
Output:

Conclusion
This event attribute helps to make a web application very easier and attractive. The different occurrence of actions generates various events. Even though this approach is generally avoided, the programmer likes to learn the function assigned for the HTML attributes events. These event handlers are still executed to beautify the web pages.
Recommended Article
This is a guide to the HTML Event Attributes. Here we discuss the Introduction to HTML Event Attributes along with Code implementation and Output. you can also go through our suggested articles to learn more –
- HTML Frames
- HTML Style Attribute
- Applications of HTML
- HTML vs HTML5
Ce qui précède est le contenu détaillé de. pour plus d'informations, suivez d'autres articles connexes sur le site Web de PHP en chinois!
JavaScript html5 html Object if for while Error Attribute Event pointer function this alert input windowsDéclaration:Le contenu de cet article est volontairement contribué par les internautes et les droits d'auteur appartiennent à l'auteur original. Ce site n'assume aucune responsabilité légale correspondante. Si vous trouvez un contenu suspecté de plagiat ou de contrefaçon, veuillez contacter admin@php.cn