Home >Software Tutorial >Computer Software >How to adjust the size of annotation arrows in Auto CAD2020 Tutorial on adjusting the size of annotation arrows in Auto CAD2020
How to adjust the size of annotation arrows in Auto CAD2020 Tutorial on adjusting the size of annotation arrows in Auto CAD2020
- WBOYWBOYWBOYWBOYWBOYWBOYWBOYWBOYWBOYWBOYWBOYWBOYWBforward
- 2024-05-08 09:31:22794browse
When drawing a drawing in Auto CAD2020, how to adjust the size of the annotation arrow? Through this article, PHP editor Xiaoxin will explain in detail the Auto CAD2020 annotation arrow size adjustment tutorial to help you easily solve the annotation arrow size problem.
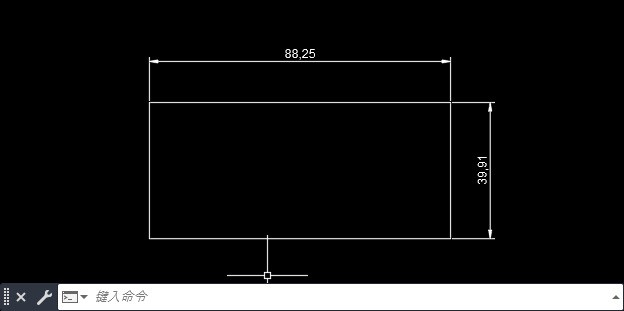
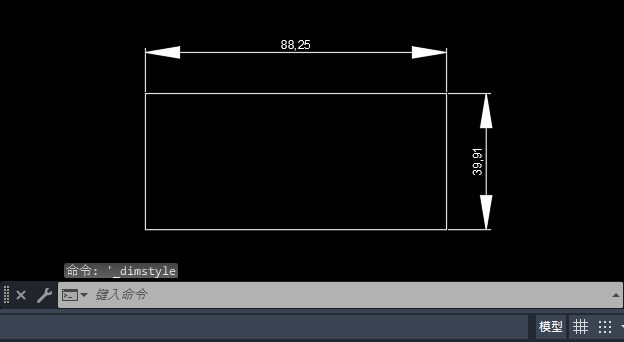
Step one: Open the Auto CAD2020 software, create a rectangle and mark it, as shown in the picture.
Step 2: Click the [small arrow] behind [Annotation] in [Comments], as shown in the picture.
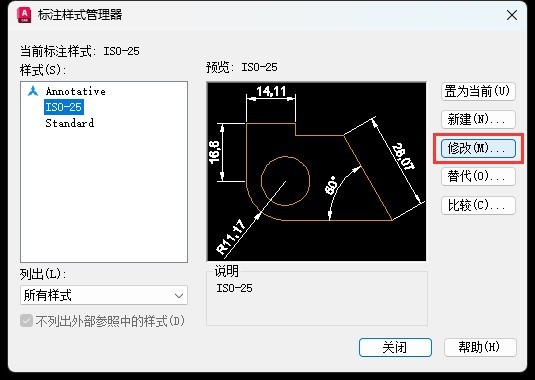
Step 3: The [Annotation Style Manager] pops up and click [Modify], as shown in the figure.
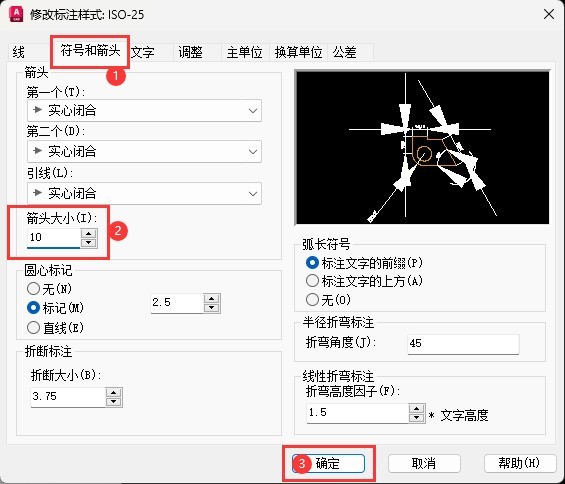
Step 4: Click the [Symbols and Arrows] option. Set the arrow size: [10], click [OK], as shown in the figure.
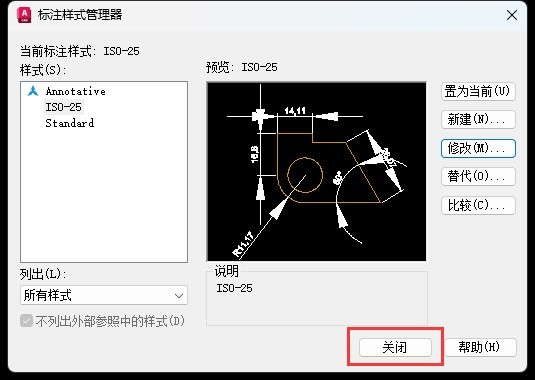
Step 5: After setting, click [Close], as shown in the figure.
Step 6: Finally mark the size of the arrow and adjust it, as shown in the picture.
The above is the detailed content of How to adjust the size of annotation arrows in Auto CAD2020 Tutorial on adjusting the size of annotation arrows in Auto CAD2020. For more information, please follow other related articles on the PHP Chinese website!
Related articles
See more- How to set the extraction code for network disk? -Network disk setting extraction code method
- Iterative production operation method within the square of the geometric sketchpad
- Detailed method of constructing textured cones with geometric sketchpad
- Beyond Compare compares table data to display row numbers
- How to find all files in Everything How to find all files in Everything

