Home >Software Tutorial >Computer Software >Detailed method of constructing textured cones with geometric sketchpad
Detailed method of constructing textured cones with geometric sketchpad
- WBOYWBOYWBOYWBOYWBOYWBOYWBOYWBOYWBOYWBOYWBOYWBOYWBforward
- 2024-04-17 13:25:021199browse
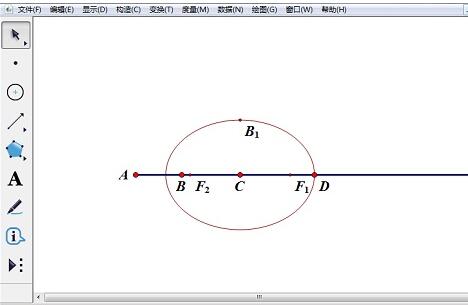
1. Construct an ellipse. Construct horizontal ray AB, click and hold the custom tool icon, select [Ellipse (Center Vertex)] in [Conic Section A], and click two points C and D on ray AB to construct an ellipse.
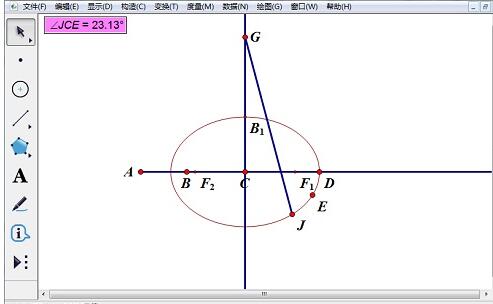
2. Construct points and line segments. Construct two points E and J arbitrarily on the ellipse. Select point C to construct the perpendicular line of ray AB passing through point C, use the point tool to construct point G on the perpendicular line, and construct line segment GJ. Select points J, C, and E in sequence, [Measurement—[Angle].
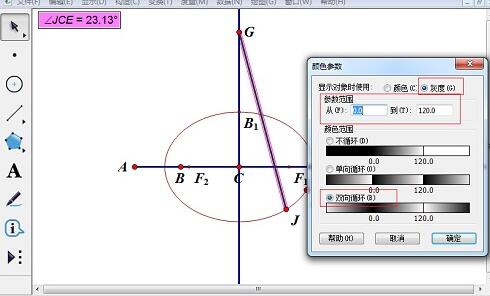
3. Set color parameters. Select the line segment GJ and angle measurement value, [Display] - [Color] - [Parameter] - [Grayscale], select 0 to 120 for [Parameter Range], and check [Bidirectional Cycle]. (These two values determine how big the angle starts and ends, and the color of the line changes in a two-way cycle from black to white)
4. Draw the cone trajectory. Select line segment GJ and point J, [Construction] - [Trajectory] to obtain the three-dimensional graphic cone. Right-click the track, [Properties]-[Drawing]-[Number of Samples] and change it to 1500 or a larger number. (Not too large)
5. Set the color. Select [Edit] - [Preferences] - [Color] to change the background color of the drawing area of the artboard to make the graphics more layered.
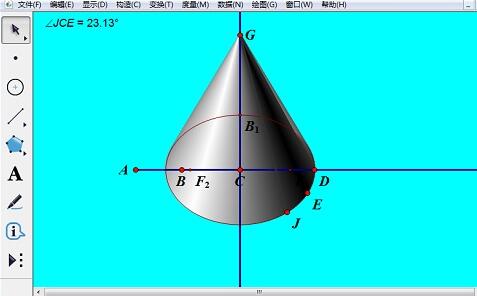
6. Hide various unnecessary objects and complete.
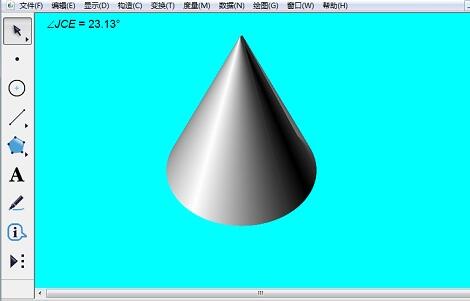
Tip: Changing the position of point B1 can adjust the ellipse of the cone base. Changing the positions of points D and G can change the size of the cone. Changing the position of point E can fine-tune the direction of the conic projection light.
The above is the detailed content of Detailed method of constructing textured cones with geometric sketchpad. For more information, please follow other related articles on the PHP Chinese website!

