
 Mobile TutorialAndroid PhoneMijia Watch Monitoring Computer Installation Tutorial (Easy to realize monitoring screen on the computer)
Mijia Watch Monitoring Computer Installation Tutorial (Easy to realize monitoring screen on the computer)

As smart home devices play an increasingly important role in daily life, MijiaKan monitoring stands out and becomes a popular smart home monitoring device. It not only allows you to remotely view the surveillance footage at home through your mobile phone, but also supports the convenient transmission of surveillance footage to your computer for real-time monitoring. PHP editor Xiaoxin will guide you in this detailed tutorial on how to install MijiaKan monitoring on your computer, allowing you to easily master the convenience of remote monitoring.

1. Purchase and prepare the required equipment
We need to purchase the required equipment first before starting to install MijiaKan monitoring. And make sure it's connected to the Internet and requires a computer. And make sure it has successfully connected with the home Wi-Fi network, which requires purchasing Mijia Watch Security Camera.
2. Download and install MijiaKan monitoring software
1. Search and enter the Mijia official website, and open your computer’s browser.

#2. Click Download and find the download link for MijiaKan monitoring on the website.
3. Double-click the installation package to install it. After the download is completed. Follow the prompts to complete the installation process.
3. Log in to Mijia account and add devices
1. Open the installed Mijia monitoring software.

#2. You need to register an account first, and then log in with the account, if you don’t have a Mijia account.
3. Click the Add Device button and after successful login, follow the software prompts to complete the device addition process.
4. Connect the computer to the MijiaKan surveillance camera
1. Open the installed MijiaKan surveillance software on the computer.
2. Click on the camera device to be connected and find the device list on the software interface.
3. Wait for the software to establish a connection with the camera and click the connect button.
5. Configure the monitoring screen display
1. Click the setting button on the software interface after the connection is successful.
2. Find the screen display option and enter the setting interface.
3. Choose the appropriate display mode and layout according to your own needs.
6. Adjust the picture quality and resolution
1. Find the picture quality and resolution options on the settings interface.
2. Choose the appropriate image quality and resolution according to your needs.
3. Click the OK button to save the settings.
7. Set the video recording and photo taking functions
1. Find the video recording and photo taking options on the settings interface.
2. Choose whether to enable video recording and photo taking functions according to your own needs.
3. Click the OK button to save the settings after the settings are completed.
8. Adjust the brightness and contrast of the monitoring screen
1. Find the screen brightness and contrast options on the settings interface.
2. Adjust the brightness and contrast of the monitoring screen according to your own needs.
3. Click the OK button to save the settings after the adjustment is completed.
9. Set the motion detection function
1. Find the motion detection option on the settings interface.
2. Choose whether to turn on the motion detection function as needed.
3. You can further set the sensitivity and alarm mode of motion detection, if enabled.
10. Adjust sound and mute settings
1. Find the sound and mute options on the settings interface.
2. Choose whether to turn on the sound and set the silent mode according to your needs.
3. Click the OK button to save the settings after the settings are completed.
11. View the surveillance screen in real time
1. Find the connected camera device and go to the main interface of Mijia View surveillance software.
2. To view the monitoring screen in real time, click on the device.
3. For operations such as zooming, you can drag the screen with the mouse or touchpad.
12. Remote access to the monitoring screen
1. Find the connected camera device and view it on the main interface of the Mijia monitoring software.
2. Then select the remote access option and click on the device.
3. You can remotely access the monitoring screen and enter the correct account number and password.
13. Save the monitoring screen and video
1. You can save the current screen to the computer. When viewing the monitoring screen in real time, click the save button.
2. To perform recording operation, click the recording button. If the recording function is turned on, view the surveillance screen in real time.
14. View historical videos and screenshots
1. Find the connected camera device and go to the main interface of the Mijia View monitoring software.
2. Then select the history option and click on the device.
3. You can find previously saved video and screenshot files in the history.
15.
And realize the real-time monitoring function. Through the above steps, we can easily install Mijia Watch monitoring on the computer. We can also customize the display effects and functions of the monitoring screen through software settings. This will bring more convenience and security to our lives. Let us enjoy the convenience brought by smart home!
The above is the detailed content of Mijia Watch Monitoring Computer Installation Tutorial (Easy to realize monitoring screen on the computer). For more information, please follow other related articles on the PHP Chinese website!

 Google Drive on Android Is Getting Two Helpful New FeaturesMay 02, 2025 am 03:02 AM
Google Drive Android App to Get Gemini AI and Enhanced Scanning Google Drive on Android is poised for a significant upgrade, borrowing popular Gemini AI features from its desktop counterpart. Recent code analysis reveals upcoming functionality inclu
 Top Tech Deals: Galaxy Watch 7, AirPods 4, AMD Ryzen 5 CPU, and More!May 02, 2025 am 12:54 AM
This week's hottest tech deals are perfect for gearing up for summer! Enjoy huge discounts on a wide range of gadgets, whether you're treating yourself or searching for the perfect gift. Here are some top picks: Samsung Galaxy Watch 7: Only $209 (S
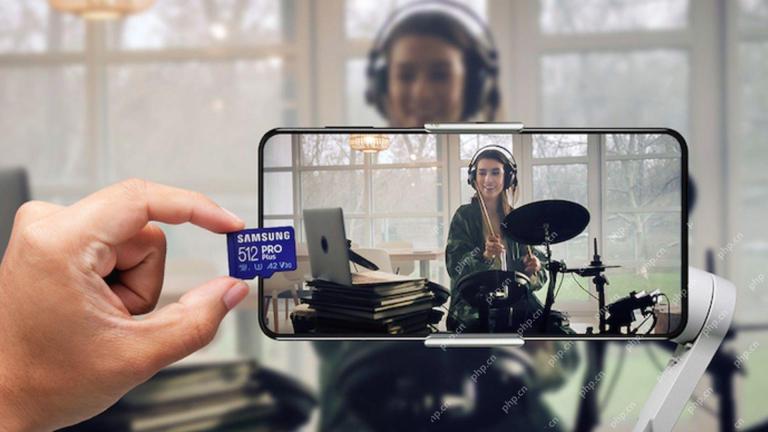 Get a 512GB Samsung microSD Card for $30 TodayMay 02, 2025 am 12:53 AM
Samsung 512GB PRO Plus microSDXC card flash! Only $29.99! Samsung PRO Plus series microSD cards are highly favored for their great price and a variety of storage capacity options. Currently, Samsung's official website launches a special offer for 512GB microSDXC card, with the original price of $68.99, and the current price is only $29.99, and a convenient USB card reader is also included! This is definitely a great value for money for a high-speed 512GB memory card. Samsung PRO Plus cards have a reading speed of up to 180MB/s and a writing speed of up to 130MB/s, easily surpassing Class 10, V30 and U3 standards, and can record 4K U smoothly
 5 Tricks I've Learned for Taking Control of My Data on AndroidMay 01, 2025 pm 09:06 PM
Maintaining control over personal data is paramount. While Android serves as my primary device, I employ several strategies to safeguard my documents and media, strategies applicable to any device. These techniques aren't Android-specific; consider
 Pocket Casts Now Automatically Generates Episode Transcripts–With a CatchMay 01, 2025 pm 09:02 PM
Pocket Casts Premium Subscribers Now Get Automatic Podcast Transcripts Pocket Casts has added a valuable feature for its Plus and Patron subscribers: automatically generated transcripts for podcast episodes. While not every episode is transcribed, t
 It's Time We Truly Think of Phones As Pocket PCsMay 01, 2025 am 01:03 AM
Most of us know that phones are small computers, but we don’t see them that way. In fact, smartphones do almost everything a laptop does – so it makes sense to use them for similar work. We need to change the way we talk about mobile phones We call some tasks computer tasks, while others mobile tasks. It feels like we are trapped in time and cannot change our perception of the technology we have used since childhood. Cell phones can make calls and provide unlimited entertainment, but work? That's the job of a computer. This ignores the reality of how millions of users already use their phones. In many parts of the world, a smartphone is the only computer a family owns. Even in areas where computers are common, the use of smartphones
 Razer's Android Kishi Ultra Gaming Controller Is Under $100May 01, 2025 am 12:55 AM
##### Razer Kishi Ultra: Top Mobile Gamepad The Razer Kishi Ultra is a high-end mobile gamepad that brings a control experience comparable to gaming consoles to smartphones and tablets. It comes with Hall effect triggers and haptic feedback and seamlessly connects a variety of devices, including PCs. Amazon now sells the Razer Kishi Ultra, the device known as the best mobile gamepad, is currently being promoted at an unprecedented low price of $99.99 on Amazon, 33% lower than the original price of $149.99. The full-size design of the Razer Kishi Ultra is compatible with phones and tablets up to 8 inches, including the iPad M
 Google Wallet Is Working to Make It Even Easier to Add CardsMay 01, 2025 am 12:54 AM
Adding cards to Google Wallet is about to get even easier. Google is reportedly testing a new feature that lets you add credit cards with a simple tap. Evidence from a recent Google Play Services beta suggests a new process using NFC. The code incl


Hot AI Tools

Undresser.AI Undress
AI-powered app for creating realistic nude photos

AI Clothes Remover
Online AI tool for removing clothes from photos.

Undress AI Tool
Undress images for free

Clothoff.io
AI clothes remover

Video Face Swap
Swap faces in any video effortlessly with our completely free AI face swap tool!

Hot Article
Hot Tools

MantisBT
Mantis is an easy-to-deploy web-based defect tracking tool designed to aid in product defect tracking. It requires PHP, MySQL and a web server. Check out our demo and hosting services.

DVWA
Damn Vulnerable Web App (DVWA) is a PHP/MySQL web application that is very vulnerable. Its main goals are to be an aid for security professionals to test their skills and tools in a legal environment, to help web developers better understand the process of securing web applications, and to help teachers/students teach/learn in a classroom environment Web application security. The goal of DVWA is to practice some of the most common web vulnerabilities through a simple and straightforward interface, with varying degrees of difficulty. Please note that this software

Notepad++7.3.1
Easy-to-use and free code editor

MinGW - Minimalist GNU for Windows
This project is in the process of being migrated to osdn.net/projects/mingw, you can continue to follow us there. MinGW: A native Windows port of the GNU Compiler Collection (GCC), freely distributable import libraries and header files for building native Windows applications; includes extensions to the MSVC runtime to support C99 functionality. All MinGW software can run on 64-bit Windows platforms.

Dreamweaver CS6
Visual web development tools

