Home >System Tutorial >Windows Series >Where to set the startup items in Windows 11_Introduction to how to disable the self-starting program in Windows 11
Where to set the startup items in Windows 11_Introduction to how to disable the self-starting program in Windows 11
- 王林forward
- 2024-05-06 14:40:291198browse
In Windows 11 system, you may need to adjust startup items to optimize system startup speed or solve certain problems. If you are facing this kind of trouble, please carefully read this tutorial prepared by PHP editor Xigua for everyone. This article will detail how to find and set Windows 11 startup items, and guide you how to disable or enable specific startup programs. Hurry up and continue reading to easily solve your boot problems!
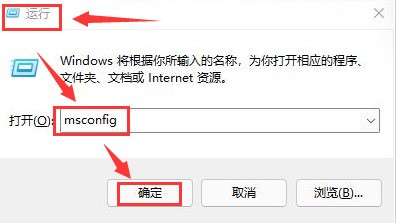
1. Press the win R key on the keyboard to open the run window, enter msconfig and click the OK button

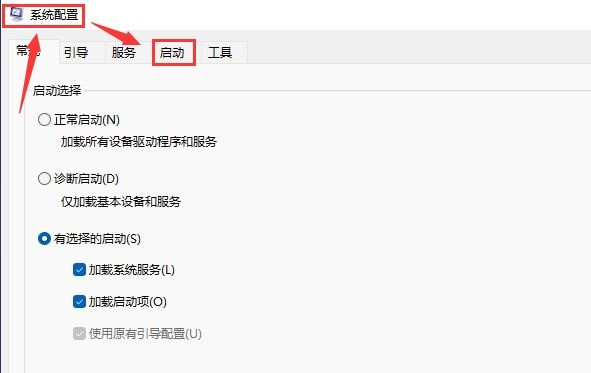
2. Select the startup column in the opened system configuration window

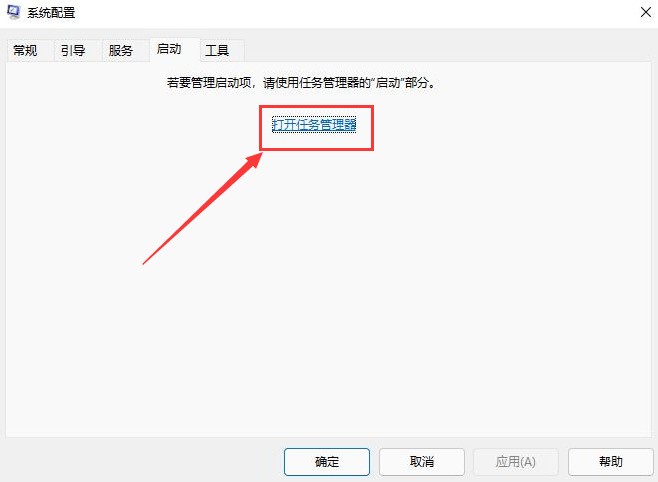
3. Click to open the Task Manager button under this page

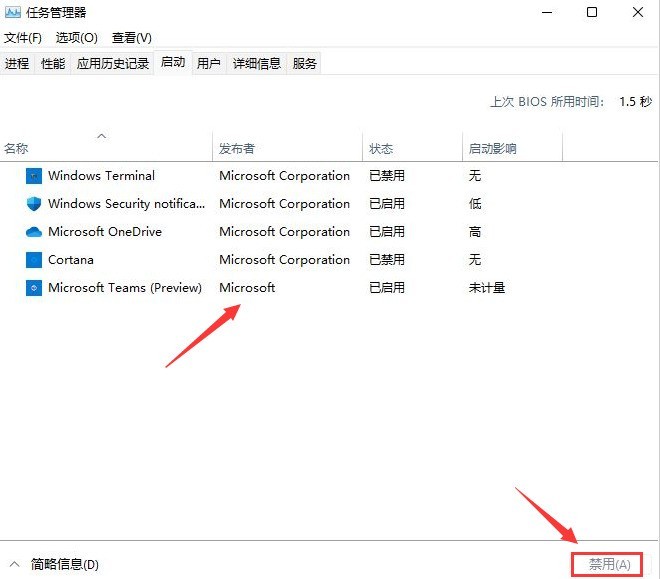
4. Select the unnecessary startup items and change the status to disabled

The above is the detailed content of Where to set the startup items in Windows 11_Introduction to how to disable the self-starting program in Windows 11. For more information, please follow other related articles on the PHP Chinese website!

