Home >Software Tutorial >Computer Software >How to create multi-level folders in OneNote
How to create multi-level folders in OneNote
- 王林forward
- 2024-05-06 11:25:401025browse
Having trouble creating multi-level folders in OneNote? PHP editor Youzi brings you detailed solutions, covering multiple methods such as creating subfolders, changing the folder hierarchy, and using shortcut keys. By reading this article, you will learn how to organize notes efficiently in OneNote and improve work efficiency.
1. First, open a OneNote notebook and right-click in the red rectangular area in the picture.
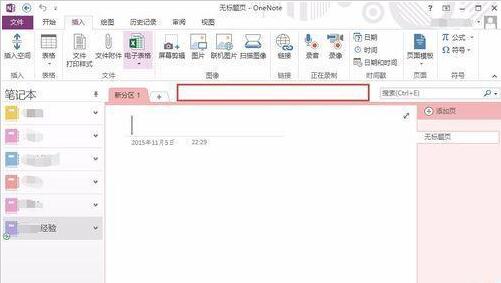
2. Select [New Partition Group] in the menu.

3. A new partition group is formed. Let’s rename it for easy identification.

4. Right-click on the new partition group and select [Rename]. We renamed it [Level 1 Folder].

5. Click [First-Level Folder] to enter the sub-layer of this partition group.
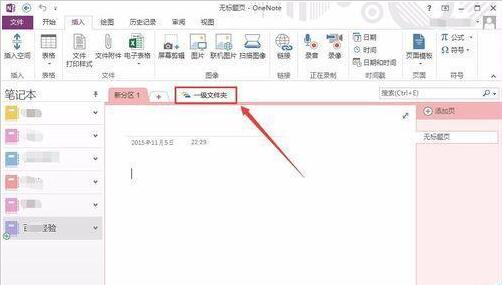
6. You can see that an upward green arrow appears on the upper left side of the partition bar. Click this arrow to return to the upper directory.

7. Sub-partition groups can be built below the partition group, and can be nested multiple times. We can create [second-level folders] and [third-level folders] in sequence according to the above method.

8. You can see that the hierarchy diagram under the [Network Experience] notebook on the left clearly shows the affiliation of the three-layer partitions. Click to easily switch to the section you want to browse.

The above is the detailed content of How to create multi-level folders in OneNote. For more information, please follow other related articles on the PHP Chinese website!

