
Home >System Tutorial >Windows Series >How to change account type in Windows 11_Steps to change account type in Windows 11
How to change account type in Windows 11_Steps to change account type in Windows 11

- PHPzforward
- 2024-05-06 11:20:19675browse
When using Windows 11, it is crucial to set up the appropriate account type for different users. Knowing how to change account types can help you ensure system security and user permissions are properly assigned. In response to this problem, PHP editor Youzi will introduce in detail how to change the account type in Windows 11. This article will guide you step-by-step through the necessary steps and provide clear and easy-to-follow instructions. Read on to learn how to effectively manage your Windows 11 account and optimize your user experience.
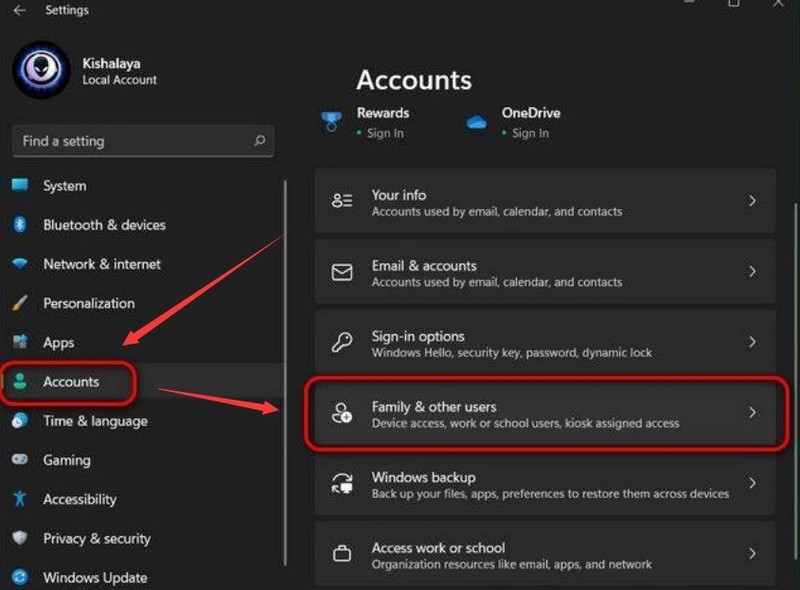
1. Open the settings page in the start menu, find the Accounts column, and click Family & other users Family and other users options
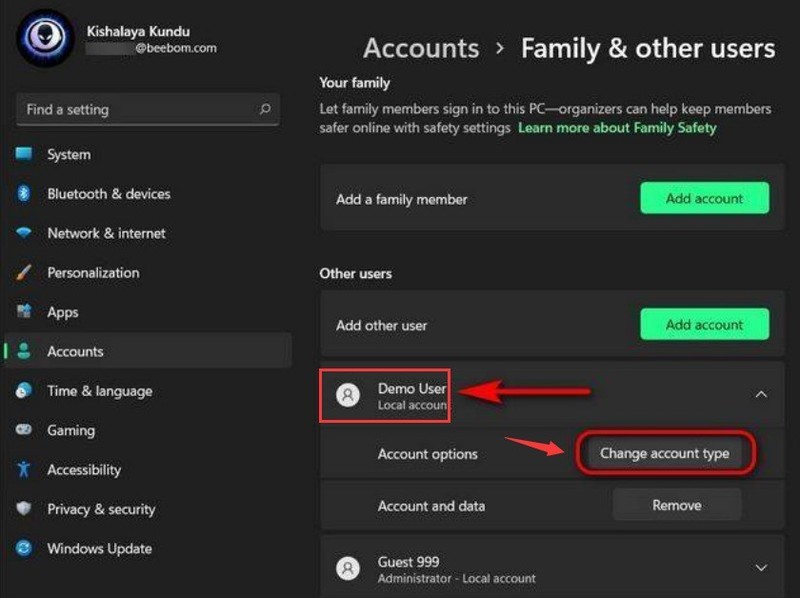
2. Find in a new window Demo User target account option, click the Change account type button
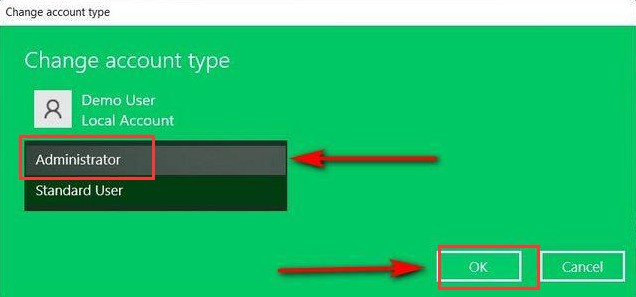
3. In the pop-up window, select Administrator in the account drop-down list, and click OK to save. Can
The above is the detailed content of How to change account type in Windows 11_Steps to change account type in Windows 11. For more information, please follow other related articles on the PHP Chinese website!
Related articles
See more- How to solve the problem of Windows 7 desktop rotating 90 degrees
- How to forcefully terminate a running process in Win7
- Win11 Build 25336.1010 preview version released today: mainly used for testing operation and maintenance pipelines
- Win11 Beta preview Build 22621.1610/22624.1610 released today (including KB5025299 update)
- Fingerprint recognition cannot be used on ASUS computers. How to add fingerprints? Tips for adding fingerprints to ASUS computers