


Using Windows 10’s built-in magnifying glass, you can easily magnify screen content, making it convenient for users with poor vision. PHP editor Xiaoxin will introduce how to use this practical tool to improve your experience. Whether you want to zoom in on a specific area or the entire screen, you'll find detailed steps in this guide. Read on to learn how to get the most out of Magnifier in Windows 10.
Click on the [Start] menu of win10 and select [Computer Settings]; as shown in the picture:

In the computer settings we select [Ease of Use]; as shown in the picture As shown:

In [Easy to Use] we select [Magnifying Glass]; as shown in the picture:

When opened for the first time, it is generally The bottom is closed. As shown in the picture:

If we want to open it, we directly select [Open] as shown in the picture:

In this way, on the screen Show us our magnifying glass. You can use the mouse to click or move directly. As shown in the picture:

You can set the magnification size, so that we can enlarge our text or desktop by moving the mouse. as the picture shows:

The above is the detailed content of How to use the built-in magnifying glass in WIN10. For more information, please follow other related articles on the PHP Chinese website!

 I Miss the Times Computers Were Plug and PlayMay 13, 2025 am 06:03 AM
Building a new PC was once a moment of triumph. Now, it’s just the beginning, as you have to install apps, download large games, and tweak dozens of settings before it's fully set up. Let's take a look at how we got here and how things used to be.
 Why Is This Logitech Mouse on Every Tech Person's Desk?May 13, 2025 am 06:02 AM
Logitech's MX Master series of mice has become a common sight in YouTube videos or photographs of tech-savvy people's desk setups, but what makes this now-iconic mouse so special? I'm on my third MX Master mouse at this point, and, honestly, I can
 I Refuse to Buy a Keyboard Without a ScreenMay 13, 2025 am 03:05 AM
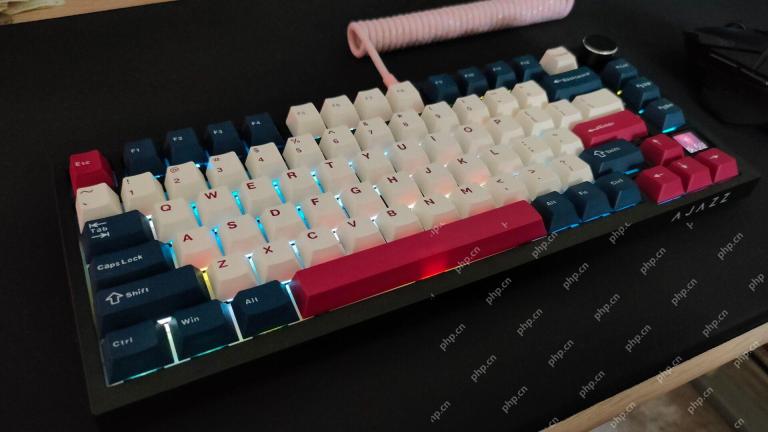
Mechanical keyboards offer a plethora of features, from switch type and keycap material to sound dampening. But one often overlooked, yet invaluable feature, is the built-in screen. Why Integrate Screens into Keyboards? The QWERTY keyboard, a staple
 The Galaxy S25 Gets Edgy, and RIP Skype: Weekly RoundupMay 13, 2025 am 03:04 AM
Tech News Roundup: Major Updates and New Releases Across the Tech Landscape This week brings a flurry of exciting tech news, from AI advancements to new gaming peripherals and significant software updates. Let's dive into the highlights: AI and Secu
 How to Rollback Windows 11 UpdateMay 12, 2025 pm 08:01 PM
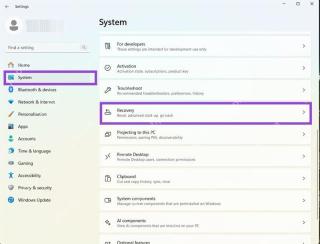
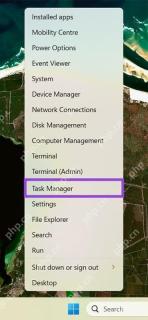
Is Windows 11 update causing system problems? Don’t panic! This article provides three methods of rollback updates to help you restore system stability. Method 1: Rollback updates through Windows settings This method is suitable for users whose update time is less than 10 days. Step 1: Click the "Start" menu to enter "Settings". You can also press the Windows key I on the keyboard. Step 2: In Settings, select System, and then click Recover. Step 3: Under Recovery Options, find "Previous Windows Versions". If the Back button is clickable, the system can be rolled back to the previous version. Step 4: The system will ask you why the rollback is
 13 Windows Keyboard Shortcuts I Couldn't Live WithoutMay 12, 2025 am 03:02 AM
Mastering Windows keyboard shortcuts isn't just about efficiency; it streamlines your entire computing experience. Windows' interface can be less than intuitive, hiding crucial settings within layers of menus. Fortunately, countless shortcuts exist
 How to Speed Up Your PC (Windows 11)May 11, 2025 pm 06:01 PM
Is your Windows 11 PC running slower than usual? Opening apps and loading websites taking an eternity? You're not alone! This guide offers three simple, no-download solutions to boost your computer's performance without complex settings adjustments
 This Mini PC Doubles as a Not-So-Great TabletMay 11, 2025 am 06:01 AM
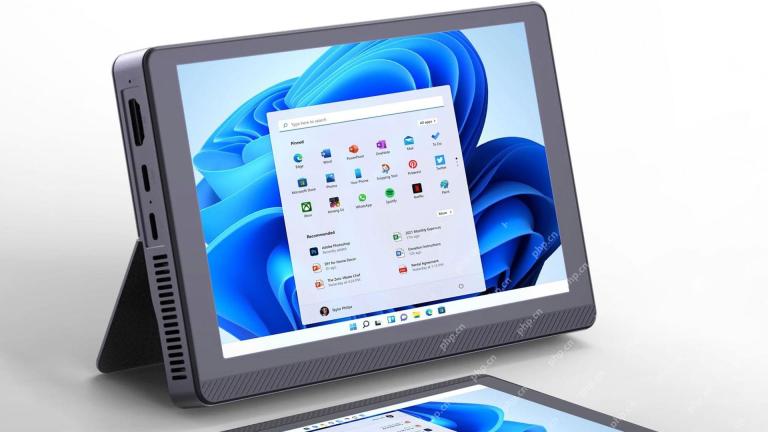
This mini PC, masquerading as a tablet, leaves much to be desired. The 7-inch, 1290x800 resolution screen is underwhelming. While some might use it for media consumption (similar to a 7-inch Amazon Fire Tablet), it's unlikely to be a primary choice


Hot AI Tools

Undresser.AI Undress
AI-powered app for creating realistic nude photos

AI Clothes Remover
Online AI tool for removing clothes from photos.

Undress AI Tool
Undress images for free

Clothoff.io
AI clothes remover

Video Face Swap
Swap faces in any video effortlessly with our completely free AI face swap tool!

Hot Article
Hot Tools

SublimeText3 Linux new version
SublimeText3 Linux latest version

Safe Exam Browser
Safe Exam Browser is a secure browser environment for taking online exams securely. This software turns any computer into a secure workstation. It controls access to any utility and prevents students from using unauthorized resources.

VSCode Windows 64-bit Download
A free and powerful IDE editor launched by Microsoft

PhpStorm Mac version
The latest (2018.2.1) professional PHP integrated development tool

MantisBT
Mantis is an easy-to-deploy web-based defect tracking tool designed to aid in product defect tracking. It requires PHP, MySQL and a web server. Check out our demo and hosting services.

