Home >Computer Tutorials >Browser >How to create a new account in Firefox
How to create a new account in Firefox
- WBOYWBOYWBOYWBOYWBOYWBOYWBOYWBOYWBOYWBOYWBOYWBOYWBforward
- 2024-04-22 16:50:061067browse
New Account in Firefox: An Easy Guide Firefox is a powerful web browser that is loved by many users. Signing in to your account brings added convenience, but how do you create a new one? PHP editor Yuzai will guide you step by step through the process of creating a new account in Firefox and help you solve the problem easily.

Overview of the steps to create a new account in Firefox
First, let’s click on Firefox on the computer. Then click the icon to open the Firefox browser in the upper left corner of the browser page (as shown in the picture).

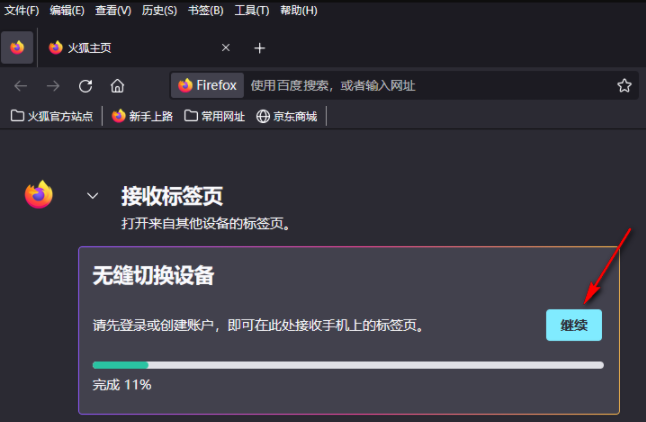
2. In the second step, after opening the Firefox icon, we find the "Continue" option on the page and click to open the option (as shown in the picture).
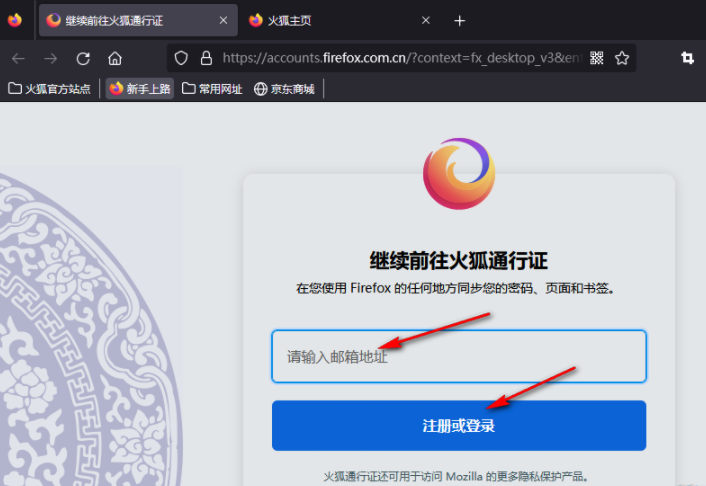
3. Step 3. After entering the login page of Firefox browser, we enter the email address on the page, and then click the "Register or Login" option (as shown in the figure) shown).
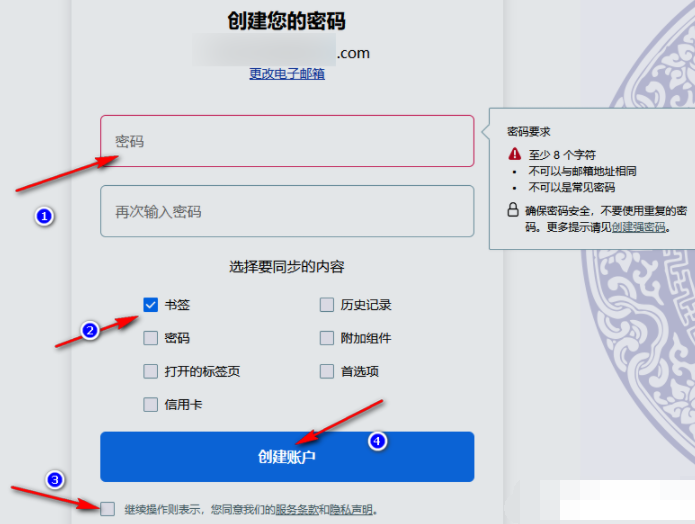
4. Step 4. After entering the password creation page, we enter the password on the page, then click on the bottom of the page to check the content to be synchronized, and then check Terms of Service option and then click the "Create Account" option (as shown in the picture).
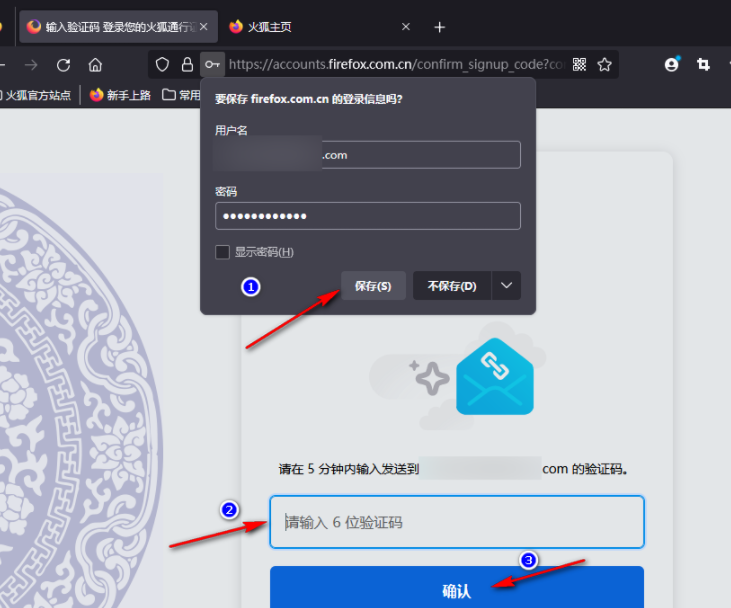
5. Step 5. After clicking the create account option, we can choose to save our account password and enter the verification code received in the email on the page. Finally click the "Confirm" option (as shown in the picture).
The above is the detailed content of How to create a new account in Firefox. For more information, please follow other related articles on the PHP Chinese website!

