Home >Software Tutorial >Computer Software >How to create a simple image distribution effect in CorelDRAW_Production method tutorial
How to create a simple image distribution effect in CorelDRAW_Production method tutorial
- PHPzforward
- 2024-04-22 13:49:30794browse
If you want to achieve beautiful and practical image distribution effects in CorelDRAW, you may need to master some skills. This article is written by PHP editor Apple to introduce you in detail how to create a simple image distribution effect to help you easily improve the image display effect. The following content will guide you step by step through the entire production process, so stay tuned.
1. Open the CorelDRAW software and import the picture material to be processed

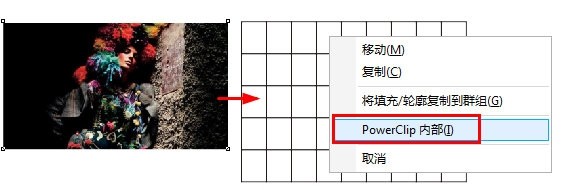
2. Find the [Drawing Tool] in the toolbox and set the rows of the drawing. Column number, drag it out in the canvas, right-click and select [Inside PowerClip]
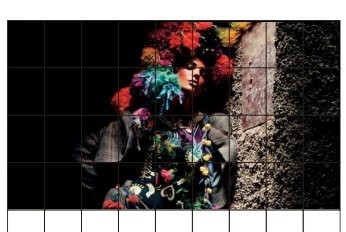
3. Adjust the position of the picture in the drawing
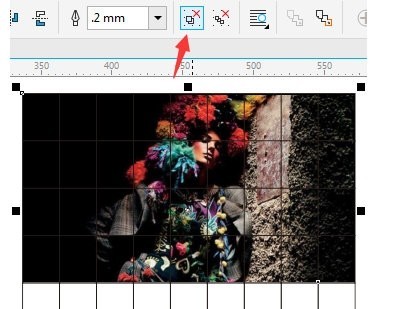
4. Click [Cancel Group Object] above to break up the grid
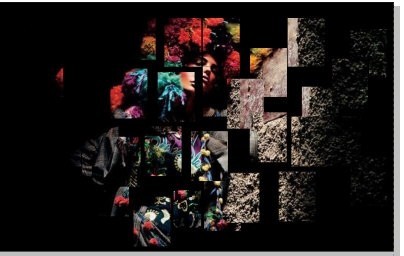
5. Then use the selection tool to move the position of the small picture. Double-click the rectangle tool, fill it with black as the background of the picture, select all, right-click on the palette to change the line outline color, so that the effect of evenly divided small distribution display is completed
The above is the detailed content of How to create a simple image distribution effect in CorelDRAW_Production method tutorial. For more information, please follow other related articles on the PHP Chinese website!

