Home >Mobile Tutorial >Android Phone >How to add attachments to oppo mobile phone emails_Tutorial on adding attachments to oppo mobile phone emails
How to add attachments to oppo mobile phone emails_Tutorial on adding attachments to oppo mobile phone emails
- 王林forward
- 2024-04-18 23:10:331346browse
How to add attachments to OPPO mobile emails? Don't worry, PHP editor Strawberry has brought you detailed operation tutorials. This tutorial will guide you step by step on how to add files, pictures or other content to emails on your OPPO phone. By reading the following content, you will learn how to easily send emails with attachments on your OPPO phone.
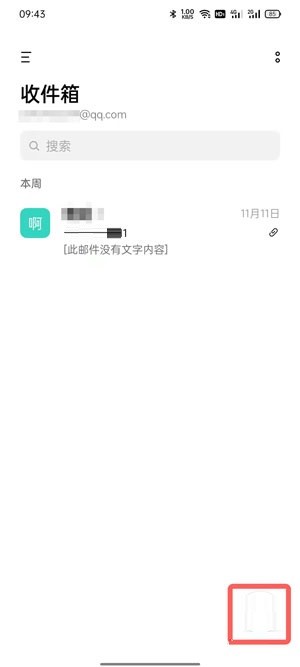
1. First, open the [Mail] app on your phone, click the More menu in the upper left corner and select Add a bound email account.

2. Then click [ ] in the lower right corner of the homepage to send an email.

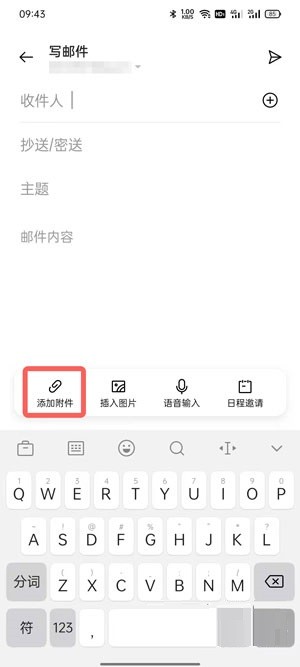
3. After editing the email content, click [Add Attachment] in the lower left corner.

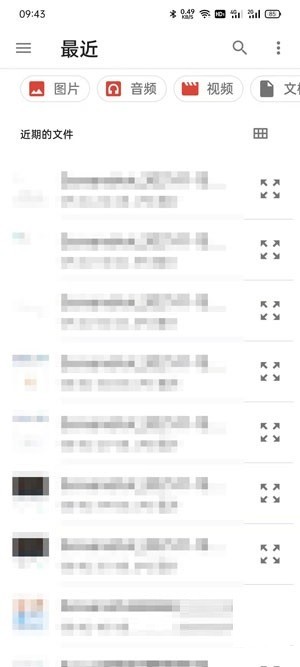
4. Next, select the attachment file to be sent in the file list and select it.

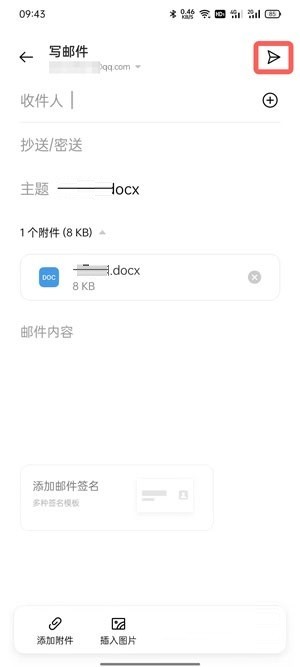
5. Finally, the corresponding attachment will be displayed in the email. Click [Send] in the upper right corner.

The above is the detailed content of How to add attachments to oppo mobile phone emails_Tutorial on adding attachments to oppo mobile phone emails. For more information, please follow other related articles on the PHP Chinese website!
Related articles
See more- What should I do if I forget my password on my OPPO phone? -How to unlock the lock screen password of Reno5 mobile phone
- How to disable the automatic synchronization function of oppo mobile phone
- Explore the reasons why oppo mobile phones become increasingly stuck during use (analyze the key factors and solutions to the lag problem of oppo mobile phones)
- Solution to forgetting the lock screen password of your Oppo phone (unlock your Oppo phone by resetting password and restoring factory settings)
- How to force shut down and restart oppo 'Detailed explanation: How to force shut down OPPO mobile phone'

