Home >Software Tutorial >Computer Software >How to use the Ellipse Tool on the Geometric Sketchpad
How to use the Ellipse Tool on the Geometric Sketchpad
- WBOYWBOYWBOYWBOYWBOYWBOYWBOYWBOYWBOYWBOYWBOYWBOYWBforward
- 2024-04-17 20:22:221024browse
Many friends encounter difficulties in making ellipses when using Geometric Sketchpad. PHP editor Yuzai will give you a detailed introduction to the operation method of the ellipse tool in Geometric Sketchpad. Through this article, you can easily master how to make ellipses in geometry. Draw an ellipse in the artboard.
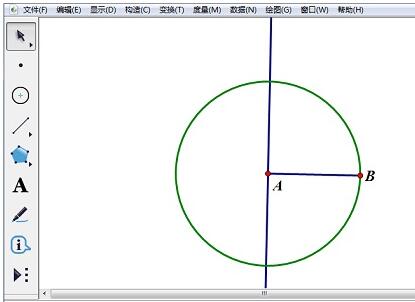
1. Select the circle tool, press the Shift key to draw a circle A, and the point on the circle is point B. Select point AB and press [Ctrl L] to construct line segment AB. Select point A and line segment AB, select [Construction] - [Perpendicular Line].
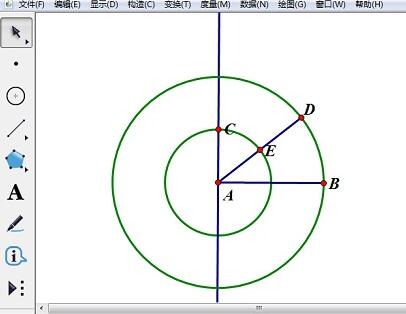
2. Use the point tool to pick any point C on the vertical line, select point A and point C, select [Construction] - [Draw a circle with the center and points on the circumference], Use the point tool to pick any point D on the large circle, use the line segment tool to connect point AD, and intersect the small circle at point D.
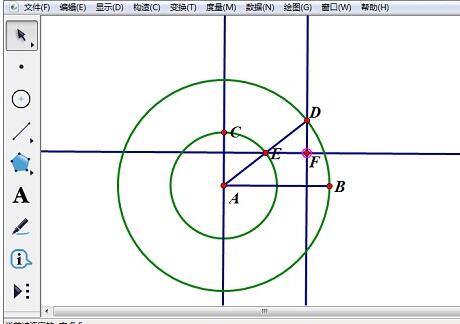
3. Select point E and line segment AB, select [Construction] - [Parallel Line], select point D and line segment AB, select [Construction] - [Perpendicular Line], The intersection point of the vertical line and the parallel line is F.
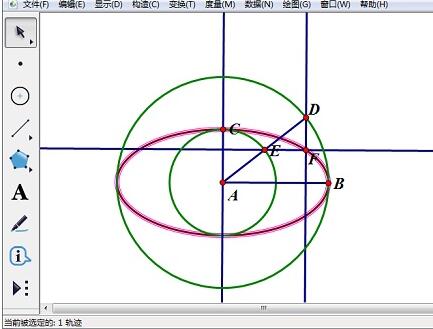
4. Select point D and point F, select [Construction] - [Trajectory] to get the elliptical shape.
5. Select point C and line segment AB, select [Construction] - [Draw a circle with center and radius], and the intersection point of the circle and line segment AB is G. Double-click the straight line AC, select point G, select [Transform] - [Reflection] to get another point G’. These two points are the two foci of the ellipse.
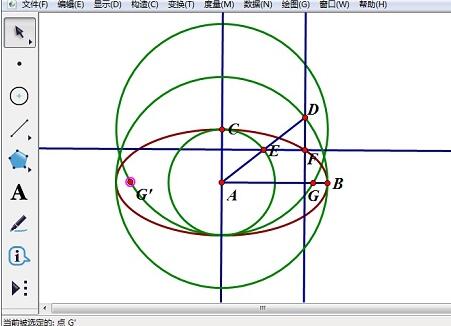
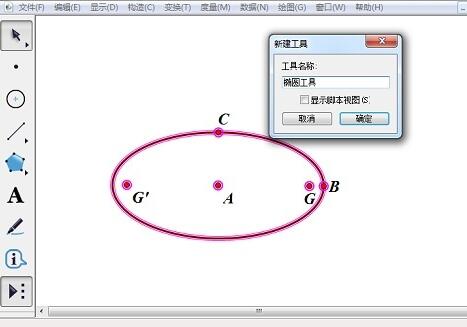
#6. Select all graphics and line segments except the ellipse, point A, point B, point G, and point G’, and press [Ctrl H] to hide them. Select all the graphics in the artboard, select Create a new tool in the custom tools, and change the tool name to [Ellipse Tool].
The above is the detailed content of How to use the Ellipse Tool on the Geometric Sketchpad. For more information, please follow other related articles on the PHP Chinese website!

