
Home >Software Tutorial >Computer Software >How to use Photoshop to design wrinkle effects
How to use Photoshop to design wrinkle effects

- 王林forward
- 2024-04-17 19:49:07683browse
In the process of learning Photoshop, designing wrinkle effects is a common and important skill. Master this technique and you'll be able to add realistic texture and depth to your images. Today, PHP editor Yuzai brings you a tutorial on how to design wrinkle effects in Photoshop. In this article, you will learn step-by-step how to use various tools and techniques to easily create realistic pleat effects. Whether you are a graphic designer or a photography enthusiast, this tutorial will help you improve your skills and improve the quality of your work.
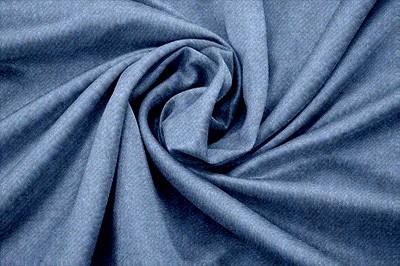
After importing your flat fabric picture into PS, import the wrinkle material you found onto your flat fabric, and adjust the size so that it covers your entire canvas. Finally rasterize the layer.
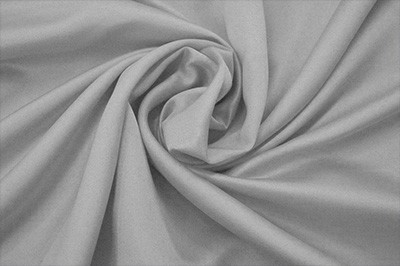
Put the wrinkled layer to [Image]-[Adjustment]-[Decolor](CTRL SHIRT U)
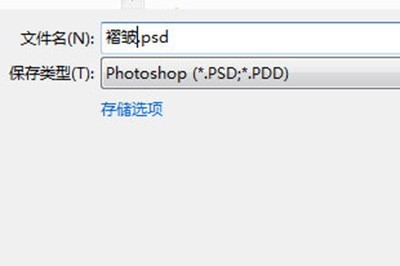
Click [File] 】-[Save as], save it in PSD format
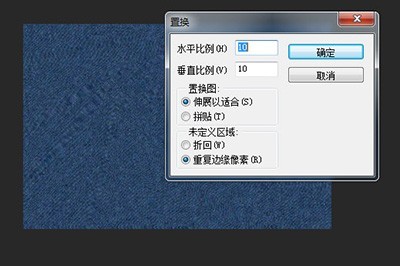
Hide the wrinkled layer, use [Filter]-[Distort]- on your original background layer [Replace], click OK and be asked to select a file. Here, select the PSD format file just saved. This will give your plane a wrinkled, distorted effect.
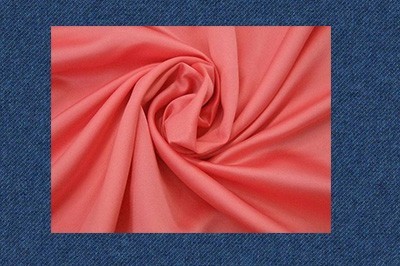
Redisplay the wrinkle layer, change the blending mode of its layer to [Linear Light], and finally the wrinkle effect on your fabric will appear!
The above is the detailed content of How to use Photoshop to design wrinkle effects. For more information, please follow other related articles on the PHP Chinese website!