Home >Software Tutorial >Computer Software >How to turn off boot time recording in 360 Security Guard_Tutorial on turning off boot time recording in 360 Security Guard
How to turn off boot time recording in 360 Security Guard_Tutorial on turning off boot time recording in 360 Security Guard
- WBOYWBOYWBOYWBOYWBOYWBOYWBOYWBOYWBOYWBOYWBOYWBOYWBforward
- 2024-04-15 10:55:42748browse
In this article, PHP editor Youzi will introduce you in detail how to turn off the boot time recording function in 360 Security Guard. Although boot time recording is helpful for monitoring system startup and operating conditions, some users may wish to disable this feature due to privacy concerns. Next, we will provide step-by-step guidance to help you complete the setup quickly and easily, ensuring that your computer starts up more in line with your personal needs and security standards.
1. First install 360 Security Guard. After the installation is complete, click the shortcut key to start Security Guard.

2. After entering the 360 Security Guard homepage, click the [three] icon in the upper right corner.

3. Then click the [Settings] button in the small window.

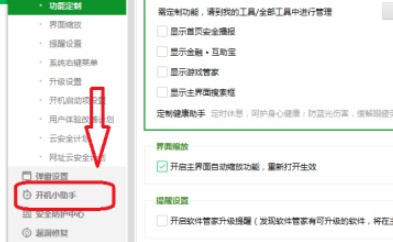
4. Let’s click the [Boot Assistant] button on the left.

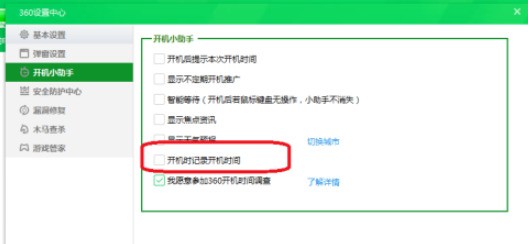
5. Uncheck the box in front of [Record boot time when booting], and then click [OK].

The above is the detailed content of How to turn off boot time recording in 360 Security Guard_Tutorial on turning off boot time recording in 360 Security Guard. For more information, please follow other related articles on the PHP Chinese website!

