Home >Software Tutorial >Computer Software >How to select the screen recording area in OBS Studio_Tutorial on selecting the screen recording area in OBS Studio
How to select the screen recording area in OBS Studio_Tutorial on selecting the screen recording area in OBS Studio
- PHPzforward
- 2024-04-09 11:55:17977browse
php editor Youzi teaches you how to choose the screen recording area! OBS Studio is a free, open source video recording and streaming software that supports multiple operating systems. One of the most important features is to record the screen area, but when choosing the recording area, you may encounter some problems, such as not knowing how to select, when to select, how to change and how to use these tools, etc. So, how to choose the recording screen area? The following is a complete guide for selecting the recording screen area for OBS Studio provided by php editor Youzi!
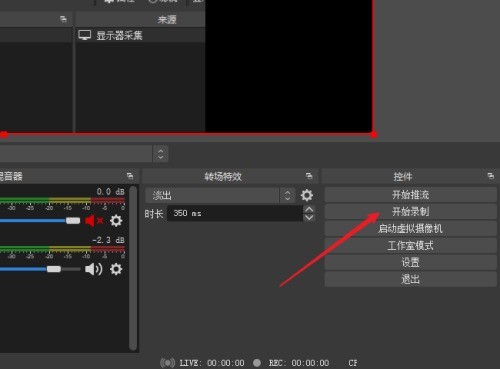
1. First open the software and enter the operation interface, click the [ ] button in the [Source] panel.

2. Then select [Monitor Collection] in the menu that opens and add the monitor.

3. Select [New] in the pop-up window and click the [OK] button to complete the new creation.

4. Select the monitor name to be displayed and click the [OK] button to complete the screen loading.

5. Click to select the screen display box, hold down alt on the keyboard and drag the small square on the border to capture the area.

6. Right-click the mouse to open the menu and select [Adjust output size (to source size)].

7. Click [OK] in the last dialog box that pops up. At this time, the screen recording area will be enlarged to the size of the canvas. Click the [Start Recording] button to start recording the screen.

The above is the detailed content of How to select the screen recording area in OBS Studio_Tutorial on selecting the screen recording area in OBS Studio. For more information, please follow other related articles on the PHP Chinese website!

