Home >System Tutorial >Windows Series >The operation process of canceling the power-on password in win10
The operation process of canceling the power-on password in win10
- WBOYWBOYWBOYWBOYWBOYWBOYWBOYWBOYWBOYWBOYWBOYWBOYWBforward
- 2024-03-28 13:51:05728browse
php editor Youzi will introduce to you in detail the operation process of canceling the power-on password in Win10. First, click the "Start" menu and select "Settings"; then, click the "Account" option and select "Login Options"; then, enter the password in the "Password" section for verification; finally, click the "Change" button and enter the password again confirm. By following the above simple steps, you can cancel the power-on password setting in Win10 system.
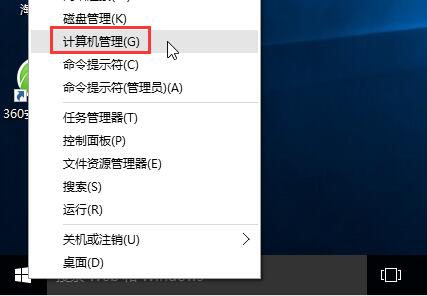
1. Right-click the start icon and select Computer Management, as shown in the figure:
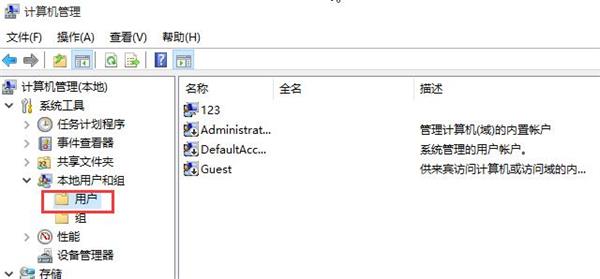
2. In the window, click Local Users and Groups → Users, and then Find the currently used account on the right, as shown in the picture:
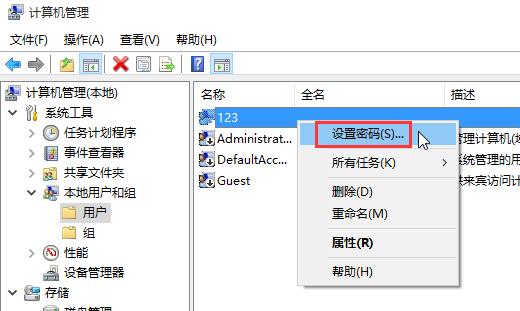
3. Right-click the current user and select Set Password, as shown in the picture:
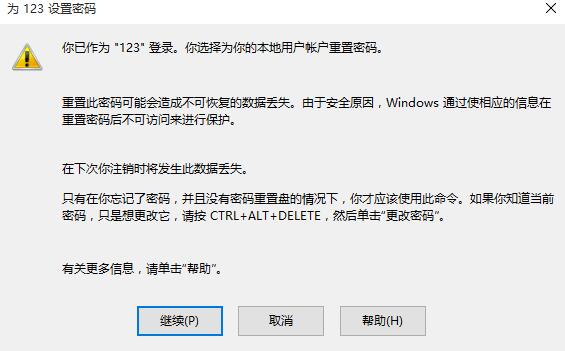
4. Then in the prompt box, click Continue, as shown in the figure:
5. Next, in the password setting window, do not enter the password, just leave it blank and click OK That's it, as shown in the picture:
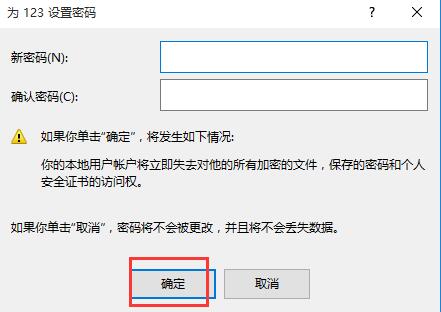
6. Then click OK in the prompt box, then restart the system, you can see the system automatically logs in without entering a password. as the picture shows:

The above is the detailed content of The operation process of canceling the power-on password in win10. For more information, please follow other related articles on the PHP Chinese website!
Related articles
See more- What should I do if my win10 adapter wlan is missing?
- Solution to vcruntime140.dll missing in win10
- What should I do if the win10 system prompts that administrator rights are required to change these properties?
- What should I do if there is no wlan in win10 network settings?
- How to clean up trash in win10

