Home >Computer Tutorials >Computer Knowledge >How to solve the error prompt in win11 local group policy editor?
How to solve the error prompt in win11 local group policy editor?
- 王林forward
- 2024-03-28 10:26:431019browse
php editor Zimo introduces to you the solution to the error prompted by the Win11 local group policy editor. After upgrading to Win11, users may encounter situations where the Local Group Policy Editor cannot be opened or an error is prompted. As a solution, you can try restarting the computer, checking for system updates, running system file detection tools, etc. Additionally, you can try other tools or commands to modify the policy. I hope the above methods can help you solve the problem of Win11 Local Group Policy Editor and make your system run more smoothly!
Win11 Local Group Policy Editor prompts error problem analysis
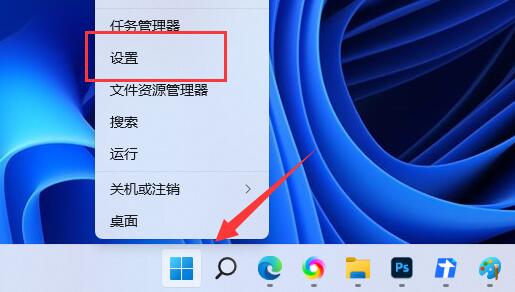
1. Press the [Win X] key combination on the keyboard, or right-click the [Windows Start Logo] on the taskbar. , select [Settings] in the right-click menu item that opens.
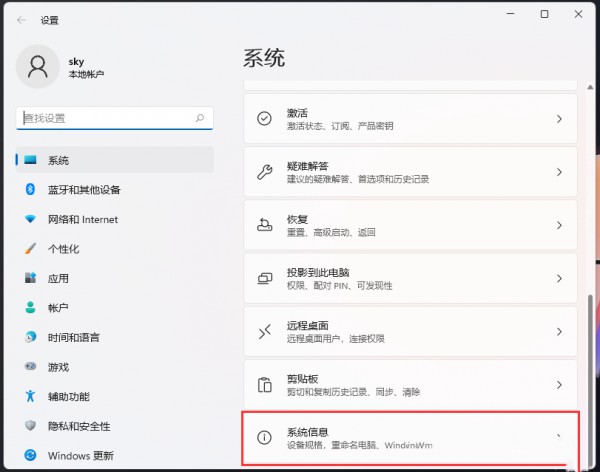
#2. In the Windows Settings window, find and click [System Information (Device Specifications, Rename Computer, Windows Specifications)] at the bottom on the right side.
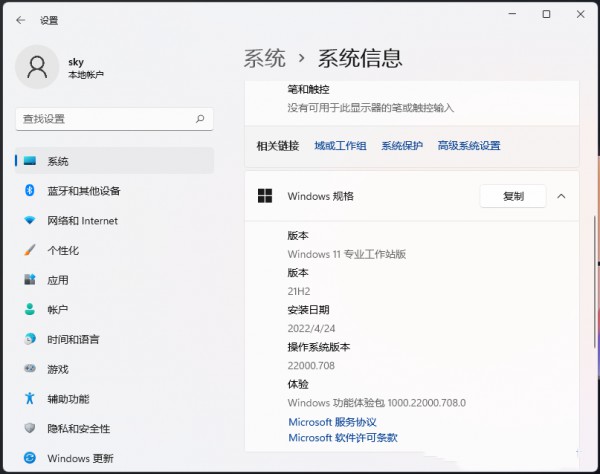
#3. You can check the version of Win11 system under Windows specifications. Under normal circumstances, if you use the home version of Win11 system, there is no gpedit.msc.
If it is Win11 Home Edition, you can also enable gpedit.msc through the following methods
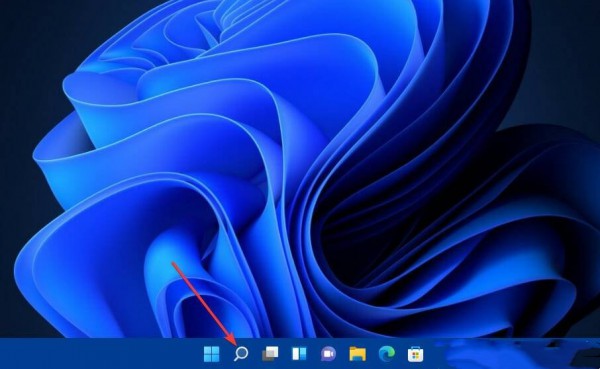
1. Press the Win S key combination, or click on the taskbar Search icon.
#2. In the search box, enter notepad.
3. From the search results, select to open the Notepad application.
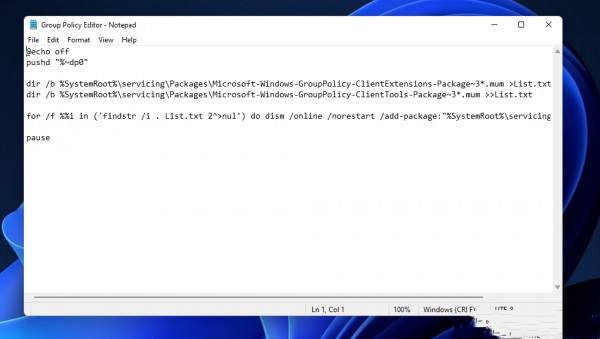
4. Then enter the following batch file code into Notepad:
@echo off
pushd %~dp0″
dir /b %SystemRoot %servicingPackagesMicrosoft-Windows-GroupPolicy-ClientExtensions-Package~3*.mum>List.txt
dir /b %SystemRoot%servicingPackagesMicrosoft-Windows-GroupPolicy-ClientTools-Package~3*.mum>>List .txt
for /f %%i in ('findstr /i . List.txt 2^>nul') do dism /online /norestart /add-package: %SystemRoot%servicingPackages%%i
pause
5. In Notepad, process the batch file code.
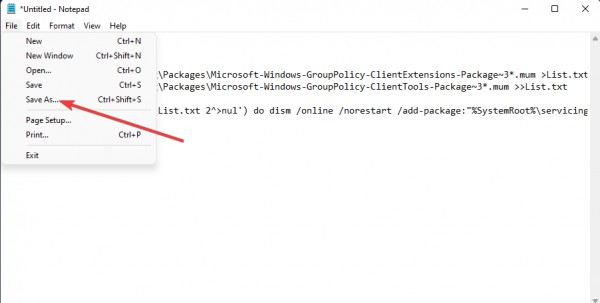
6. Click the file in the upper left corner of Notepad.
7. In the drop-down menu that opens, select Save As.
8. Then, from the save type, find and select the All Files option.
9. In the file name text box, enter Editor.bat.
10. Select Save as Desktop.
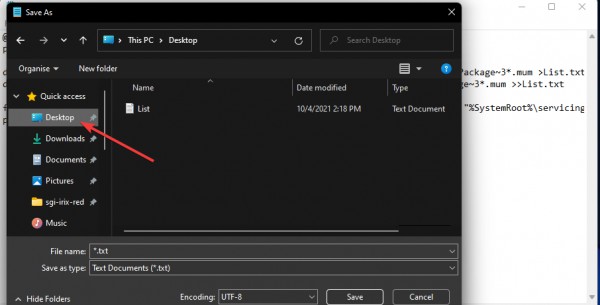
11. Click Save on the window .
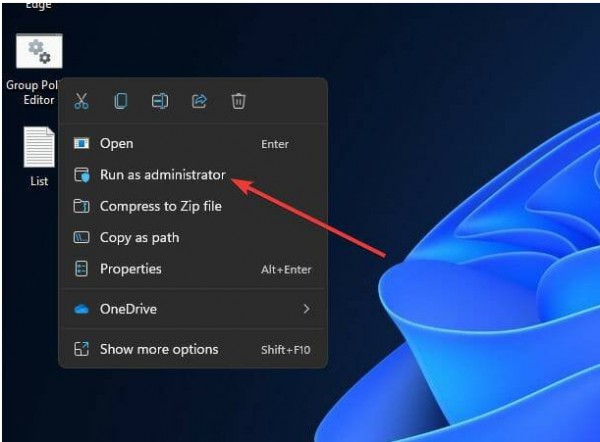
12. On the desktop, right-click the batch file you just created, and in the menu item that opens, select Run as administrator.
The above is the detailed content of How to solve the error prompt in win11 local group policy editor?. For more information, please follow other related articles on the PHP Chinese website!

