
 System TutorialLINUXVirtual network editor steps to install redhat and installation process instructions
Virtual network editor steps to install redhat and installation process instructions


linux for beginnersvmware10 install linux, because the boot disk was not foundvmware10 install linux, so I downloaded redhat-Linux from the Internet .5.5.for.x86-server-5.5-i386-dvd.iso and installed it by following the steps for installing redhat under win7 on Baidu Library. As a Linux beginner, the reason why I want to write this down is because when installing VMware Tools, I still encounter various error messages due to problems such as missing spaces or not specifying the address because I don’t understand the Linux commands. , so when I finally solved the problem, I wanted to write the whole process in detail. I hope it will be helpful to beginners like me who have no foundation and are troubled by similar problems.
The following is my entire installation process:
1. Click on the virtual network editor under the editing window
2. Confirm that there is VMnet0 - if the bridge network option is not available, reinstall VMware (I used VMware11 before, but there was no VMnet0, and then I reinstalled VMware10 and it was there)
3. Choose to create a new virtual machine
4. Select custom linux to set environment variables, next step
5, default
6. The first option is to install from the CD; the second option is to perform a simple installation from the iso image. These installation methods do not install the English language pack and English input method; the third option represents a custom installation. Choose to install the operating system later
7. Select the guest operating system and version to be installed
8. Give the virtual machine a name and select the specified installation location.
9. Processor configuration
10. Virtual machine memory settings
11. Network type selection—use bridged network
12、Default
13、Default
14. Select to create a new virtual c drive
15. Specify the size of c drive
16, default
17. Complete virtual machine creation
18. Click CD/DVD(SATA)
19. Choose to use ISO image file
20. Select ISO image file path
21. Confirm
22. Press the Enter key after starting the virtual machine
23、Skip
24、Next step
25. Select Traditional English
26. Select British language style
27. Skip entering the installation number
28、Skip
29. The choice is
30. Choose to build a custom partition structure
31. Create three new partitions respectively
32. Result after allocation
33, default
34, default
35, default
36. Set root password
37. Check the software development option (installing the software requires some related software packages)
38、Next step
39. Select Reboot
40、Forward
41. Agree to the contract
42. Disable the firewall (will affect remote login and other functions)
43. Disable SELinux (will affect remote login and other functions)
44. Disable Kdump
45. Set date and time
46. Register after selection
47. Create users later
48. Sound card check
49. Click to complete
50. The following is to install VMwareTools - find and select Install VMwareTools in the virtual machine. At this time, the Linux desktop will display the VMwareTools CD (this does not mean that it has been successfully installed). VMwareTools provides convenient user operation functions and can be manually operated. To identify whether the cursor works on the host or the virtual machine, you can drag files from the host to the virtual machine, etc.
51. Press ALT CTR F1 to switch from the graphical interface to the command line interface. After logging in to the account, enter the following commands in sequence (note the spaces):
cd/media/VMwareTools/——cd and spaces next to it
ls–al——There is a space after ls——View the files in the VMwareTools directory
mkdir/root/download——There is a space next to mkdir——Create a new download directory in the root directory
cp–a/media/VMwareTools//root/download——cp–a and a space between the two /
——Copy the VMwareTools directory to the download directory (the driver file is readable but not writable)
cdroot/download/VMwareTools/——cd and spaces next to it
ls——Display the files in the directory (ls-al already exists in it, so it is omitted here)
tar–zxvfVMwareTools-9.6.0-1294478.tar.gz——There are spaces next to tar–zxvf
Waiting for command execution
ls——At this time, there is an additional directory vmware-tools-distrib
cdvmware-tools-ditrib——There are spaces next to cd
ls——Display files in the directory
./vmware-install.pl——Install VMwareTools
——Wait for the command to be executed, still press Enter to confirm, and select the screen frame rate, until no more commands are executed (that is, the installation is completed), linux download, and then reboot (restart the system) to implement the functions of VMwareTools.
The above is the detailed content of Virtual network editor steps to install redhat and installation process instructions. For more information, please follow other related articles on the PHP Chinese website!

 How to Use 'next' Command with Awk in Linux - Part 6May 15, 2025 am 10:43 AM
In this sixth installment of our Awk series, we will explore the next command, which is instrumental in enhancing the efficiency of your script executions by skipping redundant processing steps.What is the next Command?The next command in awk instruc
 How to Efficiently Transfer Files in LinuxMay 15, 2025 am 10:42 AM
Transferring files in Linux systems is a common task that every system administrator should master, especially when it comes to network transmission between local or remote systems. Linux provides two commonly used tools to accomplish this task: SCP (Secure Replication) and Rsync. Both provide a safe and convenient way to transfer files between local or remote machines. This article will explain in detail how to use SCP and Rsync commands to transfer files, including local and remote file transfers. Understand the scp (Secure Copy Protocol) in Linux scp command is a command line program used to securely copy files and directories between two hosts via SSH (Secure Shell), which means that when files are transferred over the Internet, the number of
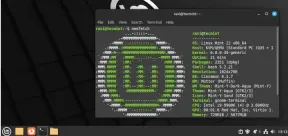
 10 Most Popular Linux Desktop Environments of All TimeMay 15, 2025 am 10:35 AM
One fascinating feature of Linux, in contrast to Windows and Mac OS X, is its support for a variety of desktop environments. This allows desktop users to select the most suitable and fitting desktop environment based on their computing requirements.A
 How to Install LibreOffice 24.8 in Linux DesktopMay 15, 2025 am 10:15 AM
LibreOffice stands out as a robust and open-source office suite, tailored for Linux, Windows, and Mac platforms. It boasts an array of advanced features for handling word documents, spreadsheets, presentations, drawings, calculations, and mathematica
 How to Work with PDF Files Using ONLYOFFICE Docs in LinuxMay 15, 2025 am 09:58 AM
Linux users who manage PDF files have a wide array of programs at their disposal. Specifically, there are numerous specialized PDF tools designed for various functions.For instance, you might opt to install a PDF viewer for reading files or a PDF edi
 How to Filter Command Output Using Awk and STDINMay 15, 2025 am 09:53 AM
In the earlier segments of the Awk command series, our focus was primarily on reading input from files. However, what if you need to read input from STDIN?In Part 7 of the Awk series, we will explore several examples where you can use the output of o
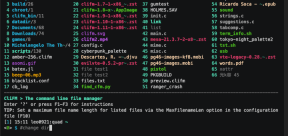 Clifm - Lightning-Fast Terminal File Manager for LinuxMay 15, 2025 am 09:45 AM
Clifm stands out as a distinctive and incredibly swift command-line file manager, designed on the foundation of a shell-like interface. This means that users can engage with their file system using commands they are already familiar with.The choice o
 How to Upgrade from Linux Mint 21.3 to Linux Mint 22May 15, 2025 am 09:44 AM
If you prefer not to perform a new installation of Linux Mint 22 Wilma, you have the option to upgrade from a previous version.In this guide, we will detail the process to upgrade from Linux Mint 21.3 (the most recent minor release of the 21.x series


Hot AI Tools

Undresser.AI Undress
AI-powered app for creating realistic nude photos

AI Clothes Remover
Online AI tool for removing clothes from photos.

Undress AI Tool
Undress images for free

Clothoff.io
AI clothes remover

Video Face Swap
Swap faces in any video effortlessly with our completely free AI face swap tool!

Hot Article
Hot Tools

SublimeText3 Linux new version
SublimeText3 Linux latest version

MantisBT
Mantis is an easy-to-deploy web-based defect tracking tool designed to aid in product defect tracking. It requires PHP, MySQL and a web server. Check out our demo and hosting services.

Zend Studio 13.0.1
Powerful PHP integrated development environment

SAP NetWeaver Server Adapter for Eclipse
Integrate Eclipse with SAP NetWeaver application server.

VSCode Windows 64-bit Download
A free and powerful IDE editor launched by Microsoft

