Home >System Tutorial >Windows Series >Where is the sleep function in win10? Introduction to the location of win10 sleep function
Where is the sleep function in win10? Introduction to the location of win10 sleep function
- WBOYWBOYWBOYWBOYWBOYWBOYWBOYWBOYWBOYWBOYWBOYWBOYWBforward
- 2024-03-17 09:16:02994browse
win10Where is the sleep function? The method is very simple. Users can directly click on the Control Panel under the Start menu, then go to the Power Options under the System and Security Options, and then find the Change Plan Settings behind the Balance option to perform the operation. Let this site give users a detailed introduction to the location of the win10 sleep function.
Win10 sleep function location introduction
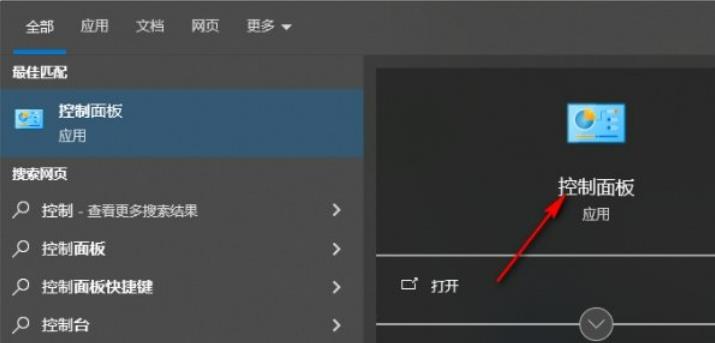
1. Search for Control Panel in the Start menu and click to enter the Control Panel.

#2. In the control panel, set the [View By] on the right to [Category], and then click the [System and Security] option to enter.

#3. After entering the new window that opens, find [Power Options] and left-click the power option.

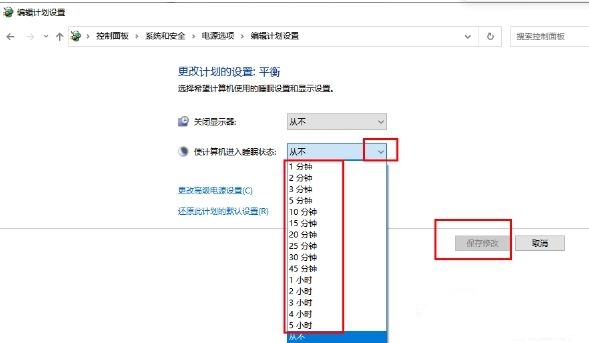
#4. In the window to set the power plan, click the [Change Plan Settings] button behind the [Balance] option.

5. Click the drop-down button behind [Put the computer to sleep] to open it, select a time, and finally click the [Save changes] button.

The above is the detailed content of Where is the sleep function in win10? Introduction to the location of win10 sleep function. For more information, please follow other related articles on the PHP Chinese website!

