Home >Computer Tutorials >System Installation >How to optimize boot speed in win10
How to optimize boot speed in win10
- WBOYWBOYWBOYWBOYWBOYWBOYWBOYWBOYWBOYWBOYWBOYWBOYWBforward
- 2024-02-28 22:07:411558browse
Some win10 users find that their computer boot time is much slower than normal, but their computer configuration is not bad. So what causes the win10 computer to start slower? There are three main reasons why Windows 10 computers will start up slowly: 1. The system does not process data quickly enough and there are too many startup items. 2. There are too many junk files in the system. 3. The computer virtual memory setting is improper. Friends can find corresponding solutions according to their own computer conditions.

How to optimize win10 boot speed
Method 1.
1. Open the control panel and find "Power Options".
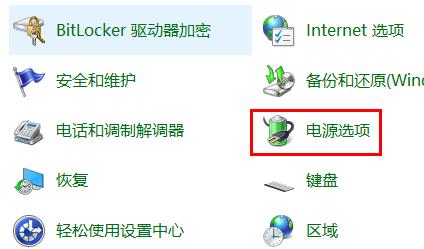
2. Then click "Choose what the power buttons do" on the right.
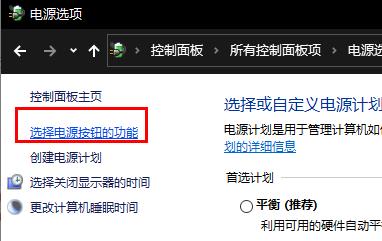
3. Then click "Change settings that are currently unavailable" above.
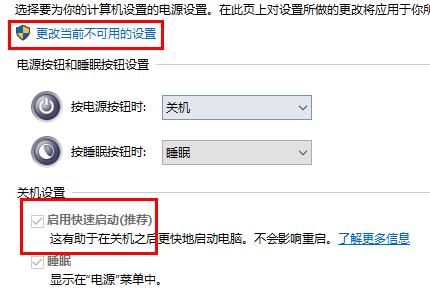
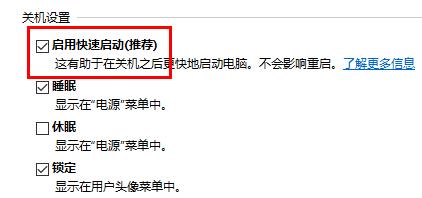
4. Then check "Enable fast startup". It can be completed.
Method 2,
1. Right-click the mouse and select Properties.
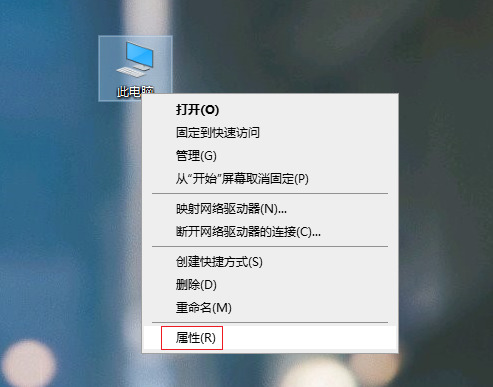
2. After entering, select on the left, then switch to the tab and click under.
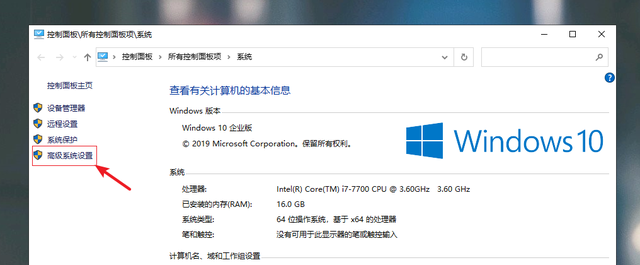
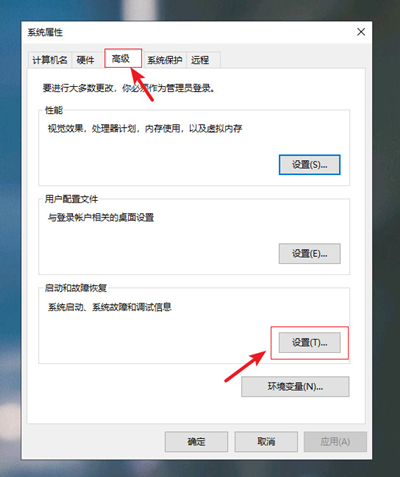
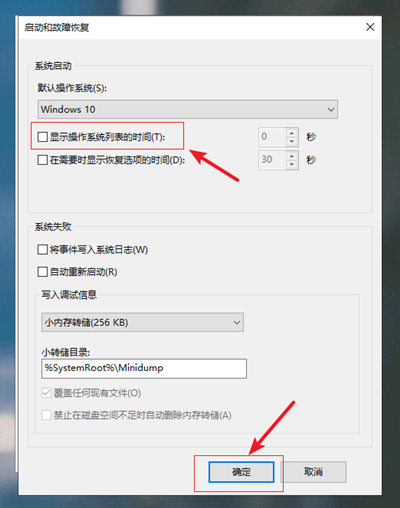
3. In the following interface, uncheck the box in front of it, and then click. This will speed up your computer's startup time.
Method 3.
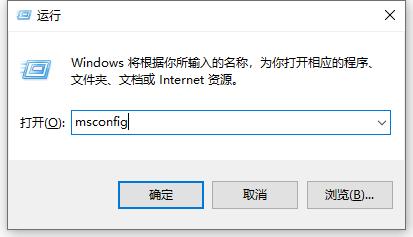
1. Press the shortcut key win R at the same time to open the run box, enter msconfig, and click OK to open.
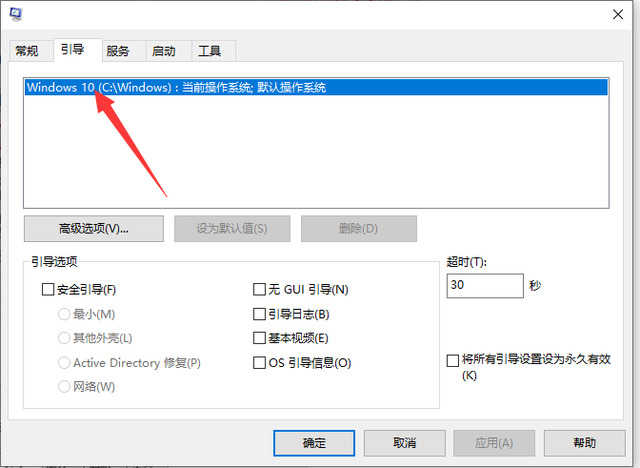
2. Click the boot tab on the system configuration page and click to switch.
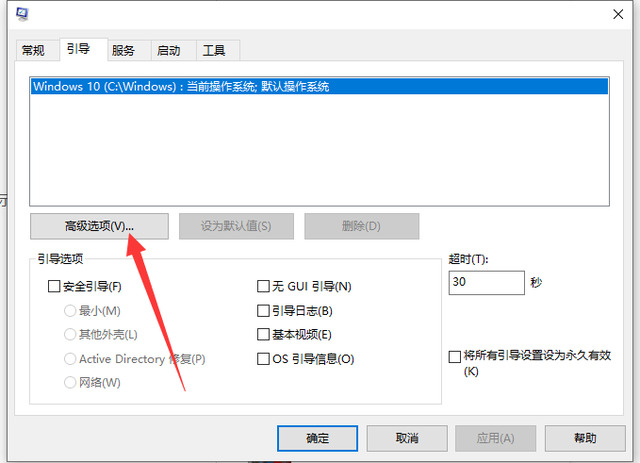
3. In the boot tab, there is an Advanced Options button. We can set the number of cores of the processor from here. Click Advanced Options.
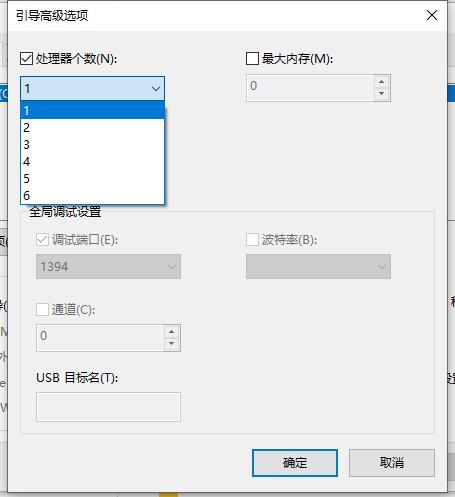
4. Here is the checkbox in front of the processor number. Select it with the mouse, as shown in the picture, and then click on the menu below. What is your processor number? The number of cores will be displayed. For example, if my processor is dual-core, it will display 2, then select 2 and click OK.
5. Then start setting the startup items. Reduce the computer startup items to speed up the computer startup. Click the Boot tab.
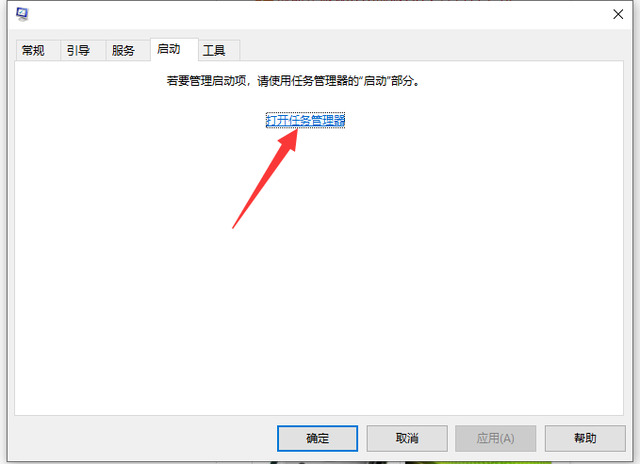
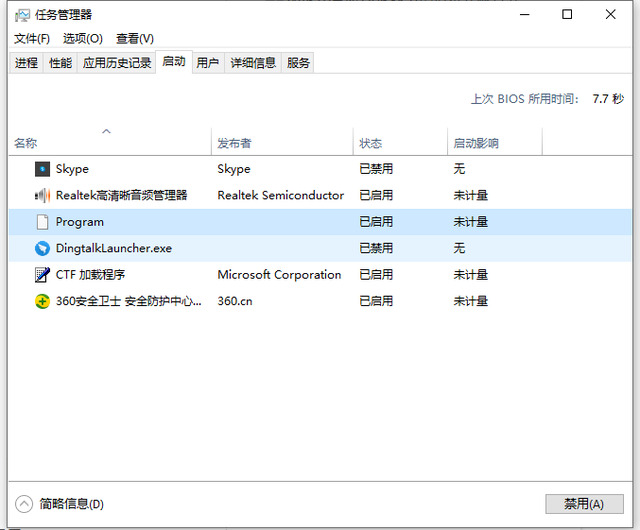
6. Then you can see the computer startup items. It is recommended to cancel the startup items except for anti-virus software, and finally click OK to exit.
Method 4,
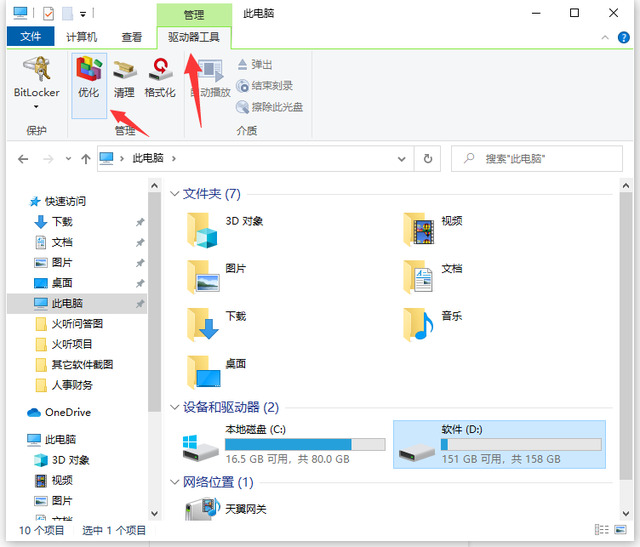
1. Double-click on the desktop to open "This Computer", select any disk drive letter, such as "C drive", and then switch to "Drive Tools", click "Optimize".
2. On the Optimize Drive page, click on the C drive and click "Optimize".
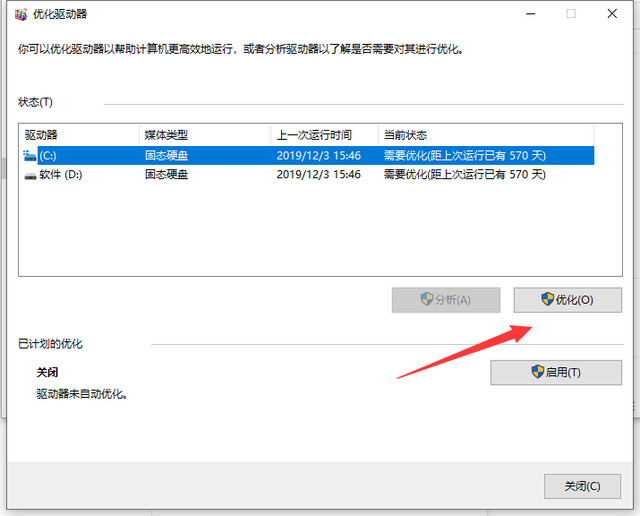
3. After that, follow the same method to defragment and optimize all disks on the computer (note: solid-state drives cannot be defragmented!).
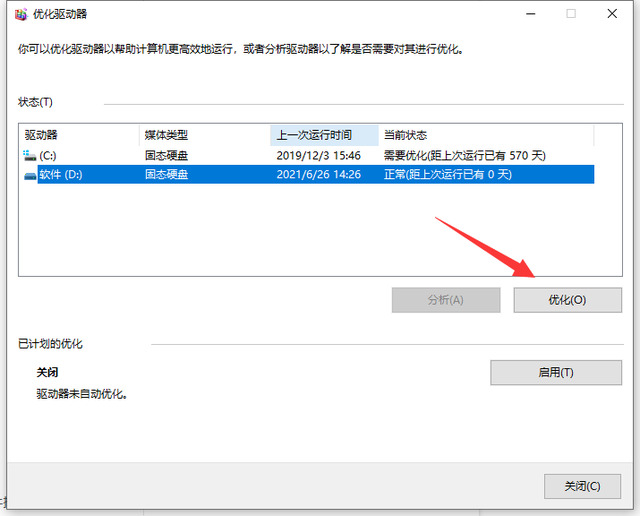
4. Detailed steps to defragment the disk in win10 system. In addition, you can also use software to reduce some useless system services, clear system garbage, and uninstall useless software plug-ins. .
Method 5.
1. First, right-click "This PC" on the desktop, and then click "Properties".
2. After opening, click "System Protection" on the left.
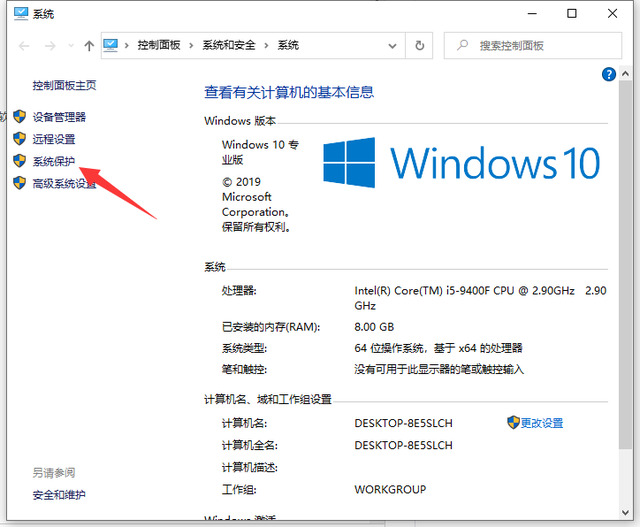
3. After entering the next page, click "Advanced" first, and then click the "Settings" option under "Performance".
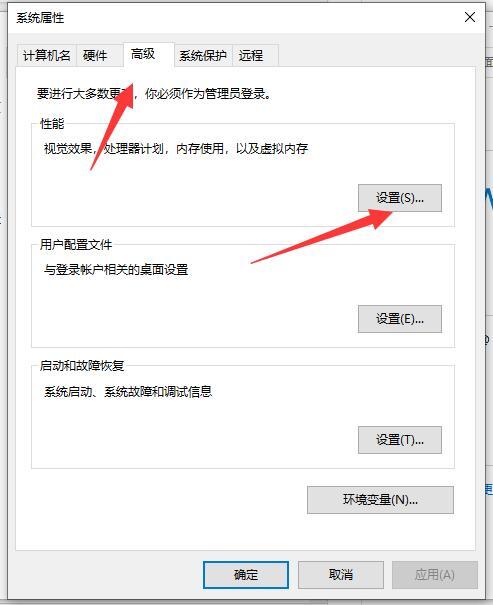
4. Then in "Performance Options", click "Advanced" again.
5. Finally, click "Change" under Virtual Memory. In "Virtual Memory", uncheck "Automatically manage all drive file sizes", then check "Custom size", and then set the memory size yourself. , expand the original one, and click "OK".
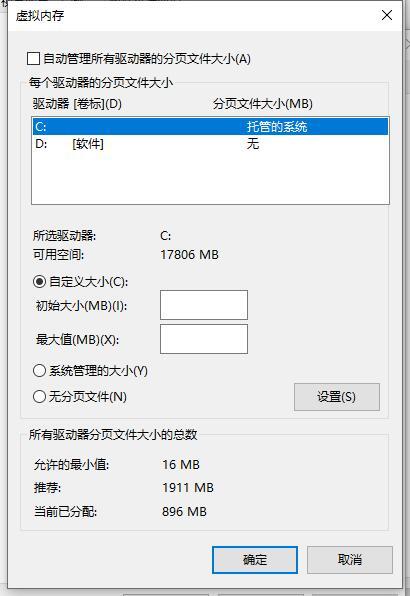
The above is the detailed content of How to optimize boot speed in win10. For more information, please follow other related articles on the PHP Chinese website!

