
Home >Software Tutorial >Mobile Application >How to operate PS character dermabrasion
How to operate PS character dermabrasion

- PHPzforward
- 2024-02-27 16:31:051177browse
php Editor Banana today introduces you to a very practical PS skill - character skin grinding operation. In PS, dermabrasion is a commonly used image retouching technology, which can help the character's skin become more delicate and smooth, and improve the overall picture texture. With simple operations, you can make your photos look more natural and beautiful. Next, let us learn about the specific operation methods of PS character skin grinding!
However, many beginners and photography enthusiasts are often confused by Photoshop’s dermabrasion technique, in part because this technique requires knowledge of multiple tools and filters, and the need to master how to properly Apply them. From basic layer manipulation to advanced blending modes, the correct skinning steps can greatly improve the overall visual effect of your work. In this guide, we will introduce in detail the specific steps and techniques for dermabrading characters in Photoshop. Whether you are a beginner or an experienced user, you will be able to learn how to effectively perform dermabrasion through this guide. Your portrait work is on the next level.
psHow to quickly grind skin on characters without plug-insRendering: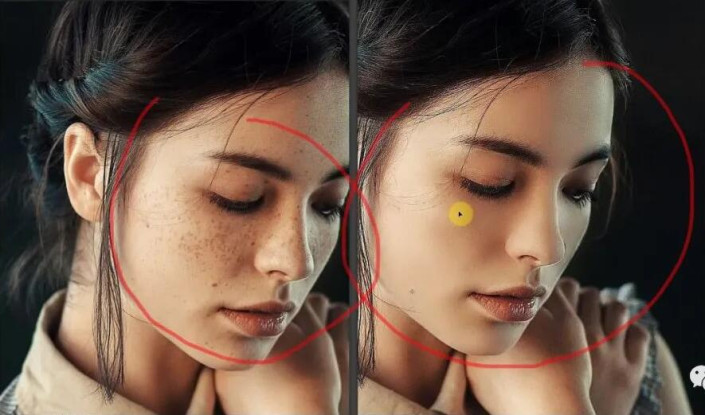
In the first step, "Ctrl O" opened the picture to be retouched, and I saw that the beautiful woman had freckles on her face, which was slightly rough.

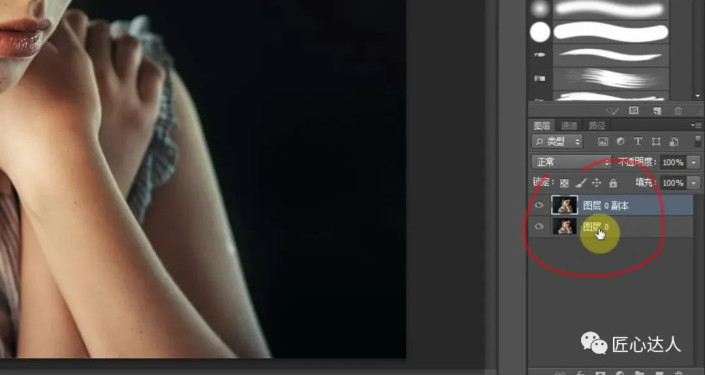
Converting the background layer to a normal layer is a key step in the operation. Simply hold down the "Alt" key on your keyboard and double-click the left mouse button to convert the background layer into an editable normal layer.
In this layer, click the shortcut key "Ctrl j" to copy a layer.
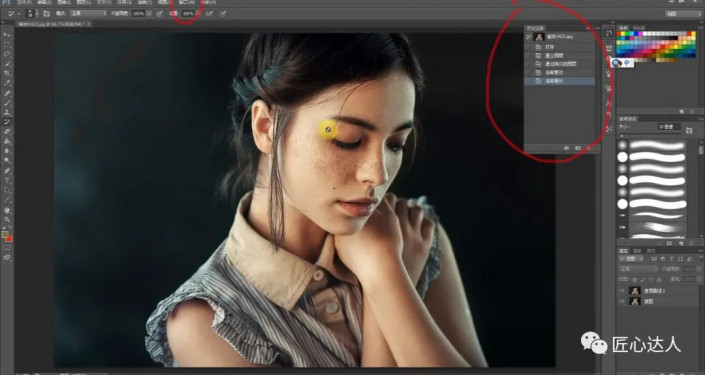
The third step is to open "Window-History" and the "History" window will appear. Don't worry about it yet.
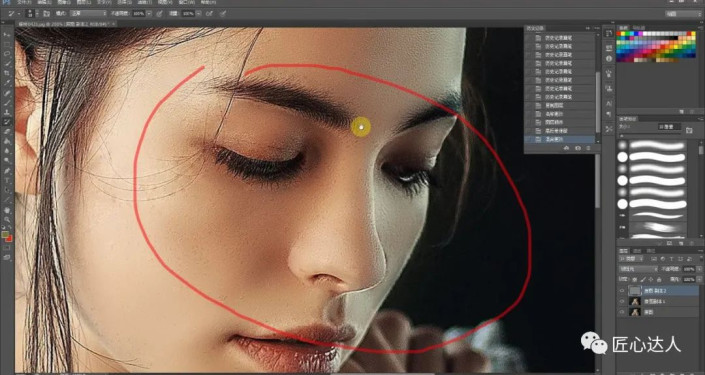
The fourth step is to select the copied layer and click "Filter-Blur-Gaussian Blur". The blur value is about "10" and click "OK".

The fifth step is to move the small brush icon of the small window "History" to the last row, and then select the second to last row.

The sixth step is to select the "History Brush Tool" in the left toolbar and apply the freckles on the face. Brush size can be adjusted. During the painting process, you can
click "Ctrl" or "Ctrl -" to adjust the view size of the modified object.


Step 7: After application, the skin looks lack of texture and unreal. Click on the original image layer, copy one layer, and move it to the top layer. Select this layer, click "
Filter-Other-High Contrast Preserve", and adjust the value to "0.5-1" pixels.
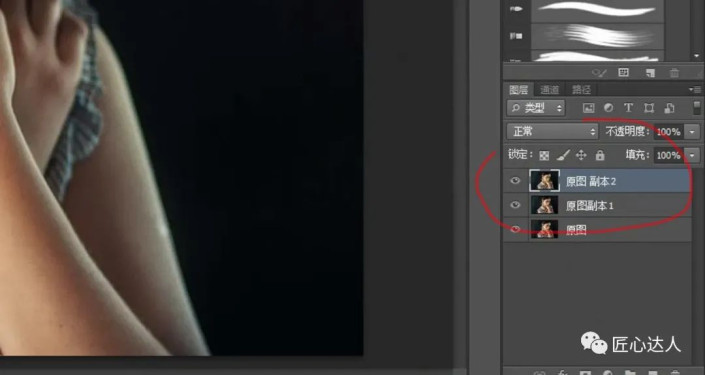
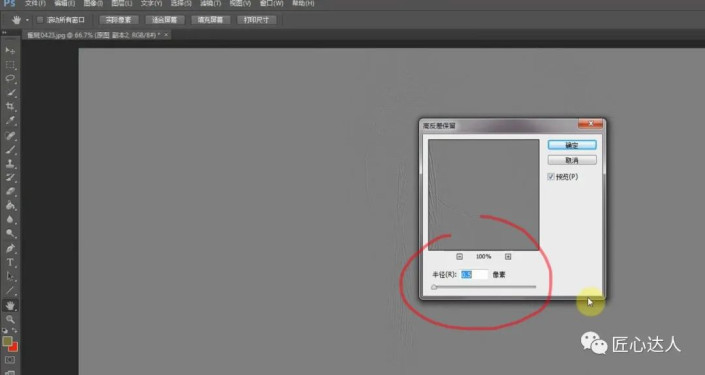
Step 8: Keep the layer selection unchanged, adjust its blending mode, select "Linear Light", and complete.


Finish:
Follow the tutorial to learn. This article mainly explains the steps of the skin grinding method, and explains the principles of parameter settings. Practice it, so that you can improve your PS skills and become a PS master.
Have you guys read the graphic tutorial on how to quickly skin resurfacing a character without plug-ins that the editor brought to you? It suddenly became a lot clearer! More interesting and practical game guides are on this site~, ux6 brings you a relaxing and enjoyable reading experience (๑•ᴗ•๑)!
The above is the detailed content of How to operate PS character dermabrasion. For more information, please follow other related articles on the PHP Chinese website!