


Easily create your own applications with Django
Django is a Python framework for developing efficient web applications. It provides rich features and easy-to-use tools, allowing developers to quickly build powerful applications. This article explains how to create your own application using Django and provides some concrete code examples.
- Installing Django
First, you need to install Django on your machine. You can use the pip tool that comes with Python to install it. Open a terminal or command prompt and enter the following command:
pip install django
This will automatically download and install the latest version of Django.
- Create Django project
After installing Django, we can create a new Django project. Execute the following command on the terminal:
django-admin startproject myproject
This will create a directory called myproject and generate the initial Django project structure.
- Create a Django application
Enter the myproject directory and execute the following command to create a new Django application:
python manage.py startapp myapp
This will create a new Django application named directory for myapp and generate the initial Django application structure.
- Configure Django project
Next, we need to configure the Django project. Open the myproject/myproject/settings.py file and modify some parameters in it:
INSTALLED_APPS = [
    # ...
    'myapp',
    # ...
]

# ...

LANGUAGE_CODE = 'zh-hans'

# ...

TIME_ZONE = 'Asia/Shanghai'
Add 'myapp' in the INSTALLED_APPS list to add our application to the Django project. Modify LANGUAGE_CODE to 'zh-hans' to set the default language to Simplified Chinese. Modify TIME_ZONE to 'Asia/Shanghai' to set the default time zone to Shanghai.
- Create a model
Model is one of the core concepts in Django, which is used to define the structure of data. Create a file named models.py in the myapp directory and define the model in it:
from django.db import models

class Article(models.Model):
    title = models.CharField(max_length=100)
    content = models.TextField()
    created_at = models.DateTimeField(auto_now_add=True)
The above code defines an Article model, which contains the title, content and creation time of the article.
- Perform database migration
Django uses migration tools to manage database schema changes. Execute the following command on the terminal to create and apply the migration of the model:
python manage.py makemigrations
python manage.py migrate
This will automatically generate a migration file and apply the model to the database.
- Create View
View is responsible for processing HTTP requests and returning responses. Create a file named views.py in the myapp directory and define the view in it:
from django.shortcuts import render
from django.http import HttpResponse
from .models import Article

def index(request):
    articles = Article.objects.all()
    return render(request, 'index.html', {'articles': articles})
The above code defines a view function named index, queries all articles, and renders the index through the render function .html template.
- Create a template
The template is used to render the page. Create a directory named templates in the myapp directory and create a template file named index.html in it:
<!DOCTYPE html>
<html>
<head>
    <title>My Django App</title>
</head>
<body>
    <ul>
    {% for article in articles %}
        <li>{{ article.title }}</li>
    {% endfor %}
    </ul>
</body>
</html>
The above code defines an HTML page with a title and displays it through the template variable All article titles.
- Configure URL routing
URL routing is used to map requests to the corresponding views. Open the myproject/myproject/urls.py file and modify the code in it:
from django.urls import include, path
from myapp import views

urlpatterns = [
    path('', views.index, name='index'),
]
The above code maps the root URL to the index view.
- Running Django Server
Run the following command to start the Django development server:
python manage.py runserver
Now, you can visit http://localhost in your browser :8000/ to see the titles of all articles displayed on the page.
Through the above steps, we successfully created a simple Django application and implemented the display of articles. Of course, this is only a small part of Django's capabilities, and there are more powerful features that can help us build more complex applications. I hope this article will help you understand and use Django!
The above is the detailed content of Use Django to quickly build personal applications. For more information, please follow other related articles on the PHP Chinese website!

 怎么将Django项目迁移到linux系统中Jun 01, 2023 pm 01:07 PM
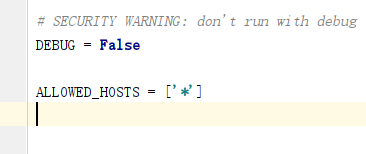
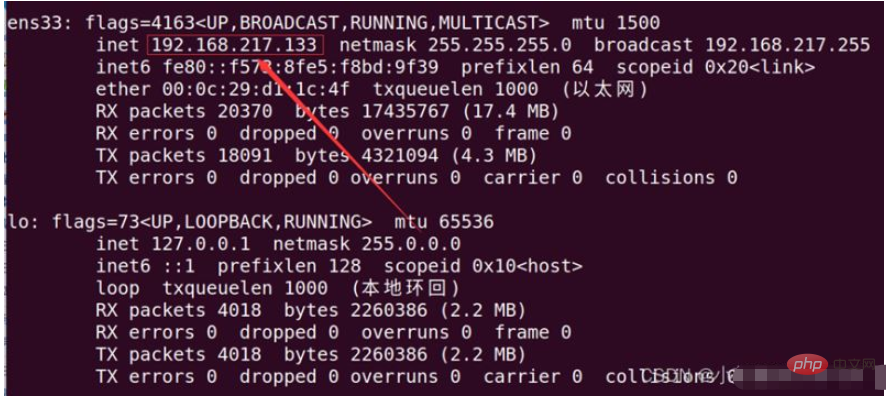
Django项目配置修改我们需要把原先的Django项目进行修改才能更好地进行项目迁移工作,首先需要修改的是settings.py文件。由于项目上线之后不能让用户看到后台的运行逻辑,所以我们要把DEBUG改成False,把ALLOWED_HOSTS写成‘*’,这样是为了允许从不同主机进行访问。由于linux中如果不加这句可能会出现文件找不到的情况,所以我们要把模板的路径进行拼接。由于做Django项目肯定进行过数据库的同步,所以我们要把migrations
 centos+nginx+uwsgi部署django项目上线的方法May 15, 2023 am 08:13 AM
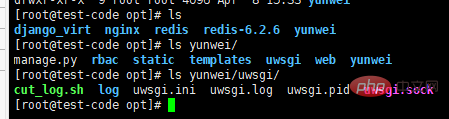
我django项目叫yunwei,主要app是rabc和web,整个项目放/opt/下如下:[root@test-codeopt]#lsdjango_virtnginxredisredis-6.2.6yunwei[root@test-codeopt]#lsyunwei/manage.pyrbacstatictemplatesuwsgiwebyunwei[root@test-codeopt]#lsyunwei/uwsgi/cut_log.shloguwsgi.iniuwsgi.loguwsgi.p
 Django框架中的数据库迁移技巧Jun 17, 2023 pm 01:10 PM
Django是一个使用Python语言编写的Web开发框架,其提供了许多方便的工具和模块来帮助开发人员快速地搭建网站和应用程序。其中最重要的一个特性就是数据库迁移功能,它可以帮助我们简单地管理数据库模式的变化。在本文中,我们将会介绍一些在Django中使用数据库迁移的技巧,包括如何开始一个新的数据库迁移、如何检测数据库迁移冲突、如何查看历史数据库迁移记录等等
 Django框架中的文件上传技巧Jun 18, 2023 am 08:24 AM
近年来,Web应用程序逐渐流行,而其中许多应用程序都需要文件上传功能。在Django框架中,实现上传文件功能并不困难,但是在实际开发中,我们还需要处理上传的文件,其他操作包括更改文件名、限制文件大小等问题。本文将分享一些Django框架中的文件上传技巧。一、配置文件上传项在Django项目中,要配置文件上传需要在settings.py文件中进
 如何用nginx+uwsgi部署自己的django项目May 12, 2023 pm 10:10 PM
第一步:换源输入命令换掉Ubuntu的下载源sudonano/etc/apt/sources.list将以下全部替换掉原文件,我这里用的是阿里的源,你也可以换其他的。debhttp://mirrors.aliyun.com/ubuntu/bionicmainrestricteddebhttp://mirrors.aliyun.com/ubuntu/bionic-updatesmainrestricteddebhttp://mirrors.aliyun.com/ubuntu/bionicunive
 使用Django构建RESTful APIJun 17, 2023 pm 09:29 PM
Django是一个Web框架,可以轻松地构建RESTfulAPI。RESTfulAPI是一种基于Web的架构,可以通过HTTP协议访问。在这篇文章中,我们将介绍如何使用Django来构建RESTfulAPI,包括如何使用DjangoREST框架来简化开发过程。安装Django首先,我们需要在本地安装Django。可以使用pip来安装Django,具体
 使用Python Django框架构建博客网站Jun 17, 2023 pm 03:37 PM
随着互联网的普及,博客在信息传播和交流方面扮演着越来越重要的角色。在此背景下,越来越多的人开始构建自己的博客网站。本文将介绍如何使用PythonDjango框架来构建自己的博客网站。一、PythonDjango框架简介PythonDjango是一个免费的开源Web框架,可用于快速开发Web应用程序。该框架为开发人员提供了强大的工具,可帮助他们构建功能丰
 Django+Bootstrap构建响应式管理后台系统Jun 17, 2023 pm 05:27 PM
随着互联网技术的快速发展和企业业务的不断扩展,越来越多的企业需要建立自己的管理后台系统,以便于更好地管理业务和数据。而现在,使用Django框架和Bootstrap前端库构建响应式管理后台系统的趋势也越来越明显。本文将介绍如何利用Django和Bootstrap构建一个响应式的管理后台系统。Django是一种基于Python语言的Web框架,它提供了丰富的功


Hot AI Tools

Undresser.AI Undress
AI-powered app for creating realistic nude photos

AI Clothes Remover
Online AI tool for removing clothes from photos.

Undress AI Tool
Undress images for free

Clothoff.io
AI clothes remover

AI Hentai Generator
Generate AI Hentai for free.

Hot Article
Hot Tools

MinGW - Minimalist GNU for Windows
This project is in the process of being migrated to osdn.net/projects/mingw, you can continue to follow us there. MinGW: A native Windows port of the GNU Compiler Collection (GCC), freely distributable import libraries and header files for building native Windows applications; includes extensions to the MSVC runtime to support C99 functionality. All MinGW software can run on 64-bit Windows platforms.

DVWA
Damn Vulnerable Web App (DVWA) is a PHP/MySQL web application that is very vulnerable. Its main goals are to be an aid for security professionals to test their skills and tools in a legal environment, to help web developers better understand the process of securing web applications, and to help teachers/students teach/learn in a classroom environment Web application security. The goal of DVWA is to practice some of the most common web vulnerabilities through a simple and straightforward interface, with varying degrees of difficulty. Please note that this software

Atom editor mac version download
The most popular open source editor

VSCode Windows 64-bit Download
A free and powerful IDE editor launched by Microsoft

Dreamweaver CS6
Visual web development tools

