Home >Computer Tutorials >Computer Knowledge >How to change personalized Ubuntu folder icons and colors
How to change personalized Ubuntu folder icons and colors
- WBOYWBOYWBOYWBOYWBOYWBOYWBOYWBOYWBOYWBOYWBOYWBOYWBforward
- 2024-02-20 08:06:03978browse
Changing folder icons or colors in Ubuntu can not only improve file management efficiency, but also make folders easier to identify.
You can select the corresponding icon according to the folder's content category, such as music, documents, and pictures, to make it easier to distinguish and find the desired folder.
Ubuntu supports using common PNG, JPG or SVG format images as folder icons.
Websites like Icon Archive, Iconfinder and Flaticon offer many beautiful folder icons and themes for Linux.
Customize Ubuntu folder icons and colors
Change Ubuntu folder icon
Changing folder icons in Ubuntu is easy. In just a few simple steps, you can set a new icon for a folder to add personalization.
1. Open the Nautilus file manager, find and right-click the folder where you want to change the icon, and then select "Properties".
2. In the pop-up "Properties" window, click the current folder icon.
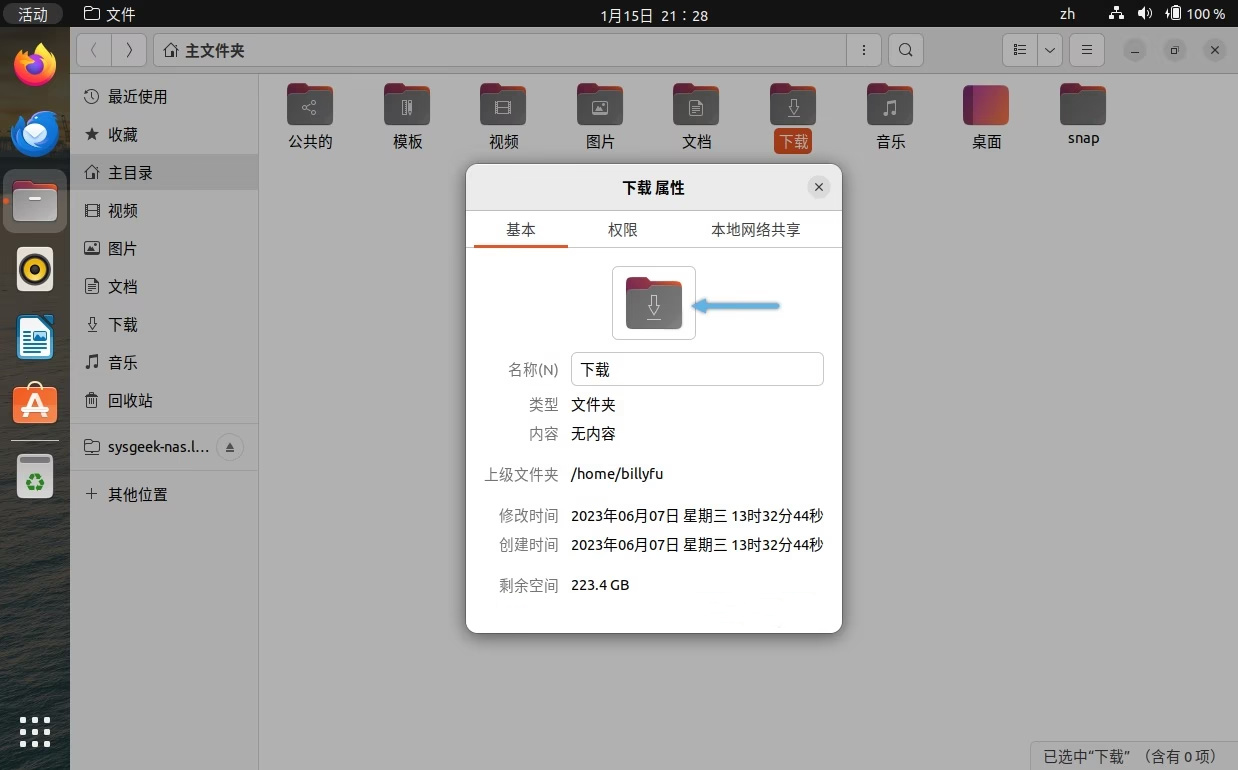
3. Browse to the folder where the icons are stored, select the icon you want to use, and then click the "Open" button.
After completing the above steps, the icon of the selected folder will be replaced with a new one.
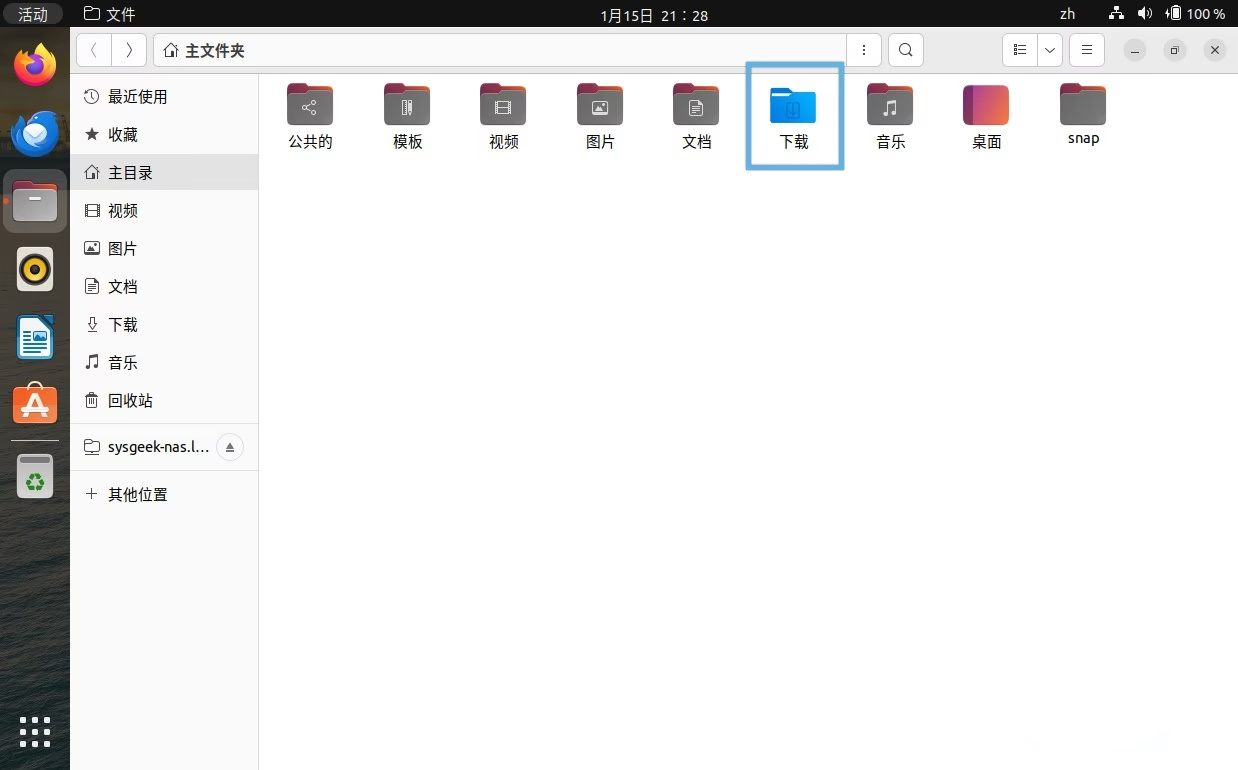
Change Ubuntu folder colors and badges
If you just want to change the color of the folder, but don't want to change the icon, you can use folder-colorThis very practical extension can be used.
Not only can it easily change the color of Ubuntu folders, it can also add badges such as "Important", "In Progress", "Completed", "Favorite" and "New" to the standard icons, which greatly enhances the efficiency of file management. Intuitive and efficient.
Please follow the steps below to install and use the folder-color extension:
1. Open "Terminal" and enter the following command to install folder-color:
sudo apt install folder-color
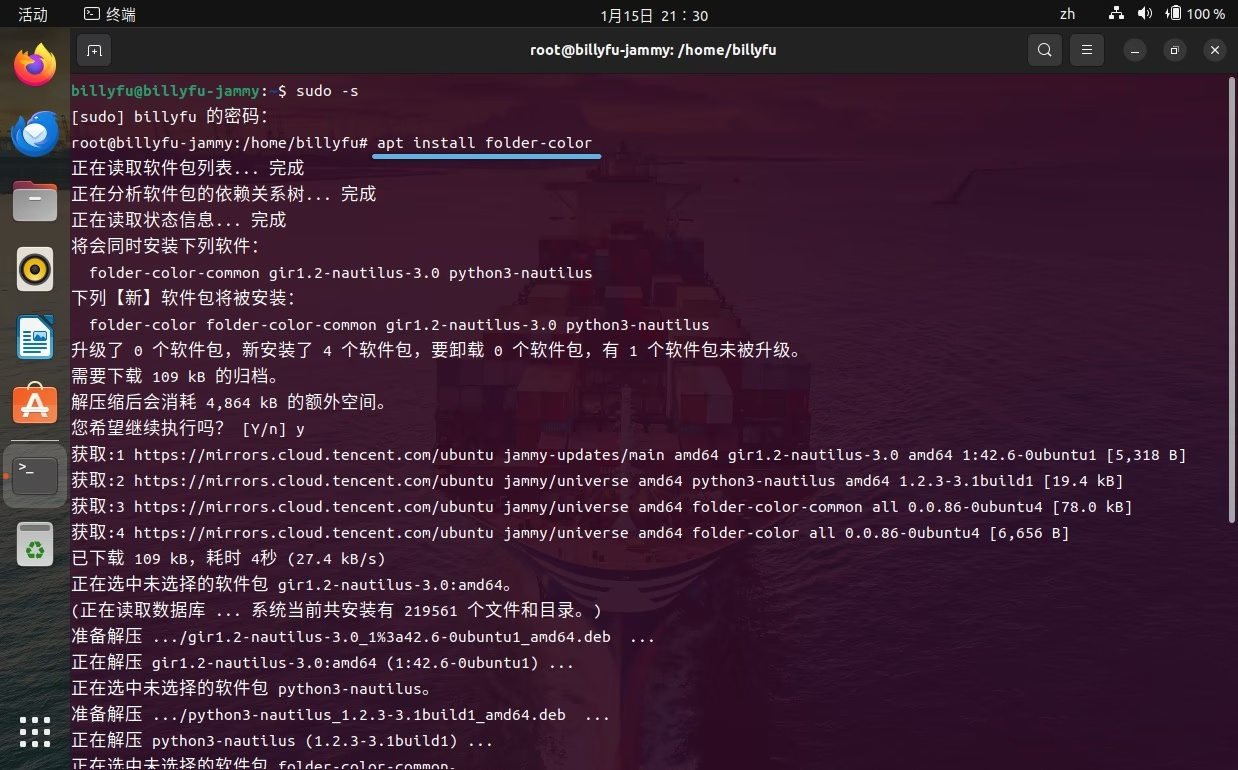
2. After the installation is complete, you need to restart the Nautilus file manager for the extension to take effect.
Enter the following command in "Terminal" to restart:
nautilus -q
3. After restarting, right-click on any folder and you will see a new “Folder’s Color” option.
4. You can choose your favorite color from several colors or select "Custom" to customize the color; or add a badge to the folder.
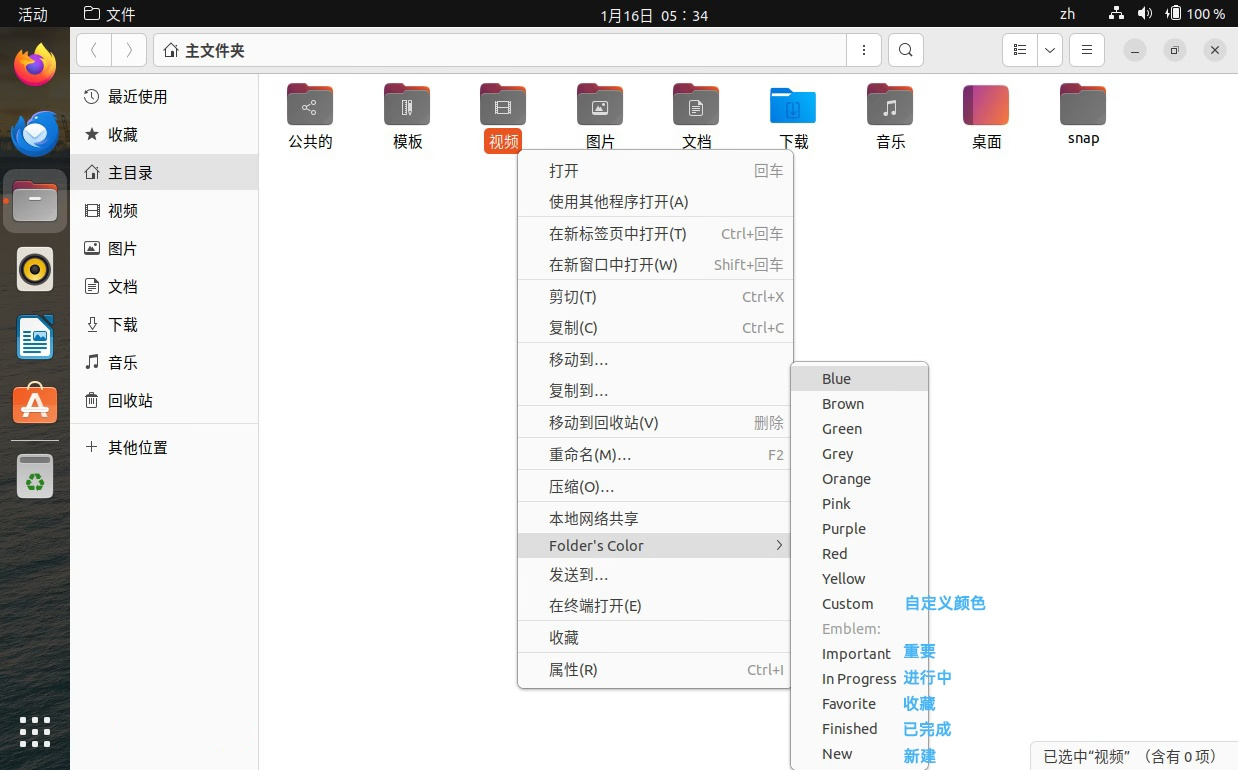
5. After selecting, the folder will immediately refresh the selected color or badge style.
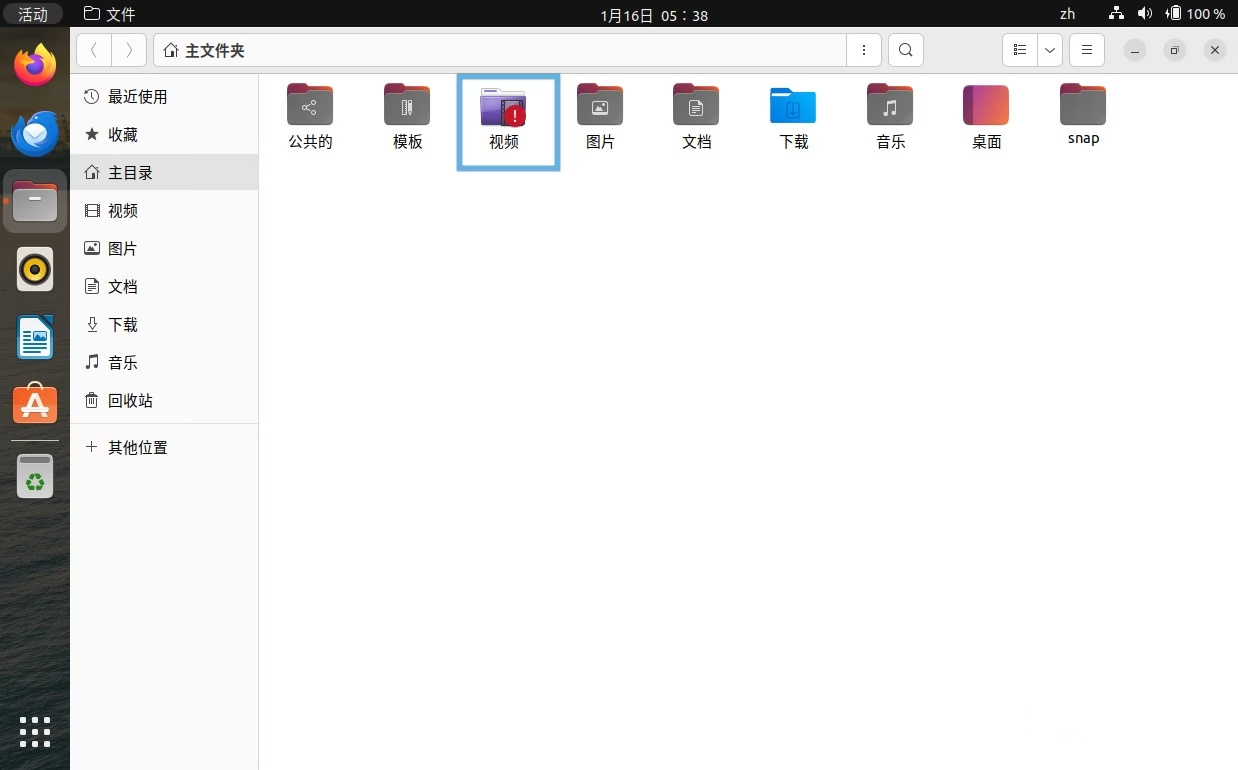
If you want to batch change the color or badge style of multiple folders, just select these folders and select the appropriate one from the right-click menu.
Using the folder-color extension not only allows folders to be displayed in more distinctive colors, but also allows the status of folders to be visually marked through badges, thereby quickly identifying folders of different categories and effectively improving Work or study efficiency.
Restore Ubuntu folder default icon style
To restore the Ubuntu folder icon or color to the default style, you can follow the steps below:
Restore default icon
1. Right-click on the folder where you want to restore the default icon and select "Properties".
2. In the pop-up "Properties" window, click the current custom icon.
3. Select the "Undo" button in the pop-up window.
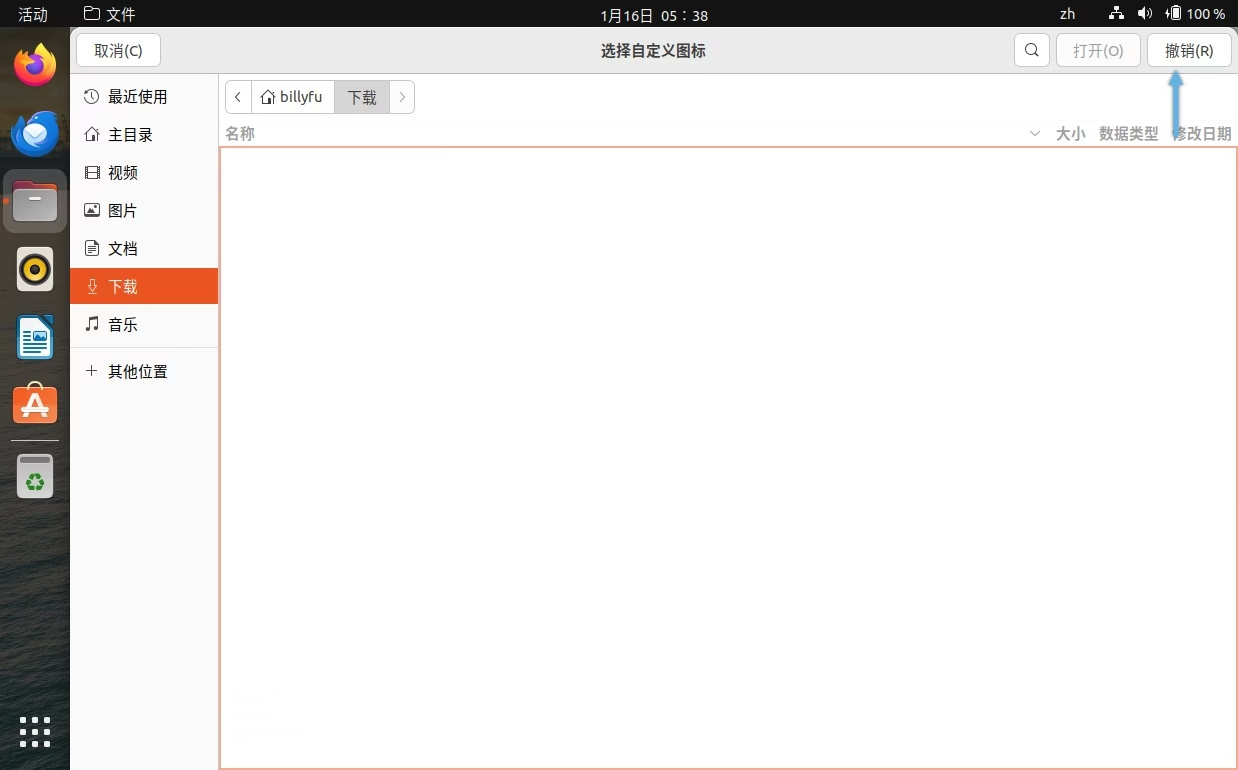
After completing these steps, the folder icons will be instantly restored to Ubuntu's default appearance.
Restore default color
If you have used the folder-color extension tool to change the folder color before, you can easily restore it:
1. Right-click on the folder to be restored and select the “Folder’s Color” option.
2. In the pop-up color selection menu, select the "default" option.
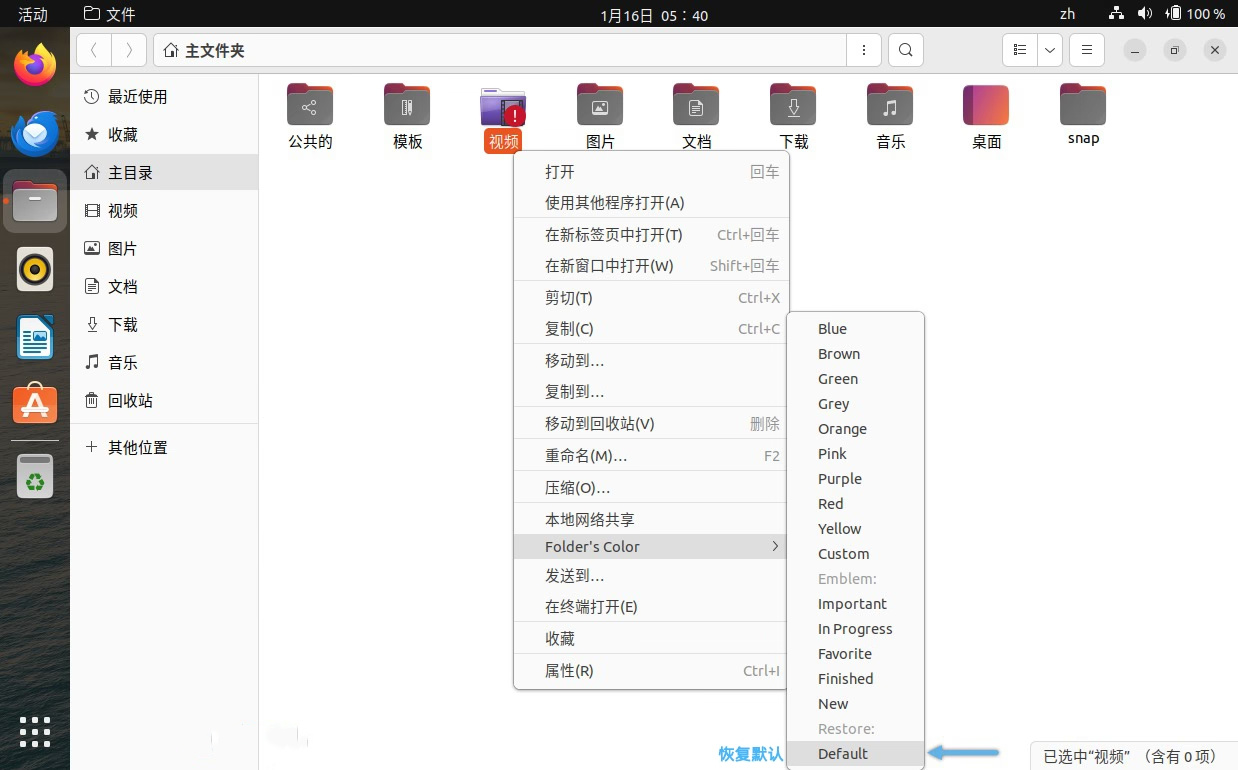
In this way, the folder color will be restored to the default Ubuntu appearance.
folder-color The extended "default" button can also undo changes made through the folder "properties".
However, changes made using the folder-color extension, such as changing colors, adding badges, etc., cannot be undone through the "Undo" button in the folder properties.
The above is the detailed content of How to change personalized Ubuntu folder icons and colors. For more information, please follow other related articles on the PHP Chinese website!

