
Home >Computer Tutorials >Computer Knowledge >vmware virtual machine disk expansion step tutorial
vmware virtual machine disk expansion step tutorial

- WBOYWBOYWBOYWBOYWBOYWBOYWBOYWBOYWBOYWBOYWBOYWBOYWBforward
- 2024-02-19 11:54:021106browse
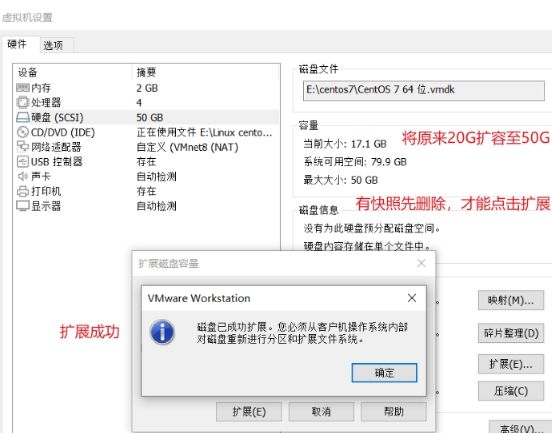
1. Enter the virtual machine settings externally and expand the disk first. The specific prompts are as shown in the figure below:
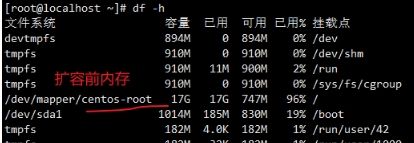
2. After the disk expansion is successful, log in to the virtual machine and first check the basic situation of the memory before expansion.
# 查看分区使用情况
df -h
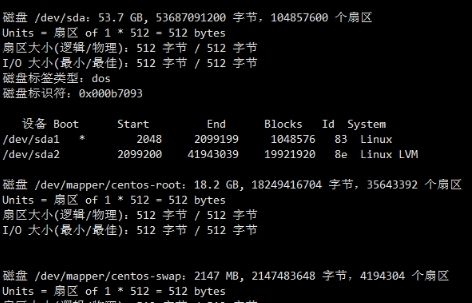
3. After clarifying the partition, first check the partition information to determine the partition status.
# 查看系统分区信息
fdisk -l
(1) Disk /dev/sda: 53.7GB – The system contains a hard disk internally recognized as disk /dev/sda by the system, with a memory of 53.7G.
(2) Disk /dev/mapper/centos-swap: 2147M and disk /dev/mapper/centos-root: 18.2 GB – The two physical identifiers representing the system partition correspond to the partitions /dev/sda1 and /dev/ respectively. sda2.
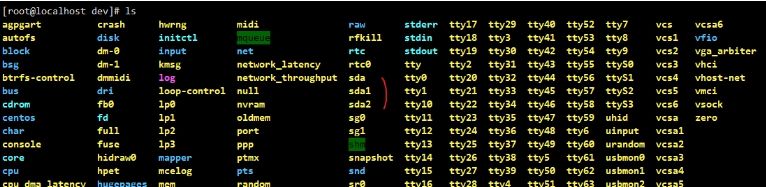
4. Based on the directory information and partition information, it is determined that there are two partitions and partition sda3 needs to be added.
# 先进入dev目录
cd /dev
# 查看目录基本信息
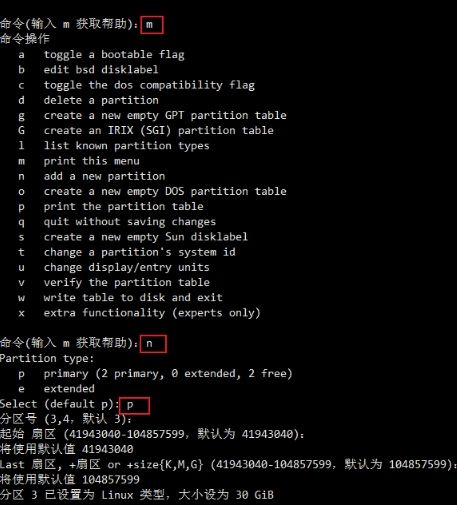
5. Configure sda disk information.
# 进入管理sda磁盘
fdisk /dev/sda
# 根据提示m查看帮助文档
m
# 选择n添加新的分区
n
# 接着创建主分区
p
# 有可能以前操作过的原因,保留了一个空闲的分区,如果有选择分区的话,默认即可,都是空的,不影响,回车即可
# 接着默认大小,直接回车即可
# 选择默认的start cylinder
# 保存修改
6. Restart the virtual machine and go to the dev directory to check the information. The partition sda3 appears, as shown below.
# 重新到dev目录
cd /dev
# 查看信息,出现分区如下图

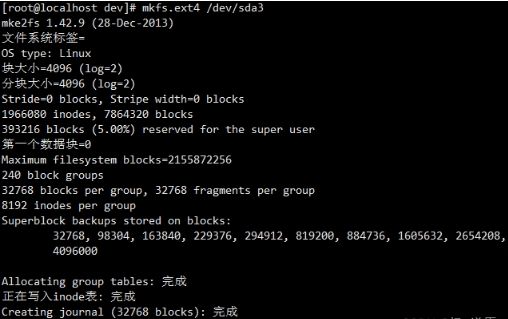
7. Format the disk device with Ext4.
# 对磁盘设备进行Ext4格式化处理
mkfs.ext4 /dev/sda3
8. Add new LVM to the existing LVM group to achieve volume expansion.
# 进入逻辑卷管理
lvm
# 初始化分区
pvcreate /dev/sda3
# 将初始化过的分区加入到虚拟卷组centos
vgextend centos /dev/sda3
# 显示VG卷组的信息
vgdisplay
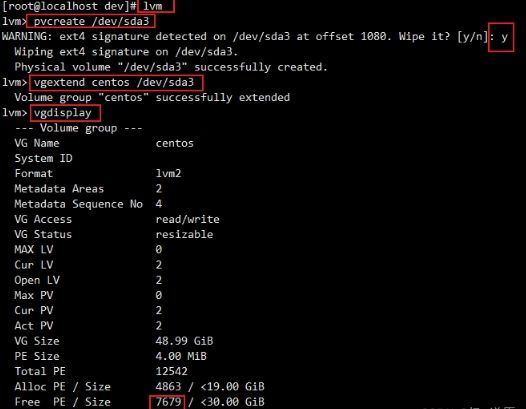
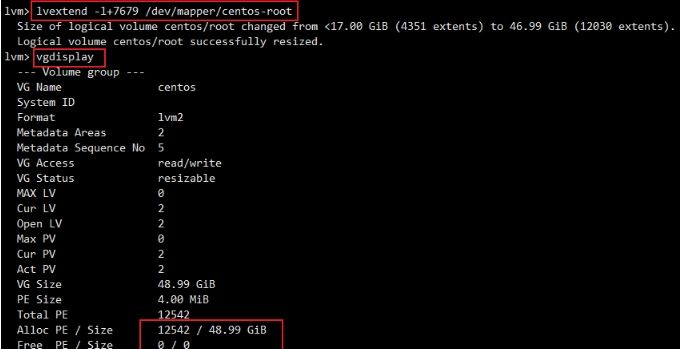
9. Expand the capacity of the existing volume. Please note that the following parameter value is the value of free PE /Site, as shown in the figure above.
# 扩展已有卷的容量(下面的参数值为free PE /Site的值)
lvextend -l+7679 /dev/mapper/centos-root
# 查看VG卷组的容量,如下图所示
vgdisplay
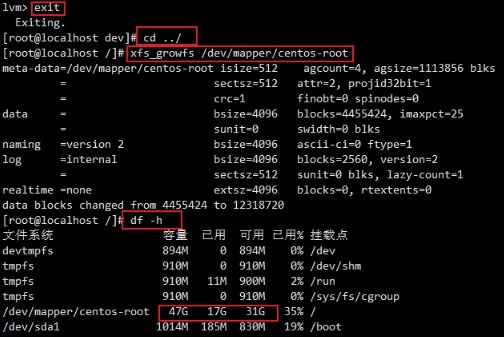
10. After the volume expansion is completed, go to the file system expansion and check the mount point of the root directory.
# 先退出逻辑卷管理
exit
# 回到根目录
cd ../
# centos7文件系统扩容
xfs_growfs /dev/mapper/centos-root
# centos6文件系统扩容
resize2fs /dev/mapper/centos-root
# 查看根目录的挂载点
df -h
The above is the detailed content of vmware virtual machine disk expansion step tutorial. For more information, please follow other related articles on the PHP Chinese website!
Related articles
See more- Detailed explanation of the use of addEventListener in JavaScript
- What is the difference between primary partition and extended partition?
- What should I do if word prompts that there is insufficient memory or disk space?
- How to allocate disk space in win10
- How to solve the problem of no bootable devices found when booting up Win10 Professional Edition